
There’s just something so special about capturing the essence of a season, isn’t there? That feeling of opening a jar of homemade preserves in the dead of winter and getting a little taste of sunshine. Today, we’re diving into one of my absolute favorites: old-fashioned Pear Preserves. Forget those super-smooth, jelled kinds; we’re talking about a beautiful, chunky fruit spread that’s bursting with pear flavor. It reminds me a lot of Leo’s approach at Dishicious – making something delicious and truly satisfying without all the fuss. This recipe is all about keeping things simple, trusting the process, and safely preserving those gorgeous seasonal pears using a straightforward water bath canning method, perfect for anyone from total newbies to seasoned canners. Get ready for your pantry to feel extra cozy!

- Why You'll Love This Old-Fashioned Pear Preserves Recipe
- Ingredients for Delicious Pear Preserves
- Essential Equipment for Canning Pear Preserves
- How to Make Pear Preserves Without Pectin
- Water Bath Canning Pear Preserves Safely
- Tips for Perfect Pear Preserves
- Serving Suggestions for Your Homemade Pear Preserves
- Storage and Reheating Instructions
- Frequently Asked Questions About Pear Preserves
- Estimated Nutritional Information
- Estimated Nutritional Information
Why You’ll Love This Old-Fashioned Pear Preserves Recipe
Trust me, you’re going to adore making these preserves! Here’s why:
- Super Simple: Seriously, it’s so straightforward, even if you’ve never canned before.
- Incredible Flavor: That pure, natural pear taste is just unbeatable.
- Perfectly Chunky: We’re going for that lovely old-fashioned texture that’s rich and satisfying.
- So Versatile: Slather it on toast, pair it with cheese, or use it in baking – the possibilities are endless!
- The Best Feeling: There’s a huge sense of accomplishment knowing you’ve preserved a little bit of autumn goodness yourself.
Ingredients for Delicious Pear Preserves
Alright, let’s talk about what you’ll need to make these amazing pear preserves! It’s pretty simple, and you might already have most of it in your pantry. Grab these goodies:
- About 3 lbs of ripe pears – that’s usually around 6 or 7 medium ones. Make sure they’re ripe but still a bit firm so they hold their shape. We want them peeled, cored, and chopped up nice and chunky!
- 1/4 cup of fresh lemon juice. This isn’t just for flavor, it’s super important for safety when canning!
- 3 cups of granulated sugar. Now, you can totally play with this a bit depending on how sweet your pears are and how sweet you like things. If you’re using pectin (more on that later!), you might even get away with a little less. We’re aiming for that sweet spot!
- A tiny splash of 1/4 cup of water, if you want things a little smoother. It’s totally optional!
- And if you want a quicker set and a little boost, have ready 1 packet (about 1.75 oz) of powdered fruit pectin. We’ll talk about when to use it!
Essential Equipment for Canning Pear Preserves
Okay, before we get our hands sticky with pears, let’s make sure we’ve got all our ducks in a row. Having the right gear makes this whole process SO much smoother. You’ll need a big, heavy-bottomed pot – think Dutch oven or a large stockpot – to cook those pears down. Of course, we need clean canning jars, new lids, and bands. A water bath canner is key for safely preserving these little jars of goodness, and a jar lifter is a lifesaver for handling those hot jars. A canning funnel and a ladle will make filling a breeze. Don’t forget a non-metallic spatula for getting out air bubbles!
How to Make Pear Preserves Without Pectin
Alright, so if you’re like me and love that really authentic, old-school fruit preserve texture, you’ll want to try making these Pear Preserves without any added pectin. It takes a little more patience, but oh boy, is it worth it! The pears kind of break down naturally, creating this wonderful, naturally thick spread. It’s all about coaxing out the fruit’s own goodness.
Preparing Your Pears for Preserves
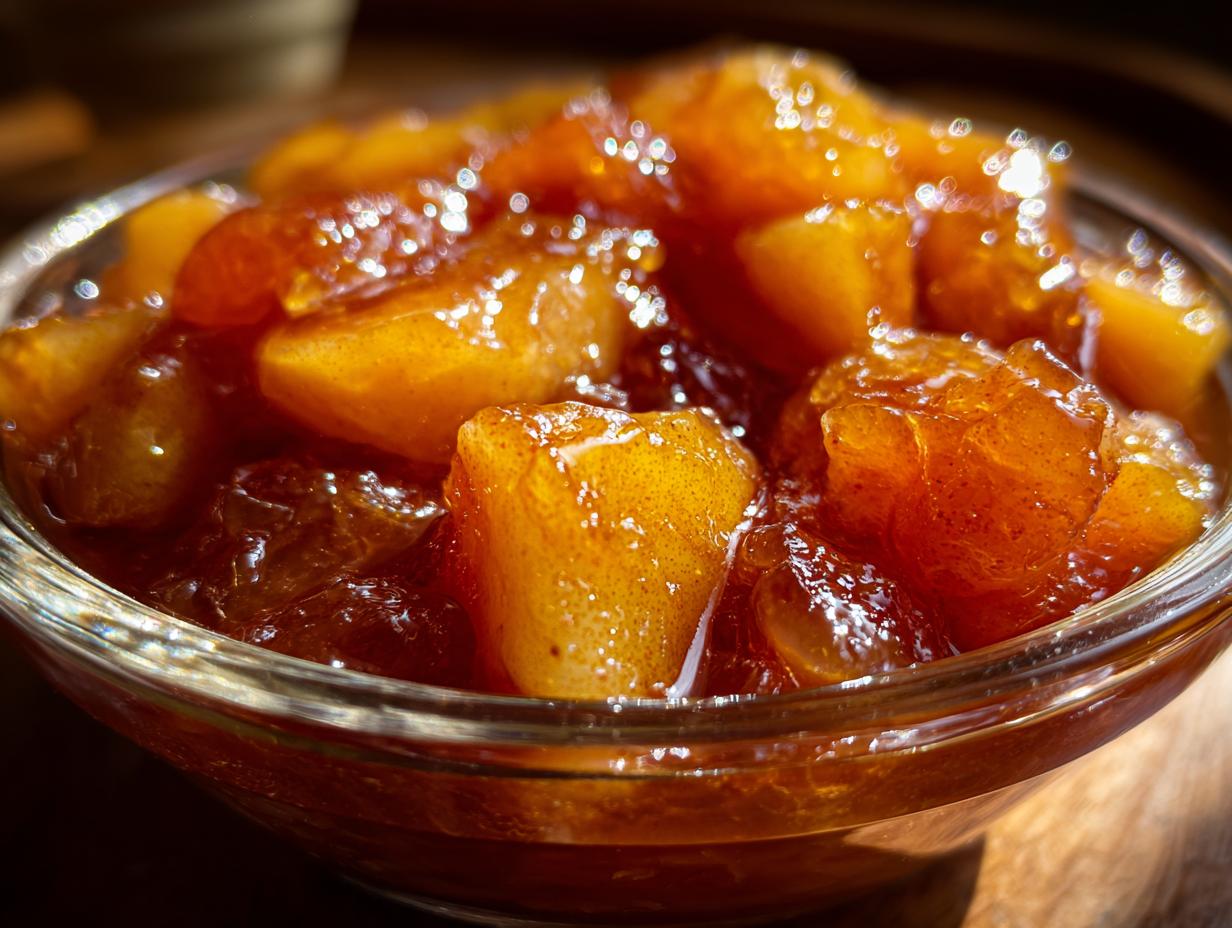
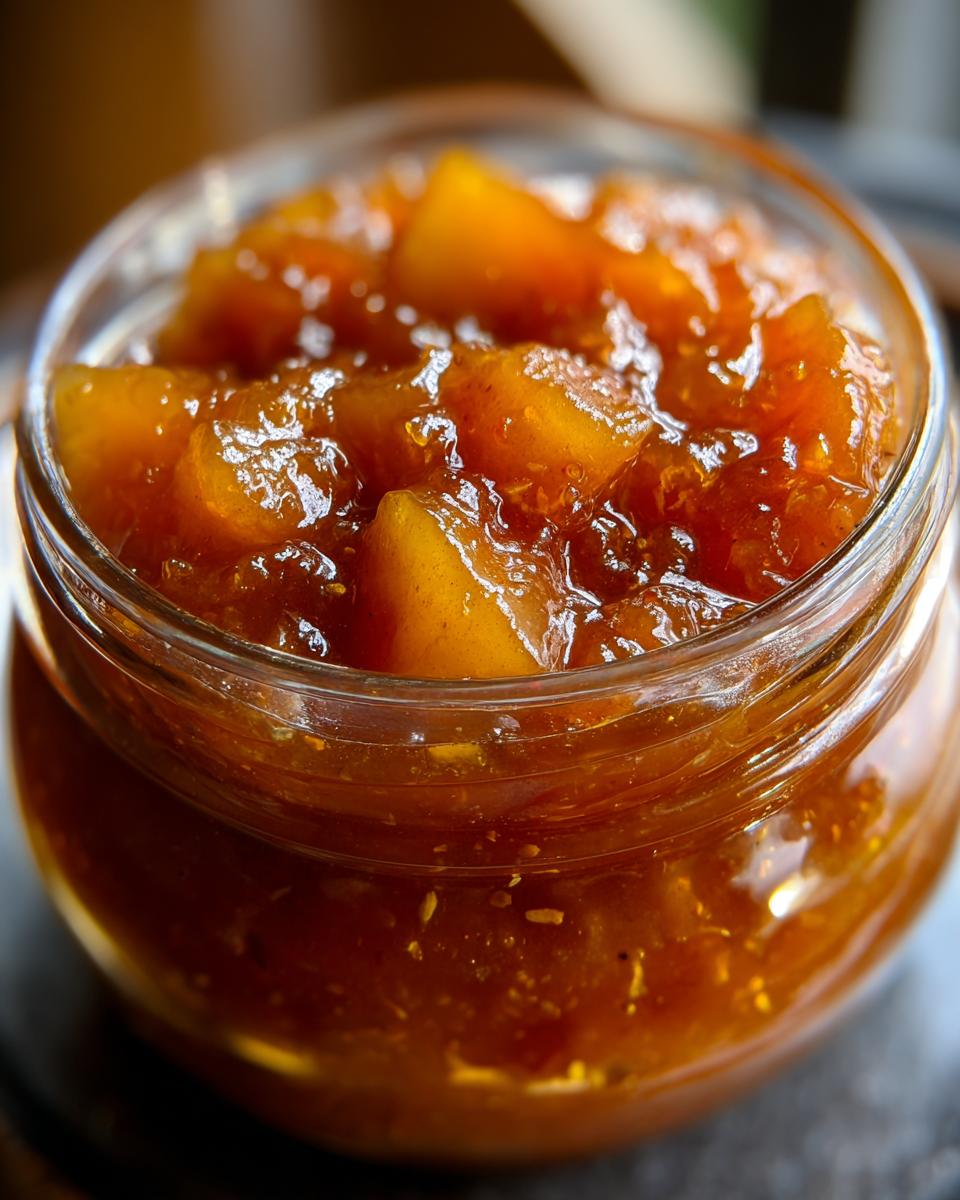
First things first, let’s get those pears ready. You want ripe but still firm pears – the kind that smell amazing but won’t turn to mush too fast. Peel them, slice out those cores, and then chop ’em up! Aim for a nice, chunky dice; this is what gives us that lovely old-fashioned texture we’re going for. Don’t worry too much about perfect uniformity; a little variation is part of the charm!
Cooking and Thickening the Pear Preserves
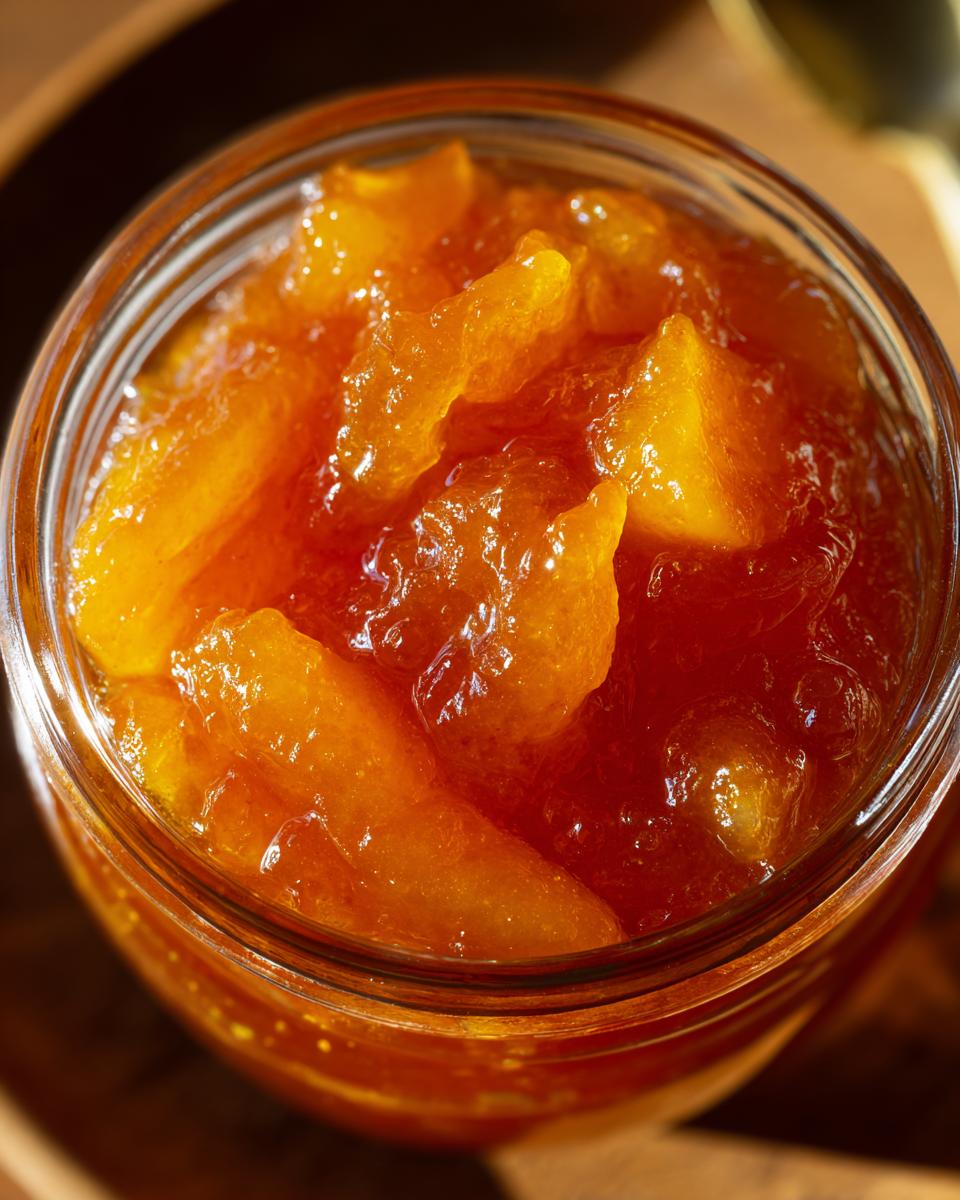
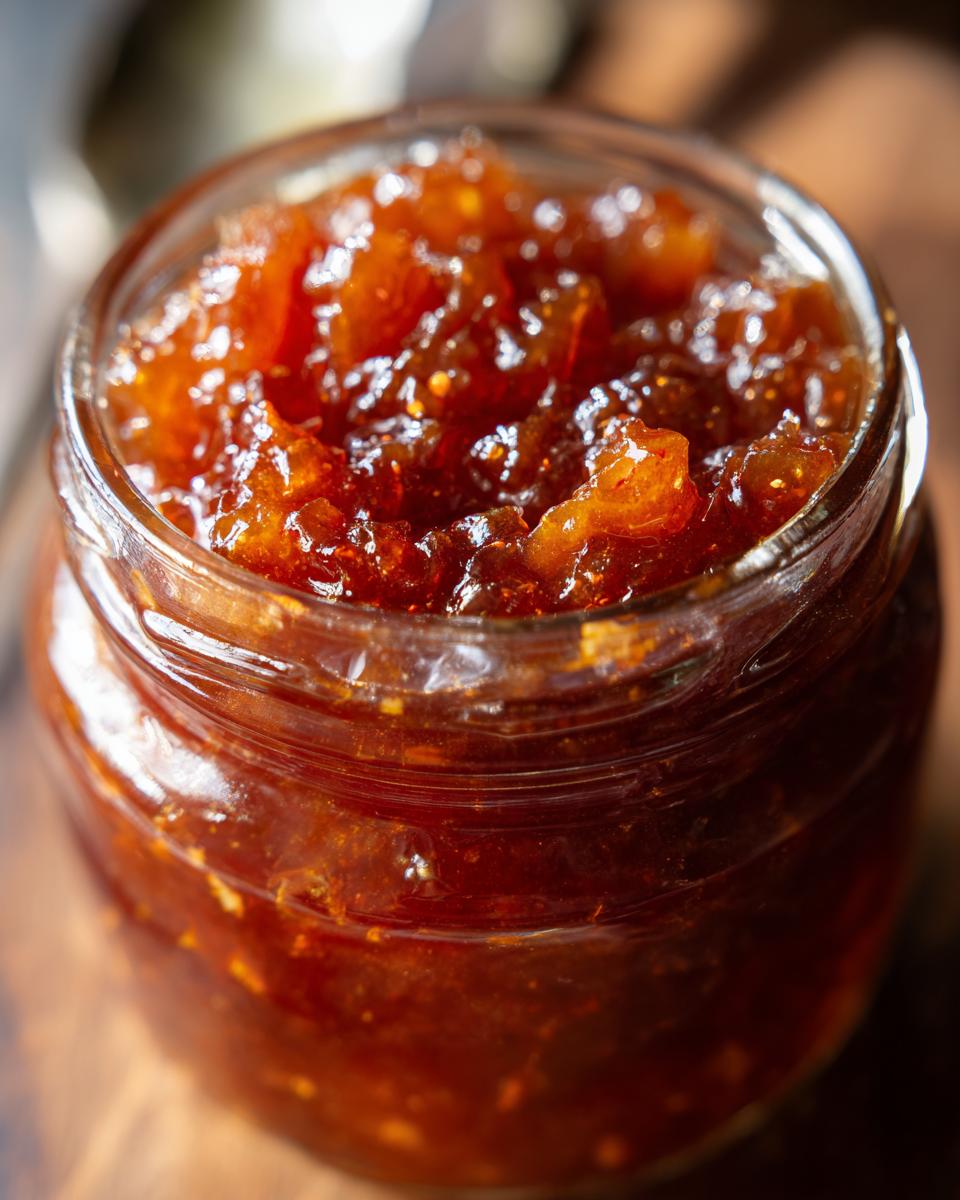
Now for the magic! Toss your chopped pears and that all-important lemon juice into your big, heavy pot. We’re going to cook these over medium-low heat. Stir them now and then, and just let them bubble away gently. You’ll notice the pears start to soften and release their juices, and the whole mixture will begin to get wonderfully thick. This can take about 30 to 45 minutes, so be patient! If you want it extra chunky, you can gently mash some of the pears against the side of the pot as they cook. Once everything looks tender and the liquid is thickening up, stir in your sugar until it’s all dissolved. Then, crank the heat up a little to medium-high and let it boil rapidly. Keep stirring often! You’re looking for it to get nice and thick, usually about 15-25 more minutes. The best way to tell if it’s ready? Spoon a little onto a chilled plate (keep some in the freezer for this!). If it mounds up instead of spreading out, you’ve got yourself a perfect set!
Water Bath Canning Pear Preserves Safely
Alright, now comes the super important part: getting these gorgeous Pear Preserves safely into jars so they’ll last! This is where the magic of water bath canning pears comes in. It might sound a little technical, but trust me, it’s totally doable and gives you that peace of mind knowing your jars are sealed up tight and ready for the pantry. It’s all about keeping things clean and following a few key steps to ensure shelf stability.
Preparing Jars and Lids for Canning
First, grab your clean jars, new lids, and bands. Wash them all in hot, soapy water. Keep those jars hot! You can do this by simmering them in your water bath canner or just keeping them in a big pot of hot water on the stove. This helps prevent them from cracking when you fill them with the hot preserves.
Filling and Sealing Your Pear Preserves
Now, ladle your hot pear preserves right into those hot jars. This is where canning headspace for jam becomes super important – leave about 1/2 inch of space at the top. Use a thin, non-metallic spatula (like plastic or wood) to gently run around the inside of the jar and pop any air bubbles you see. Then, wipe those jar rims super clean with a damp cloth. Pop a new lid on each jar and screw the bands on just fingertip tight. We don’t want them too tight; the air needs a way to escape during processing.
Processing and Cooling Your Preserves
Carefully place your filled jars into the prepared water bath canner. Make sure they’re covered by at least an inch of water. Bring the water up to a rolling boil, then start your timer for processing. For these pear preserves, we’re looking at 10 minutes of boiling. Once the time is up, turn off the heat, remove the canner lid, and let the jars just sit in there for another 5 minutes to kind of settle. Then, carefully lift the jars out using your jar lifter and place them on a towel-lined counter to cool completely. You’ll hear little pings as they seal! Check seals after 12-24 hours.
Tips for Perfect Pear Preserves
Making these preserves is a bit like project managing your garden haul – you want to get the best possible result with minimal fuss, right? Following a few simple tips will make sure your Pear Preserves turn out absolutely fantastic! We want that perfect balance of flavor, texture, and safety.
Ingredient Notes and Substitutions
Let’s chat ingredients for a sec. That lemon juice? Crucial! It adds a little brightness, but more importantly, it helps make sure your preserves are safe for water bath canning pears. If you’re wondering how much sugar for pear preserves, the 3 cups is a good starting point, but don’t be afraid to taste and adjust slightly. Just remember, sugar helps with the set when you’re not using pectin, so don’t cut it *too* drastically, or you might end up with a runnier preserve.
Achieving the Perfect Chunky Texture
For that beloved, old-fashioned chunky feel in your pear preserves, the secret is all in the prep! Chop your pears into good-sized pieces – not too tiny! And if you’re going the no-pectin route, gently mashing some of the cooked pears against the side of the pot really helps create that wonderfully thick, slightly uneven, delightful texture we’re after. It’s all about embracing that rustic charm!
Serving Suggestions for Your Homemade Pear Preserves
Oh, the best part! Now that you’ve got these gorgeous jars of pear preserves, what do you do with them? Honestly, they go with *everything*. Slather them on some warm biscuits fresh from the oven for a real farmhouse kitchen treat, or dollop them onto a cheese board alongside some sharp cheddar or creamy brie. They’re also divine swirled into yogurt or oatmeal for breakfast. And don’t forget, these beautiful jars make the most thoughtful, giftable preserves!
Storage and Reheating Instructions
Properly sealed jars of these yummy pear preserves will keep beautifully in a cool, dark place for up to a year! It’s like having a little bit of autumn tucked away. Once you’ve opened a jar, just pop it in the refrigerator. It’ll stay delicious for about 3-4 weeks. No reheating needed, just grab a spoon and enjoy!
Frequently Asked Questions About Pear Preserves
Got a few lingering questions about whipping up these delightful pear preserves? I totally get it! Canning can seem a bit daunting at first, but once you get the hang of it, it’s a breeze. Here are some common questions I get:
Can I make these pear preserves with less sugar?
You sure can! While the sugar does act as a natural preservative and helps with the set, especially when you’re not using pectin, you can certainly reduce it a bit. Keep in mind that using significantly less sugar might result in a softer set and a shorter shelf life, so it’s always best to stick to the recommended amount for safe water bath canning. Taste your pears first – if they’re super sweet, you might be able to get away with a little less!
How do I know if my jars of pear preserves are sealed properly?
This is the crucial part for shelf stability! After the jars have cooled completely (usually overnight), you should check the seals. The best way is to press down on the center of the lid. If it doesn’t flex or pop up and down, it’s sealed! You can also try removing the band – a properly sealed jar will hold its lid tightly. If a jar hasn’t sealed, don’t despair! Just pop it in the fridge and enjoy it within a few weeks.
What’s the best type of pear for making preserves?
For that wonderful old-fashioned, chunky texture we’re aiming for in our pear preserves recipe, you want pears that are ripe but still firm. Varieties like Bartlett, Bosc, or Anjou work beautifully. They have a lovely flavor when ripe and hold their shape pretty well during cooking, giving you those delicious bites without turning into complete mush. Avoid overripe pears, as they’ll just dissolve!
Do I really need the lemon juice in my pear preserves?
Yes, you really do! That little bit of lemon juice is super important for a couple of reasons. It adds a nice bit of brightness to the pear flavor, cutting through the sweetness. But more importantly, it adds critical acidity to the preserves, which is essential for safe water bath canning. Without enough acidity, you run the risk of botulism, so don’t skip it!
Still have questions? Reach out using our contact form, and I’ll do my best to help!
Estimated Nutritional Information
Keep in mind these are just estimates, as the exact nutritional values can vary based on the ripeness of your pears and the specific sugar you use. But, for a serving of about 2 tablespoons of these delicious pear preserves:
- Calories: Around 70
- Sugar: About 17g
- Carbohydrates: Around 18g
- Fat: 0g
- Protein: 0g
Estimated Nutritional Information
Just a heads-up, these are estimates because every pear is a little different, and brands can vary! But for a sweet little dollop of about 2 tablespoons of our beautiful pear preserves, you’re generally looking at:
- Calories: Around 70
- Sugar: About 17g (from the pears and added sugar!)
- Carbohydrates: Around 18g
- Fat: 0g – yep, zero!
- Protein: 0g
Old-Fashioned Pear Preserves
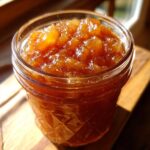
Make chunky, old-fashioned pear preserves with this straightforward canning recipe. Learn how to safely preserve your seasonal pears using a water bath method, with or without pectin.
- Prep Time: 30 min
- Cook Time: 45 min
- Total Time: 75 min
- Yield: About 5-6 half-pint jars 1x
- Category: Preserves
- Method: Water Bath Canning
- Cuisine: American
- Diet: Vegetarian
Ingredients
- 3 lbs ripe pears (about 6–7 medium), peeled, cored, and chopped
- 1/4 cup lemon juice
- 3 cups granulated sugar (adjust to taste, less if using pectin)
- 1/4 cup water (optional, for smoother preserves)
- 1 packet (1.75 oz) powdered fruit pectin (optional, for quicker set)
Instructions
- Prepare your canning supplies: Wash jars, lids, and bands in hot, soapy water. Keep jars hot in a water bath canner or a large pot of simmering water.
- Combine chopped pears and lemon juice in a large, heavy-bottomed pot. If using, add the 1/4 cup water.
- If using pectin: Stir the pectin into the pear mixture. Bring to a rolling boil that cannot be stirred down, stirring constantly.
- Add sugar all at once and stir until dissolved. Bring back to a full rolling boil and boil hard for 1 minute, stirring constantly. Remove from heat.
- If NOT using pectin: Cook the pear mixture over medium-low heat, stirring occasionally, until pears are tender and the liquid has thickened, about 30-45 minutes. You can mash some of the pears for a chunkier texture. Gradually stir in sugar until dissolved. Increase heat to medium-high and bring to a boil. Boil rapidly, stirring often, until the preserves reach desired thickness, about 15-25 minutes. Test for set by placing a small spoonful on a chilled plate; it should mound up.
- Skim off any foam from the top of the preserves.
- Ladle hot preserves into hot jars, leaving 1/2 inch headspace. Remove air bubbles with a non-metallic spatula. Wipe jar rims clean.
- Center lids on jars and screw bands on fingertip tight.
- Place jars in the water bath canner, ensuring they are covered by at least 1 inch of water. Bring water to a rolling boil.
- Process jars for 10 minutes (adjust for altitude if necessary). Turn off heat, remove canner lid, and let jars sit in the canner for 5 minutes.
- Carefully remove jars from the canner and place them on a towel-lined counter to cool completely. Check seals after 12-24 hours.
Notes
- For a smoother preserve, you can process the pears briefly in a food processor before cooking.
- Adjust sugar based on your preference and ripeness of pears. Less sugar may result in a softer set.
- Ensure your pears are ripe but firm for the best texture.
- Properly sealed jars can be stored in a cool, dark place for up to a year.
Nutrition
- Serving Size: 2 tablespoons
- Calories: 70
- Sugar: 17g
- Sodium: 0mg
- Fat: 0g
- Saturated Fat: 0g
- Unsaturated Fat: 0g
- Trans Fat: 0g
- Carbohydrates: 18g
- Fiber: 1g
- Protein: 0g
- Cholesterol: 0mg