
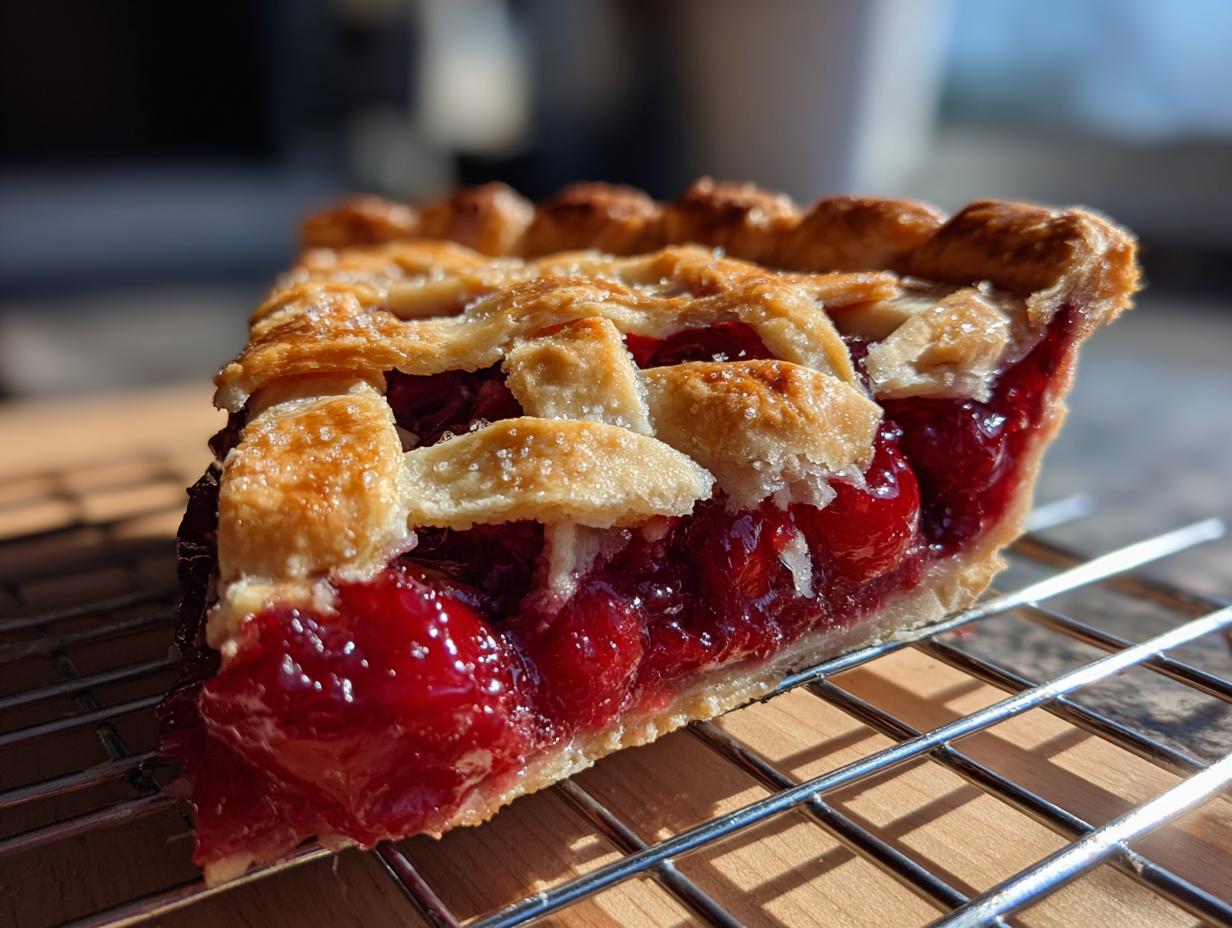
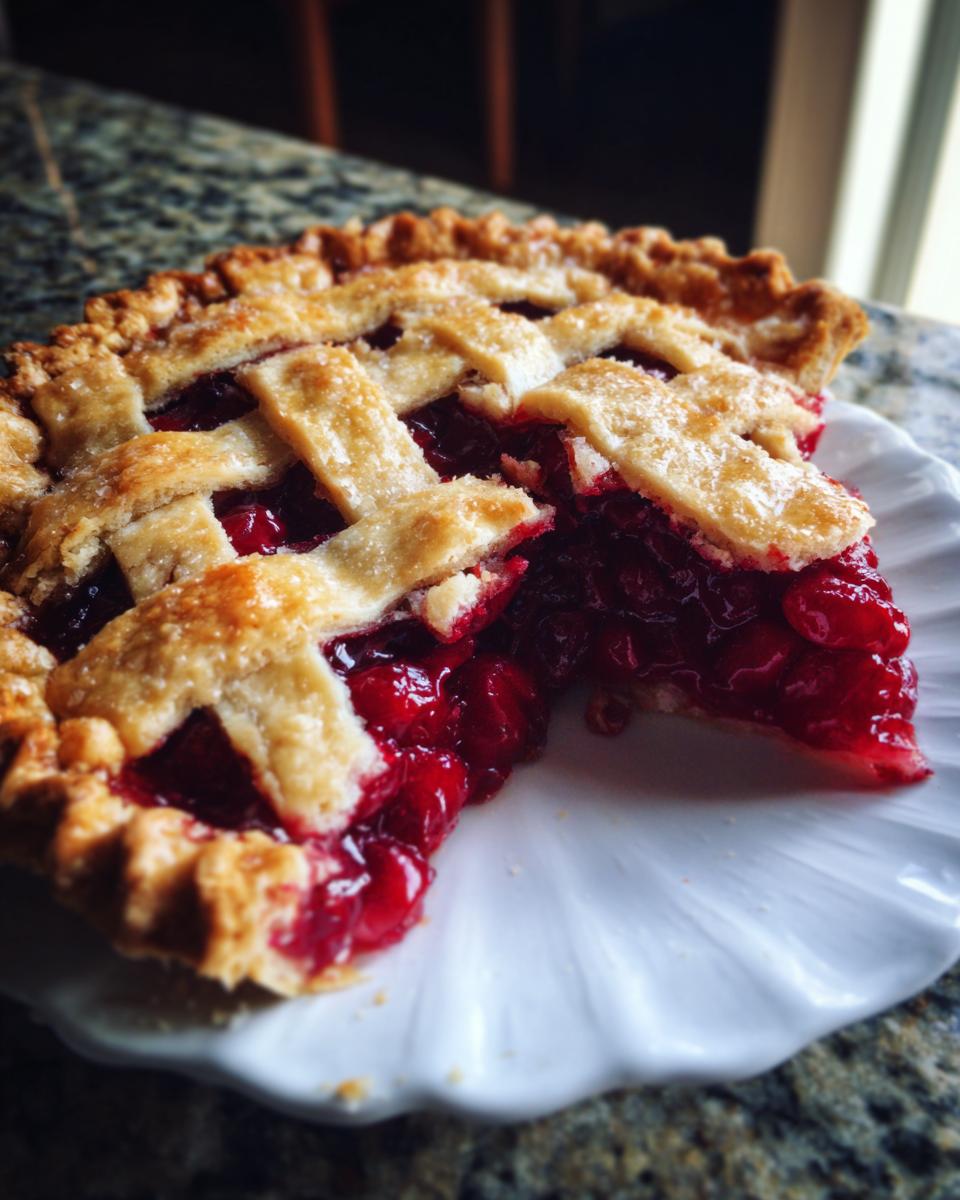
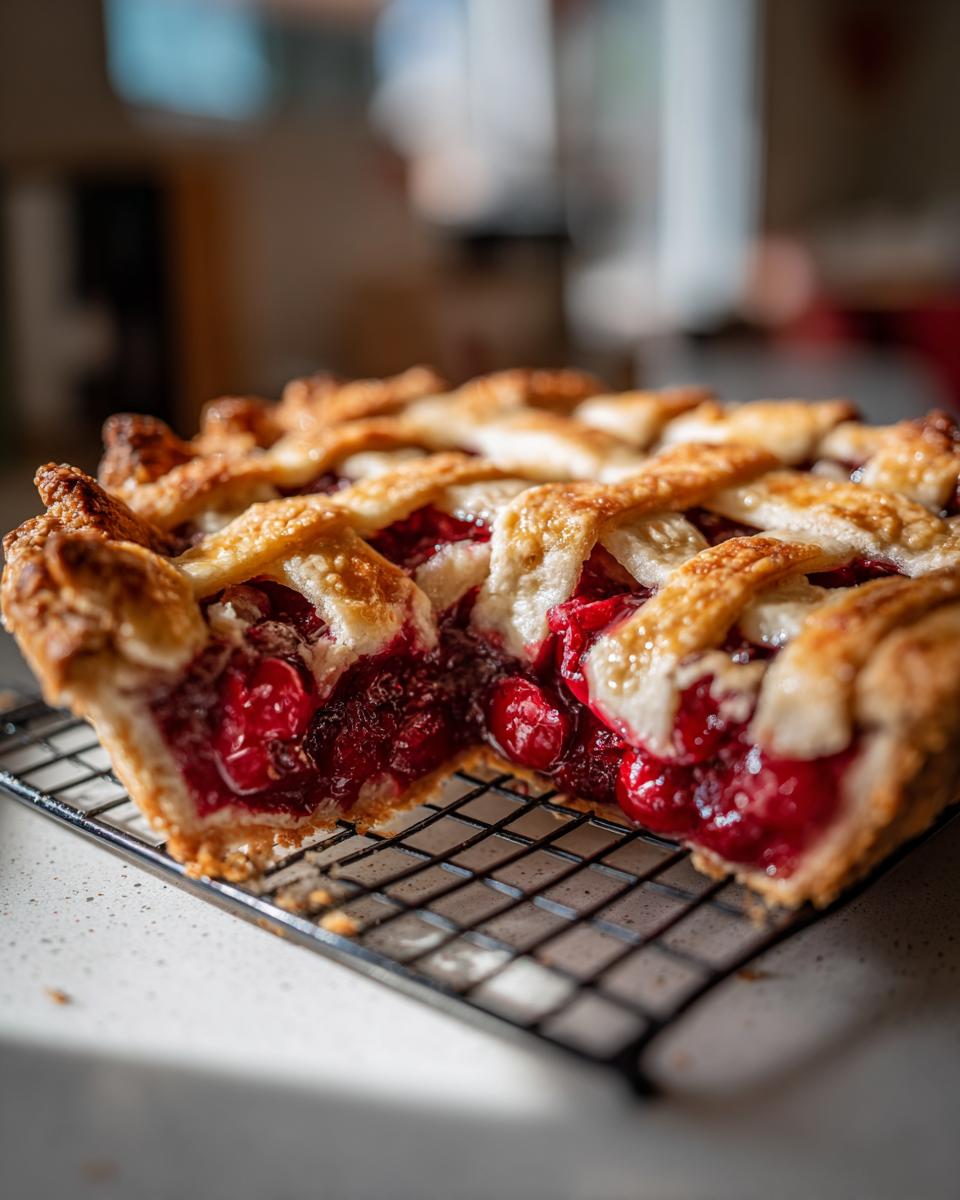
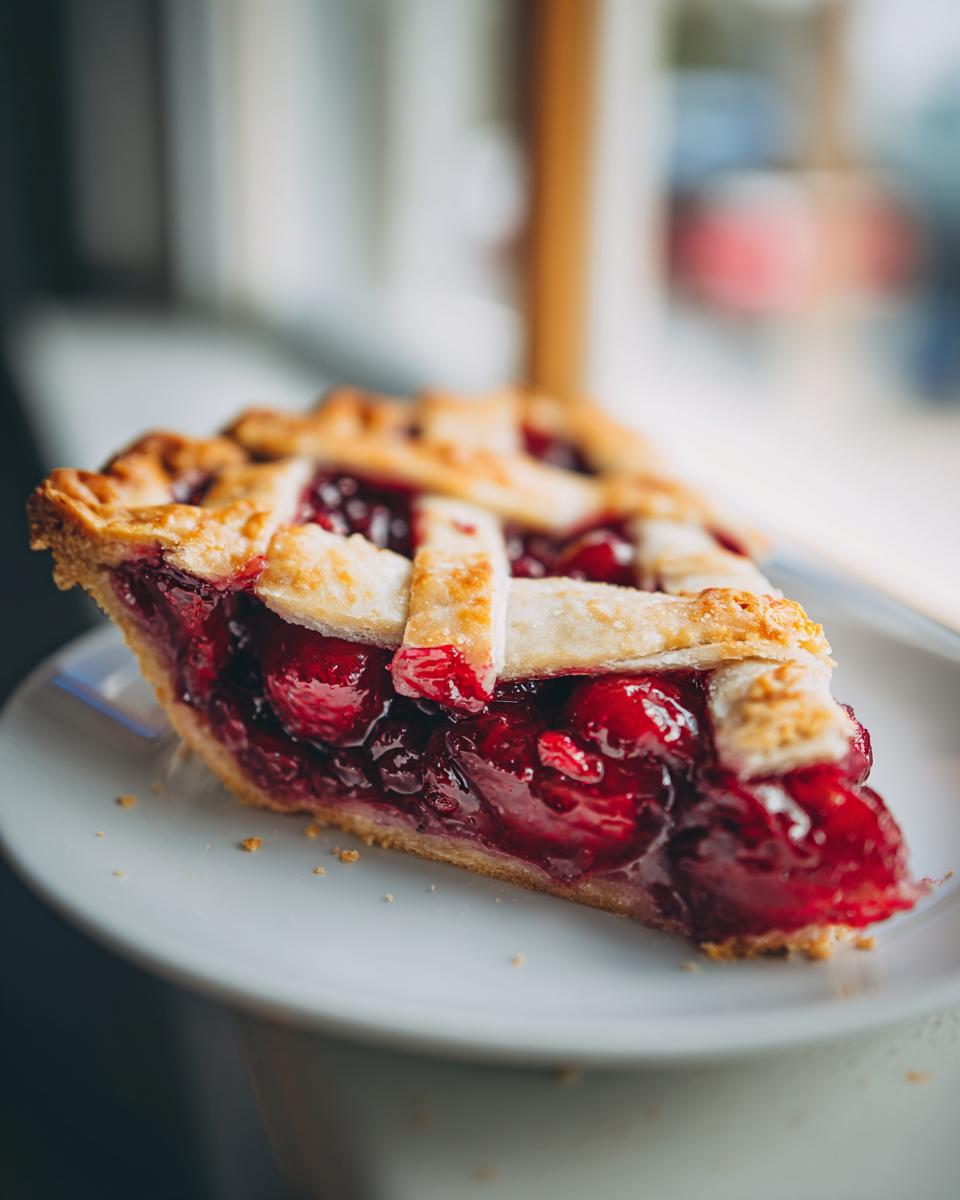
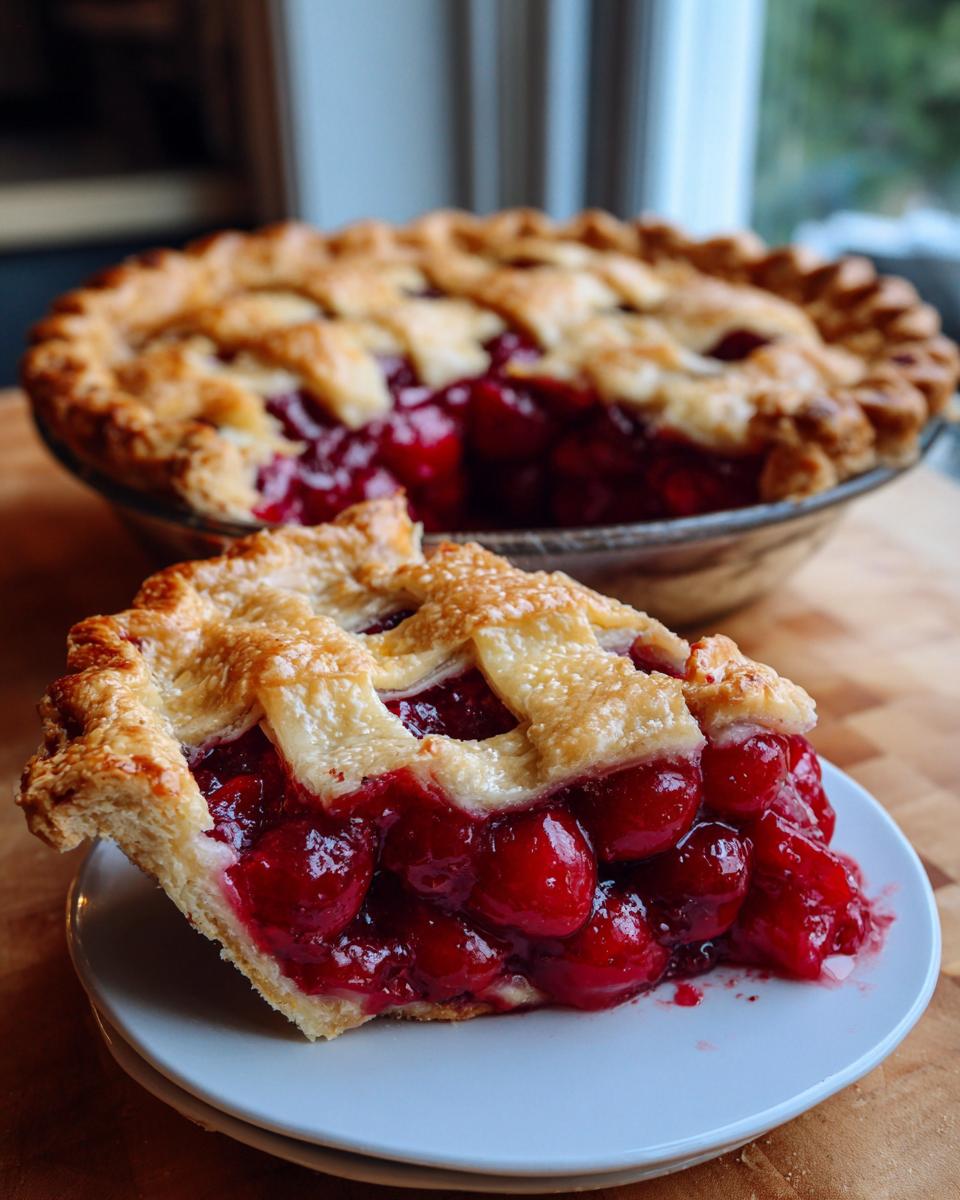
Oh, you know those holiday gatherings, right? That one dessert that just screams ‘special occasion’ and makes everyone grab a fork the second it hits the table? For me, it’s always been a perfect slice of homemade cherry pie. Not just any cherry pie, though! I’m talking about that dreamy, café-style masterpiece – the kind with a thick, luscious filling that doesn’t run out when you slice it, all hugged by the flakiest, most buttery lattice crust you can imagine. It reminds me of my grandma’s kitchen, the smell of warm cherries and cinnamon filling the air. At Dishicious, we’re all about making those amazing flavors achievable without the fuss. Just like our founder Leo approaches recipes like a project to be perfected, this classic cherry pie recipe is all about streamlining the process to get maximum deliciousness with minimal stress. You can learn more about our philosophy here. Trust me, this is the cherry pie you’ve been dreaming of!
- Why You'll Love This Classic Cherry Pie Recipe
- Making the Perfect Cherry Pie: Ingredients You'll Need
- Crafting Your Homemade Cherry Pie: Step-by-Step Instructions
- Tips for the Best Fresh Cherry Pie
- Holiday Cherry Pie: Make-Ahead and Storage
- Frequently Asked Questions About Cherry Pie
- Estimated Nutritional Information for Classic Cherry Pie
- Share Your Homemade Cherry Pie Creations!
Why You’ll Love This Classic Cherry Pie Recipe
This isn’t just *any* cherry pie recipe, it’s a keeper! You’re going to absolutely love it because:
- You’ll finally master that thick, sliceable cherry filling that holds its shape beautifully.
- The crust? Oh, it’s unbelievably flaky and buttery – perfect for cradling all that gorgeous fruit.
- It’s surprisingly easy to put together, even with that fancy-looking lattice top!
- It’s the ultimate showstopper for holidays and special gatherings, guaranteed to impress.
Making the Perfect Cherry Pie: Ingredients You’ll Need
Alright, let’s get down to business! To make this dream pie a reality, you’ll need a few key players. For the dough, we’re talking classic flaky goodness: 2 ½ cups of all-purpose flour, a teaspoon of salt, and a whole cup (that’s two sticks!) of super cold, cubed unsalted butter. Then, half a cup of ice water to bring it all together. For that gloriously thick, sweet-tart filling, grab 6 cups of fresh cherries – make sure they’re pitted! You’ll also need ¾ cup of granulated sugar, ¼ cup of cornstarch to thicken everything up just right, a tablespoon of lemon juice for brightness, and that little secret weapon, ½ teaspoon of almond extract. Oh, and don’t forget one beaten egg for that shiny egg wash and an extra tablespoon of sugar to sprinkle on top for a little sparkle!
Crafting Your Homemade Cherry Pie: Step-by-Step Instructions
Okay, deep breaths! Making a truly stellar homemade cherry pie isn’t as scary as it sounds, I promise. It’s all about breaking it down into manageable steps. First things first, we need that incredible crust to chill out and get happy. Then we’ll prep that gorgeous filling. Finally, we’ll bring it all together for baking. Trust me, the aroma that fills your kitchen during this process? Pure magic!
Preparing the Flaky Pie Dough for Your Cherry Pie
This is where super cold ingredients are your best friends. In a big bowl, whisk together your flour and salt. Then, toss in that cold, cubed butter. Now, get your hands in there (or use a pastry blender if you prefer!) and work that butter into the flour until it looks like coarse crumbs with a few pea-sized butter bits still peeking out. Those little bits? They’re the secret to flakiness! Now, gradually add ice water, just a tablespoon at a time, mixing until the dough *just* starts to come together. Don’t overmix! Divide it into two disks, wrap ’em up, and let them chill in the fridge for at least an hour. This is SO important for a great cherry pie crust – it lets the gluten relax and the butter firm up.
Creating the Thick Cherry Filling
While the dough is chilling, let’s whip up that luscious filling. Just gently toss those beautiful pitted cherries with the sugar, cornstarch (this is our magic thickener!), a splash of lemon juice, and that little hint of almond extract. Oh, the almond extract with cherries? Divine! Make sure everything is coated evenly. It’ll seem a little juicy now, but that cornstarch will work its wonders in the oven, giving you that perfect, thick filling we’re aiming for.
Assembling and Baking Your Lattice Cherry Pie
Alright, time to bring it all home! Preheat your oven to a nice hot 400°F (200°C). On a lightly floured surface, roll out one disk of that chilled dough into about a 12-inch circle. Carefully lay it into your pie plate, letting any extra hang over the edge. Now, pour that gorgeous cherry filling right into the crust. For the lattice top, roll out the second dough disk and cut it into ½-inch strips. Weave those strips in a lattice pattern over the cherries – it looks fancy, but it’s just over and under! Trim the strip ends and pinch the top and bottom crusts together to seal. Brush the whole top with your beaten egg wash and sprinkle with that extra sugar for a lovely golden crunch. Pop it on a baking sheet (to catch any bubbly drips) and bake for 20 minutes. Then, lower the oven temp to 375°F (190°C) and bake for another 30-40 minutes until it’s beautifully golden and the filling is bubbling away. If it starts browning too fast, just loosely tent it with foil. The hardest part? Letting this cherry pie cool *completely* for at least 3-4 hours before slicing. Patience, my friends!
Tips for the Best Fresh Cherry Pie
Okay, so you’ve got the recipe, and you’re ready to bake up a storm! Here are a few little secrets I’ve picked up to make sure your fresh cherry pie is an absolute triumph. First off, for that glorious thick filling we talked about, use good quality cornstarch and make sure it’s evenly distributed with the cherries. If you can’t get your hands on fresh cherries, frozen ones work just fine! Just thaw them completely first and, this is crucial, drain off ALL that extra juice before you mix them with the cornstarch and sugar. Otherwise, you’ll end up with a soupy mess. Also, don’t skimp on the cooling time! Letting your cherry pie cool completely is the *real* secret to a beautifully sliceable filling. Resist the urge to cut into it too soon – I know it smells amazing!
Holiday Cherry Pie: Make-Ahead and Storage
Planning ahead for holiday parties? You’re in luck! This cherry pie is a total game-changer for making ahead. You can totally prep the pie dough and that amazing cherry filling up to 2 days in advance. Just wrap those dough disks tight and keep the cherry mixture covered in the fridge. When you’re ready to bake your glorious cherry pie, assemble it as directed. If you want to bake it from frozen, just add about 10-15 minutes to the total baking time – easy peasy! Letting it cool completely is still the key, even when you’re baking it fresh off the make-ahead plan!
Frequently Asked Questions About Cherry Pie
My cherry pie filling is too runny, what did I do wrong?
Oh, the dreaded runny filling! Most often, it’s because of too much liquid. Make sure you’re using enough cornstarch – ¼ cup is usually perfect for 6 cups of cherries. If you used frozen cherries, draining them really well is key. You might also need to bake the pie a little longer, or let it cool completely. Patience is a virtue here!
Can I use canned cherries instead of fresh for my pie?
You can, but it won’t be quite the same! Canned cherries are often softer and already in syrup. If you absolutely must, use good quality canned sour cherries and drain them *really* well. You might also need to adjust the sugar and cornstarch a bit. Fresh cherries really give you that best homemade cherry pie vibe, though!
How do I prevent a soggy bottom crust on my cherry pie?
A soggy bottom is a pie baker’s nightmare! A few things help: make sure your oven is preheated properly to 400°F. A hot oven helps set the bottom crust quickly. Also, try to avoid overworking the dough, and make sure the cornstarch is mixed evenly into the filling. Sometimes, baking the pie on a lower rack and placing it on a baking sheet helps too. And, of course, let it cool completely before slicing!
What’s the best way to achieve a buttery, flaky crust?
It all starts with super cold ingredients! Make sure your butter and water are ice cold when you make the dough. Don’t overwork the dough when you’re mixing; you want those little pockets of butter to remain. And chilling the dough disks for at least an hour before rolling is non-negotiable. It seems like a small step, but it makes a world of difference for that perfect lattice cherry pie crust!
Estimated Nutritional Information for Classic Cherry Pie
Okay, so you’ve baked this amazing pie, and now you’re curious about what’s in that delicious slice. Here are some estimated numbers per serving: about 450 calories, 25g of fat (with 15g being saturated), 5g of protein, 55g of carbs, and 35g of sugar. You’ll also find about 4g of fiber and 250mg of sodium, plus 60mg of cholesterol. Keep in mind, these are just estimates and can change depending on the exact ingredients and brands you use!
Share Your Homemade Cherry Pie Creations!
Alright, bakers, now it’s YOUR turn! Whether you followed this recipe to the letter or put your own spin on it, I absolutely want to hear all about your homemade cherry pie! Did it turn out perfectly sliceable? Did your lattice crust look amazing? Drop a comment below with your thoughts, give the recipe a star rating, or tag us on social media with a pic of your glorious cherry pie creation. Happy baking!
PrintClassic Cherry Pie with Lattice Crust

Bake a delicious homemade cherry pie with a thick, non-runny filling and a buttery lattice crust. This recipe uses fresh cherries and includes tips for making it ahead for holidays.
- Prep Time: 45 min
- Cook Time: 50 min
- Total Time: 135 min
- Yield: 8 servings 1x
- Category: Dessert
- Method: Baking
- Cuisine: American
- Diet: Vegetarian
Ingredients
- 2 ½ cups all-purpose flour
- 1 teaspoon salt
- 1 cup (2 sticks) unsalted butter, cold and cut into cubes
- ½ cup ice water
- 6 cups fresh cherries, pitted
- ¾ cup granulated sugar
- ¼ cup cornstarch
- 1 tablespoon lemon juice
- ½ teaspoon almond extract
- 1 large egg, beaten (for egg wash)
- 1 tablespoon granulated sugar (for sprinkling)
Instructions
- In a large bowl, whisk together flour and salt. Cut in cold butter using a pastry blender or your fingertips until the mixture resembles coarse crumbs with some pea-sized pieces of butter remaining.
- Gradually add ice water, 1 tablespoon at a time, mixing until the dough just comes together. Divide the dough in half, flatten each half into a disk, wrap in plastic wrap, and refrigerate for at least 1 hour.
- In a separate bowl, combine pitted cherries, sugar, cornstarch, lemon juice, and almond extract. Toss gently to coat the cherries.
- Preheat your oven to 400°F (200°C).
- On a lightly floured surface, roll out one disk of dough into a 12-inch circle. Carefully transfer the dough to a 9-inch pie plate. Trim the edges, leaving about a 1-inch overhang.
- Pour the cherry filling into the pie crust.
- Roll out the second disk of dough. Cut it into ½-inch wide strips. Arrange the strips over the filling in a lattice pattern. Trim the ends of the strips and crimp the edges of the top and bottom crusts together to seal.
- Brush the lattice crust with the beaten egg wash and sprinkle with the remaining tablespoon of sugar.
- Place the pie on a baking sheet to catch any drips. Bake for 20 minutes at 400°F (200°C).
- Reduce the oven temperature to 375°F (190°C) and continue baking for another 30-40 minutes, or until the crust is golden brown and the filling is bubbly. If the crust starts to brown too quickly, loosely tent the pie with aluminum foil.
- Let the pie cool completely on a wire rack for at least 3-4 hours before slicing to allow the filling to set.
Notes
- For a make-ahead option, prepare the pie crust and filling separately up to 2 days in advance. Store the dough disks and cherry mixture in the refrigerator. Assemble and bake when ready.
- If fresh cherries are not available, you can use frozen cherries. Thaw them completely and drain off excess liquid before using.
- Ensure your butter and water are very cold for the flakiest crust.
Nutrition
- Serving Size: 1 slice
- Calories: 450
- Sugar: 35g
- Sodium: 250mg
- Fat: 25g
- Saturated Fat: 15g
- Unsaturated Fat: 10g
- Trans Fat: 0g
- Carbohydrates: 55g
- Fiber: 4g
- Protein: 5g
- Cholesterol: 60mg