
Listen, I know the struggle. You bite into homemade fried chicken and it’s just… fine. It’s either dry, or the coating is floppy, or it tastes like the oil you used. We aren’t aiming for “fine” here! My goal, just like when I tackle any kitchen project, was to engineer a foolproof system for that unforgettable, shatteringly crispy exterior and meat so juicy it practically melts.

This isn’t just a list of steps; it’s the methodical approach that gets you restaurant-style quality consistently. Trust me, by the time you finish this guide, you’ll have mastered the Ultimate Crispy Southern Fried Chicken Recipe that will make everyone ask for your secret.
- Why This Is the Best Fried Chicken Recipe You Will Ever Make
- Ingredients for Ultimate Crispy Fried Chicken
- Step-by-Step Instructions for Perfect Fried Chicken
- Expert Tips for the Best Fried Chicken Recipe
- Making Southern Fried Chicken for a Family Dinner
- Storage and Reheating Fried Chicken
- Frequently Asked Questions About Fried Chicken
- Estimated Nutritional Data for Fried Chicken
- Share Your Homemade Fried Chicken Success
Why This Is the Best Fried Chicken Recipe You Will Ever Make
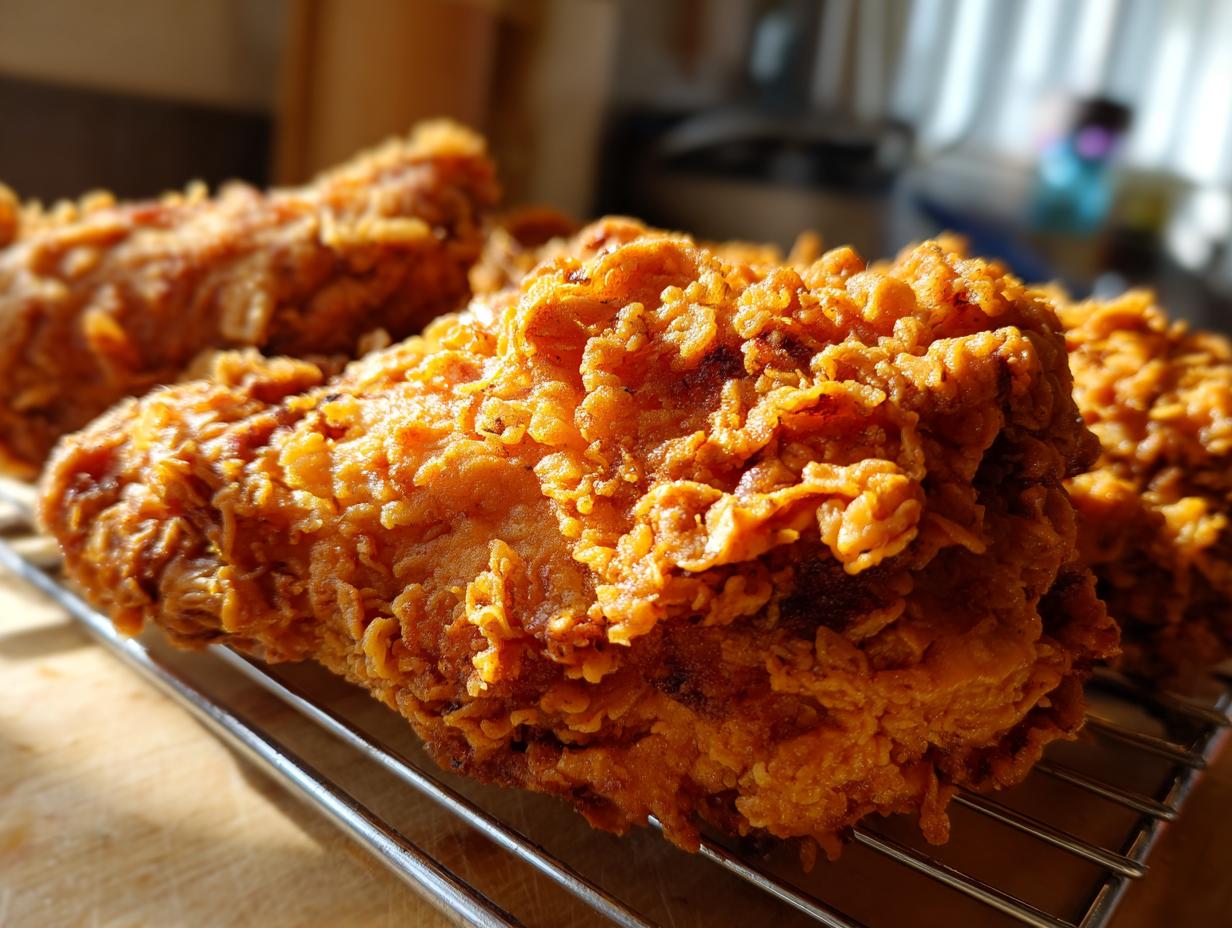
The magic of this recipe isn’t one single trick; it’s how we hit every single must-have attribute you look for in truly great fried chicken. We’re talking about achieving that legendary, golden, shatteringly **Extra Crispy Coating** that stays crunchy even after sitting five minutes on the plate.
But crisp doesn’t mean dry, not here! The secret to **Juicy Fried Chicken** starts hours before it hits the hot oil. That long soak in buttermilk isn’t just for flavor, either. The acid actually works to tenderize the muscle fibers, giving you unbelievably tender meat clear down to the bone. We nail the seasoning blend too, so you get that classic, savory Southern taste that screams comfort food. This formula is basically foolproof, built to deliver perfection every single time.
Ingredients for Ultimate Crispy Fried Chicken
Okay, let’s talk supplies. Getting the best fried chicken starts right here with what you pull out of the fridge and pantry. I insist on using bone-in, skin-on pieces—that fat and skin render down beautifully and lock in flavor, which is essential for a great meal!
Don’t skimp on the oil, either. For that perfect texture we talked about, grab something with a high smoke point like vegetable or peanut oil. That nice, clean, neutral flavor is how you get that classic color!
For the Buttermilk Marinade
- 4 cups buttermilk
- 2 tablespoons hot sauce (This gives us a little background heat, don’t skip it!)
For the Seasoned Flour Coating
- 3 cups all-purpose flour
- 1/2 cup cornstarch (This is the secret weapon for that crackly, **Extra Crispy Coating**!)
- 2 tablespoons salt
- 1 tablespoon black pepper
- 1 tablespoon paprika
- 1 tablespoon garlic powder
- 1 teaspoon cayenne pepper
Oh, and don’t forget the chicken itself! You’ll need 3 lbs of bone-in, skin-on pieces—thighs, drumsticks, the whole works.
Step-by-Step Instructions for Perfect Fried Chicken
This is where my project manager brain kicks in—it’s all about process control to get that perfect crunch. Don’t rush these steps, especially the waiting parts! If you follow this order, you’ll have **Crunchy Chicken at Home** that rivals any good diner. We’re building a highly efficient flavor delivery system here, sort of like engineering the perfect meal, similar to how we approach that amazing smothered chicken and rice!
Marinating the Chicken for Juicy Fried Chicken
First things first: get that chicken taking a bath! Place your 3 lbs of pieces into a big bowl and cover everything with that seasoned buttermilk mixture, plus the hot sauce. You need to cover this up and stick it in the fridge. I know, I know, waiting is hard, but you have to let it chill for a minimum of four hours. Honestly, overnight is when the buttermilk really gets to work breaking down those proteins, making sure your **Juicy Fried Chicken** goal is totally locked in. It’s worth the patience, I promise!
Creating the Craggy Coating for Crispy Fried Chicken
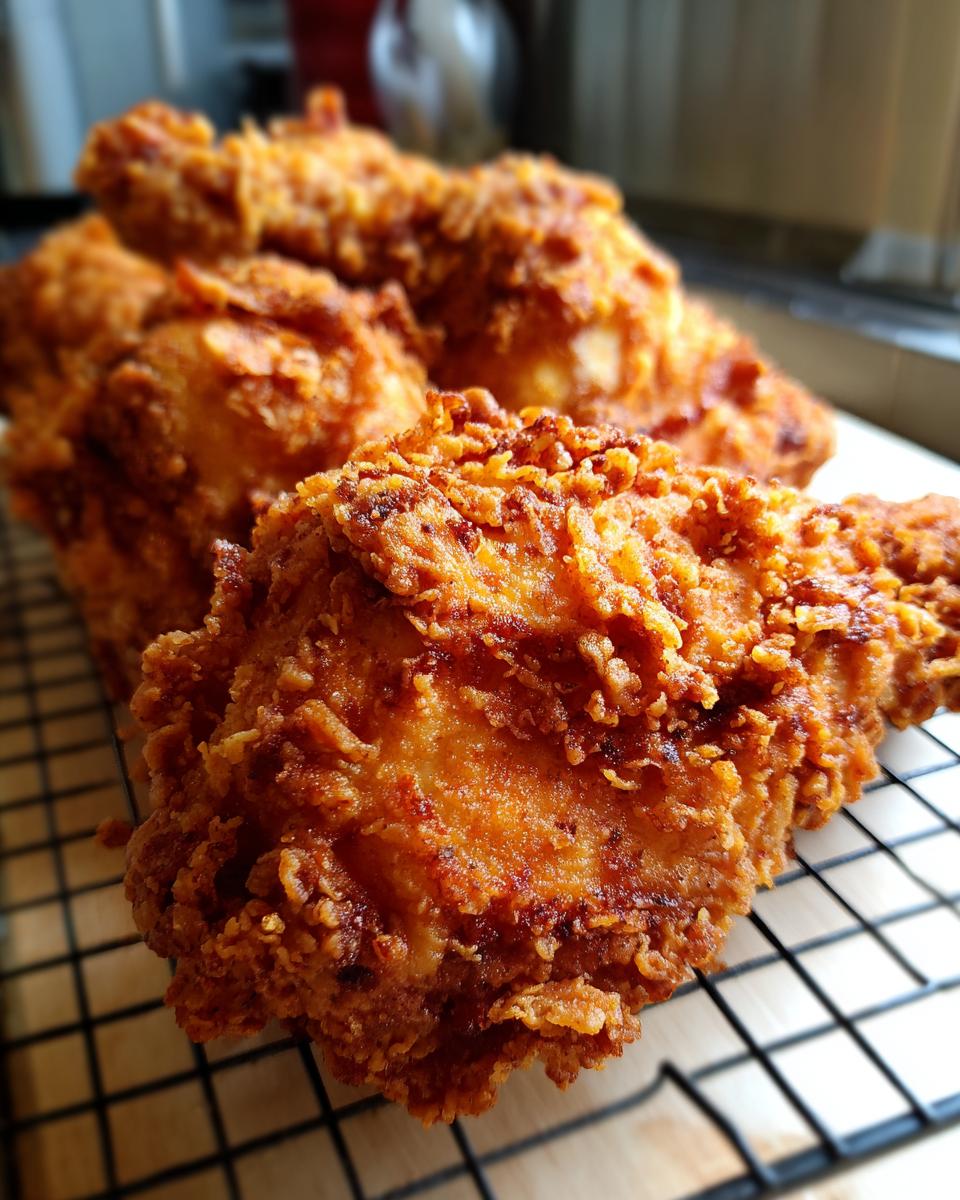
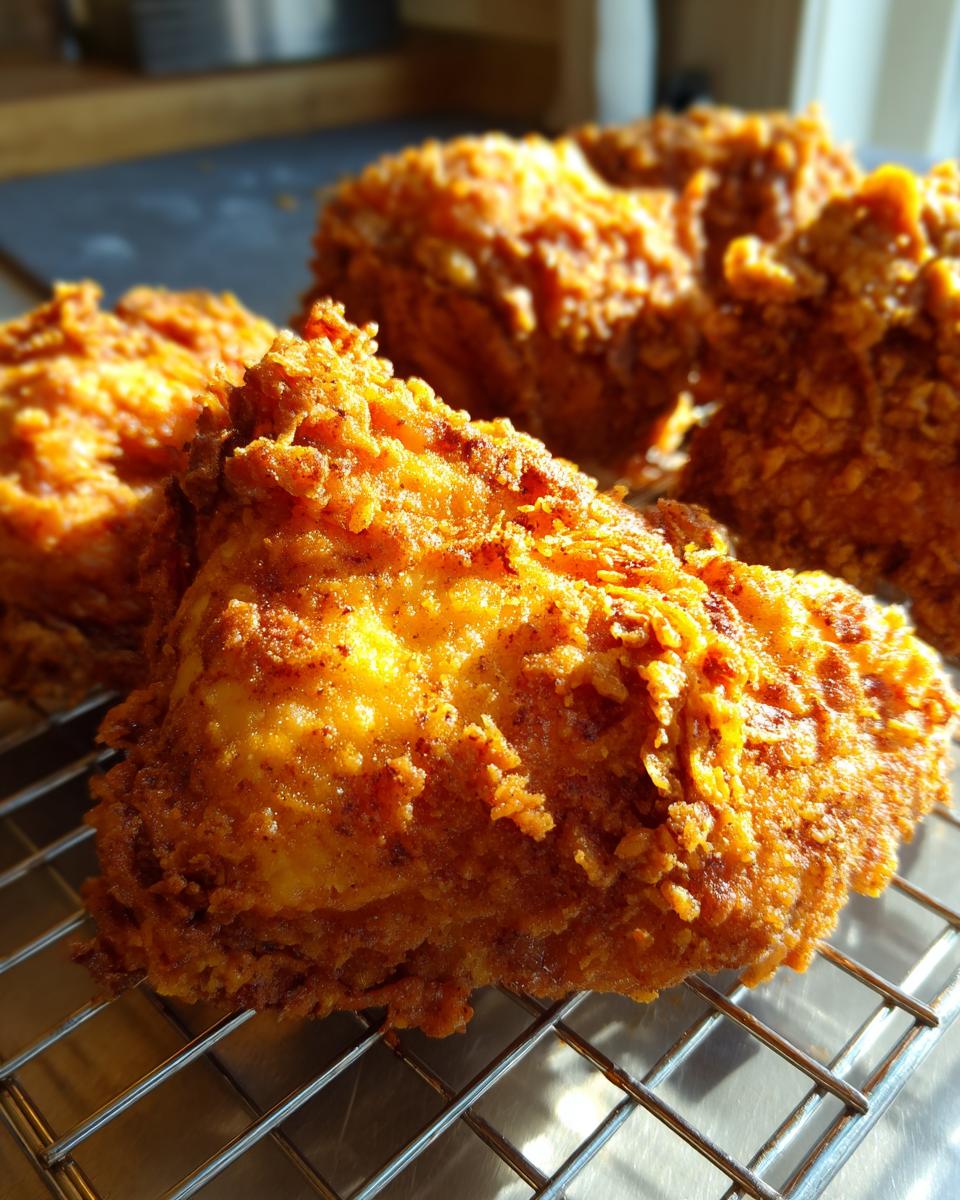
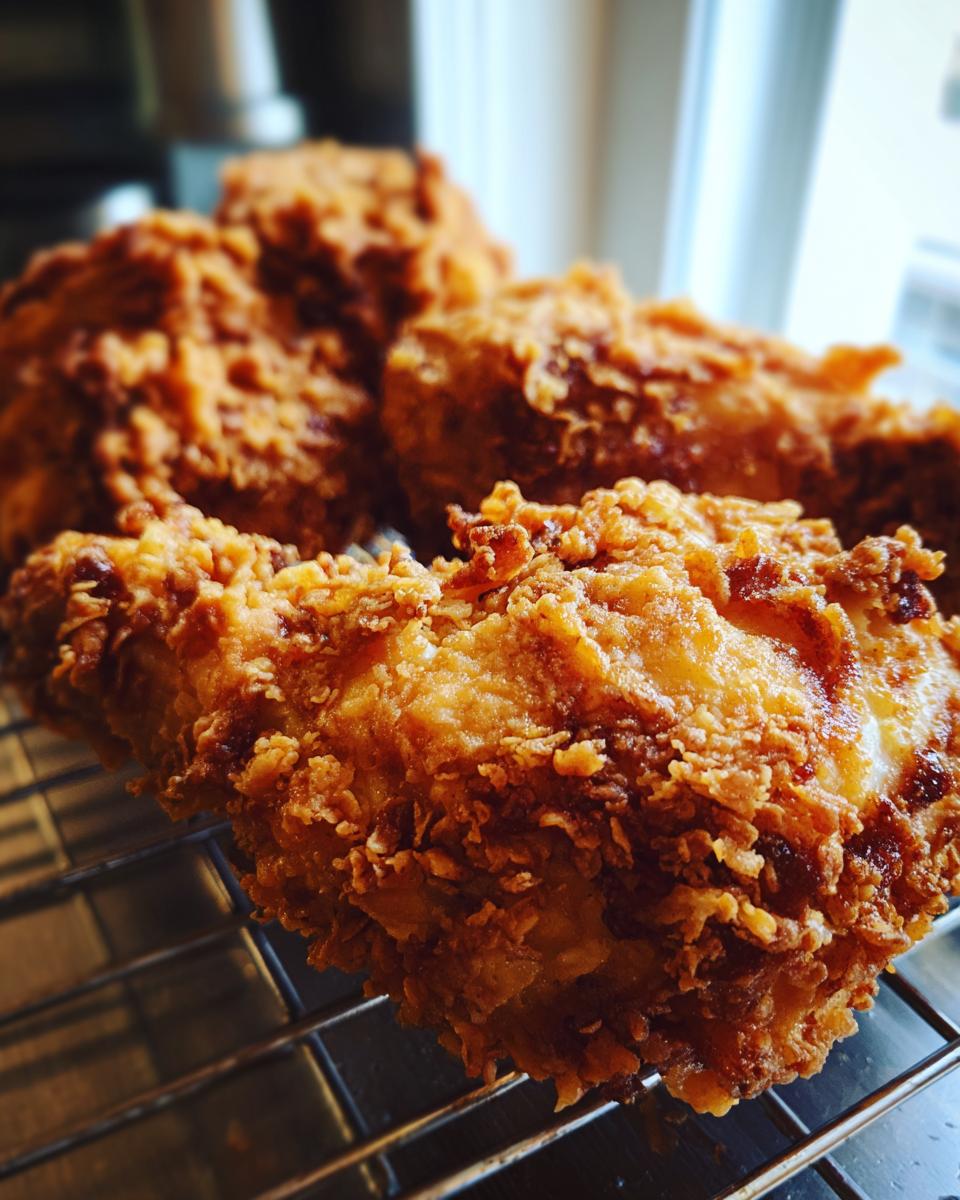
Once it’s nicely marinated, we build texture! Take your chicken out of the buttermilk—just let the excess drip off, don’t wipe it dry. Now, you need to dredge it thoroughly in that seasoned flour. Don’t just toss it in there; you actually need to *press* the flour onto every nook and cranny. I mean it—pat, press, and really work that coating on. This builds up those shaggy, craggy bits that fry up into the ultimate crunch. Put the coated pieces on a wire rack. For really killer results, try to let them sit there for about 15 minutes before frying; this sets the crust beautifully.
Deep Frying Technique for Restaurant Style Fried Chicken
Time to heat the oil in your heavy pot until it hits exactly 325 degrees Fahrenheit (160°C). Seriously, use a thermometer! If the oil is too cold, you end up with greasy, soggy chicken—nobody wants that **Restaurant Style Fried Chicken** failure. Carefully drop only 3 or 4 pieces in at a time; overcrowding is my number one enemy here. Fry them for about 6 to 8 minutes on each side until they look perfectly golden brown. Always check the internal temperature with a meat thermometer like a good strategist—it needs to hit 165°F (74°C) to be safe and done. Then, quickly transfer them to a clean wire rack to drain!
Remember, this entire **fried chicken** process is optimized for maximum crunch and juiciness!
Expert Tips for the Best Fried Chicken Recipe
So, you nailed the marinade and the dredging—awesome! Now, I want to share a couple of expert moves that elevate this from good **Classic Fried Chicken** to something you’ll brag about later. These are the little details that turn the process into precision cooking, which is how we ensure that gorgeous golden crust holds up.
The biggest thing people mess up, even with a great recipe, is dealing with the finished product. Never, ever place your just-fried chicken directly on paper towels to drain. Seriously, resist the urge! Those towels trap steam underneath the crust, and that steam is the enemy of crunch. That’s why we use a clean wire rack set over a baking sheet. It lets the air circulate all around the chicken, keeping the bottom crust just as crisp as the top.
Temperature Control: The Secret to Success
I preach temperature control constantly because it’s the difference between incredible **fried chicken** and a greasy mess. You absolutely must keep your oil steady at 325°F while frying. If it dips too low when you drop the pieces in, the coating soaks up oil like a sponge before it has a chance to set hard. If it gets too high? The outside burns long before the inside gets juicy.
For an extra layer of security, peek at what they do over at The Inspired Girl’s kitchen; they focus heavily on managing that heat. It requires a good, reliable thermometer and a bit of patience to maintain that pocket of perfect frying heat. It’s a key step in mastering dishes like this, much like getting the temperature spot-on for a perfect restaurant-style skillet chicken.
Making Southern Fried Chicken for a Family Dinner
When you’re making a big batch for a **Family Dinner Chicken** showdown, efficiency becomes everything, right? We want that amazing **Southern Fried Chicken** flavor without spending all afternoon standing over a hot pot of oil. That’s where batch cooking comes in, fitting that meal into our busy lives, just like Leo emphasizes in the Dishicious philosophy!
The key here is not to smash too many pieces into the fryer at once, because that tanks your oil temperature and ruins the crunch we worked so hard for. So, cook in small batches, but have a plan for the finished pieces. As soon as a batch comes out of the oil, put them immediately onto that wire rack, but place that rack inside a very low oven—about 200°F will do the trick.
This low heat keeps your **fried chicken** piping hot and crispy right until everything is done frying. Then, you can pull the whole platter out and serve your delicious chicken dinner! If you want some inspiration for sides that pair perfectly, check out that fantastic local guide for another great Southern fried chicken recipe inspiration.
Storage and Reheating Fried Chicken
So, if you actually have leftovers—which is unlikely with this **fried chicken**—we need to treat them right! First, make sure the chicken is completely cooled down before you try to store it. Stick it in an airtight container, but don’t try to stack the pieces too tightly.
The absolute worst thing you can do when reheating is using the microwave. That heat turns the crust instantly soft. To bring back that divine crunch, skip the microwave completely. I strongly suggest either popping it in an air fryer for about 5 minutes at 375°F or laying it out on a baking sheet in a 375°F oven for about 10 minutes. Just enough heat to crisp up the coating again while warming those juicy insides. It’s almost as good as fresh, especially when served next to some creamy twice-baked potatoes!
Frequently Asked Questions About Fried Chicken
I get so many questions about tweaking this **Classic Fried Chicken** recipe, so let’s clear up the common confusion right here. Getting that crispy, juicy result isn’t always intuitive, but I manage to solve most of my frying dilemmas by sticking to the master plan we laid out above. Hopefully, these quick tips help you nail your next batch of homemade goodness!
Can I use chicken breasts for this fried chicken recipe?
You certainly can use chicken breasts, but you have to be extra careful because they are way leaner than thighs or legs. Since the goal is **Juicy Fried Chicken**, you really don’t want to overcook them! Breasts will cook faster, so start checking them maybe 2 minutes earlier than the thighs. If the outside looks perfectly golden on the breast pieces but the thermometer isn’t reading 165°F yet, just pull them out and let them coast to full doneness on the resting rack while the darker meat finishes up! It’s all about managing those different cook times.
What is the best oil to use for the crispiest fried chicken?
If you want that incredible, golden crust that screams **Restaurant Style Fried Chicken**, you need oil that can handle the heat without burning or tasting funny. Honestly, I always reach for vegetable oil or peanut oil. They both have high smoke points, which means they stay stable at 325°F, which is crucial for that ultimate crunch! Low smoke-point oils will break down, start smoking, and your **fried chicken** will end up tasting heavy and greasy. Stick to the high-heat folks for the best flavor!
How long should the chicken marinate for the juiciest results?
This is a non-negotiable part of getting the most **Juicy Fried Chicken**, so listen up! While technically you can get away with marinating for at least four hours, it won’t pack the same punch. If you have your calendar open, plan for it! I always try to do it overnight—that’s 10 to 12 hours in the fridge. The longer that buttermilk has to work on breaking down the texture of the meat, the more tender and flavorful your final **Southern Fried Chicken** will be. It’s the difference between good and unforgettable!
If you’re looking for amazing side dishes for your **Easy Fried Chicken Dinner**, you absolutely have to check out my recipe for easy chili recipe—or, you know, just make an extra batch of this chicken; it tastes great cold the next day!
Estimated Nutritional Data for Fried Chicken
Look, I’m a home cook, not a registered dietitian, so you have to take these numbers with a grain of salt! Since we’re doing the full deep-fry treatment for that amazing crunch, the nutritional breakdown is going to lean towards the indulgent side—but hey, that’s what makes this **fried chicken** the ultimate comfort food, right? These values are estimated based on averages for bone-in pieces prepared via deep frying, using the ingredients listed.
If you’re planning your menu for the week, maybe pair these amazing bits of crunch with some lighter fare, like my go-to anti-inflammatory dinner ideas!
- Serving Size: 1 piece (estimated)
- Calories: 450
- Fat: 28g
- Protein: 30g
- Carbohydrates: 18g
- Sodium: 650mg
This is a rich meal! That fat content comes from the skin and the oil absorption, which is exactly what drives that unparalleled texture. But look at that protein count—it’s satisfying! Every item in this list is a product of meticulous process control to achieve that perfect, juicy result.
Share Your Homemade Fried Chicken Success
Okay, you did it! You achieved that perfect crunch and the unbelievable juiciness, right? I honestly can’t wait to hear about it. Please take a second to leave us a star rating right below this recipe—it helps other home cooks find this quality **fried chicken** method!
Drop a comment telling me what you served it with, or if this finally solved your quest for that perfect **Classic Fried Chicken**. If you need to get in touch with us about anything else, you can always reach out on our contact page. Happy eating!
PrintUltimate Crispy Southern Fried Chicken Recipe

Make the best fried chicken at home with this recipe. You get a juicy, tender interior and an ultra-crispy, golden-brown coating every time. This is classic comfort food perfect for family dinner.
- Prep Time: 30 min
- Cook Time: 35 min
- Total Time: 4 hours 5 minutes
- Yield: 4 servings 1x
- Category: Dinner
- Method: Deep Frying
- Cuisine: American
- Diet: None
Ingredients
- 3 lbs bone-in, skin-on chicken pieces (thighs, drumsticks, breasts)
- 4 cups buttermilk
- 2 tablespoons hot sauce
- 3 cups all-purpose flour
- 1/2 cup cornstarch
- 2 tablespoons salt
- 1 tablespoon black pepper
- 1 tablespoon paprika
- 1 tablespoon garlic powder
- 1 teaspoon cayenne pepper
- Vegetable oil or shortening, for frying
Instructions
- Place the chicken pieces in a large bowl. Pour the buttermilk and hot sauce over the chicken. Make sure all pieces are submerged. Cover the bowl and refrigerate for at least 4 hours, or preferably overnight. This step ensures juicy meat.
- In a separate shallow dish, whisk together the flour, cornstarch, salt, pepper, paprika, garlic powder, and cayenne pepper. This is your seasoned flour mix for the extra crispy coating.
- Remove the chicken from the buttermilk, letting excess drip off, but do not rinse.
- Dredge each piece of chicken thoroughly in the seasoned flour mixture, pressing the flour onto the chicken to create a thick, craggy coating. Place the coated pieces on a wire rack.
- Pour enough oil into a deep, heavy-bottomed pot or Dutch oven to reach a depth of about 2 inches. Heat the oil to 325 degrees Fahrenheit (160 degrees Celsius). Use a thermometer to monitor the temperature; maintaining this heat is key for crunchy chicken at home.
- Carefully place 3 to 4 pieces of chicken into the hot oil, ensuring you do not overcrowd the pot. Overcrowding lowers the oil temperature and results in soggy chicken.
- Fry the chicken for about 6 to 8 minutes per side, turning occasionally, until deep golden brown and cooked through. The internal temperature should read 165 degrees Fahrenheit (74 degrees Celsius).
- Remove the fried chicken from the oil and place it on a clean wire rack set over a baking sheet to drain excess oil. Do not place it on paper towels, as this traps steam and softens the crust.
- Allow the chicken to rest for 5 minutes before serving hot.
Notes
- For the crispiest results, let the dredged chicken rest on the rack for 15 minutes before frying. This allows the coating to hydrate slightly, setting the crust.
- If you are making a large batch, keep finished pieces warm in a 200 degree Fahrenheit oven while you finish frying the rest.
- Use peanut oil for frying if you want a neutral flavor profile similar to restaurant style fried chicken.
Nutrition
- Serving Size: 1 piece
- Calories: 450
- Sugar: 3
- Sodium: 650
- Fat: 28
- Saturated Fat: 8
- Unsaturated Fat: 20
- Trans Fat: 0
- Carbohydrates: 18
- Fiber: 1
- Protein: 30
- Cholesterol: 110