
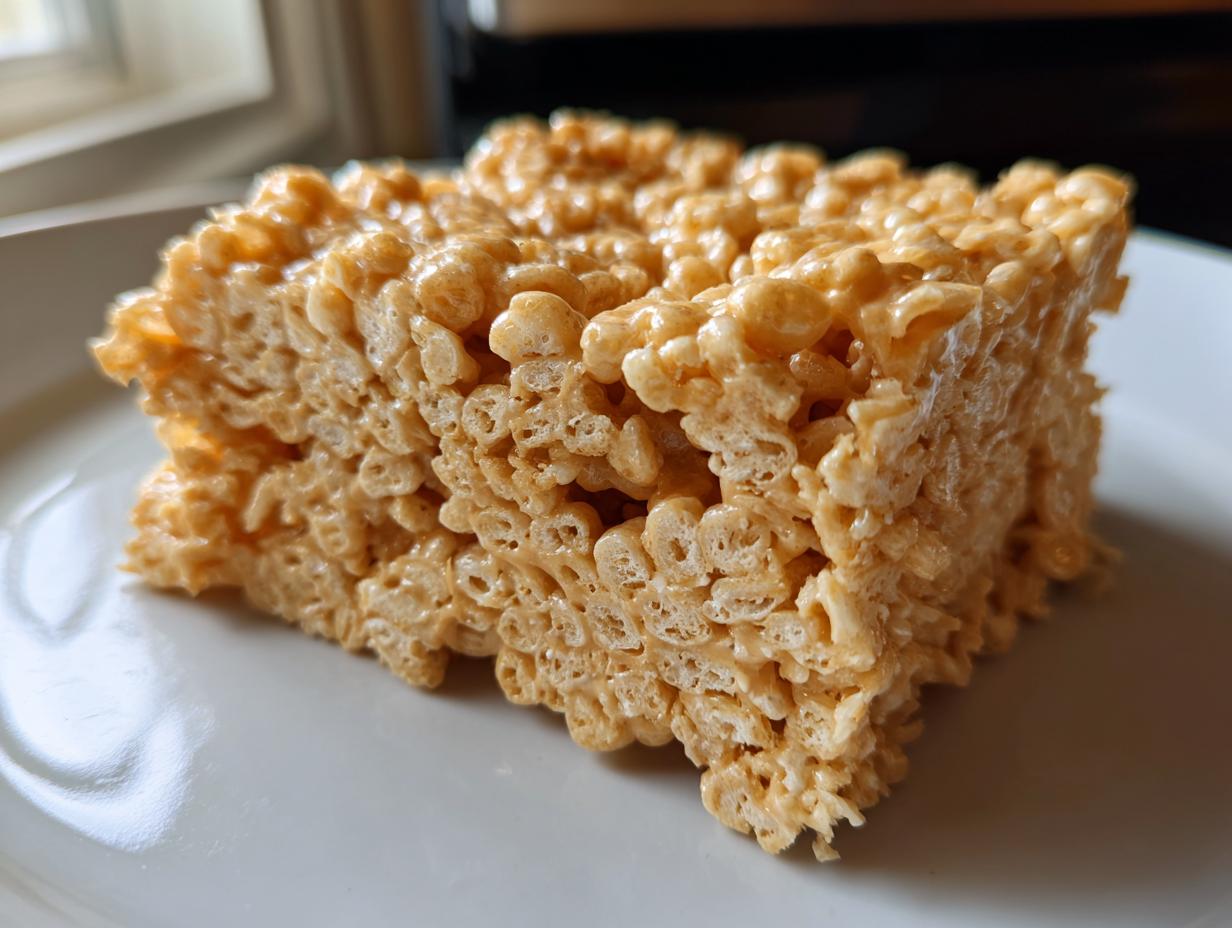
When I think about that perfect, easy, **no-bake peanut butter bar**, nothing beats a Rice Krispie Treat, but we’re kicking it up about a thousand notches. Forget those crumbly, hard versions you sometimes end up with! We are making the ultimate gooey, crunchy **Peanut Butter Rice Krispie Treats** here, trust me. This recipe fits right into our Dishicious philosophy—it’s fast, it’s reliable, and it delivers maximum flavor without wasting your whole evening in the kitchen, just like Leo Grant always preaches about smarter cooking. Check out more about our mission over at why we focus on efficiency in the kitchen.
We nailed the ratios here to ensure every single square you pull from the pan is perfectly chewy on the inside while still having that satisfying crunch. These are simple pantry dessert ideas made spectacular, and they’re going to become your new go-to snack for anything from school lunch boxes to last-minute party needs. You absolutely need this recipe!
- Why This is the Ultimate Gooey Peanut Butter Rice Krispie Treats Recipe
- Ingredients for Perfect Peanut Butter Rice Krispie Treats
- Step-by-Step Instructions for Easy Rice Krispie Recipe
- Tips for Making the Best Crunchy Peanut Butter Dessert
- Variations: Beyond Classic Peanut Butter Rice Krispie Treats
- Storage and Making Ahead for Peanut Butter Party Treats
- Frequently Asked Questions About Homemade Crispy Bars
- Nutritional Estimates for These Simple Pantry Dessert Ideas
- Share Your Family Favorite No Bake Desserts Experience
Why This is the Ultimate Gooey Peanut Butter Rice Krispie Treats Recipe
I know what you’re thinking: they’re just Rice Krispies, how different can they be? Well, trust me, these are different. We aren’t just throwing things into a pot; we are engineering the perfect texture. When you stick to the method, you get that amazing quality you’re looking for in these **Peanut Butter Rice Krispie Treats**.
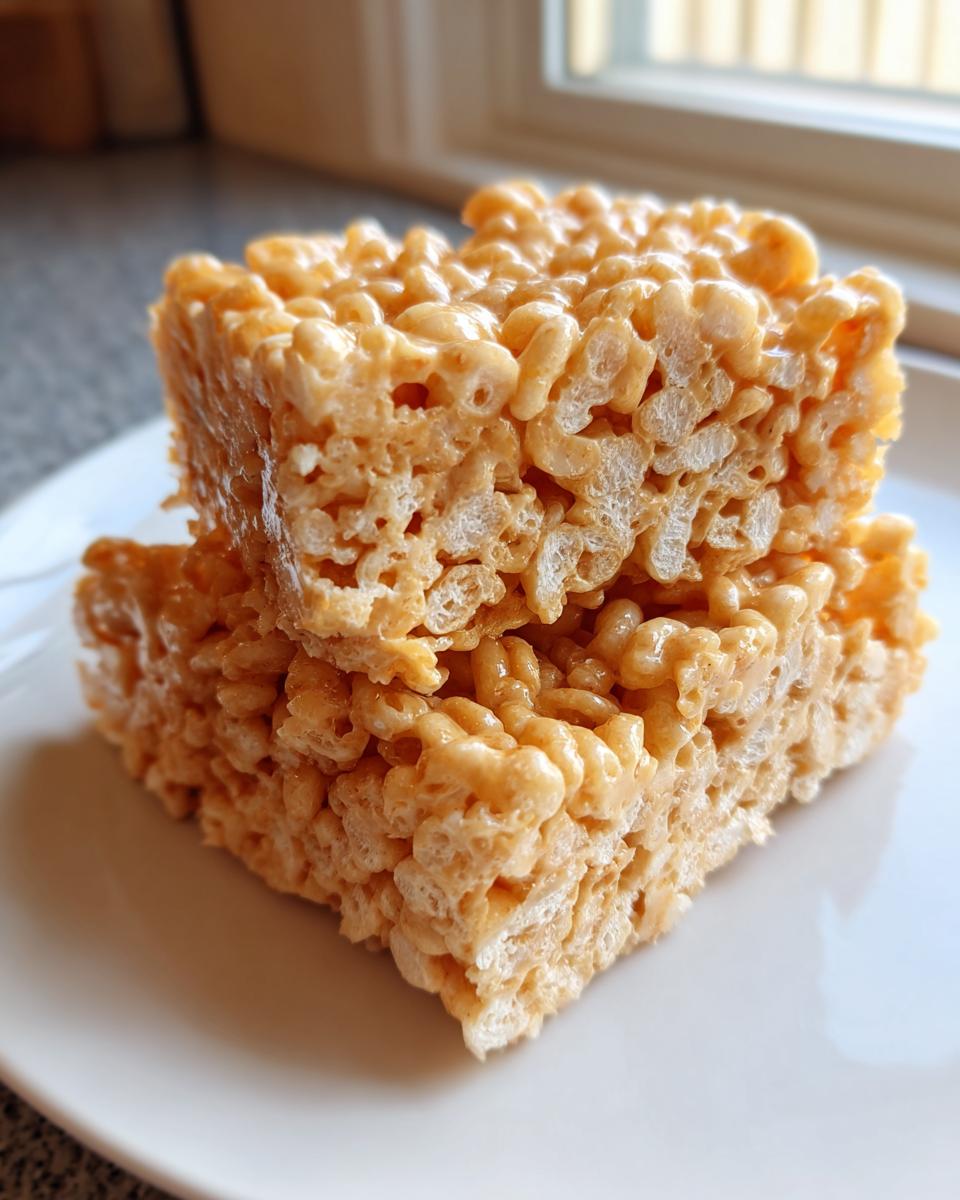
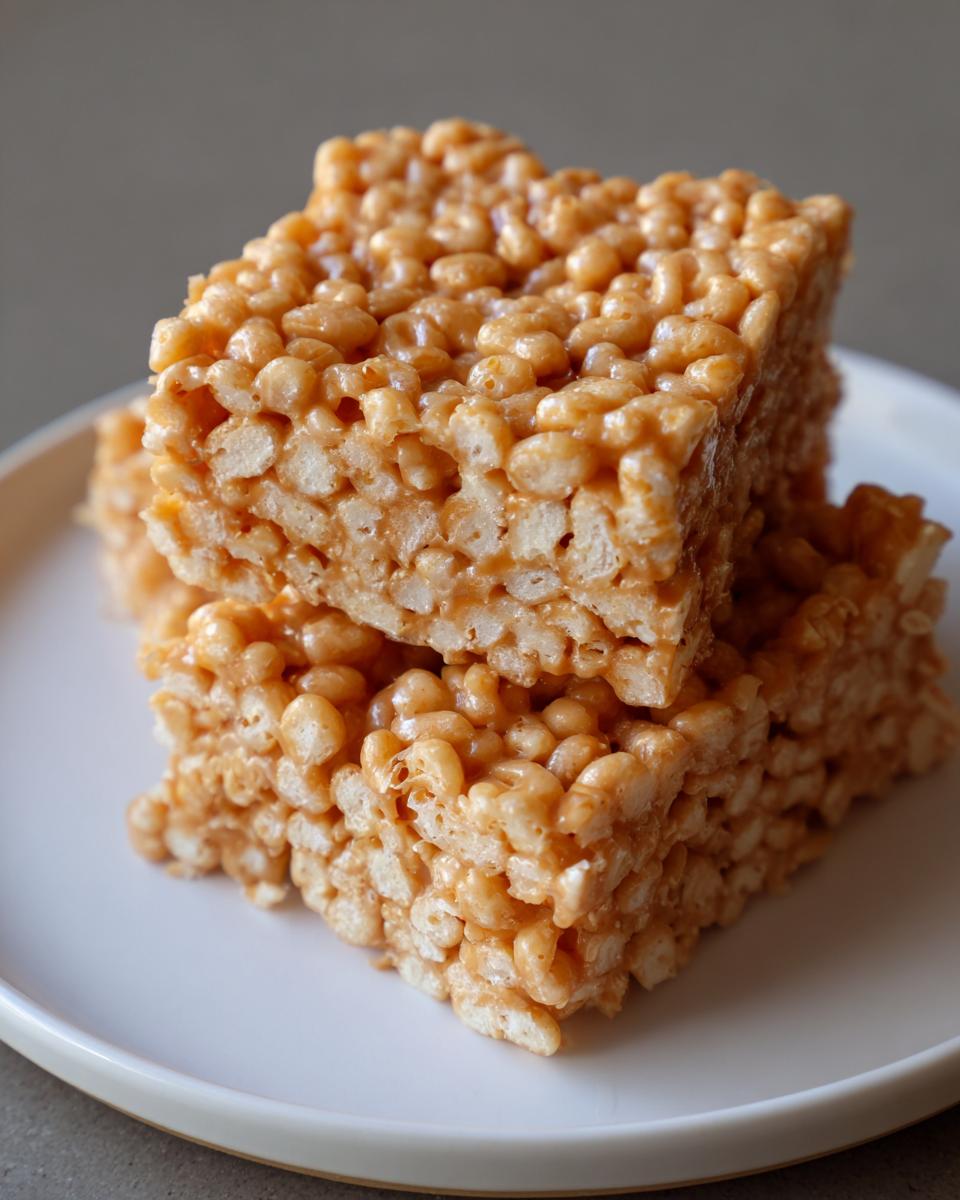
- You get that perfect combination: ultra-gooey from the melted marshmallow base, satisfyingly crunchy because the cereal stays crisp, and rich flavor from all that peanut butter we pack in.
- They hold their shape beautifully, making them ideal for cutting and serving messy-free.
Achieving Perfect Chewy Peanut Butter Rice Krispies Treats Texture
The secret sauce, really, is how we handle the heat. You must pull that pan off the burner right before you mix in the cereal! This stops the marshmallows from cooking too long, which is what makes them tough afterward. We want soft, pliable **Chewy Peanut Butter Squares**, not little bricks! It’s a simple step, but it makes all the difference between a good treat and a legendary one.
Quick Marshmallow Snacks Ready in Minutes
You won’t believe how fast this comes together. Seriously, if you have 10 minutes, you have time to make these happen. This genuinely qualifies as a **10 Minute Dessert Recipe**, maybe even faster if you’re a seasoned melter! It’s the perfect antidote when you need a sweet fix right now without dirtying up a bunch of equipment or firing up that hot oven.
Ingredients for Perfect Peanut Butter Rice Krispie Treats
Okay, gathering your supplies is straightforward, which is the beauty of this **Simple Pantry Dessert Idea**, but precision matters, especially with the peanut butter! You’ll need just a handful of things, but make sure they are exactly what I listed below so we don’t mess up that great texture we worked so hard for.
- 6 cups crispy rice cereal (the standard kind works perfectly)
- 1 (10 ounce) package marshmallows (your main source of goo!)
- 1/2 cup unsalted butter
- 1 cup creamy peanut butter (don’t skimp!)
- 1 teaspoon vanilla extract
- 1/4 teaspoon salt
- Optional: 1/2 cup semi-sweet chocolate chips for topping
Don’t forget your prep work! You need a 9×13 inch baking pan ready to go, preferably lined with parchment paper so you can lift those big bars right out later.
Ingredient Notes and Peanut Butter Substitutions
Here are the insider details on what makes these the **Best Rice Krispie Variations**. First, about the peanut butter: I absolutely insist on creamy for this recipe. Crunchy peanut butter throws off the distribution of the gooey binder, and we lose that seamless texture. If you must use crunchy, just know your bars will be significantly less gooey.
And seriously, dig out that bag of fresh marshmallows. If they are older and hardened, they melt poorly and leave little chewy clumps that ruin the consistency. For the best results in these **No Bake Peanut Butter Bars**, fresh marshmallows are non-negotiable—it keeps the bars soft and chewy!
Step-by-Step Instructions for Easy Rice Krispie Recipe
Alright, let’s get this delicious project started! Since this is a no-bake dream, we avoid the oven completely. Remember that **Simple Pantry Dessert Idea** we talked about? This is where the magic happens, and it’s so quick you’ll want to make another batch before you even finish the first one. We’re aiming for that picture-perfect look, so make sure you prep your pan first. If you’re looking for how to speed up other parts of your cooking routine, remember efficiency is key—check out some ideas for quick and easy dinners while these set up!
- First thing’s first: Lightly grease your 9×13 inch baking pan or line it with parchment paper, letting the paper hang over the sides like little handles. This is crucial for easy removal later!
- Get your big saucepan ready and melt that half-cup of butter over low heat. Keep that heat LOW; we don’t want any scorching here.
- Toss in the entire bag of marshmallows and stir, stir, stir until they are totally smooth and gorgeous.
- Take the pan OFF the heat—this is important! Then, immediately stir in that full cup of peanut butter until the whole mixture looks creamy and unified.
- Mix in the vanilla extract and that little pinch of salt.
- Now, gently fold in your 6 cups of crispy rice cereal. Just fold until everything is coated. Don’t overdo it!
- Transfer the whole sticky mess into your prepared pan. This is the most important texture step: Use a greased spatula or a piece of wax paper lightly greased with butter to *gently* press the mixture down. I mean gentle! Pressing too firmly is how you turn these **Family Favorite No Bake Desserts** into hard candy.
- If you’re doing the chocolate topping, melt those chips now (maybe with a tiny bit of coconut oil for shine) and drizzle them right over the top.
- Let them chill! Leave them on the counter to cool completely, roughly an hour, until they are totally set.
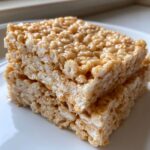
- Cut into squares and enjoy your perfect **Homemade Crispy Bars**!
Melting Marshmallows for Gooey Cereal Treats
Listen to me closely on the marshmallow part. We are aiming for that dreamy, stretchy texture, which means no scorching! Keep the heat on low—I mean the lowest setting your stove has—when melting the butter and then the marshmallows. If you rush this process, the bottom layer of your melted marshmallow mix will burn a little, giving your otherwise perfect **Gooey Cereal Treats** a slightly bitter taste. Patience here equals the best chewiness later on!
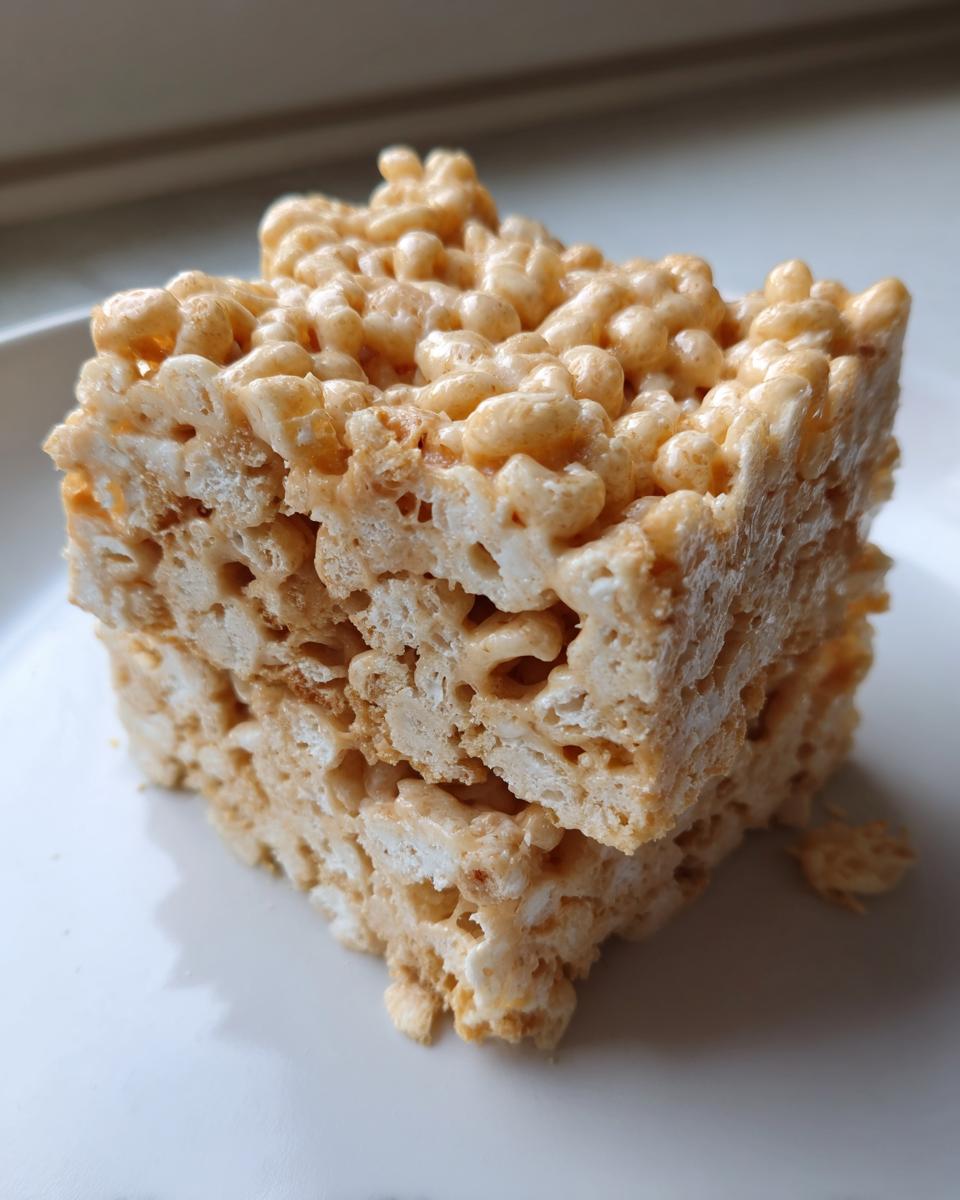
Pressing and Setting Your Peanut Butter Rice Krispie Treats
My biggest pet peeve is when people flatten these bars like they are packing concrete! To get those **Chewy Peanut Butter Squares**, you must press lightly. Think “patting” them into the pan, not “smashing” them. If you press too hard, you remove all the air that keeps them soft and chewy. Once they are pressed gently, leave them alone! They need a good hour at room temperature to set up properly before you slice them. If you try to cut them warm, they just fall apart.
Tips for Making the Best Crunchy Peanut Butter Dessert
You know I love sharing all the little secrets that take a recipe from ‘good’ to ‘absolutely phenomenal.’ This isn’t just about mixing ingredients; it’s about treating those ingredients with respect so you get the ultimate **Crunchy Peanut Butter Dessert** experience. Here are a few things I learned over the years that make these **Peanut Butter Rice Krispie Treats** unbeatable.
First up: measuring your cereal. Don’t reach into the box with your measuring cup and pack it down! Cereal is light and airy; if you pack it in, you’ll end up using way too much, and your bars will be dry and crumbly, no matter how much marshmallow goo you use. Always use the spoon-and-sweep method, just like you would for flour. Spoon the cereal lightly into your measuring cup, and then sweep the excess off the top with a flat knife.
Second, don’t be afraid of salt! I call this my savory backbone tip. A quarter teaspoon of salt seems small, but in a dessert this sweet, it magically balances everything out and really lets that peanut butter flavor pop through. It’s what separates a kid’s snack from a truly satisfying adult treat.
My third little trick involves the butter. I always use unsalted butter, but if you happen to only have salted butter on hand, just skip adding the extra salt in the recipe entirely. Butter is the foundation of our goo, and using good quality butter matters since there are so few ingredients here. If you’re looking for other simple, amazing snack recipes for your next gathering, take a peek at some of my favorite appetizers and snacks!
And finally, if you want those satisfying little crunchy bits on top, try mixing in a tablespoon of finely chopped roasted peanuts right along with the cereal. It just adds another layer of texture and that deep, nutty roast flavor that makes these **No Bake Peanut Butter Bars** unforgettable.
Variations: Beyond Classic Peanut Butter Rice Krispie Treats
While the plain, nutty version of these treats is truly something special, sometimes you just crave a little extra decadence, right? Because this base recipe is so reliable, it’s just waiting for you to play mad scientist with yours! These **Peanut Butter Rice Krispie Treats** are the perfect canvas for adding other favorite flavors. We’re definitely going to talk about chocolate, but I also love the sound of a super-sweet twist.
If you’re having a party and need something extra impressive, these variations are simple swaps that make guests think you spent hours in the kitchen when, in reality, this is still a super fast dessert. Maybe check out how I do my crockpot candy if you’re looking for other low-effort, high-impact treats!
Adding Chocolate to Your Peanut Butter Cereal Squares
That optional topping I mentioned in the ingredient list is a game-changer. If you want that luxurious look, you need to melt your chocolate chips gently. I usually melt them in a small, separate bowl in 30-second bursts in the microwave, stirring well between each one. For the smoothest drizzle, stir in just one tiny teaspoon of coconut oil; it makes the chocolate shiny and prevents it from getting that dull, streaky look as it sets.

Once melted, you can either use a fork to create a zigzag drizzle pattern over the cooled bars, or just spread it evenly across the top for a solid chocolate layer. This elevates your simple **Peanut Butter Cereal Squares** into something that looks almost gourmet. A little sprinkle of flaky sea salt right over the wet chocolate? Unbeatable move.
If you want to lean into the classic pairing, a full chocolate coating makes these into fantastic **Chocolate Peanut Butter Krispies**. Just wait for the peanut butter layer to fully set, pour on your melted chocolate, and let it firm up again. Instant upgrade!
And for those sticking purely to pantry items, you can also mix in about a half-cup of mini chocolate chips right along with the cereal mixture for a chunkier, more integrated experience. That’s a great way to get that chocolate flavor throughout without the extra mess of a topping layer.
On the other end of the spectrum, if you want sweet and fluffy, try making **Fluffernutter Rice Krispie Treats**! Instead of adding the vanilla and salt to the marshmallow/PB mix, gently fold in about 1/2 cup of marshmallow fluff right at the end, after the cereal is incorporated. It just adds an extra layer of marshmallow flavor that tastes like childhood!
Storage and Making Ahead for Peanut Butter Party Treats
Since these **Peanut Butter Rice Krispie Treats** are so addictive—and this is an observation from real life, not just a recipe claim—you might actually have leftovers! Good news: they store beautifully, which means they are fantastic for making ahead of time, perfect for prepping for those big game days or parties.
My recommendation for storage is simple: an airtight container at room temperature. Don’t stick them in the fridge! The cold air sucks all the moisture out of those marshmallows, and suddenly your gooey square turns into a hard little rock. You want them fresh and chewy, so keep them on the counter. Seriously, my rule is to store them in the container with a piece of wax paper or parchment paper layered between the rows, just to make absolutely sure that chocolate topping (if you used it) doesn’t stick to the row above it.
I’ve found that they are best in that 24 to 48-hour window, but they last up to three days just fine following that rule. This makes them one of my favorite **Family Favorite No Bake Desserts** to make for gatherings. You can knock them out the day before the event, and they just sit there looking perfect, ready to be sliced for your **Peanut Butter Party Treats** table. No rush, no stress, no oven required!
If you need to transport them, cutting them just before you leave is the way to go. If you cut them ahead of time, they sometimes stick together a little when stacked, even with parchment paper dividers. For transportation, I always pack them snugly in the lined pan, and then I just bring a small knife to cut them on site. It keeps them looking pristine, and everyone loves that fresh-cut look when you present them! If you’re looking for more reliable sweets for your parties, be sure to browse my full collection of best dessert recipes.
Frequently Asked Questions About Homemade Crispy Bars
It’s totally normal to have questions when you are trying to achieve that perfect, gooey texture! I spent ages tweaking my methods, so I totally get it. Here are the things folks ask me most often about making sure these **Homemade Crispy Bars** come out exactly right every time.
Can I use natural peanut butter in my peanut butter rice krispie treats?
Oh, that’s a tricky one! I strongly recommend sticking to conventional, homogenized creamy peanut butter, the kind that stays soft on the shelf. Natural peanut butter separates, which means you either get mostly oil or mostly dry peanut solid.
If you absolutely must use natural peanut butter, make sure you stir it until it is perfectly combined before measuring. You need that fat to incorporate with the marshmallows! Honestly, though, for these **No Bake Peanut Butter Bars**, the regular stuff just blends smoother and guarantees that perfect texture we are aiming for.
How do I prevent my bars from sticking to the pan?
Sticking is the enemy of a good, clean cut! I swear by lining the 9×13 pan perfectly with parchment paper, ensuring the paper hangs over two opposite sides. That way, once they cool, you just grab the overhangs like handles and lift the whole block out onto your cutting board—no scraping necessary!
When it comes to pressing down, never use your bare fingers, even though they might be dirty from other steps! Take a small sheet of wax paper or a silicone spatula, lightly grease it with butter, and use that as your press. It keeps the goo from sticking to you and ensures a smooth, even surface for your topping. These little tricks keep the mess minimal, which is perfect for any of our quick easy brunch or snack ideas.
Nutritional Estimates for These Simple Pantry Dessert Ideas
Hey, I know a lot of us are focused on eating smarter, even when we’re grabbing a quick, sweet bite like these **Peanut Butter Rice Krispie Treats**. While these are definitely a treat and not health food—let’s be real—knowing the ballpark figures helps when planning your week. Remember, since we don’t use any fancy, obscure ingredients, these numbers reflect using standard grocery store brands for everything.
These estimates are based on a serving size of one square, cut from the full 9×13 pan setup. If you cut yours bigger or smaller, these numbers will definitely change!
- Calories: Roughly 220 per square. That’s pretty reasonable for a rich **Sweet Peanut Butter Bite**!
- Fat: Around 11g. This comes mostly from the peanut butter and butter, which are the flavor heroes here.
- Carbohydrates: About 28g. Mostly sugars, of course, because let’s face it, we are using a whole bag of marshmallows!
- Protein: We get a decent little boost of about 5g of protein, thanks to that peanut butter carrying the load.
It’s an **Old Fashioned Krispie Treat With Peanut Butter** that gives you a little something back, unlike just eating plain sugar! This is just a rough guide using the core recipe data. If you add a big layer of chocolate or use extra mix-ins, you’ll need to adjust accordingly. But for the base recipe, this gives you a solid idea of where you stand with these wonderful **Quick Marshmallow Snacks**!
Share Your Family Favorite No Bake Desserts Experience
Okay, now that you’ve got your hands on the secrets for the absolute best **Peanut Butter Rice Krispie Treats**, the ball is in your court! This recipe is supposed to be a cornerstone of your **Family Favorite No Bake Desserts** collection, and I genuinely want to hear how it turned out for you. Did you manage to press them gently enough? Did that creamy peanut butter shine through the way I promised?
Don’t just leave me hanging! I thrive on comments and feedback. Please, take a minute to leave a star rating below—it helps other busy home cooks like us know that this recipe is reliable and worth the quick 10 minutes of work.
If you made them and they look as gooey and perfect as mine—and I bet they do!—snap a picture! Share your squares on social media and tag us! It makes my day to see my efficient little recipes popping up in your kitchens. If you run into any snag or have a super fun variation you tried, don’t hesitate to drop me a line through the contact page. Happy baking (or, well, happy *no-baking*)!
PrintThe Ultimate Gooey Peanut Butter Rice Krispie Treats Recipe (Easy No-Bake Bar)
Make the best peanut butter Rice Krispie treats that are perfectly gooey, chewy, and crunchy. This easy, no-bake bar recipe uses simple pantry ingredients for a quick family favorite dessert.
- Prep Time: 10 min
- Cook Time: 5 min
- Total Time: 65 min
- Yield: 12 large squares 1x
- Category: Dessert
- Method: No-Bake
- Cuisine: American
- Diet: Vegetarian
Ingredients
- 6 cups crispy rice cereal
- 1 (10 ounce) package marshmallows
- 1/2 cup unsalted butter
- 1 cup creamy peanut butter
- 1 teaspoon vanilla extract
- 1/4 teaspoon salt
- Optional: 1/2 cup semi-sweet chocolate chips for topping
Instructions
- Lightly grease a 9×13 inch baking pan or line it with parchment paper, leaving an overhang for easy removal.
- In a large saucepan, melt the butter over low heat.
- Add the marshmallows to the melted butter. Stir constantly until the marshmallows are completely melted and smooth. Remove the pan from the heat.
- Stir in the peanut butter until it is fully incorporated into the marshmallow mixture.
- Mix in the vanilla extract and salt.
- Add the crispy rice cereal to the marshmallow mixture. Fold gently until the cereal is evenly coated.
- Transfer the mixture to the prepared baking pan. Lightly press the mixture into the pan using a piece of wax paper or lightly buttered spatula. Do not press too firmly, as this makes the treats hard.
- If using, melt the chocolate chips separately and drizzle or spread over the top of the bars. Sprinkle with a pinch of sea salt if desired.
- Let the treats cool completely at room temperature for about 1 hour, or until set.
- Cut into squares and serve.
Notes
- For extra gooey treats, use fresh marshmallows.
- If you prefer a firmer bar, press the mixture down more firmly in the pan.
- Store leftovers in an airtight container at room temperature for up to 3 days.
- For a chocolate topping variation, melt the chocolate chips with 1 teaspoon of coconut oil for a smoother drizzle.
Nutrition
- Serving Size: 1 square
- Calories: 220
- Sugar: 18g
- Sodium: 150mg
- Fat: 11g
- Saturated Fat: 4g
- Unsaturated Fat: 7g
- Trans Fat: 0g
- Carbohydrates: 28g
- Fiber: 1g
- Protein: 5g
- Cholesterol: 10mg