
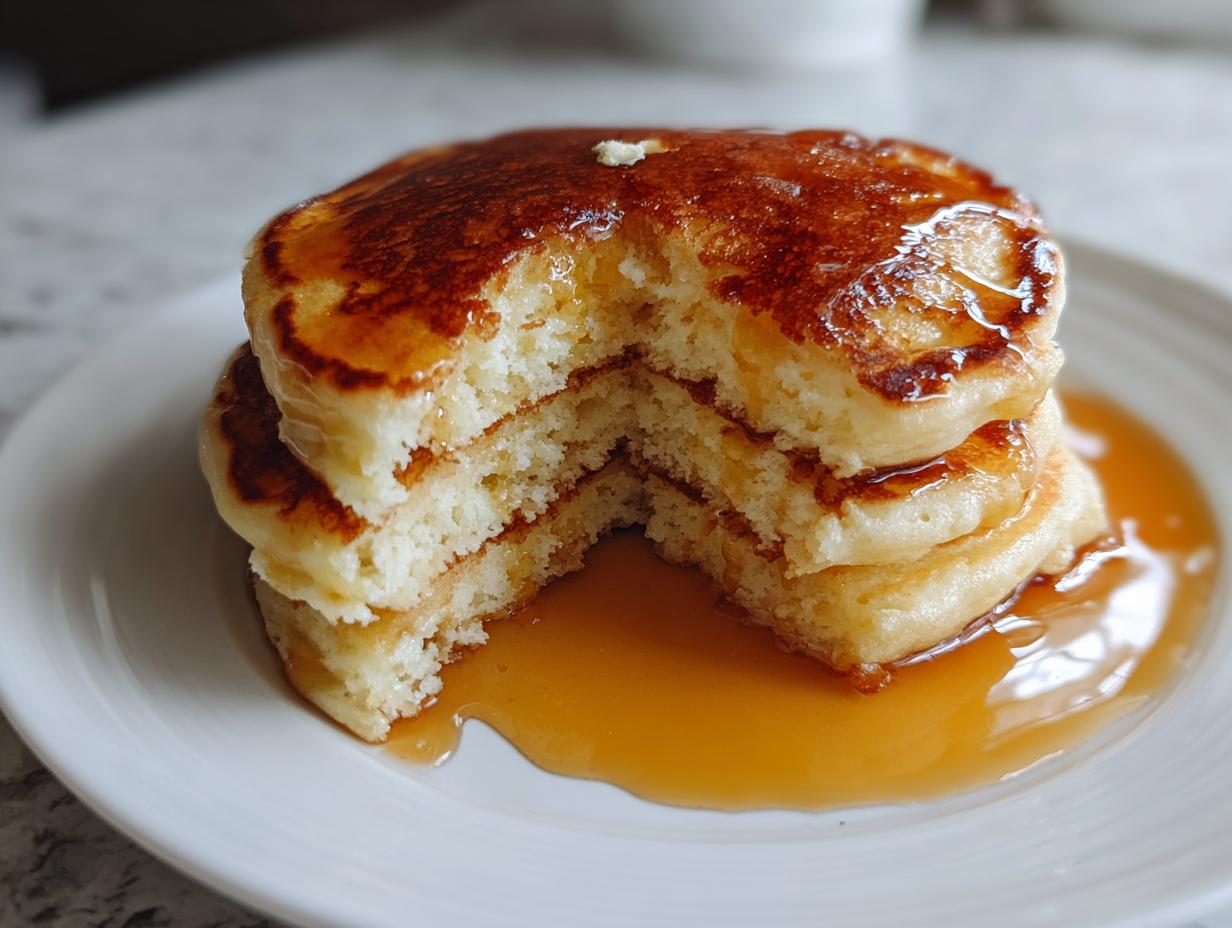
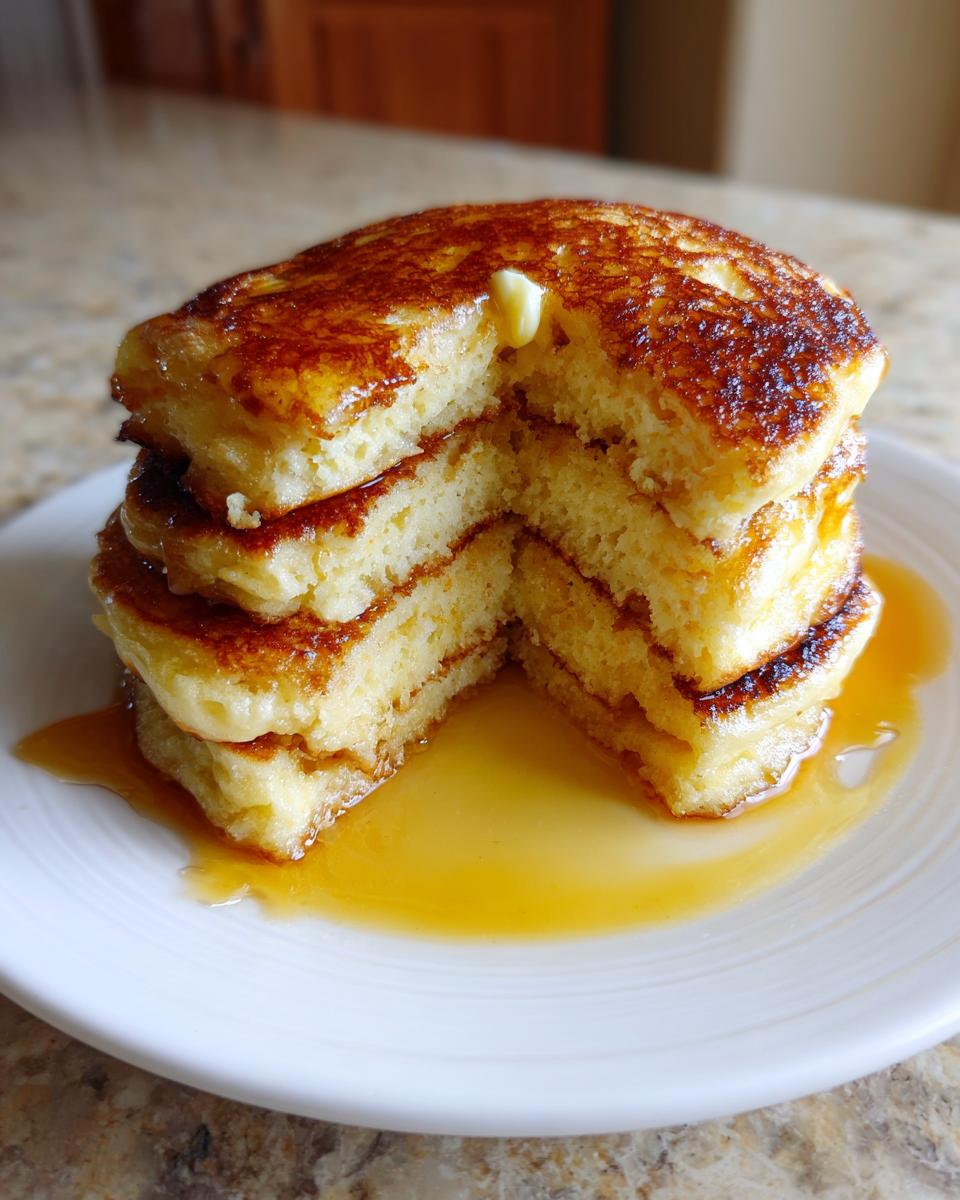
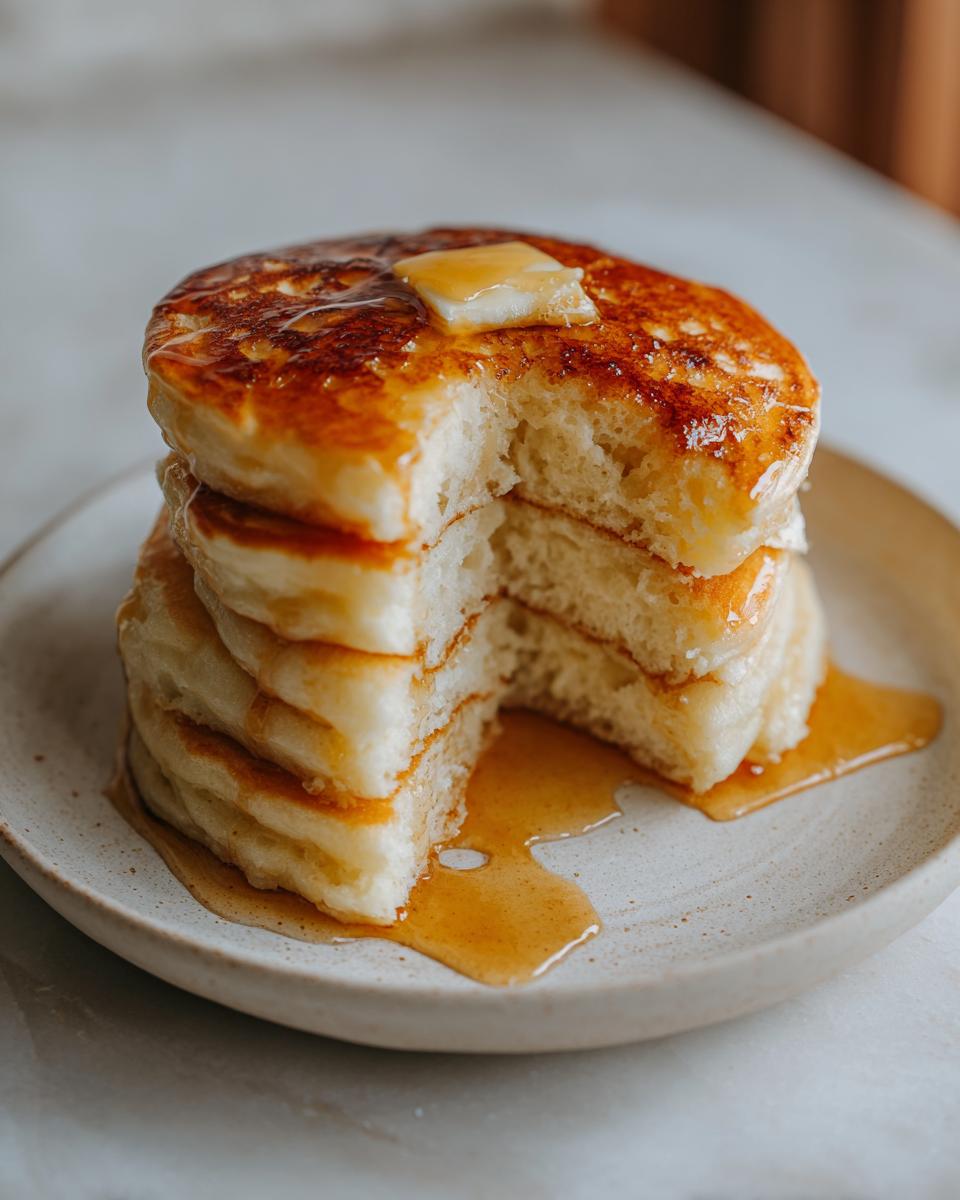
If you are tired of flat, rubbery pancakes floating sadly in your syrup, then stop what you are doing right now, because I finally cracked the code. We are talking about achieving those towering, cloud-like buttermilk pancakes that taste like they came straight from the best diner in town. Seriously, ditch the box mix—this recipe for buttermilk pancakes from scratch is so simple, even my methodical founder Leo Grant could follow it without turning it into a complex project. This isn’t just a recipe; it’s a system for guaranteed fluffiness, perfect for elevating your next weekend brunch!
- Why This Is The Best Fluffy Pancakes Recipe From Scratch
- Ingredients for Perfect Buttermilk Pancakes
- Step-by-Step Instructions for Easy Buttermilk Pancakes
- Tips for Cooking Pancakes Perfectly Every Time
- Variations: Vanilla Cinnamon Pancakes and More
- Serving Suggestions for Your Classic Pancake Recipe
- Storage and Reheating Instructions for Buttermilk Pancakes
- Frequently Asked Questions About Fluffy Pancakes Recipe
- Estimated Nutrition for These Buttermilk Pancakes
- Estimated Nutrition for These Buttermilk Pancakes
Why This Is The Best Fluffy Pancakes Recipe From Scratch
I’m telling you, those sad, thin pancakes you get from a mix? We are officially moving on. This Fluffy Pancakes Recipe is my go-to for making Homemade Pancakes From Scratch that are genuinely thick enough to build a towering stack on your plate. The secret isn’t fancy ingredients; it’s harnessing the power of a few simple rules. We use quality buttermilk, which is non-negotiable for that slight tang, and we skip the urge to stir until it’s smooth. You want lumpy batter, trust me!
This method cuts down on actual cooking time too, making it ideal for your next weekend brunch. Forget runny results; we are aiming for light, airy, and substantial.
Achieving Diner Style Pancakes Texture
The real magic that gives you that incredible lift—that is the beautiful chemical reaction happening between the acidic buttermilk and our leavening agents, baking soda and baking powder. When they meet, they immediately start creating carbon dioxide bubbles. If you overmix after adding the wet ingredients, you just force all those precious bubbles out! We need those bubbles locked in place so they inflate beautifully on the griddle. That’s how you get true Diner Style Pancakes that practically float off the plate.
Ingredients for Perfect Buttermilk Pancakes
Okay, the ingredients list here is short, which is another reason I love this recipe for quick mornings. We are using stuff you should already have, but exact measurements really matter here to keep those pancakes thick. I listed exactly what you need below. Don’t try to substitute the buttermilk for regular milk unless you follow my little trick right below this list—that’s the key component!
- 1 3/4 cups all-purpose flour
- 2 tablespoons granulated sugar
- 2 teaspoons baking powder
- 1 teaspoon baking soda
- 1/2 teaspoon salt
- 1 3/4 cups buttermilk (the star!)
- 2 large eggs
- 4 tablespoons unsalted butter, melted, plus more for the griddle
- 1 teaspoon vanilla extract (optional—but I always add it!)
- 1/4 teaspoon ground cinnamon (optional, but makes them cozy)
Buttermilk Substitute: What If You Don’t Have Buttermilk?
I get it, sometimes you run out, or you just forget to pick some up. No sweat! You can make a perfect substitute, and it works just as well for getting those fluffy pancakes. Just take 1 3/4 cups of regular whole milk and whisk in 1 tablespoon of white vinegar or fresh lemon juice. Let it sit on the counter for about five minutes until it looks slightly curdled, almost like a thin yogurt. That’s all you need to activate the baking soda properly!
Step-by-Step Instructions for Easy Buttermilk Pancakes
Now that we have all our wonderful ingredients ready, let’s put this amazing Easy Buttermilk Pancakes recipe into action. The order you do things in, and how gently you handle the batter, is honestly more important than the ingredients themselves when you’re chasing that ultimate fluffy height. We break this down into simple, manageable steps so you can execute this perfectly, even before coffee kicks in.
First thing’s first: always tackle your dry ingredients in a big bowl and your wet ones in a separate, smaller bowl. This keeps everything organized, which Leo, my project-manager husband, absolutely insists upon! Whisk the flour mixture really well to distribute the baking soda and powder. In the second bowl, just get the wet stuff mixed—buttermilk, eggs, melted butter, and any flavorings like vanilla.
Mixing the Buttermilk Pancakes Batter: The Lumps Rule
This is where most people go wrong, leading to flat, chewy discs instead of fluffy clouds! When you pour the wet into the dry, switch to a whisk or a wooden spoon, and mix only until the ingredients are *just* incorporated. I mean it—stop stirring when you still see streaks of flour and definitely when you see small lumps hanging out in the batter. Seriously, lumps are your friends here! If you keep beating out those lumps, you are developing the gluten in the flour. Developed gluten means chewy, tough pancakes, and we are aiming for tender melt-in-your-mouth goodness here.
After mixing gently, let that lumpy batter rest on the counter for about five to ten minutes. This rest time lets the flour hydrate and gives the leavening agents a head start, which is vital for achieving those thick, beautiful layers.
Griddle Prep and Cooking Technique for Thick Pancakes
You need medium heat. Not high, or the outside will burn before the middle cooks through—and we need that middle to inflate! To check if your griddle is ready, flick a small drop of water onto the surface. If it sizzles loudly and evaporates immediately, you’re golden. If it just sits there, the griddle isn’t hot enough. If it evaporates instantly with no sizzle, it’s too hot!
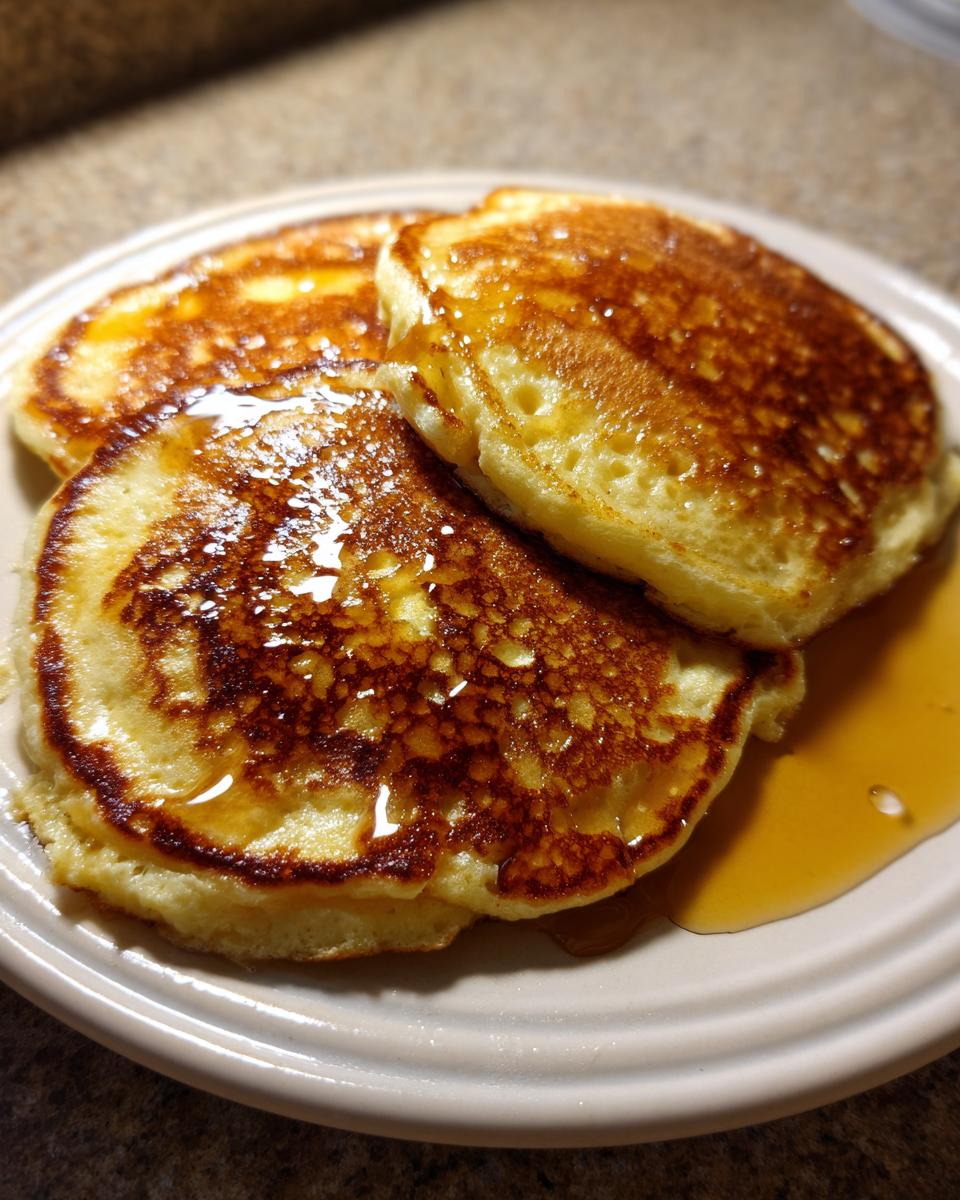
Pour about 1/4 cup of batter onto the hot surface for each pancake. Don’t try to spread it out; let it sit in its own little mound—this helps us achieve that great Thick Pancakes Guide result. Watch closely: you need to see lots of bubbles forming on the surface, and the edges have to look set and dry before you attempt the flip. That’s your visual cue! Flip once, cook for about a minute or two more until golden brown, and you are done!
Tips for Cooking Pancakes Perfectly Every Time
We talk a lot about batter consistency, which is super important, but the real pro move in my kitchen happens *after* the pancake hits the heat. If you’re making a big batch for family brunch, you can’t just let them sit on a cold plate! I’ve learned a few tricks over the years to ensure that the first pancake is just as hot and lovely as the last one. These little steps really make the difference between a good pancake and one that everyone asks for the recipe for.
First off, let’s circle back to letting the batter rest for those 5 to 10 minutes we talked about. Don’t skip that, seriously! That time gives the baking powder and soda time to get working, and it makes for a noticeably thicker pancake the second you pour it out. If you don’t let it rest, your pancakes will spread way too much, and you’ll end up with those thin, crepe-like versions instead of the fluffy kind we are aiming for.
When you are pouring the batter, remember what I said about letting it mound? If you are using a 1/4 cup measure, just drop it right onto the griddle and step back. If you try to smooth it out with the back of the spoon, you are just punching all the wonderful air out, and we just spent all that time trying to keep it in there! Let convection do the shaping for you.
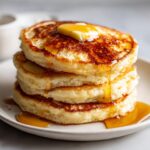
And here is the big one for keeping that stack warm: Get a baking sheet ready and pop it into your oven set to a very low temperature—like 200°F. As soon as a pancake is perfectly cooked, pull it off the griddle and place it directly on that warm sheet in a single layer. Do not stack them wet, or the trapped steam will ruin the crust you just worked so hard to build! By the time you’ve finished the last batch, you’ll have a hotel-style warming oven ready to go for serving. This trick is a lifesaver when cooking pancakes perfectly for a crowd.
Variations: Vanilla Cinnamon Pancakes and More
While this Classic Pancake Recipe is perfect just as it is—tangy, fluffy, and pure Americana—sometimes you just want to jazz things up a little bit for a special Saturday morning, right? I love making simple flavor additions right into the batter because, honestly, the batter is just begging for a little extra personality. You don’t need to overhaul the whole process to get some fun new tastes!
My favorite easy tweak, especially when the weather turns cool and I’m craving that deep comfort food smell, is taking it to the next level with some warm spice. Mixing in both vanilla extract and ground cinnamon creates what I call my special Vanilla Cinnamon Pancakes. You just add one teaspoon of vanilla and that tiny bit of cinnamon right with the wet ingredients when you’re mixing those together. It adds such a wonderful warmth without overriding that essential buttermilk tang. It really makes breakfast feel like an event.
If you’re looking for something a bit brighter, fresh fruit is always the answer. If you are going to add blueberries, though, you have to treat them right! Fresh blueberries are fantastic—just toss them lightly in about a teaspoon of flour before you drop them onto the griddle. This prevents them from sinking straight to the bottom of your batter. Seriously, if you layer the batter and then sprinkle the floured berries on top of the wet batter surface before flipping, you get an absolutely gorgeous result. You will love having these easy breakfast treats in your rotation; they are just so satisfying!
Serving Suggestions for Your Classic Pancake Recipe
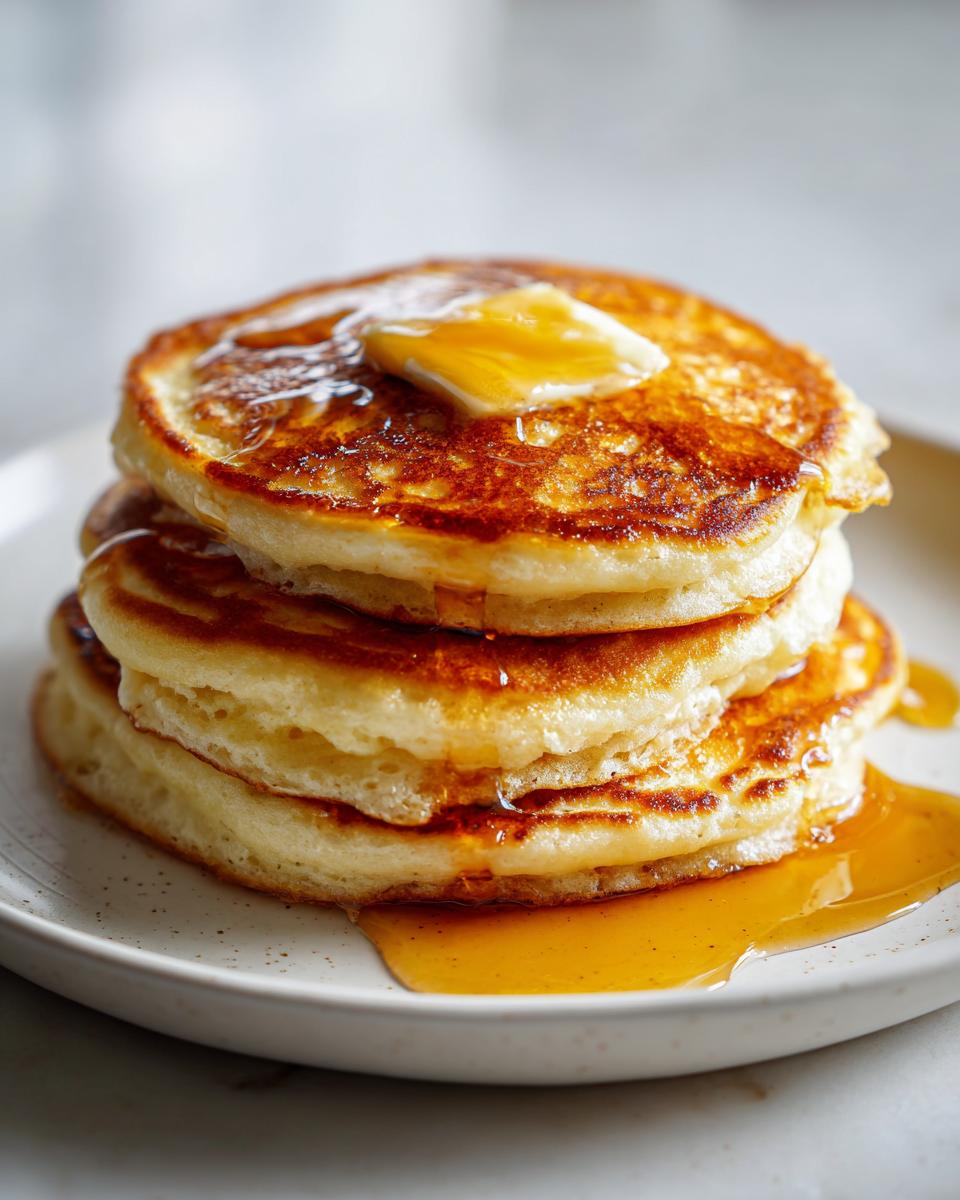
We have mastered the art of the fluffy stack, and now it’s time for the fun part—dressing them up! This Classic Pancake Recipe deserves better than cheap syrup and flavorless powdered sugar. Since we put so much effort into making them light and thick, we need toppings that match that quality, especially if we are making this for Weekend Brunch Ideas. Think about texture and flavor contrast; that’s how you turn a stack of pancakes into a real centerpiece!
First and most importantly: the syrup. You absolutely must use real maple syrup if you can swing it. The difference in flavor is night and day. Warm up your syrup just slightly before serving; it helps the syrup flow beautifully over the sides of the hot pancakes instead of just sitting in a pool on top. If you take one piece of advice from me today, let it be the syrup warming step!
For freshness, skip the tired bananas and go for seasonal berries. Fresh strawberries sliced thinly or raspberries tucked between the layers add a wonderful tartness that cuts through the richness of the batter and butter. If you want something truly luxurious on top, make a quick dollop of softly sweetened whipped cream. Just use heavy cream, a touch of powdered sugar, and a tiny splash of vanilla, and whip it until soft peaks form. You don’t even need a mixer for a small amount; a good whisk and some elbow grease works great!
If you want a savory twist—and hear me out on this one—a little crispy bacon crumbled right over the top, along with that warmed syrup, is an incredible salty/sweet combination that I adore for a quick morning treat. It works surprisingly well with the slight tang of the buttermilk base. Honestly, once you have a recipe this reliable, you can let your imagination run wild with these pairings!
Storage and Reheating Instructions for Buttermilk Pancakes
One of the best parts about having a foolproof recipe like this is leftovers! Seriously, leftover pancakes are the secret weapon for those mornings when you need a genuine, satisfying breakfast but only have about five minutes to spare. This recipe is fantastic because these buttermilk pancakes reheat so incredibly well—they don’t turn into sad little sponges if you follow my lead.
First, you have to make sure they are completely cooled down before you store them; otherwise, you’ll get condensation, and that means soggy pancakes, which defeats the whole purpose! Once they are at room temperature, the best way to store them is layered with parchment paper in a heavy-duty, airtight container. I try to make about ten pancakes, and if they all fit without squishing each other, that’s perfect. They’ll keep nicely in the fridge for up to three or four days. This makes grabbing a real meal on a busy Tuesday morning way better than grabbing something sugary or processed.
Now for reheating, which should be fast because we are talking about Quick Morning Recipes here, right? You have two main options, and I use both depending on how much effort I want to put in. The microwave is the fastest, but you have to be careful. Place just one or two pancakes on a microwave-safe plate and heat them in 15-second bursts. If you do too long, they will get rubbery. This is okay in a pinch.
However, if you have an extra two minutes, the toaster is my personal favorite way to revive them. A toaster works wonders because it hits both sides with dry heat, bringing back that almost crispy edge we loved when they came off the griddle. Pop them in on a medium setting, and they come out tasting almost baked fresh. If you want that ultimate diner experience even from leftovers, try using a toaster oven or a dry skillet over low heat. Just warm them through gently until they are piping hot.
Frequently Asked Questions About Fluffy Pancakes Recipe
Look, I know you might have a few lingering doubts, especially if you’ve struggled with flat pancakes in the past. These are the questions everyone asks when they try to move beyond the box mix and master the art of the truly Fluffy Pancakes Recipe. I’ve gathered the common hurdles, so let’s clear those up right now so you can get to stacking!
The main thing people worry about is batter thickness, or why their pancakes turn out flat when they were expecting that perfect, thick diner look. The short answer is usually overmixing, or skipping the batter rest. Don’t worry if you are still figuring out timing; that’s why we love these easy breakfast treats—they are worth practicing for!
Can I make this buttermilk pancakes recipe ahead of time?
You can definitely prepare the batter ahead of time if you are planning a big weekend brunch, but you have to be strategic about it. Once you mix the wet and dry ingredients together, those leavening agents start working immediately! If you let it sit for more than about 15 minutes, the bubbles start to deflate, and you’ll lose that lift. So, the best practice for making the batter ahead is to mix all the dry ingredients in one bowl, and all the wet ingredients (including the buttermilk) in another.
Keep them stored separately, tightly covered, in the fridge. Then, right before you are ready to cook, whisk the wet mixture into the dry. You’ll still want to let it rest for that key 5-10 minutes after mixing to get the best rise possible for your Thick Pancakes Guide results. If you are reheating already-cooked pancakes, check my storage section above for the best methods!
Why are my homemade pancakes flat instead of fluffy?
More often than not, flat pancakes come down to two things we talked about: either you overmixed the batter until it was completely smooth and tight, or your baking powder/soda is old and lost its fizz. If you overmixed, you beat the gas right out of the batter, creating tough gluten strands instead of tender air pockets. You need those lumps! Secondly, make sure your baking powder is fresh. If it’s been sitting in the pantry for a year, it won’t create the lift needed for those incredible Homemade Pancakes From Scratch.
Can I use regular milk instead of buttermilk?
Technically, yes, you *can* use regular milk, but I would strongly advise against it if you are aiming for maximum fluffiness and that slight tang only buttermilk provides. Regular milk doesn’t have the acidity needed to react strongly with the baking soda in the recipe. If that’s all you have? Follow the substitute tip I gave earlier! Add a teaspoon of lemon juice or vinegar to regular milk and let it sit for five minutes. Turning your milk ‘sour’ mimics the buttermilk reaction, which is essential for this Classic Pancake Recipe.
How thick should the batter be for diner style pancakes?
The batter should be quite thick—much thicker than you might expect for a crepe or a thin waffle batter. When you lift your whisk or spoon, the batter should fall off slowly, almost in ribbons, and it should definitely hold its shape when you drop it onto the griddle; it shouldn’t immediately spread into a wide, thin circle. If it spreads too quickly, add another tablespoon of flour until it mounds up slightly when poured. That mound is what gives you that satisfying height and that Diner Style Pancakes look.
Estimated Nutrition for These Buttermilk Pancakes
Here’s a quick rundown of the estimated nutrition based on the recipe details above. Now, keep in mind this is just an estimate because, you know, how much butter *I* use versus how much butter *you* use can change things! Plus, this doesn’t account for all the syrup and toppings you pile on top, which we all know is the best part of any Best Breakfast Recipes session!
- Serving Size: 1 pancake
- Calories: 180
- Fat: 7g
- Carbohydrates: 25g
- Protein: 6g
We are keeping the sugar pretty low in the base recipe too, sitting around 4g, which lets those toppings—whether it’s fruit or pure maple syrup—do the heavy lifting on the sweetness front. Enjoy this perfect stack!
PrintThe Best Fluffy Buttermilk Pancakes From Scratch
Make thick, diner-style buttermilk pancakes that are light and fluffy every time. This easy recipe delivers classic results better than any boxed mix for your weekend brunch.
- Prep Time: 10 min
- Cook Time: 15 min
- Total Time: 25 min
- Yield: About 10 pancakes 1x
- Category: Breakfast
- Method: Griddling
- Cuisine: American
- Diet: Vegetarian
Ingredients
- 1 3/4 cups all-purpose flour
- 2 tablespoons granulated sugar
- 2 teaspoons baking powder
- 1 teaspoon baking soda
- 1/2 teaspoon salt
- 1 3/4 cups buttermilk
- 2 large eggs
- 4 tablespoons unsalted butter, melted, plus more for the griddle
- 1 teaspoon vanilla extract (optional)
- 1/4 teaspoon ground cinnamon (optional)
Instructions
- Combine dry ingredients: In a large bowl, whisk together the flour, sugar, baking powder, baking soda, and salt.
- Combine wet ingredients: In a separate medium bowl, whisk together the buttermilk, eggs, and melted butter. If using, add the vanilla extract and cinnamon now.
- Mix batter: Pour the wet ingredients into the dry ingredients. Gently whisk until just combined. Stop mixing when you still see a few small lumps; overmixing develops gluten and makes pancakes tough. This is key for fluffy pancakes.
- Rest the batter: Let the batter rest at room temperature for 5 to 10 minutes. This allows the leavening agents to activate, creating thicker pancakes.
- Heat the griddle: Heat a large nonstick skillet or griddle over medium heat. Lightly grease the surface with butter or cooking spray. The griddle is ready when a drop of water sizzles immediately.
- Cook pancakes: Pour 1/4 cup of batter onto the hot griddle for each pancake. Cook for 2 to 3 minutes until bubbles appear on the surface and the edges look set.
- Flip and finish: Flip the pancakes and cook for another 1 to 2 minutes until golden brown and cooked through.
- Serve immediately: Stack the pancakes and serve hot with your favorite toppings.
Notes
- For extra thick pancakes, do not spread the batter on the griddle; let it sit in a mound.
- If you do not have buttermilk, mix 1 3/4 cups of whole milk with 1 tablespoon of white vinegar or lemon juice. Let it sit for 5 minutes before using.
- Keep finished pancakes warm in a single layer on a baking sheet in a 200°F oven while you cook the remaining batter.
Nutrition
- Serving Size: 1 pancake
- Calories: 180
- Sugar: 4g
- Sodium: 350mg
- Fat: 7g
- Saturated Fat: 4g
- Unsaturated Fat: 3g
- Trans Fat: 0g
- Carbohydrates: 25g
- Fiber: 1g
- Protein: 6g
- Cholesterol: 55mg