

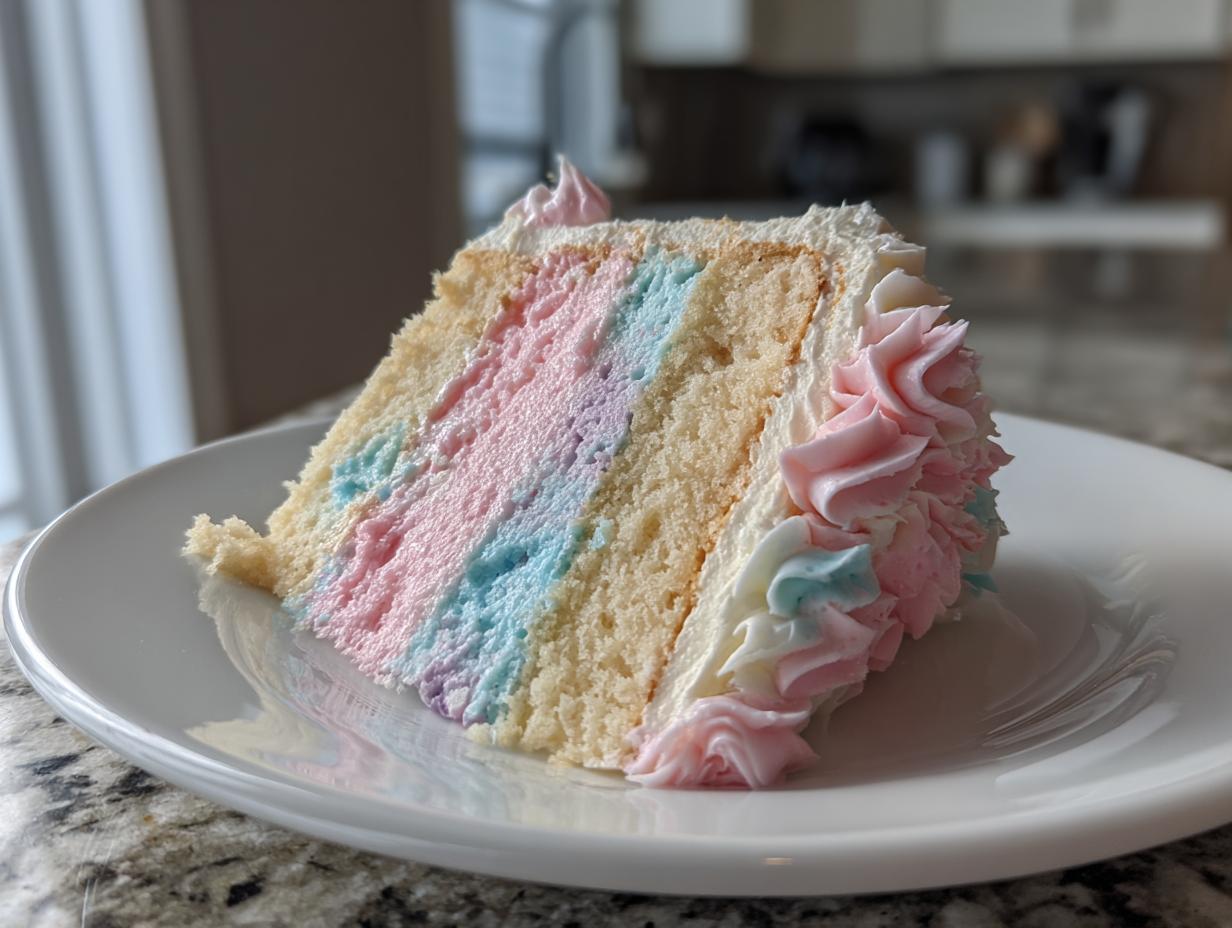
If you’re looking for a dessert that screams ‘party’ and tastes like pure childhood joy, you’ve found it! Forget overly complicated baking projects; we specialize in making things that look magical but are surprisingly simple. That’s the Dishicious way—our founder, Leo, is obsessed with streamlining processes so you get maximum flavor with minimum fuss. This cotton candy cake recipe is the perfect example. Trust me, getting those perfectly fluffy, sweet, pastel-swirled layers has never been easier. Get ready to bake a truly memorable celebration centerpiece!
- Why This Fluffy Pastel Swirl Cotton Candy Cake Recipe Works
- Gathering Ingredients for Your Homemade Cotton Candy Cake
- Step-by-Step Instructions for the Cotton Candy Cake Recipe
- Tips for Success with Your Cotton Candy Frosting
- Variations on the Cotton Candy Cake Theme
- Storage and Serving Suggestions for Your Celebration Cake
- Frequently Asked Questions About Making a Cotton Candy Cake
- Estimated Nutritional Data for This Cotton Candy Cake
- Share Your Magical Cotton Candy Cake Creations
- Estimated Nutritional Data for This Cotton Candy Cake
- Share Your Magical Cotton Candy Cake Creations
Why This Fluffy Pastel Swirl Cotton Candy Cake Recipe Works
We designed this cotton candy cake to be totally reliable—no sinking, no crumb disaster, just pure, fluffy success. That’s the secret to our method! Most whimsical desserts look tricky, but this one is engineered for foolproof results, giving you that beautiful pastel cake you dream about.
What sets this apart? It’s the balance. We nailed the batter to ensure you get a genuinely fluffy cake crumb, not something dense. Plus, the frosting is sweet but stable enough to hold up at a party. If you want to know how to make amazing batter that doesn’t let you down, check out some of my tips on cake batter cookies—the technique is really similar!
Achieving the Signature Whimsical Desserts Look
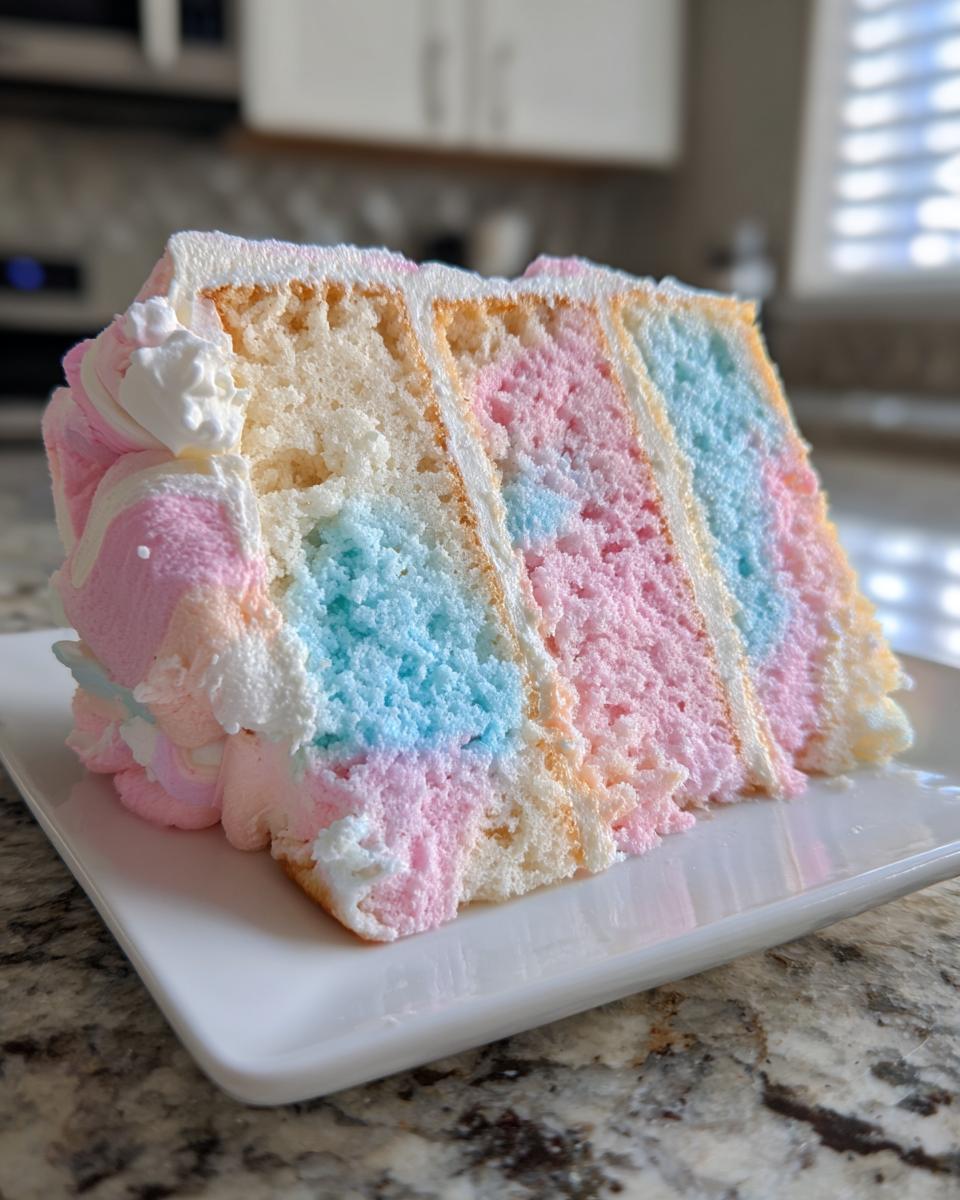
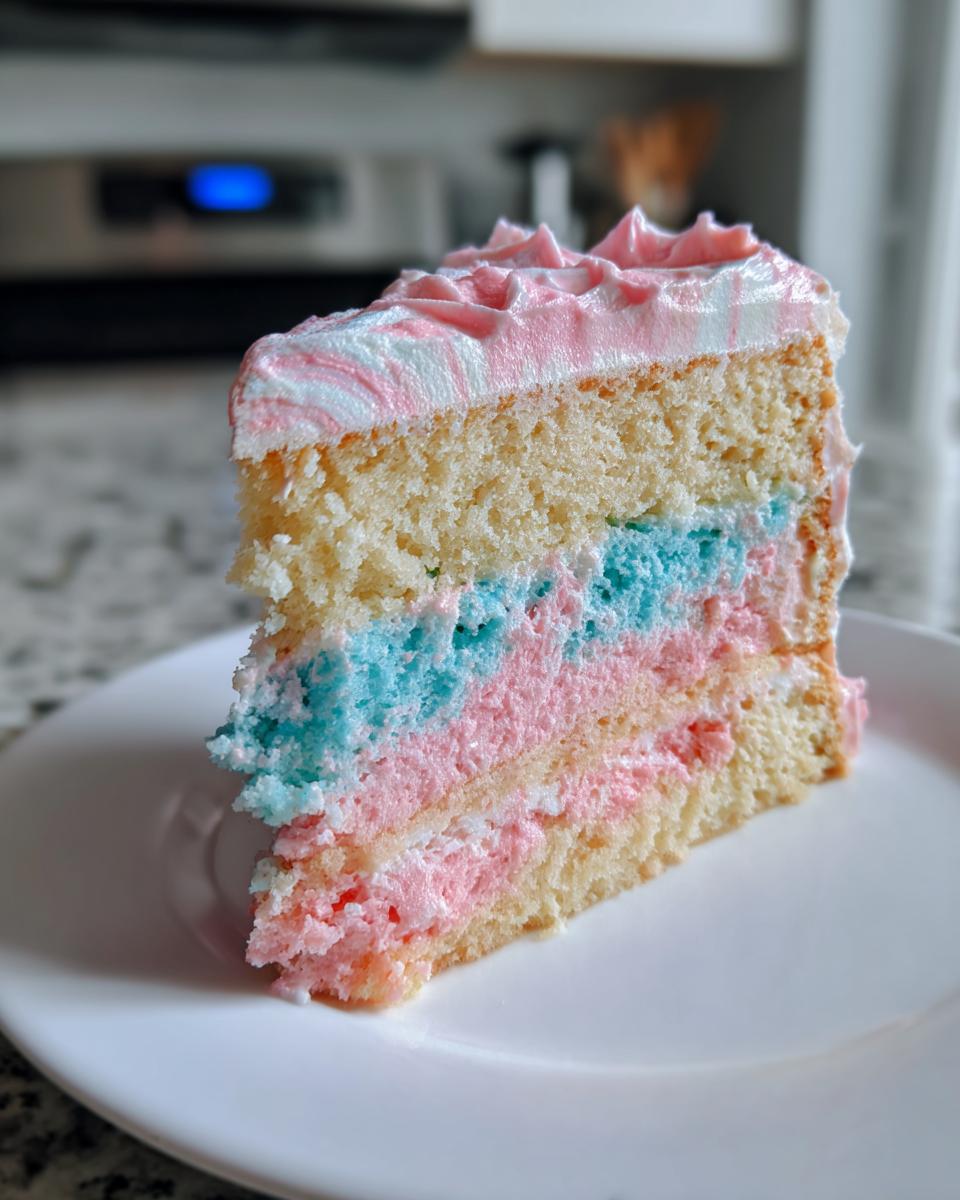
Honestly, the best part is watching the colors come together. When you swirl the pink and blue into the batter, you create those amazing marbled layers that truly hit that whimsical desserts vibe. Don’t overmix! You want visible streaks of color peaking through.
For the final flourish, I highly recommend grabbing just a small puff of actual spun cotton candy to sit right on top as the final decoration. Since it dissolves fast, pop it on right before you sing ‘Happy Birthday.’ It changes the whole presentation!
Gathering Ingredients for Your Homemade Cotton Candy Cake
Okay, let’s talk about what you need for this showstopper. We aren’t chasing after any specialty store items here; that’s just not how we do things! Every ingredient for this cotton candy cake is meant to be easy to grab on your regular grocery run. Trust me, using common pantry staples is key to keeping this project fun and stress-free. You are going to need two separate sets of ingredients: one for those fluffy cake layers and one for the super sweet frosting.
Cake Batter Ingredients
- 1 1/2 cups all-purpose flour
- 1 1/2 teaspoons baking powder
- 1/2 teaspoon salt
- 1 cup granulated sugar
- 1/2 cup unsalted butter, softened
- 2 large eggs
- 1 teaspoon vanilla extract
- 1/2 cup whole milk
- 1 teaspoon cotton candy flavoring extract
- Pink and blue gel food coloring
Cotton Candy Frosting Ingredients
- 1 cup unsalted butter, softened
- 4 cups powdered sugar, sifted
- 1/4 cup heavy cream
- 1 teaspoon cotton candy flavoring extract
- Extra cotton candy for garnish (optional)
Step-by-Step Instructions for the Cotton Candy Cake Recipe
Alright, here is where the magic happens! Follow these steps sequentially, and you’ll have the most impressive cotton candy cake ready for the table in no time. Since we are dealing with delicate cake layers that need to stay airy, timing and technique are everything. Remember, smooth, simple steps lead to a stunning result. If you are interested in perfect grain structure in other recipes, I have a really neat breakdown about fluffy rice pilaf that uses similar mixing concepts!
Preparing the Fluffy Cake Layers
First things first: get that oven warming up to 350°F (175°C). While it’s heating, properly grease and flour those two 8-inch pans. No sticking allowed! In a medium bowl, whisk your flour, baking powder, and salt together—this is your dry team. Now, the fun part: In your main bowl, cream that softened butter and sugar until it looks really light and fluffy. Beat in your eggs one by one, then get the vanilla and that crucial teaspoon of cotton candy flavoring in there.
Next, you need to alternate. Slowly add your dry mixture into the wet, mixing it up equally with the milk. Start and end with the dry stuff. Stop mixing the second everything comes together. Seriously, overmixing is the enemy of a fluffy cake, leading to toughness! Pour that batter evenly into your two pans.
Creating the Pastel Swirl Effect
This step gives us the pastel cake look everyone loves. Divide your batter evenly into two separate bowls. Take one bowl and add just a tiny bit of pink gel coloring—you want soft pink, not hot lava! Do the same with the blue coloring in the other bowl. Now, don’t stir them like you’re mixing paint! Gently scoop the two batters into the prepared pans, maybe dropping scoops of blue next to scoops of pink. Use a knife or skewer to gently, *gently* drag through the colors a couple of times. That’s it! That light swirl is what makes it look so whimsical.
Pop those beauties in the oven for about 28 to 32 minutes. You know they’re done when a toothpick comes out clean. Let them chill in the pans for 10 minutes before you flip them out onto a rack to cool completely. Don’t even think about frosting warm cakes—they will weep, and we don’t want that!
Making the Cotton Candy Frosting
While those layers cool down, we whip up the frosting to match the flavor profile! Beat your softened butter until it’s super creamy, like pale yellow silk. Now, start adding that sifted powdered sugar little by little. You absolutely must alternate adding the sifted sugar with the heavy cream and the remaining teaspoon of cotton candy flavoring. Keep beating it until it’s smooth and perfectly fluffy. Getting that alternation right means your frosting won’t break or separate, giving you that creamy result mentioned in great recipes like this one over at Cooks Orchard.
Assembling and Decorating Your Cotton Candy Cake
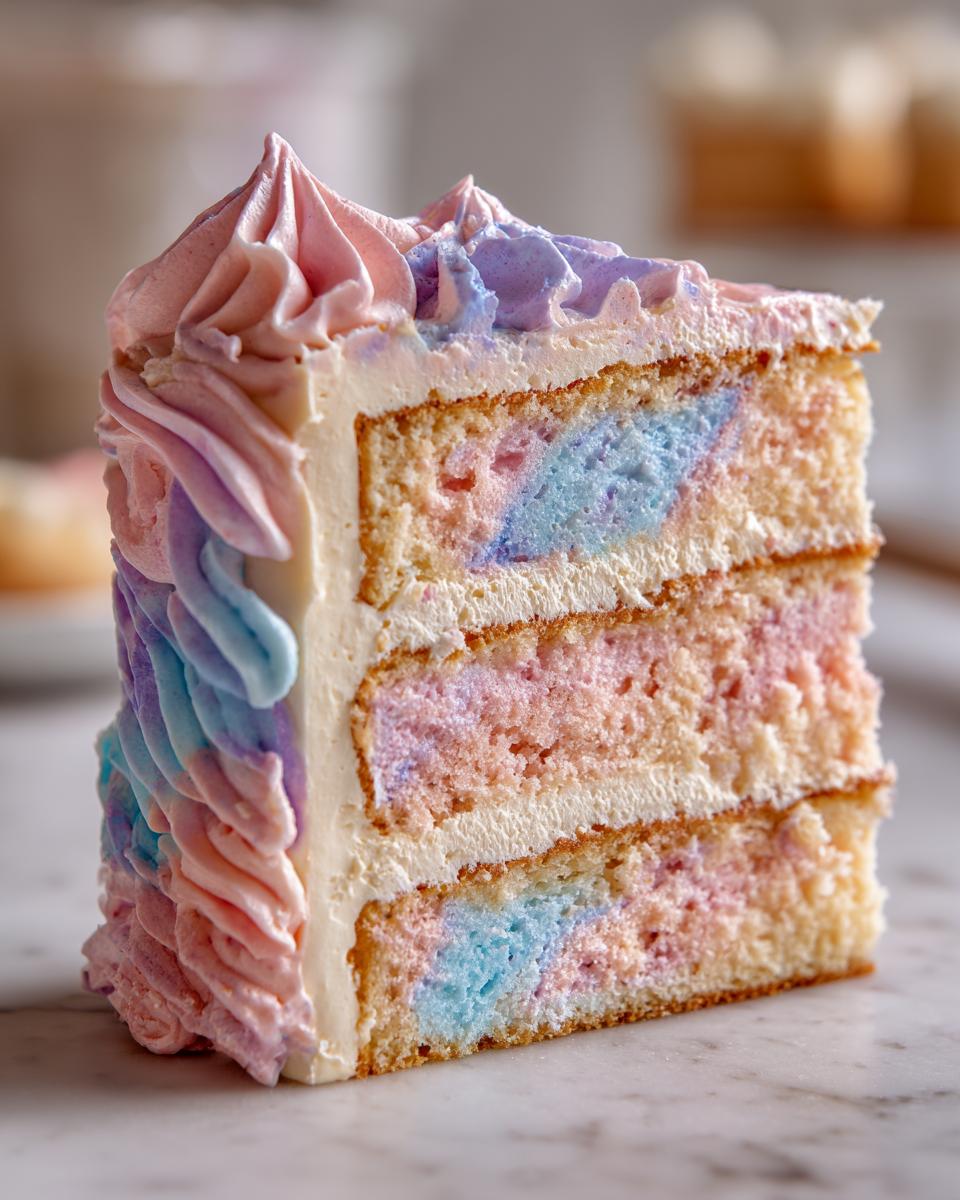
Time to put it all together! Place one cooled layer down. Slather on about a third of that sweet frosting right on top—don’t be shy. Place the second layer on top carefully. Now, use the rest of your cotton candy frosting to cover the top and sides. You can make swoopy textures or keep it smooth; whatever you prefer for your party cake ideas!
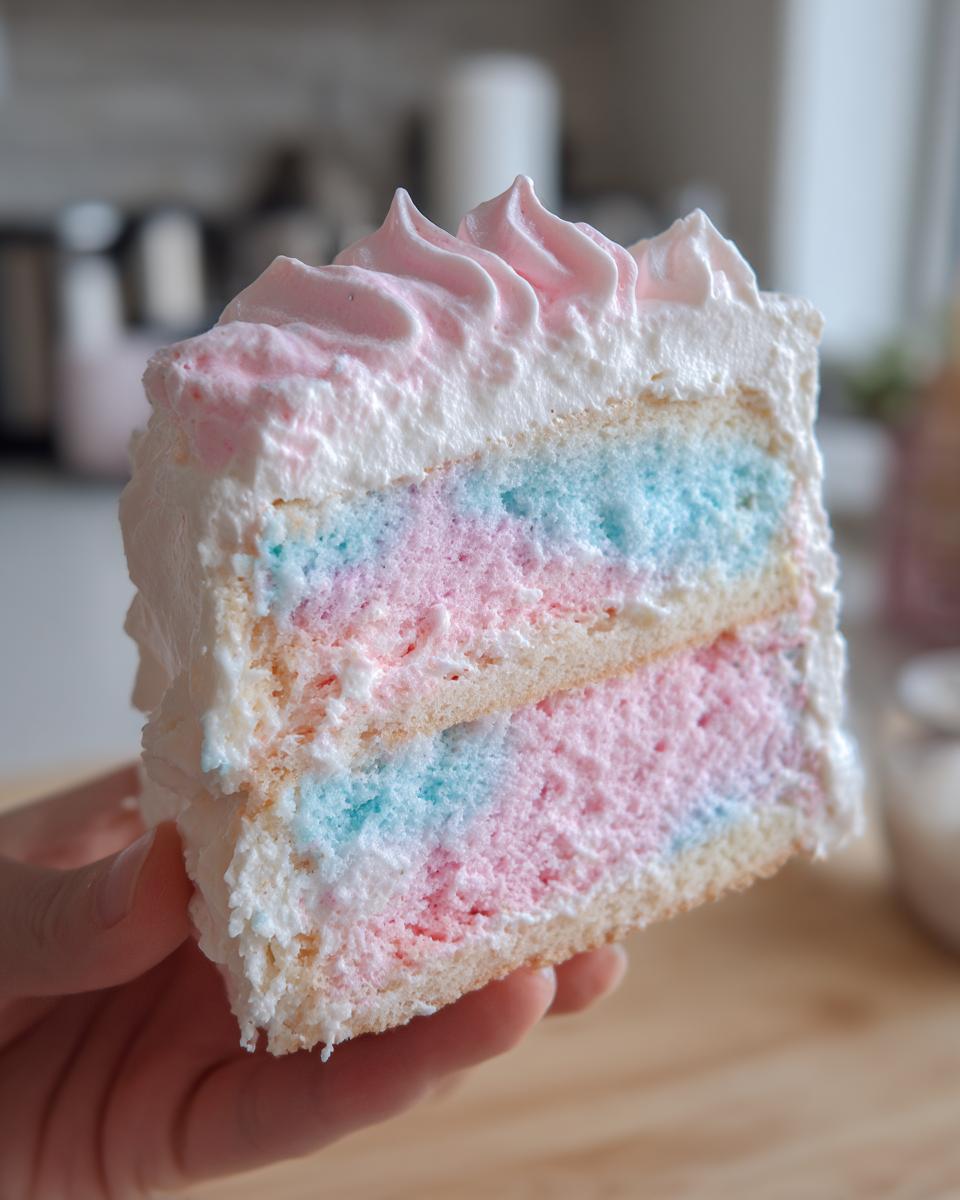
Final, critical step: If you are using the real stuff, reserve a few little wisps of actual cotton candy. Place those delicate, fluffy bits right on top of the cake *just* before you slice into it. If you put it on too early, humidity will make it disappear before anyone gets a good look!
Tips for Success with Your Cotton Candy Frosting
Look, frosting can sometimes be the trickiest part of any dessert, even a fun one like this cotton candy cake. The trick to that cloud-like texture we love so much is temperature control. It’s what makes the difference between a gorgeous, professional swirl and a runny mess. Trust me, getting this right brings the entire cake together!
Make sure your butter for the frosting is not just soft, but perfectly room temperature. If it’s too warm, your frosting will be greasy, no matter how much sugar you add. If you need a refresher on getting your buttercream just right, I have a great guide over at cream cheese frosting recipe—smooth and easy that details the exact butter texture we are aiming for.
Now, let’s talk extracts. That cotton candy flavoring is potent, right? You can’t just dump it in! Too much, and your frosting will taste artificial or slightly soapy—and that ruins the nostalgic magic! Start with just half a teaspoon, taste it, and *then* add the rest if you think it needs more punch. Consistency is key here because you want that sweet carnival flavor to shine through, not overpower.
Also, remember that heavy cream needs to be cold when you beat it into the butter/sugar mixture. Alternating the cold cream with the sifted dry ingredients stabilizes everything perfectly. This method ensures a stable frosting that’s easy to spread and pipe, just like they show in those beautiful, dreamy photos over at Foodie Fairy!
Variations on the Cotton Candy Cake Theme
Even though this cotton candy cake is pretty much perfect as is—because why mess with magic?—I always love seeing how you all put your own spin on things! That’s the fun of accessible baking; you get to customize the projects we design here. Don’t be afraid to treat this base recipe like a starter kit!
If you aren’t totally sold on sticking with the classic pink and blue theme, try swapping out the cotton candy extract for something equally nostalgic. Maybe you use half cotton candy and half bubblegum extract? It’s wild, I promise! Or, you could go wild with the extracts: try a little raspberry or maybe even a hint of toasted marshmallow flavor for a deeper, warmer profile.
Boosting the Color and Crunch
To really lean into that colorful layer cake feeling, think about what happens *inside* the cake, not just on top. While we are swirling the batter, why not toss in some small, fun additions? Rainbow nonpareils or tiny edible glitter flakes tossed right into the blue and pink batter before baking will give you a delightful crunch and shimmer every time you take a bite.
Another simple twist? Add some zest! A tiny bit of lemon zest mixed into the white batter (before coloring) actually brightens up the overall flavor profile beautifully. It keeps that sweetness from feeling too heavy. If you want other fun, fruity layer cake ideas, you should totally check out my strawberry shortcake cupcakes—they use a similar layering method but keep things bright and fresh!
Making it a True Kid-Friendly Dessert
Since this is such a great fun dessert for kids, you can easily adapt the frosting, too. If the kids aren’t crazy about the flavor extract, you can skip it in the frosting entirely and use just vanilla. Then, you can color the frosting in vibrant stripes instead of swirling it through the cake layers. That way, the cake itself tastes almost like a light vanilla cake, and the frosting delivers that beautiful visual pop they love so much.
For extra fun, try making small batches of the batter and coloring them vibrant green and yellow instead of blue and pink. Suddenly, you have a “Gumball Machine Cake”! It’s the same easy process, just different colors, proving how versatile this foundation is for all your upcoming party cake ideas.
Storage and Serving Suggestions for Your Celebration Cake
So, you’ve successfully baked this amazing cotton candy cake, and now you’re wondering how to keep it looking fabulous until the party starts! That’s a smart question. Since this cake has both a sweet buttercream frosting and sometimes uses actual spun sugar on top, storage needs a little careful planning. We want to keep those pastel colors bright and the texture perfect.
For short-term storage—say, if you bake it the day before the big event—room temperature is actually fine, provided your kitchen isn’t scorching hot! Keep the cake loosely covered, maybe under a big, inverted bowl or under a cake dome, to protect it from dust and humidity. This keeps the cake layers from getting hard. If you need to keep it longer than 24 hours, you’ll need to tuck it into the fridge. That high sugar content helps it hold up, but the cold can sometimes make the cake slightly firmer.
When you refrigerate it, wrap the cake tightly in plastic wrap first, followed by a layer of foil. This traps moisture. But listen up: Never serve it straight from the fridge! Take the cake out about an hour or so before you plan to serve it. That allows the frosting to soften up beautifully and lets the cake layers return to their fluffy, perfect state. Don’t forget to scrape off any residual condensation before slicing!
This cake is absolutely designed to be the star of the show for your party cake ideas. Since it’s so bright and whimsical, you don’t need a lot of extra decorations on the table. A simple, classic stand lets the pink and blue swirls do all the talking. It looks fantastic next to something savory and simple, like my recipe for easy homemade celery soup if you need a lighter starter!
And remember, if you do use that optional, real cotton candy garnish, you absolutely must stick to that last-minute application rule. Humidity is the enemy of spun sugar glory!
Frequently Asked Questions About Making a Cotton Candy Cake
It’s totally normal to have questions when you’re trying to nail a Magical Birthday Cake like this one! While I engineered this cotton candy cake recipe to be incredibly straightforward, sometimes little details trip people up. Here are the things I hear most often. Hopefully, these quick tips help you feel super confident!
Can I use store-bought cake mix for this cotton candy cake recipe?
That’s a fair question if you’re looking for an even quicker solution! While you absolutely *can* use a good quality white cake mix if you’re in a pinch, I have to caution you: you won’t get the exact same texture. The reason this is such an Easy Cake Recipe is because we build the aeration right into the batter by creaming the butter and sugar properly. That creates the signature fluffiness you see in the photos.
If you must use a mix, definitely use a high-quality brand. Then, substitute the milk in the box mix directions with our cotton candy flavoring, and add your pink and blue coloring right before pouring it into the pans. But honestly? Take the extra 15 minutes to make it from scratch; that’s where all the fluffy good stuff lives!
How do I keep the actual cotton candy garnish from melting?
Ah, the real cotton candy garnish—it’s beautiful, but it despises humidity! Think of it like spun sugar clouds waiting to dissolve. The trick here is all about timing and location rather than ingredient swapping. You have to keep the cake itself stored in an airtight container, perhaps even refrigerated overnight if it’s a humid summer party.
However, the garnish needs to be added at the absolute last minute. I mean it—place it on the cake no more than 10 minutes before you bring it out to the table. If your party space is very damp or humid, you might need to keep the actual cotton candy sitting next to the cake on its own stand until the last possible second. Honestly, if you’re making this for a backyard party in July, you might want to skip the real stuff and just focus on artistic swirls in the frosting instead, but when it works, it’s just wow!
If you’re looking for other simple, reliable meals to serve alongside your amazing party star, you should check out my guide for easy chicken alfredo—it always gets rave reviews and lets the cake be the ultimate showstopper!
For more great tips on all kinds of baking, I often reference good community advice found online, like these tips over at Easy Savory Meals!
Estimated Nutritional Data for This Cotton Candy Cake
Since this cotton candy cake is definitely a celebratory treat and not an everyday meal, I wanted to give you a general idea of what you’re looking at per slice. Remember, we’re using standard ingredients here, so these numbers are just estimates based on the recipe provided. Every topping choice or brand of butter you use will change the final count slightly, but this should give you a good ballpark!
- Serving Size: 1 slice
- Calories: 450
- Sugar: 65g
- Sodium: 250mg
- Fat: 20g
- Saturated Fat: 12g
- Unsaturated Fat: 8g
- Trans Fat: 0.5g
- Carbohydrates: 68g
- Fiber: 1g
- Protein: 4g
- Cholesterol: 70mg
It’s sweet because it’s a party cake! But totally worth every colorful, fluffy bite, right?
Share Your Magical Cotton Candy Cake Creations
Now it’s your turn to bring a little whimsy into the world! I absolutely love seeing your beautiful pastel swirls and how you manage those last-minute cotton candy garnishes. Baking should be fun, and when you make something this unique, you have to show it off!
Once you’ve served up your cotton candy cake masterpiece, please come back here and leave a star rating—it helps other bakers know this recipe is reliable. And tag me on social media! Seeing your photos reminds me why I spend so much time perfecting these streamlined recipes. If you have any burning questions that I didn’t cover in the FAQ, don’t hesitate to drop me a line through the contact page!
Happy baking, everyone. May your cake be fluffy and your celebrations colorful!
Estimated Nutritional Data for This Cotton Candy Cake
Since this cotton candy cake is definitely a celebratory treat and not an everyday meal, I wanted to give you a general idea of what you’re looking at per slice. Remember, we’re using standard ingredients here, so these numbers are just estimates based on the recipe provided. Every topping choice or brand of butter you use will change the final count slightly, but this should give you a good ballpark!
- Serving Size: 1 slice
- Calories: 450
- Sugar: 65g
- Sodium: 250mg
- Fat: 20g
- Saturated Fat: 12g
- Unsaturated Fat: 8g
- Trans Fat: 0.5g
- Carbohydrates: 68g
- Fiber: 1g
- Protein: 4g
- Cholesterol: 70mg
It’s sweet because it’s a party cake! But totally worth every colorful, fluffy bite, right?
Share Your Magical Cotton Candy Cake Creations
Now it’s your turn to bring a little whimsy into the world! I absolutely love seeing your beautiful pastel swirls and how you manage those last-minute cotton candy garnishes. Baking should be fun, and when you make something this unique, you have to show it off!
Once you’ve served up your cotton candy cake masterpiece, please come back here and leave a star rating—it helps other bakers know this recipe is reliable. And tag me on social media! Seeing your photos reminds me why I spend so much time perfecting these streamlined recipes. If you have any burning questions that I didn’t cover in the FAQ, don’t hesitate to drop me a line through the contact page!
Happy baking, everyone. May your cake be fluffy and your celebrations colorful!
PrintFluffy Pastel Swirl Cotton Candy Cake Recipe
Make a whimsical, sweet, and fluffy cotton candy cake with pastel-colored layers and a simple cotton candy flavored frosting. This recipe is perfect for birthdays and celebrations.
- Prep Time: 30 min
- Cook Time: 35 min
- Total Time: 65 min
- Yield: 10 servings 1x
- Category: Dessert
- Method: Baking
- Cuisine: American
- Diet: Vegetarian
Ingredients
- 1 1/2 cups all-purpose flour
- 1 1/2 teaspoons baking powder
- 1/2 teaspoon salt
- 1 cup granulated sugar
- 1/2 cup unsalted butter, softened
- 2 large eggs
- 1 teaspoon vanilla extract
- 1/2 cup whole milk
- 1 teaspoon cotton candy flavoring extract
- Pink and blue gel food coloring
- For the Frosting: 1 cup unsalted butter, softened
- 4 cups powdered sugar, sifted
- 1/4 cup heavy cream
- 1 teaspoon cotton candy flavoring extract
- Extra cotton candy for garnish (optional)
Instructions
- Preheat your oven to 350°F (175°C). Grease and flour two 8-inch round cake pans.
- In a medium bowl, whisk together the flour, baking powder, and salt. Set aside.
- In a large bowl, cream together the softened butter and sugar until light and fluffy. Beat in the eggs one at a time, mixing well after each addition. Stir in the vanilla extract and cotton candy flavoring.
- Gradually add the dry ingredients to the wet ingredients, alternating with the milk, beginning and ending with the dry mixture. Mix until just combined. Do not overmix.
- Divide the batter evenly between two bowls. Add a few drops of pink gel coloring to one bowl and blue gel coloring to the other. Gently swirl the color into the batter without fully mixing to create a marbled effect.
- Pour the pink batter into one prepared pan and the blue batter into the other. Bake for 28 to 32 minutes, or until a toothpick inserted into the center comes out clean.
- Let the cakes cool in the pans for 10 minutes before inverting them onto a wire rack to cool completely.
- To make the frosting, beat the softened butter until creamy. Gradually add the sifted powdered sugar, alternating with the heavy cream and cotton candy flavoring. Beat until smooth and fluffy.
- Once the cakes are completely cool, place one layer on a serving plate. Spread about one-third of the frosting over the top. Place the second layer on top.
- Use the remaining frosting to cover the top and sides of the cake. Create swirls or texture as desired.
- If using, gently place pieces of actual cotton candy on top of the cake just before serving to prevent melting.
Notes
- For the best pastel effect, use gel food coloring sparingly. You want soft pink and blue swirls, not deep colors.
- Make sure your butter and eggs are at room temperature for the cake batter to combine smoothly.
- Store leftover cake loosely covered at room temperature for up to two days, or refrigerate for longer storage.
Nutrition
- Serving Size: 1 slice
- Calories: 450
- Sugar: 65g
- Sodium: 250mg
- Fat: 20g
- Saturated Fat: 12g
- Unsaturated Fat: 8g
- Trans Fat: 0.5g
- Carbohydrates: 68g
- Fiber: 1g
- Protein: 4g
- Cholesterol: 70mg