
We’ve all been there, right? You pull a beautiful, orange tuber out of the oven, anticipating that cloud-like, fluffy interior, only to slice into it and find dense, slightly gummy disappointment. It’s frustrating, especially when you’re looking for a quick, healthy side dish. Well, that guessing game is officially over. As the founder here at Dishicious, I treated the standard baked sweet potato recipe like any other project: find the bottlenecks and optimize the system. This isn’t just another recipe; this is the foolproof, foil-free technique Leo Grant engineered to guarantee you get that perfect balance every single time—a deeply caramelized, crispy skin surrounding the absolute best fluffy baked sweet potato interior.
- The Dishicious Method for the Best Fluffy Baked Sweet Potato
- Crispy Skin Sweet Potato Technique: Step-by-Step Instructions
- Transforming Your Baked Sweet Potato with Topping Ideas
- Making Ahead: Healthy Baked Sweet Potato Meal Prep Strategy
- Troubleshooting Common Baked Sweet Potato Issues
- Baked Sweet Potato vs. Roasted Sweet Potatoes: Understanding the Difference
- Storage and Reheating Your Perfect Baked Sweet Potato
- Frequently Asked Questions About Baking Sweet Potatoes Perfectly
- Estimated Nutritional Data for This Simple Vegetable Side Dish
The Dishicious Method for the Best Fluffy Baked Sweet Potato
When I started optimizing my dinner routine, the standard baked potato was a huge time-waster. Why wrap it in foil? Foil just traps steam against the skin, essentially steaming it, which makes it soft and a little sad. My goal, like in any good project, was maximizing output while minimizing fussy steps. That means we’re going completely foil free baked sweet potato here.
By skipping the foil and using a higher heat setting, we force that moisture inside to convert into dry, light steam, which sets the starch just right for that fluffy texture we want. Simultaneously, the dry heat circulates completely around the potato, making the skin crisp up beautifully. If you want to see how we handle sweet potatoes when cut up, check out this guide on roasted sweet potato cubes, but for the whole-tuber experience, this direct-rack method is king.

Essential Ingredients for a Simple Oven Baked Sweet Potato Recipe
I keep this list ridiculously short because the technique does most of the heavy lifting. You truly only need four things to get that incredible flavor boost and fluffiness. This whole process is designed to be simple and reliable.
- Four medium sweet potatoes (aiming for 8 to 10 ounces each is perfect for this timing).
- One teaspoon of coarse salt for rubbing into the skin.
- One tablespoon of olive oil, which is optional but really helps the salt stick and enhances the crisp.
Crispy Skin Sweet Potato Technique: Step-by-Step Instructions
Setting up the oven correctly is the “project management” step for this recipe. If the heat isn’t right, you get steamed potatoes instead of fluffy ones. We need intense, dry heat to achieve maximum caramelization on the outside while leaving the inside like silk. Remember, we are putting these directly on the middle rack—no sheet pan buffer allowed!
If you want to see another way we maximize flavor by roasting cut vegetables, check out my Honey Garlic Roasted Sweet Potatoes recipe, but for the whole potato, follow this process exactly.
Prepping and Salting for Maximum Texture
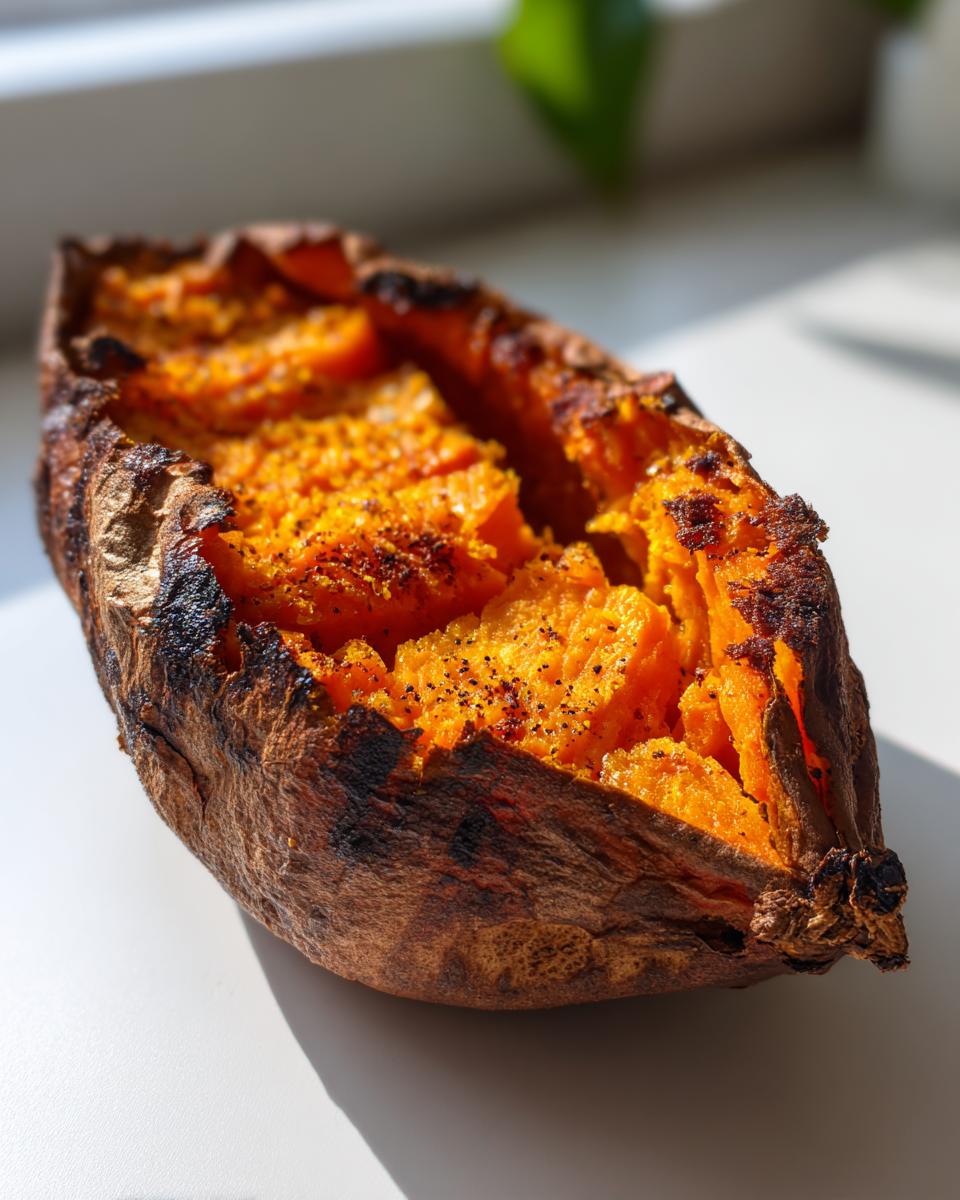
First things first: cleaning. Scrub those skins hard under running water. Then, hear me out on the next part: you must pat them bone-dry with paper towels. Seriously, moisture on the outside is the enemy of crispiness. Next, grab a fork and prick each potato deeply about six to eight times all over. This is critical because it allows the internal steam to escape while baking; otherwise, the pressure builds up.
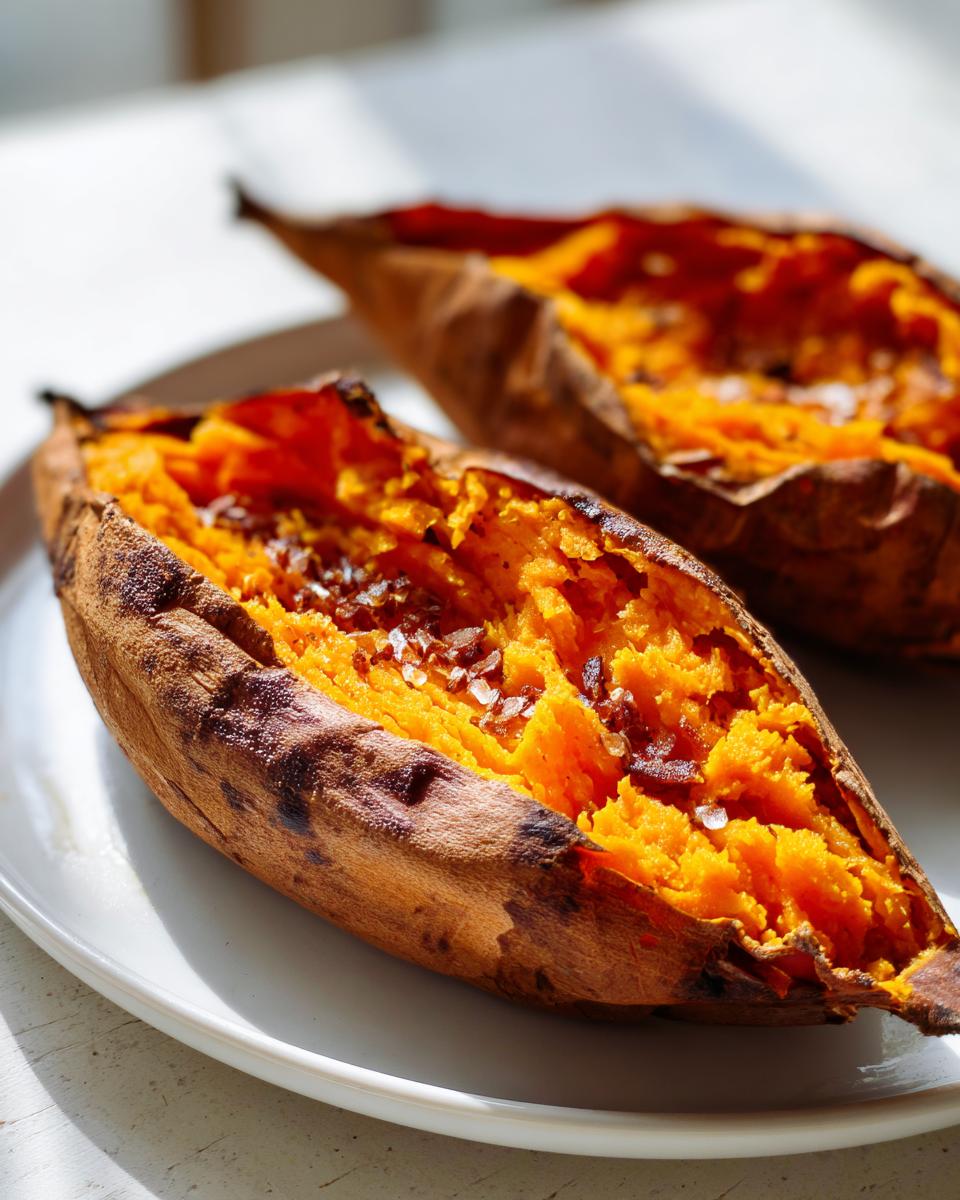
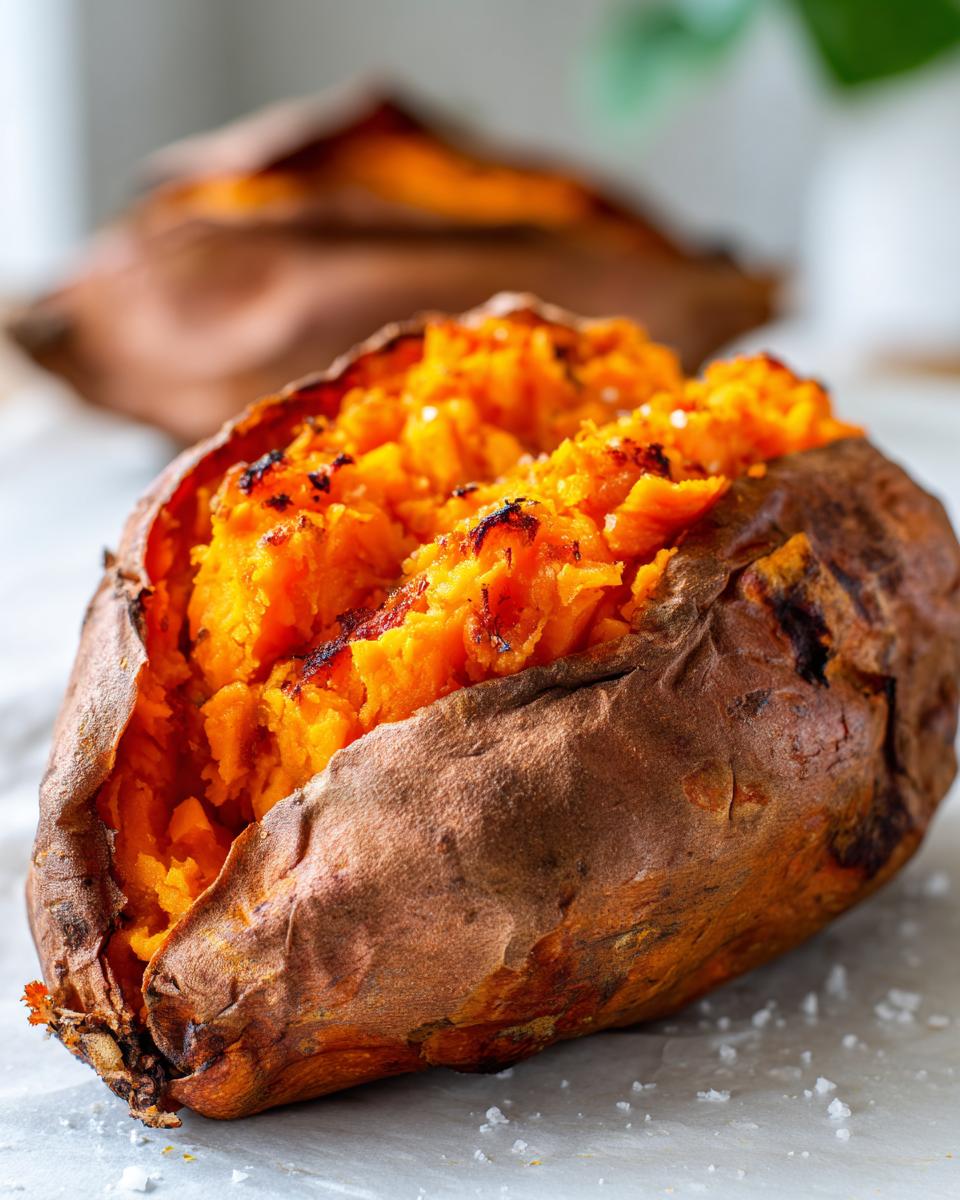
To get that beautiful, slightly wrinkled exterior that signals a naturally sweet baked potato, lightly rub each one down with a tiny bit of olive oil—just enough to wet the skin. Then, sprinkle generously with coarse salt. This salt crust is what creates that satisfying snap when you bite in. Don’t skip the drying or the pricking!
Baking Time and Doneness Check for Your Baked Sweet Potato
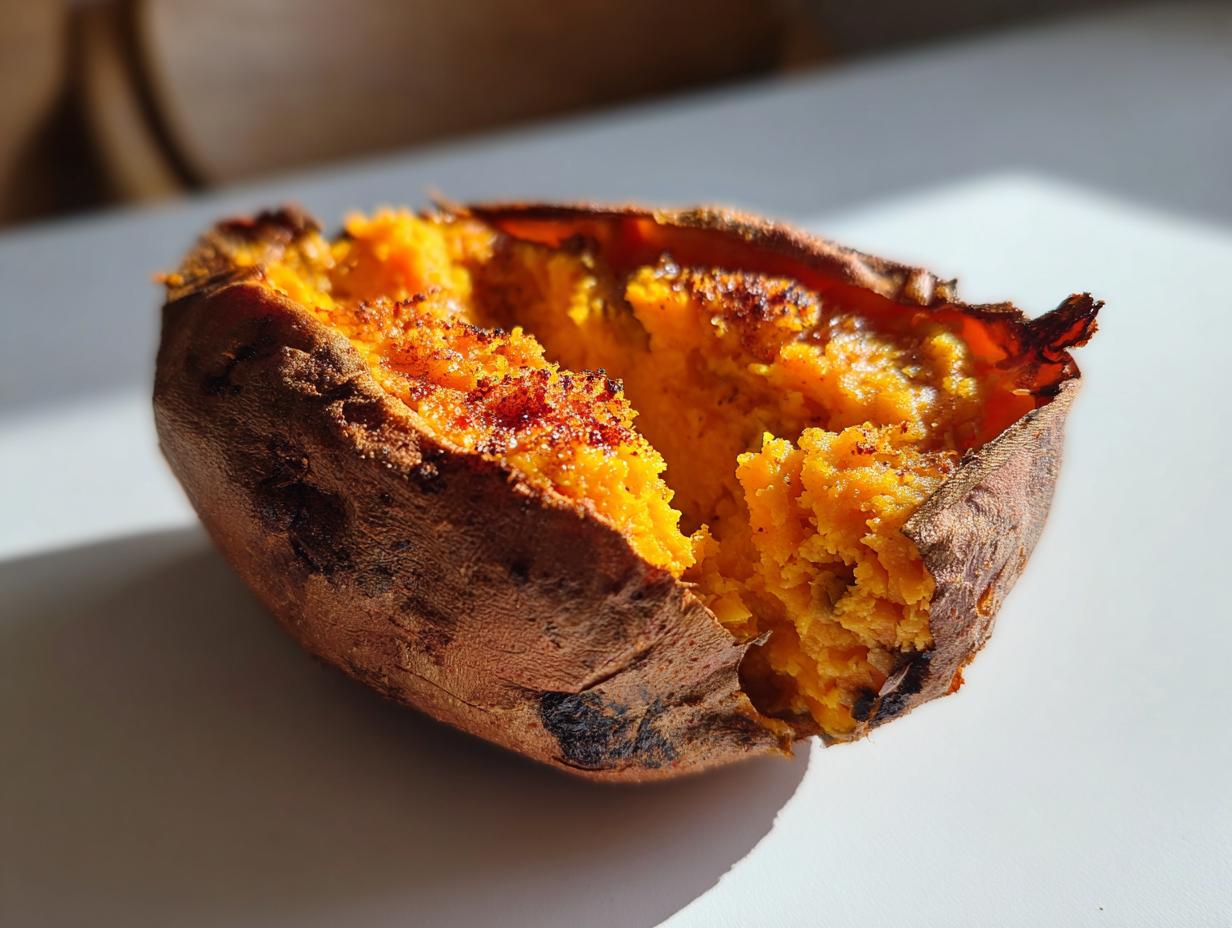
Preheat your oven all the way up to 425 degrees Fahrenheit. We need that high temperature for takeoff! Place the potatoes right onto the middle oven rack. For a standard medium potato, you are looking at a **quick sweet potato baking time** of about 40 to 55 minutes. I always start checking around the 40-minute mark right here: baking sweet potatoes perfectly relies on size, not just time.
The definitive test for doneness isn’t just color; it’s resistance. Grab a sharp skewer or a thin knife and push it into the center. If there’s any resistance, put it back in for another 5 minutes. When it slides in with zero effort, they are done. Pull them out and let them rest on a cooling rack for 5 minutes. That short rest firm up the exterior just a bit more.
Transforming Your Baked Sweet Potato with Topping Ideas
Okay, you’ve got your perfect, fluffy baked sweet potato—the skin is crisp, the inside is steaming, and it smells incredible. Now comes the fun part: loading it up! This simple method makes the potato a fantastic base, whether you need an easy weeknight baked potato side or a filling part of your healthy dinner ideas with sweet potato rotation. Don’t forget, we can make this as healthy or as decadent as we want!
Because the texture is so reliable, it holds up well to heavy toppings. For example, if you’re meal prepping lunches, you can load up half the potato and save the other half plain. Check out my recipe for a fluffy sweet potato soufflé if you ever want to dress them up even further for a holiday!
Savory and Sweet Potato Topping Ideas
You really only need a little butter and salt, but where’s the fun in that? For savory applications, pile on some shredded sharp cheddar cheese until it melts down into the flesh, add a scoop of black beans and salsa, or try topping it with leftover pulled pork or chicken and a sprinkle of fresh cilantro.
If you’re leaning sweet, you have options beyond the usual marshmallows! My absolute favorite way to celebrate this recipe is making a copycat of that famous steakhouse side. You need to smother it in cinnamon butter—I just mix softened butter with cinnamon and a teaspoon of brown sugar—and top it with toasted pecans. You can find great instruction on that specific Texas Roadhouse copycat recipe out there, but honestly, the base flavor from our bake is what makes it shine.
Making Ahead: Healthy Baked Sweet Potato Meal Prep Strategy
This recipe is practically engineered for meal prepping. When you’re focused on efficiency, why bake potatoes one by one? Do yourself a favor and bake four or six at once. Once they are fully baked using the high-heat method described above, let them cool completely on a wire rack. Don’t try to store them hot!
Once they are cool to the touch, store them whole, or halved if you prefer, in a solidly sealed, airtight container. You can safely keep these ready-to-go potatoes in the fridge for up to four days. This means grabbing a **healthy baked sweet potato meal prep** base for lunch or dinner is faster than microwaving leftovers!
When it’s time to eat, you have options. If you’re in a rush, the microwave works—be sure to sprinkle a tiny bit of water on it first to prevent rubbery skin. But if you want to preserve that fluffy interior we worked so hard for, reheat them gently in a 350°F oven for about 10 to 15 minutes. Keep that heat low and slow to warm them through without drying them out. If you love potato soup, check out my easy crockpot potato soup for another great way to use up those tubers!
Troubleshooting Common Baked Sweet Potato Issues
Even with foolproof plans, sometimes things go sideways in the oven. Don’t stress; this is where the project manager mindset really pays off—we analyze the failure and adjust the process. If your baked sweet potato interior turned out dense instead of fluffy, nine times out of ten, it means the steam couldn’t escape fast enough. Did you remember to aggressively prick the skin 6 to 8 times? That’s usually the culprit.
Now, if your skin is soggy, we already know what happened: you wrapped it in foil or put it on a baking sheet! The moisture needs a place to go, and putting it directly on the oven rack allows that critical air circulation we talked about. If you baked a smaller potato for the full 55 minutes, it might be dry; next time, rely on the skewer test rather than the clock—that’s the key to this method, just like the excellent advice found over here.
Baked Sweet Potato vs. Roasted Sweet Potatoes: Understanding the Difference
People often confuse baking a whole sweet potato with roasting them, but trust me, the results are totally different—and it all comes down to preparation. When you roast sweet potatoes, you usually toss cubes or wedges in oil and spread them edge-to-edge on a pan. That maximizes the surface area exposed to that dry heat, resulting in super-crispy edges all the way around. It’s fantastic for snacking or big sheet pan meals, like the garlic herb roasted veggies I make.
However, this recipe is designed specifically for the whole, skin-on baked sweet potato. Keeping it whole traps the moisture inside, ensuring that perfectly light, fluffy interior—the hallmark of a truly great side dish. If you cut it up first, you bake out all that internal steam, sacrificing fluffiness for overall crispness. So, if your goal is that soft, steaming center, stick to this whole-bake method!
Storage and Reheating Your Perfect Baked Sweet Potato
One of the best things about nailing this foolproof technique is that your leftovers are incredible. If you’re not eating them all right away, the short-term storage rule is simple: let them cool completely on the counter first. Do not put hot food into an airtight container; that creates condensation, and condensation means soggy skin!
Once cool, pop those perfectly baked sweet potato gems into the fridge in a sealed container; they hold up great for about four days. When you’re ready to eat one later, just skip the microwave if you can. Reheating them in a 350°F oven for about 10 minutes brings back that dry heat that preserves the fluffy texture we fought for. It’s worth the extra few minutes!
Frequently Asked Questions About Baking Sweet Potatoes Perfectly
Look, I know you want reliability, which is why I’ve pre-emptively answered the sticking points that pop up when people try to achieve the perfect bake. After running these procedures so many times, I can predict exactly what questions you’ll have. We want zero kitchen failures here; we want confidence in making those quick, healthy dinner bases!
Can I use foil when I bake sweet potatoes?
Nope, absolutely not, and I’m serious about this! Remember, the whole point of this method is achieving that crisp skin and fluffy texture. If you wrap your potato in foil, you trap the steam inside, and that steam softens the skin into that disappointing, leathery texture. Foil defeats the entire crispy skin sweet potato technique. Direct rack heat is the only way to go.
What temperature is best for a fluffy baked sweet potato?
We crank it up high—425 degrees Fahrenheit is what I use every single time. That high heat attacks the skin immediately, helping it caramelize and turn crisp while ensuring the inside cooks through relatively quickly. This high-temperature blast is absolutely central to getting that signature contrast, achieving the results of the **best fluffy baked sweet potato** you’ve ever made at home.
If you ever need a reliable, hands-off protein to go alongside this perfect side, make sure you check out my sheet pan mini meatloaves—that’s another recipe built for maximum efficiency!
Estimated Nutritional Data for This Simple Vegetable Side Dish
When you’re making this baked sweet potato recipe, remember that we aren’t adding butter, sugar, or anything fancy yet—this is just the plain, perfectly cooked base. Since I manage my meals closely, I calculated the basics for one medium potato (about 1/4 of the total batch). Don’t forget that any toppings you add, like my favorite cinnamon butter, will increase the totals significantly.
- Serving Size: 1 medium potato (approx. 1/4 batch)
- Calories: 112
- Sugar: 10g
- Fat: 0.2g
- Protein: 2g
It’s an incredibly straightforward side dish. For more reliable weeknight meals that pair well with something simple, check out my slow cooker BBQ chicken recipe!
PrintFoolproof Baked Sweet Potatoes: Crispy Skin and Fluffy Interior

This method guarantees perfectly cooked sweet potatoes with a fluffy interior and caramelized, crispy skin every time. It is a simple, healthy side dish that requires no foil and is perfect for weeknight meals or meal prep.
- Prep Time: 5 min
- Cook Time: 45 min
- Total Time: 50 min
- Yield: 4 servings 1x
- Category: Side Dish
- Method: Baking
- Cuisine: American
- Diet: Vegetarian
Ingredients
- 4 medium sweet potatoes (about 8–10 ounces each)
- 1 teaspoon coarse salt (for skin)
- 1 tablespoon olive oil (optional, for skin)
Instructions
- Preheat your oven to 425 degrees Fahrenheit. This high heat is key for crispy skin.
- Wash the sweet potatoes well under running water. Scrub the skin to remove any dirt. Pat them completely dry with a paper towel. Moisture prevents crisping.
- Prick each sweet potato deeply 6 to 8 times all over using a fork. This allows steam to escape.
- For extra crispy skin, lightly rub the outside of each potato with olive oil, then sprinkle generously with coarse salt. If skipping oil, just use the salt.
- Place the potatoes directly onto the middle oven rack. Do not use a baking sheet or foil underneath; this allows air to circulate around the entire potato for even cooking and crisping.
- Bake for 40 to 55 minutes. Cooking time depends on the size of your sweet potatoes. Start checking at 40 minutes.
- The potato is done when you can easily pierce the center with a sharp knife or skewer with no resistance. The skin should look slightly wrinkled and firm.
- Remove from the oven. Let them rest on a cooling rack for 5 minutes before serving.
- Slice open lengthwise and fluff the interior with a fork. Add your desired toppings.
Notes
- For a Texas Roadhouse copycat style, top with cinnamon butter (softened butter mixed with cinnamon and brown sugar) and toasted pecans.
- To use for meal prep, bake the potatoes, cool them completely, and store them whole or halved in an airtight container in the refrigerator for up to 4 days. Reheat in the oven or microwave.
- If you prefer a softer skin, you can place the potatoes on a baking sheet lined with parchment paper instead of directly on the rack.
Nutrition
- Serving Size: 1 medium potato
- Calories: 112
- Sugar: 10
- Sodium: 10
- Fat: 0.2
- Saturated Fat: 0
- Unsaturated Fat: 0.2
- Trans Fat: 0
- Carbohydrates: 26
- Fiber: 4
- Protein: 2
- Cholesterol: 0