
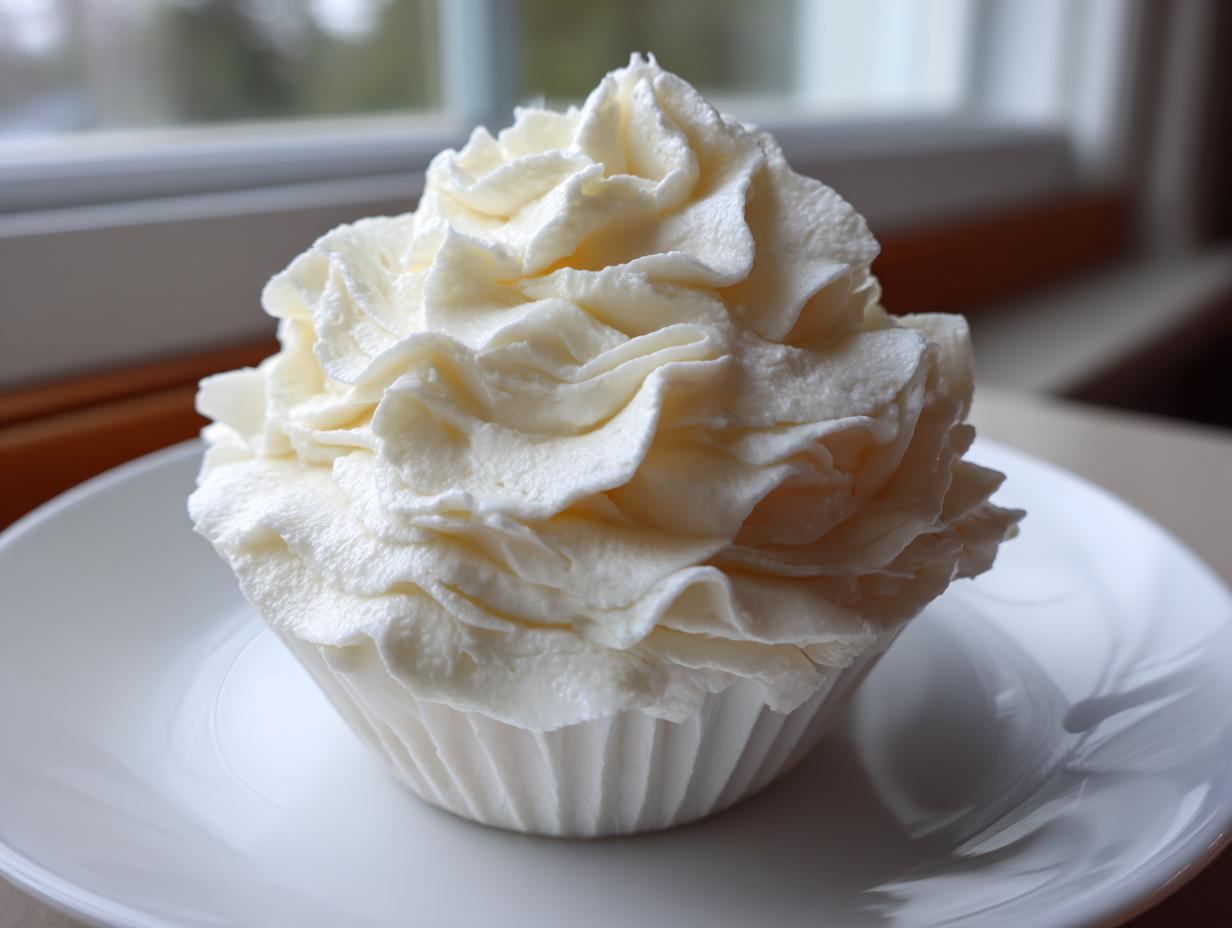
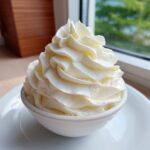
Forget everything you think you know about finicky frostings that split or slump the moment you look away. My goal here at Dishicious, driven by my project management approach to cooking, is simple: reliable flavor with maximum efficiency. That means we’re building the absolute foundation for sweet toppings today—the vanilla buttercream that professional bakers swear by. This is my ultimate, foolproof American buttercream recipe, engineered to be both incredibly fluffy and remarkably stable. You get the best homemade frosting for cake without needing specialized pastry training. In less than ten minutes, you’ll have enough creamy icing to completely transform your next batch of cupcakes or layer cake, proving that gourmet results don’t require gourmet time.
- Why This is the Ultimate Fluffy & Stable Vanilla Buttercream
- Ingredients for Perfect Vanilla Buttercream
- How to Make Smooth Buttercream: Step-by-Step Instructions
- Tips for Perfect Bakery Style Vanilla Frosting
- Using Your American Buttercream Recipe for Decorating
- Storage and Reheating Instructions for Vanilla Buttercream
- Frequently Asked Questions About Classic Vanilla Icing Tutorial
- Nutritional Estimates for Your Sweet Dessert Topping
- Share Your Best Homemade Frosting for Cake Creations
Why This is the Ultimate Fluffy & Stable Vanilla Buttercream
So, why do I call this the ultimate fluffy vanilla frosting recipe? Because I treated it like a logistical problem that needed solving. Most recipes skip the crucial blending time, which results in frosting that tastes like sweet butter and collapses under pressure. We aren’t having that. If you’ve ever searched for a reliable topping for those amazing coconut cupcakes, you know how frustrating bad frosting can be.
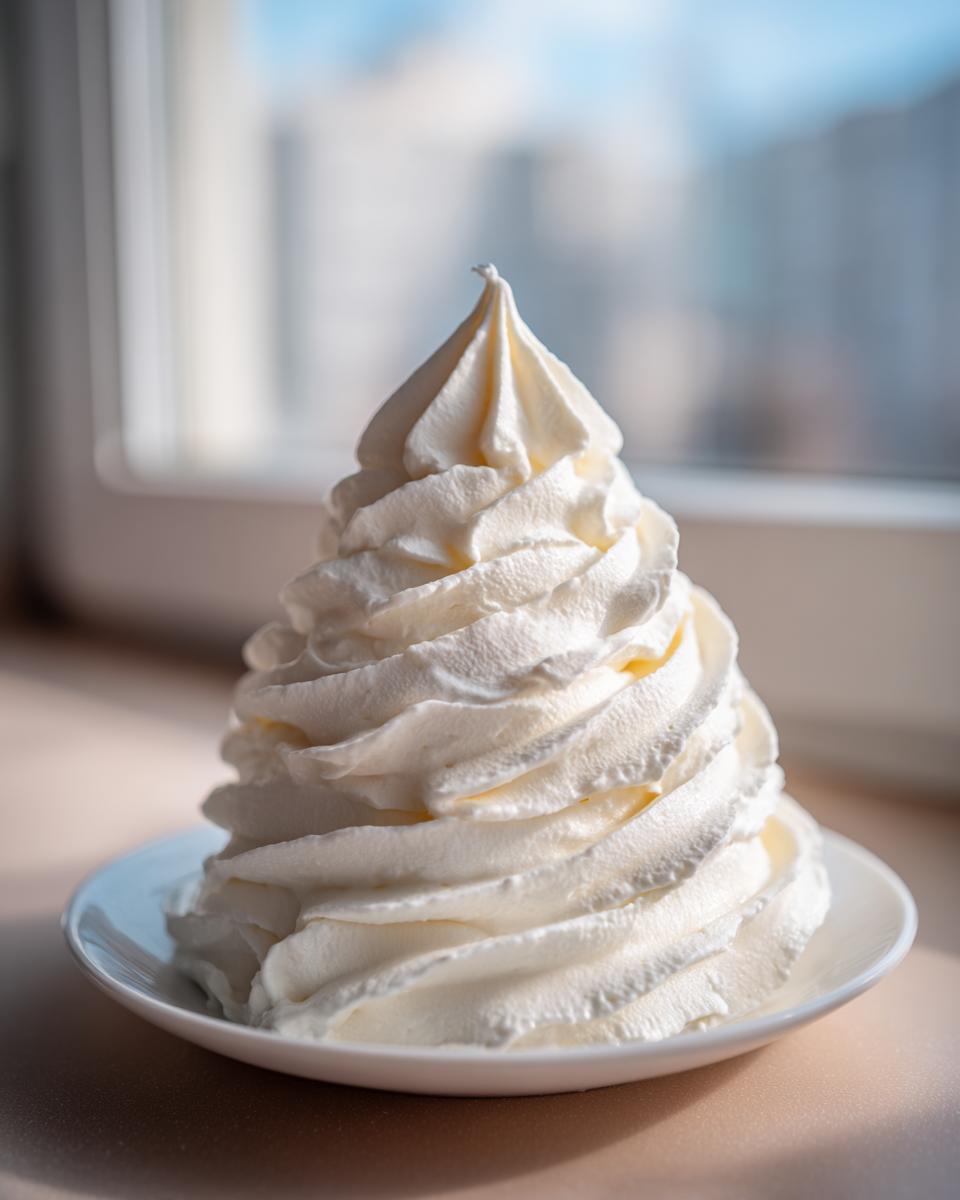
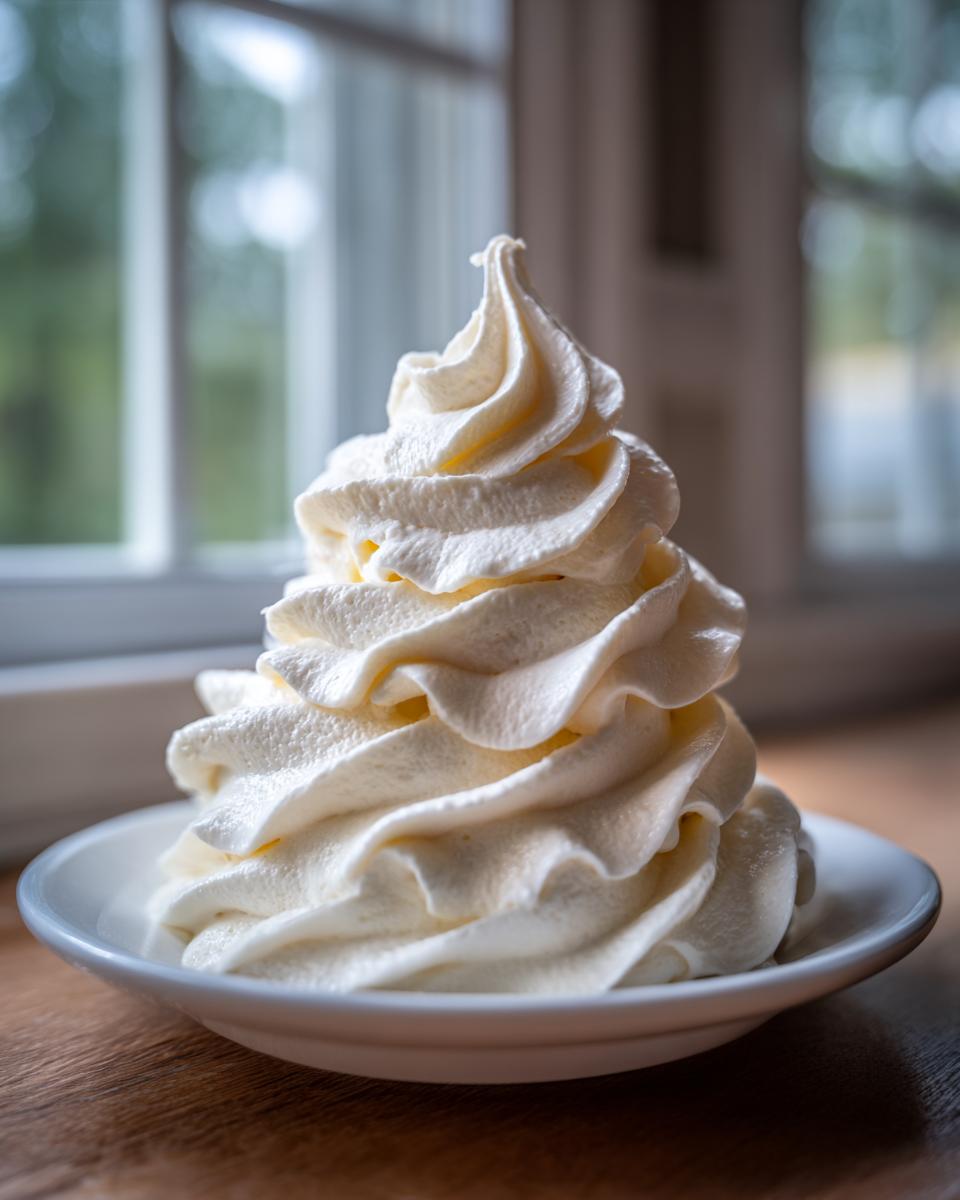
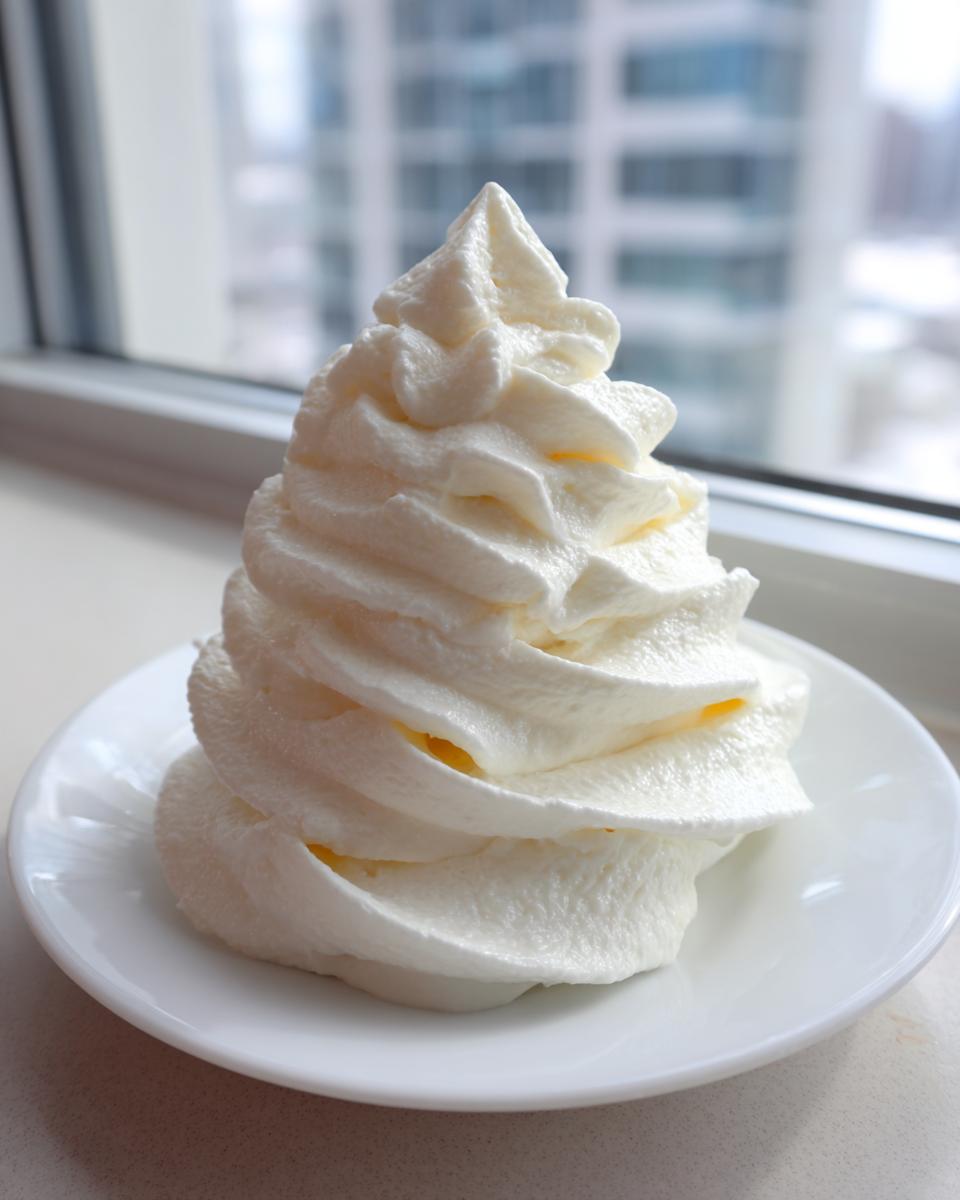
This American buttercream thrives because of the intense initial whipping of the butter solo. That process creates the microscopic air pockets we need, which is the secret to that light, melt-in-your-mouth texture that mimics bakery style vanilla frosting perfectly. It has structure without being dense.
If you’re aiming for those tall, sharp swirls on your cupcakes, stability is key. By carefully managing the ratio of butter to sifted sugar before introducing any liquid, we lock in that structure. It pipes beautifully and holds tight, even if your kitchen is warmer than you’d like. When you follow these steps, you are set up for success!
Achieving Creamy Buttercream Icing Consistency
The core difference between clunky icing and utterly creamy buttercream icing is the initial aeration. You have to spend time beating the room-temperature butter until it’s almost white and fluffy before adding one speck of sugar. This is folding in air, plain and simple. If you rush this, the sugar just dissolves into the fat instead of whipping *with* it, leading to a dense, greasy end product. Trust me; give that butter three full minutes on medium speed, and you’ll see the volume change right before your eyes.
Ingredients for Perfect Vanilla Buttercream
When we are aiming for the best homemade frosting for cake, the ingredients list might look simple, but the details matter immensely. Since this is an American buttercream recipe, we aren’t dealing with complex stabilizers; we are relying on perfect ratios and temperature control. I’ve broken down exactly what you need below to ensure we hit that sweet spot between light and sturdy. You’ll need just a few things, and the total time from start to finish is usually just 10 minutes—seriously!
- 1 cup (226g) unsalted butter, softened to room temperature
- 4 cups (480g) powdered sugar, sifted
- 1 teaspoon pure vanilla extract (use high-quality for rich vanilla flavor)
- 2-4 tablespoons heavy cream or milk
- Pinch of salt
Following this formula gives you a yield of about 3 cups of frosting, which is enough to generously frost one 9-inch layer cake or about 18 standard cupcakes. If you’re making a huge batch for a party, just double everything—it scales beautifully!
Ingredient Notes and Flavor Boosters for Rich Vanilla Flavor Frosting
Let’s talk quality control, because this is where we ensure you get that rich vanilla flavor frosting everyone raves about. First, the butter absolutely must be at room temperature. If it’s cold, it won’t cream properly. If it’s melting, it will just turn into soup later. You want it soft enough that your finger leaves an indent but still holds its shape firmly. That is non-negotiable for the right result.
Second, please, please use pure vanilla extract, not imitation. Imitation vanilla has a harsh, chemical aftertaste that ruins the clean sweetness of this icing. Since there are so few flavor components here, the vanilla has to shine! It’s worth the extra dollar or so for the real deal. We want that classic, comforting taste, not something synthetic. For another great base recipe that focuses on texture, check out my notes on cream cheese frosting.
How to Make Smooth Buttercream: Step-by-Step Instructions
This is where the magic happens, and honestly, it’s why people think this is a bakery style vanilla frosting. It’s all about process control, something I learned long before I learned about folding egg whites. We are going to move quickly, but precisely, to keep this process under that 10-minute mark for a truly easy buttercream recipe.
We are using the paddle attachment for this whole process, but I have one rule: never rush the sugar. Your goal is maximum aeration without incorporating too much air that the mixture becomes runny. When you add that powdered sugar, do it slowly—one cup at a time—and wait for it to mostly incorporate before adding the next. If you dump it all in, you’ll just end up blowing sugar dust everywhere, and you compromise the texture.
- Beat the softened butter in a stand mixer with the paddle attachment on medium speed until it is pale and creamy, about 3 minutes. This step incorporates air for a fluffy texture.
- Gradually add the sifted powdered sugar, one cup at a time, mixing on low speed until just combined after each addition. Scrape down the sides of the bowl as needed.
- Add the vanilla extract and salt. Increase the mixer speed to medium-high and beat for 3-4 minutes until the frosting is light and fluffy. This whipping time is key for a bakery style consistency.
- Add the heavy cream or milk, one tablespoon at a time, beating until you reach your desired spreading or piping consistency. If the frosting is too soft, add a little more sifted powdered sugar. If it is too stiff, add a tiny bit more liquid.
- If you need a very stiff frosting for intricate piping designs, beat on high speed for an extra minute after achieving the right consistency.
- Use immediately on your cooled cakes, cupcakes, or cookies.
My personal tip as the founder? Once you hit Step 4 and start adding the cream, watch how the frosting behaves on the paddle. If it starts clinging in long, sticky sheets instead of smoothly coating the entire mixing bowl, you’ve hit the sweet spot for a beautiful, smooth finish.
Whipping for Fluffy Vanilla Frosting Recipe Texture
That 3-4 minute beating session in Step 3 is critically important when striving for a true fluffy vanilla frosting recipe. This isn’t just about mixing ingredients; this is introducing sustained speed to make the finished product light. If you stop too soon, you end up with heavy icing that tastes overly sweet. Keep running the mixer after the vanilla is added until the color lightens significantly. That color change means you’ve successfully incorporated enough air to make it cloud-like and delicious.
Adjusting Consistency for Buttercream for Piping Designs
The best part of this American buttercream is how adjustable it is. If you want that stiff texture absolutely necessary for complex buttercream for piping designs—think sharp stars or delicate borders—you need to hold back on the optional cream/milk. If you’ve mixed it all in and it seems a touch too soft for piping, the fix is simple: add another quarter cup of sifted powdered sugar, or, even better, run the mixer on high for 60 extra seconds. That rapid whipping often stiffens it up just enough to make it hold those crucial shapes. For more insight on technique, you might find my detailed article on how to make smooth buttercream really helpful!
Tips for Perfect Bakery Style Vanilla Frosting
Even though this is designed as a no-fail kind of recipe, I always share what I’ve learned—these are the little extras that elevate it to the title of ultimate buttercream secrets. Think of these as my project manager checklist for flawless execution when you need that dependable, bakery style vanilla frosting.
First, remember the butter temperature rule we discussed earlier. If your butter is too warm—say, it looks glossy or starts melting onto the counter—the frosting will weep later. If you’re having trouble getting that temperature just right, chilling the finished frosting for about ten minutes will work wonders for stability, especially if you live in a hot climate. It firms right up!
Second, for the fluffiest possible result, if you are making a really large batch, swap the paddle attachment for the whisk attachment right after you add the cream in Step 4. The whisk is designed to incorporate dramatically more air, which will give you a lighter, almost cloud-like texture, closer to a whipped topping than a simple icing. It truly makes a difference for high volume work.

Finally, if you are just struggling with getting the absolute smoothest texture, sometimes a quick splash of vodka or lemon extract instead of milk can help speed up the incorporation process without adding extra water content that can thin it out. For more deep-dive advice on stability and finishing techniques, check out my guide to ultimate buttercream secrets.
Using Your American Buttercream Recipe for Decorating
Now that you have this beautifully light and stable icing, let’s talk about putting it to work! This specific American buttercream recipe—because it’s built on fat and sugar, not just air and water—is fantastic for almost any application. It works like a dream spread thick on a homemade cookie, dolloped generously on a brownie, or piped onto your favorite treats. If you’re looking for the perfect canvas for this frosting, make sure you check out my vanilla cupcakes best recipe moist fluffy!
The structure we built in the mixer means it crusts just slightly on the outside while staying luscious inside. This makes it perfect for stacking layer cakes where you don’t want the layers sliding around. On cupcakes, it holds those beautiful ridges from the piping tip wonderfully. It really is versatile enough for whatever your dessert requires.
Troubleshooting Common Issues with Vanilla Buttercream
Even with a recipe designed to be foolproof, sometimes elements outside our control—like high humidity or slightly overheated butter—can cause issues. Don’t panic! This is where being a smart cook comes in handy; we always have a quick fix ready.
If your frosting has started to separate (where you see little beads of liquid fat pooling), you likely mixed it too fast or added liquid too quickly. The quickest solution here is to put the whole bowl back on the mixer, turn it on the LOWEST speed, and just let it turn for about 90 seconds. Then, increase the speed to medium and beat slowly until it comes back together into a smooth emulsion. This often saves the batch and keeps it looking like the smooth buttercream you aimed for.
If it’s weeping (meaning little droplets are forming on the surface), that’s usually a temperature issue. The solution is stabilization: cover the bowl and pop it into the refrigerator for 10 to 15 minutes. When you bring it back out, you might need to whip it again on medium speed for just a minute to reincorporate any lost air. This simple step is a key part of my no-fail buttercream guide, ensuring you always get that creamy, perfect finish.
Storage and Reheating Instructions for Vanilla Buttercream
Handling leftovers is key when you’ve made a successful batch of this frosting, and since this is such a sweet dessert topping, you’ll probably have some! For short-term storage, airtight containers work perfectly; the buttercream will keep well in the fridge for up to a week. If you need to freeze it, wrap it tightly in plastic wrap first, then place it in an airtight container. When you’re ready to use it again, let it sit on the counter for an hour or two, then give it a good re-whip using my instructions for easy crockpot potato soup—just kidding, use the mixer!
The re-whipping is essential to bring back that light, airy structure. Don’t just try to stir it; you need to beat it until you restore that beautiful creamy buttercream icing texture we mastered in the first place. That’s how you save time and get that perfect consistency again!
Frequently Asked Questions About Classic Vanilla Icing Tutorial
I get a ton of messages asking for clarifications or slight tweaks on this standard process. Since this is meant to be your go-to guide for a classic vanilla icing tutorial, I figured it makes sense to tackle the most common curveballs right here. We want this to be your go-to recipe, and that means addressing potential user errors before they happen. Whether you’re looking for a super light texture or wondering about speed, these questions should help speed up your success.
Can I make this a quick 10 minute frosting if I skip chilling the butter?
Absolutely not, and I say this with love! You are aiming for that quick 10 minute frosting time frame based on *perfect* butter temperature. The chilling step isn’t really about chilling the finished product; it’s about the butter starting at the perfect, cool room temperature. If you skip letting it soften correctly, it won’t cream, and you’ll just end up with tiny, gritty chunks of cold butter mixed with sugar lumps. That defeats the purpose of making a smooth buttercream! The initial three minutes of beating solo are crucial for volume; cold butter physically cannot trap enough air, no matter how long you beat it.
How do I make this vanilla buttercream a whipped vanilla topping?
That’s a great question if you’re looking for something incredibly light, maybe for a very tender cake that shouldn’t bear a heavy load. To create more of a genuine whipped vanilla topping texture, you need to lean heavily into aeration. After you finish Step 4 and have reached your desired spreading consistency (not piping stiff), switch the paddle attachment out for the whisk attachment if you have one—as I mentioned in my notes. Then, just let it run on medium-high speed for an extra two to three minutes. You’ll notice the volume increase again! Just be careful: too much whipping with the whisk attachment and it can eventually break, so watch it closely.
For more advanced techniques for things like making a Swiss meringue base (which is naturally lighter), you can check out my overview on easy BBQ chicken recipe slow cooker—just kidding, I haven’t written that one yet! But seriously, stick to the whisk trick for a lighter version of this classic American buttercream.
Nutritional Estimates for Your Sweet Dessert Topping
Okay, let’s talk numbers briefly. I’m not a dietician, the founder Leo Grant is a process guy, but when you’re making something this delicious, it’s smart to know what’s what. Since this is the best homemade frosting for cake and you’re likely using it as a generous sweet dessert topping, I’ve pulled the estimates from the core ingredients used in the recipe above. Keep in mind, these are calculated averages based on using unsalted butter and standard powdered sugar.
These figures are based on a standard serving size of 1/4 cup of the finished frosting, which is a pretty healthy dollop, if you ask me. As ingredients vary slightly between brands, treat these numbers as a solid guideline, not a strict mandate for your baking project.
- Serving Size: 1/4 cup
- Calories: 350
- Fat: 18g (Saturated Fat: 11g)
- Carbohydrates: 48g (Sugar: 45g)
- Protein: 1g
- Sodium: 45mg
- Cholesterol: 45mg
If you’re looking to tweak the recipe for lower sugar content—maybe you prefer less sweetness for your easy steak fajitas sheet pan recipe—you can swap out some of the powdered sugar for a zero-calorie alternative, but be warned: that will absolutely change the structure. Sugar provides bulk and rigidity in American buttercream, so any change requires re-testing the whipping process to maintain that crucial stability.
Share Your Best Homemade Frosting for Cake Creations
Alright, that’s the whole game plan right there! We’ve engineered, optimized, and systematically built the ultimate vanilla buttercream meant to withstand any test you throw at it. Now that you have the secrets for getting that flawless, bakery-style texture, I seriously want to know how it worked out for you.
Did you manage to get the frosting light enough for a truly fluffy vanilla frosting recipe? Were you able to whip up a batch quickly enough to qualify as a quick 10 minute frosting? Please tell me below in the comments section! If you’ve had success using this for your tiered projects, let me know how it held up for your buttercream decorating techniques.
Don’t keep your victories secret! If you baked something amazing using this recipe, I’d love to see it. Tag us on social media so I can celebrate your success in whipping up the best homemade frosting for cake. And hey, if you thought this streamlined approach solved your icing dilemmas, please leave this recipe a star rating—it really helps other home cooks find reliable solutions. If you want to check out another recipe that uses a streamlined method, you might like my guide to easy crockpot potato soup, which proves simplicity works across the board.
For the most popular takes on this frosting, be sure to check out what others are pinning, like this one from Cookibly: Vanilla buttercream frosting. Happy baking, and I’ll see you in the comments!
PrintThe Ultimate Fluffy & Stable American Vanilla Buttercream Frosting Recipe
Make the best homemade frosting for cake with this easy American buttercream recipe. You get a creamy, fluffy, and stable vanilla buttercream perfect for piping designs on cakes and cupcakes.
- Prep Time: 10 min
- Cook Time: 0 min
- Total Time: 10 min
- Yield: About 3 cups 1x
- Category: Dessert Topping
- Method: Mixing
- Cuisine: American
- Diet: Vegetarian
Ingredients
- 1 cup (226g) unsalted butter, softened to room temperature
- 4 cups (480g) powdered sugar, sifted
- 1 teaspoon pure vanilla extract (use high-quality for rich vanilla flavor)
- 2–4 tablespoons heavy cream or milk
- Pinch of salt
Instructions
- Beat the softened butter in a stand mixer with the paddle attachment on medium speed until it is pale and creamy, about 3 minutes. This step incorporates air for a fluffy texture.
- Gradually add the sifted powdered sugar, one cup at a time, mixing on low speed until just combined after each addition. Scrape down the sides of the bowl as needed.
- Add the vanilla extract and salt. Increase the mixer speed to medium-high and beat for 3-4 minutes until the frosting is light and fluffy. This whipping time is key for a bakery style consistency.
- Add the heavy cream or milk, one tablespoon at a time, beating until you reach your desired spreading or piping consistency. If the frosting is too soft, add a little more sifted powdered sugar. If it is too stiff, add a tiny bit more liquid.
- If you need a very stiff frosting for intricate piping designs, beat on high speed for an extra minute after achieving the right consistency.
- Use immediately on your cooled cakes, cupcakes, or cookies.
Notes
- For the smoothest buttercream, ensure your butter is truly at room temperature, not melted.
- If your kitchen is warm, chill the finished frosting for 10 minutes before piping to increase stability.
- To achieve a rich vanilla flavor, use a high-quality pure vanilla extract.
- If you are making a large batch, consider using a whisk attachment instead of the paddle for maximum air incorporation.
Nutrition
- Serving Size: 1/4 cup
- Calories: 350
- Sugar: 45g
- Sodium: 45mg
- Fat: 18g
- Saturated Fat: 11g
- Unsaturated Fat: 7g
- Trans Fat: 0g
- Carbohydrates: 48g
- Fiber: 0g
- Protein: 1g
- Cholesterol: 45mg