
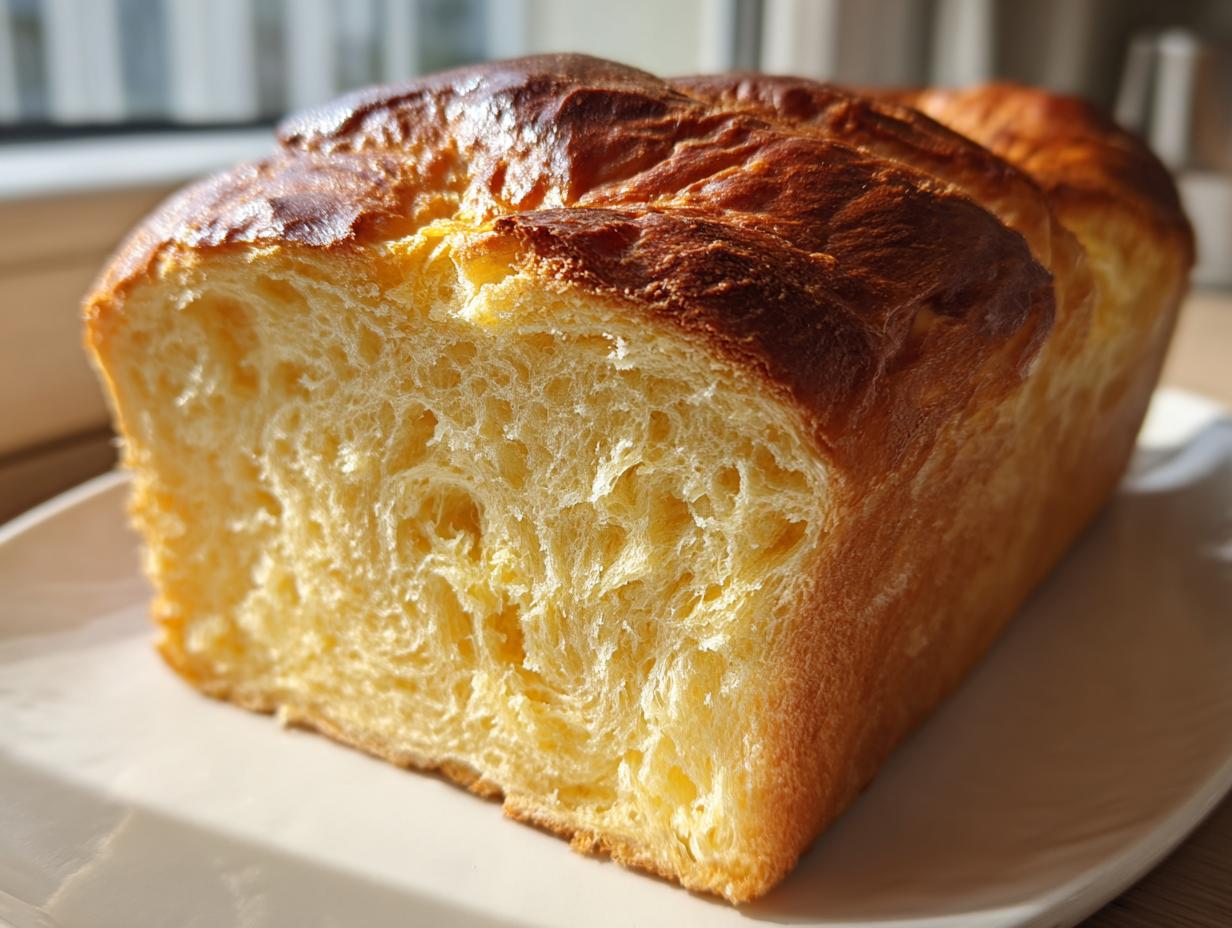
There’s something genuinely luxurious about pulling a perfect loaf of homemade bread from the oven, isn’t there? And when that bread is brioche? Forget about it. This incredibly rich french bread recipe often seems intimidating, but honestly, it doesn’t have to be. As a project manager in my ‘real’ life, I’ve taken the complexity out of making amazing brioche bread from scratch, focusing only on the steps that truly deliver that signature rich, buttery texture. We achieve that unbelievable softness using an overnight proofing method, ensuring deep flavor development. If you’re curious about starting your yeast journey, you can check out my guide on sourdough starter from scratch for beginners now, but for this recipe, stick with the yeast! Trust me, by the time you see this loaf rise, you’ll realize this is the definitive guide you’ve been looking for.
- Why This Overnight Proofed brioche bread Recipe Works
- Ingredients for the Best buttery bread recipe
- Homemade brioche dough instructions: Mixing and Kneading
- The Essential Long Fermentation step for brioche bread
- How to Shape and Proof Your brioche bread Loaf
- Baking the brioche bread for a perfect golden brown bread crust
- Tips for Success When You make brioche at home
- Serving Suggestions for your brioche bread
- Storage and Reheating Instructions
- Frequently Asked Questions About brioche bread
- Estimated Nutritional Information
- Share Your brioche bread Baking Success
Why This Overnight Proofed brioche bread Recipe Works
So, what makes this recipe the one you should use? It’s all about slowing things down. I know you want quick results, but for the absolute best flavor and texture, we leverage the cold. The overnight proofing isn’t just for convenience; it’s crucial for transforming a decent dough into a truly failproof brioche recipe.
- It deepens the flavor profile far beyond what a quick dough can manage.
- The cold temperature helps control the ridiculous amount of butter, letting the flour fully hydrate.
- This slow approach yields a tender, amazing texture that makes this perfect for slicing thick for cinnamon roll french toast casserole later!
The Science Behind Rich french bread recipe Texture
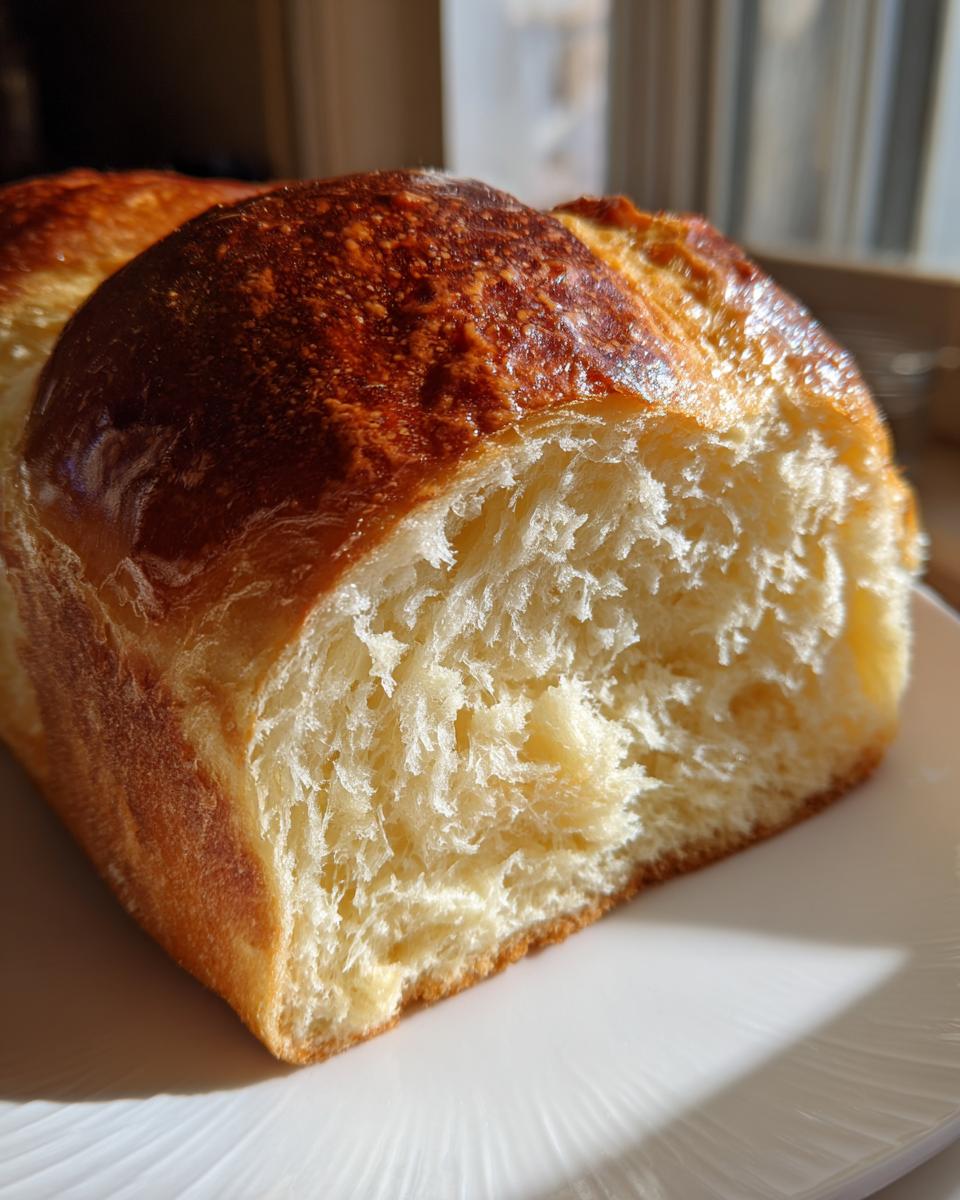
This isn’t your average lean bread. We are working with what bakers call enriched dough techniques. That means lots of fat and eggs! The high amount of cold butter coats the gluten strands as they relax in the cold. The eggs add protein and emulsifiers, which bind everything together beautifully. When baked, this structure keeps the crumb incredibly soft and tender, leading to that melt-in-your-mouth quality.
Ingredients for the Best buttery bread recipe
When you’re making something this rich, the quality of your ingredients really shines through. Don’t skimp here; this is where the magic starts that leads to that perfect brioche bread. We are using the full component list: 1 cup of whole milk, which needs to be just lukewarm, not hot. Then we hit it with the active dry yeast and a touch of the sugar to get things bubbling.
The bulk of the structure comes from 4 cups of all-purpose flour, 1 teaspoon of salt, and the rest of that sugar. But the real star? That’s 1 full cup (that’s two whole sticks!) of unsalted butter, which absolutely must be cold and cut into little 1-inch cubes before we start. Oh, and don’t forget those 4 large eggs; make sure they are at room temperature so they mix in nicely with the other liquids. For more ideas on excellent doughs, check out my sourdough sandwich bread recipe sometime!
Ingredient Notes and Substitutions for brioche bread
Let’s talk quality control! For this recipe, the butter is everything. Use the best quality unsalted butter you can find because that fat is responsible for almost all the flavor. You want that rich, creamy taste we look for in a classic european bread recipe. If you use cold butter, the dough incorporates it slowly, which is what gives us that soft crumb, remember?
Also, please, please, please use room-temperature eggs. If you drop cold eggs into your mixture, they can sometimes shock the dough, especially after all that butter goes in. It messes with the emulsion we are trying to build. Just drop them in a bowl of warm water for ten minutes before you start if you forgot to take them out!
Homemade brioche dough instructions: Mixing and Kneading
Okay, this is where we start turning ingredients into actual dough, and this is where you need to pay attention to the process if you want that perfect brioche bread. First off, make sure that yeast foam we talked about is happy and bubbly—that means it’s alive and ready to work! We’re going to dump our dry stuff—flour, most of the sugar, and the salt—into the mixer bowl first. Give it a quick churn just to distribute everything evenly. You can reference my easy yeast bread beginner recipe if you need a refresher on activating that yeast!
Next, the wet ingredients go in: the yeast mixture and those room-temp eggs. Mix it low until it looks like a shaggy mess, maybe two minutes. Then, increase the speed just a little and knead it for about five minutes. Right now, it’s going to look disastrously sticky—almost wet—but that’s normal for this high-fat dough. Keep kneading! This phase starts building the gluten structure required to hold all that richness.
Incorporating Butter: The Key to Fluffy sweet bread baking
Here comes the fun, but tedious, part. We have to introduce the cold butter cubes one by one. Seriously, one cube at a time! Add a cube, let the mixer run until it’s completely incorporated—meaning you can’t see distinct chunks anymore—and *then* add the next one. This slow introduction is critical for fluffy sweet bread baking because it allows the dough to absorb the fat without breaking down the gluten network we just worked so hard to build.
This process takes patience; I’m talking ten to fifteen minutes after the last cube goes in. Don’t rush it! You are looking for a dough that suddenly transforms, becoming smooth, elastic, and pulling cleanly away from the sides of the bowl. When it starts clinging nicely to the dough hook, you know you nailed the technique for this enriched dough!
The Essential Long Fermentation step for brioche bread
Alright, listen up, because this next step is where good bread becomes *great* bread, especially when dealing with rich brioche bread. I know you want to rush to the oven, but we are implementing the cold rest—the overnight proofing. This is non-negotiable if you want that amazing, deep, complex flavor that separates homemade from store-bought. If you want foolproof results, you have to let the process take its time.
Once your mixer finally finishes that marathon kneading session and the dough is smooth and elastic, quickly get it into a lightly oiled bowl. Cover that thing tightly with plastic wrap—I mean *tightly* because we don’t want any dry spots forming overnight. Then, it goes into the refrigerator. You should aim for at least 12 hours in there, but honestly, up to 24 hours is even better. It’s a long fermentation, and it’s essential for breaking down some of those heavy fats and developing the subtle sweetness that makes this work so well. This time in the cold is the secret weapon for that incredible texture you’ve been chasing.
When you pull it out the next morning, it won’t look like anything you’ve seen before; it’ll be dense and cool, but trust me. This long, slow rise builds the character of the finished loaf. You can read more about why I love this slow process in my piece on long fermentation bread baking; it really changes the game for any enriched dough!
How to Shape and Proof Your brioche bread Loaf
The dough has had its marathon cold nap, and now we wake it up gently! When you finally pull that chilled mass of buttery, flavorful dough out of the fridge, it might look a little intimidating—it’s usually pretty firm. Don’t panic! This is perfect. Gently punch it down right in the bowl to release all that built-up trapped gas. It won’t deflate much, which is exactly what we want.
Next, turn the dough out onto a lightly floured surface. You aren’t going to knead it again, just coax it into shape. For our loaf version, you want to gently form it into a neat log or rectangle, depending on your pan shape. Make sure you get a smooth top, and then place it seam-side down into your greased 9×5 inch loaf pan. I always make sure the pan is coated really well, maybe even using a bit of cake goop just for insurance on this valuable dough!
Now comes the final, crucial waiting period—the bloom. Cover the pan loosely with plastic wrap or a tea towel. We let the brioche bread dough proof at room temperature. This usually takes about two to three hours, but watch the dough, not the clock! You are waiting for it to swell up until it’s nearly doubled in size. This final proof is what gives you that amazing, light structure in the end.
How do you know when it’s ready? Forget the windowpane test; we use the poke test here. Gently—and I mean gently—poke the side of the dough with a floured finger. If the indentation slowly springs back about halfway, leaving a slight divot, it’s perfect. If it springs back immediately, it needs more time. If it collapses, oops! You waited too long, but honestly, with the cold fermentation, that’s rare. If you need other pan ideas, check out my easy homemade bread bowls recipe for shaping inspiration!
Baking the brioche bread for a perfect golden brown bread crust
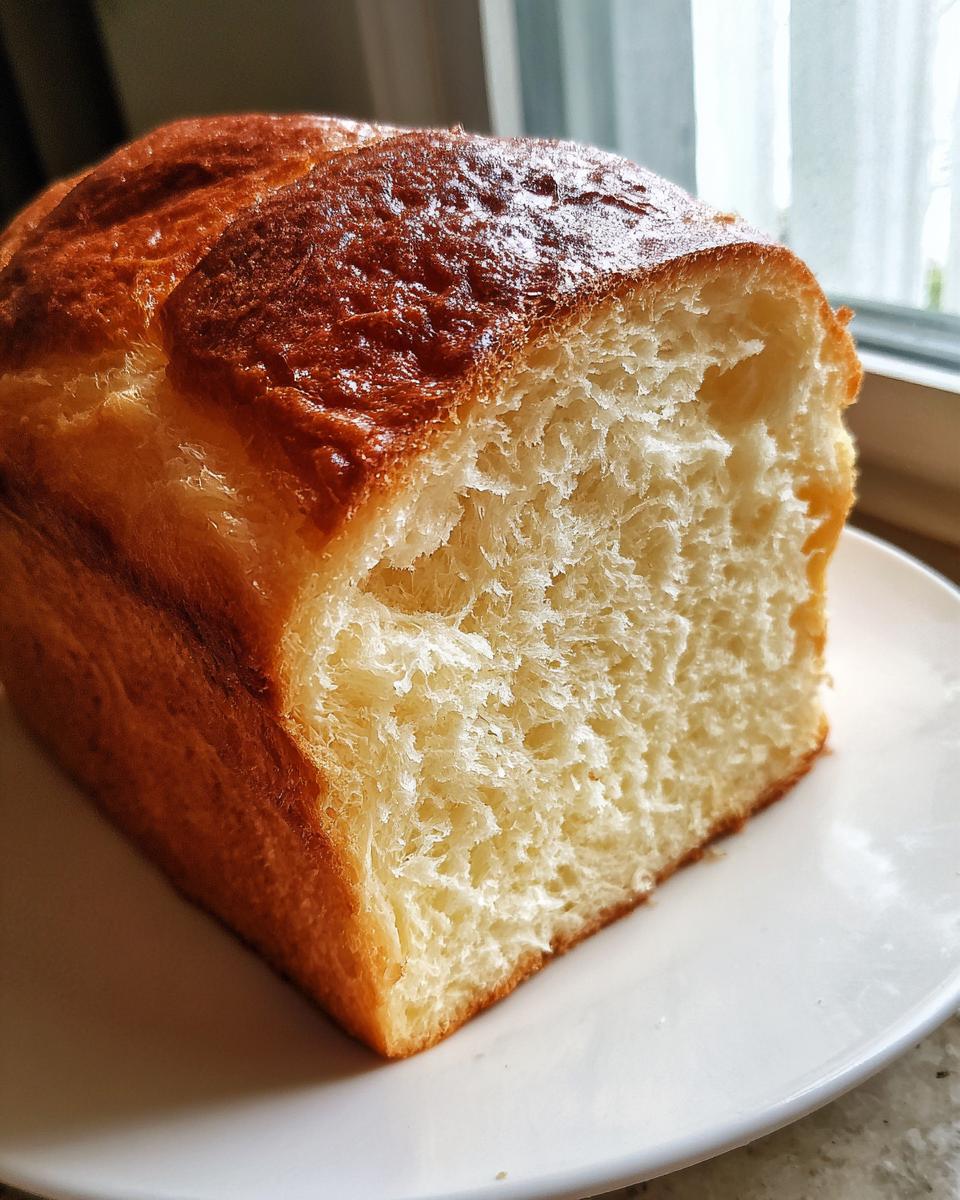
We have mixed, kneaded, and waited patiently—now it’s time for the payoff! Baking is where that beautiful color comes to life. You need to get your oven cranked up to 375 degrees Fahrenheit. Make sure that oven has plenty of time to preheat fully; thermal stability is key when dealing with the high fat content in our brioche bread.
Before it goes in, we apply the secret weapon for that glossy, deep golden brown bread crust: the egg wash. Just take one egg, beat it up with about a teaspoon of water or milk—I use water because I like a slightly less intense color—and brush it lightly but completely over the top of the loaf. You want it coated, but you don’t want egg wash dripping down the sides and sealing the crust too early. This step guarantees that beautiful, shiny top.
Bake this beauty for about 30 to 35 minutes. Now, here’s my project manager tip for even baking: I always place my loaf pan on the center rack, but if you notice your tops are browning way too fast—like mine did the first few times because my oven runs hot—I quickly slide a baking sheet underneath it on the rack below it. This insulates the bottom and diverts some direct heat, ensuring that you get that perfect golden brown bread crust without burning the bottom or the top getting too dark before the center cooks through.
Don’t just rely on the color, though! For true peace of mind, especially with enriched doughs, checking the internal temperature is how you know you’ve truly succeeded. You are looking for an internal temperature of 200 degrees Fahrenheit when you stick an instant-read thermometer right into the center of the loaf. Once it hits that mark, pull it out immediately! If you need a reminder on getting that perfect bake consistency, take a look at how I manage heat for my Yorkshire pudding; the principle of stable oven heat applies here too.
As hard as it is, let the loaf hang out in the pan for about 10 minutes after it comes out. That initial short cooling period helps the structure set before you turn it out onto a wire rack to finish cooling completely. This step is vital for letting the internal structure breathe without collapsing!
Tips for Success When You make brioche at home
Even with a solid, reliable plan, sometimes the dough has other ideas, right? That’s when you need to step back and troubleshoot like the kitchen project manager I am! Don’t sweat it if your dough isn’t behaving exactly as the video shows. We can usually fix things with small adjustments based on technique.
- If Your Dough Is Too Sticky: This is super common! Remember, this is a high hydration enriched dough, so it should feel softer than standard bread dough. If it’s just impossible to handle after the butter is incorporated, add flour one tablespoon at a time, but stop as soon as it starts showing elasticity. Don’t reach for too much flour, or you sacrifice that melt-in-your-mouth texture!
- If The Dough Won’t Rise (or Rises Slowly): If you’ve proofed it for hours and nothing is happening, your yeast might have been lukewarm when you activated it, or maybe your kitchen is just too cold. Try moving the covered bowl to a slightly warmer spot, like inside an oven that is turned OFF but has the light on. That gentle warmth can kickstart sluggish yeast without killing it.
- If The Loaf Seems Dense After Baking: Usually, this means you rushed the final proof. If you cut it too early, the structure hasn’t set properly. Also, double-check that you added all the eggs! Seriously, one missing egg can lead to a denser outcome because the structure relies heavily on that protein content.
It’s all about adjusting the variables! For more helpful guides on basic kitchen science, you can check out my post on easy homemade mayonnaise recipe from scratch—it breaks down emulsions just like this dough!
Making brioche hamburger buns recipe from the same dough
If you baked a giant loaf, you might end up with leftovers (unlikely, I know!), or maybe you just prefer smaller portions. The dough we made is perfect for making individual soft dinner rolls making or classic, sturdy brioche hamburger buns recipe! You use the exact same dough you used for the loaf.
Once the dough has finished its long cold fermentation and is gently deflated, skip the loaf shaping. Instead, divide the dough into 12 equal pieces—using a kitchen scale really helps here for consistency! Roll each piece gently between your palms until you create a smooth, tight ball. Place these balls close together in a prepared cake pan or baking dish. Since they are smaller, they will proof faster, usually in about 1.5 to 2 hours. They need to look nicely puffed up before you egg wash and bake them. They bake quicker than the loaf, usually around 18-20 minutes at the same temperature!
Serving Suggestions for your brioche bread
Now that you have conquered the technical process of making the most incredible, rich brioche bread imaginable, the real fun begins: eating it! Because this bread is so wonderfully enriched with butter and eggs, it truly spans the spectrum from decadent breakfast item to the perfect savory sidekick.
Let’s start with breakfast, because honestly, who can resist? Slicing this loaf thick and using it to make brioche loaf for french toast is non-negotiable. The high fat content prevents it from turning into a soggy sponge when soaked in custard. It toasts up beautifully, holding its shape while the inside stays soft and custardy. If you make a batch of the French toast, you honestly should consider turning the leftovers into my baked casserole version—you can find the details for that cinnamon roll french toast casserole recipe right here!
But don’t just save it for the mornings! Because this is such a superior, soft dinner rolls making bread, use square slices instead of plain white bread for your next grilled cheese sandwich. The butter in the dough actually helps achieve a crispier, deeper golden crust on the outside while the inside stays pillowy soft. It is also fantastic served slightly warmed alongside a big bowl of rich stew or chili. Any time a recipe calls for a hearty bread, reach for your leftover brioche loaf; it elevates whatever you are pairing it with!
Storage and Reheating Instructions
This bread is so rich and good that you might not have leftovers, but just in case you manage to save some of that amazing loaf, knowing how to properly store it is key to keeping that fluffy texture intact. Since we’ve got so much butter and egg in there, it doesn’t have the same shelf life as lean bread, but we can definitely extend it!
For short-term storage—say, you plan on eating it within three days—keep the loaf completely cooled first. Once it’s totally cool, wrap it tightly. I mean *tightly*. I usually use plastic wrap first, making sure to cover both ends, and then I’ll wrap the whole thing in a layer of aluminum foil or place it in a large zip-top bag. This double-layer approach keeps the air out and prevents that gorgeous crust from going stale too fast. Store it right there on your counter at room temperature, away from direct sunlight!
If you know you won’t get to it before day four, you absolutely should freeze it. Freezing stops time for the bread! Once fully cooled, wrap it up using that same tight plastic-and-foil combo. It freezes perfectly well for up to three months. When you are ready to eat it later, you just transfer it directly from the freezer to the counter, still wrapped, and let it thaw slowly for several hours.
How to Refresh Stale or Thawed Slices
The secret to making bread that’s a day old taste freshly baked is steam and mild heat. Never just toast a slice of day-old brioche; you’ll end up with crumbs! The best method is to slightly dampen a paper towel—it should be moist, not dripping wet—and wrap your slice or portion of the loaf in that damp towel. Then, pop that into the microwave for about 10 to 15 seconds on medium power, or pop the wrapped slice into a toaster oven set to 300 degrees for about five minutes.
That little bit of moisture re-activates the starches and softens the crumb right back up. If you want that perfect crust back after microwaving, you can quickly toast it in a dry pan or toaster oven once it’s soft again. It’s like magic, honestly! If you ever want to see how I prep other doughs for storage, take a look at my tips for easy homemade bread bowls recipe; the principles for keeping bread fresh are pretty similar across the board!
Frequently Asked Questions About brioche bread
Can I skip the overnight proofing step in this brioche bread recipe?
You technically *can*, but I really, really advise against it if you want the full experience of this recipe. Skipping the overnight proof means you have to let the dough rise at room temperature after the butter is mixed in, which usually takes hours and is far less reliable. The cold fermentation is what develops that deep, complex, slightly savory-sweet profile that makes this a truly satisfying loaf of brioche bread. If you rush it, you get a sweet bread, but you miss out on the flavor maturity that the long fermentation brings.
Why is my homemade brioche dough instructions seeming too sticky to handle?
This is the number one question I get! Look, you are working with an enriched dough technique—it’s supposed to be soft! This recipe involves a high ratio of liquid (milk and eggs) to flour, plus tons of butter. When you mix it, especially before the final gluten development, it’s going to feel messy. If it’s so sticky it’s gluing itself to the sides of the bowl after the full 15 minutes of kneading with the butter incorporated, *then* you can add a tablespoon of flour. But usually, just trusting the process and keeping the mixer going is the key to achieving this fluffy sweet bread baking result!
Can I use this dough to make soft dinner rolls making?
Absolutely! This is one of the best parts about mastering the base brioche bread dough. Once the dough is finished with its long cold proof (Step 6), you turn it out and divide it into even portions—I suggest aiming for 1.5 to 2 ounces each for standard rolls. Shape them into tight balls and place them close together in a baking dish. They will proof faster than the loaf, maybe 90 minutes to 2 hours at room temperature, and bake up into the softest dinner rolls making you’ve ever tasted!
How do I make sure I get that perfect golden brown bread crust every time?
The final egg wash is non-negotiable for that classic look! But here’s a tip I learned running tests: temperature matters. If your oven runs hot, the crust can brown too quickly before the inside is fully baked. To ensure you get that deep color without burning, try placing a baking sheet on the rack directly below the brioche loaf during the first 20 minutes of baking. This slightly insulates the bottom and creates very even heat distribution, leading to that perfect golden brown bread crust all over. After 20 minutes, remove that bottom sheet so the bottom can finish setting up.
Is this the best buttery bread recipe for making brioche loaf for french toast?
Yes, it truly is! Because this recipe builds such a high fat content—we use a whole cup of butter—the bread structure is incredibly stable. When you use slightly stale slices of this brioche loaf for french toast, it soaks up the custard mixture without falling apart. I find it browns better in the pan than leaner breads, giving you that crispy edge while the middle stays creamy. We’ve got an amazing recipe for turning those leftovers into a full casserole if you’re interested; check out my easy sugar cookie bars recipe for another sweet treat idea while you’re over there!
Estimated Nutritional Information
I’m Leo, and while I tackle recipes like a project manager to ensure they are delicious, I’m not a registered dietitian. So, take these numbers as a solid estimate based on standard ingredient calculations—they are helpful to know, but they aren’t a guarantee!
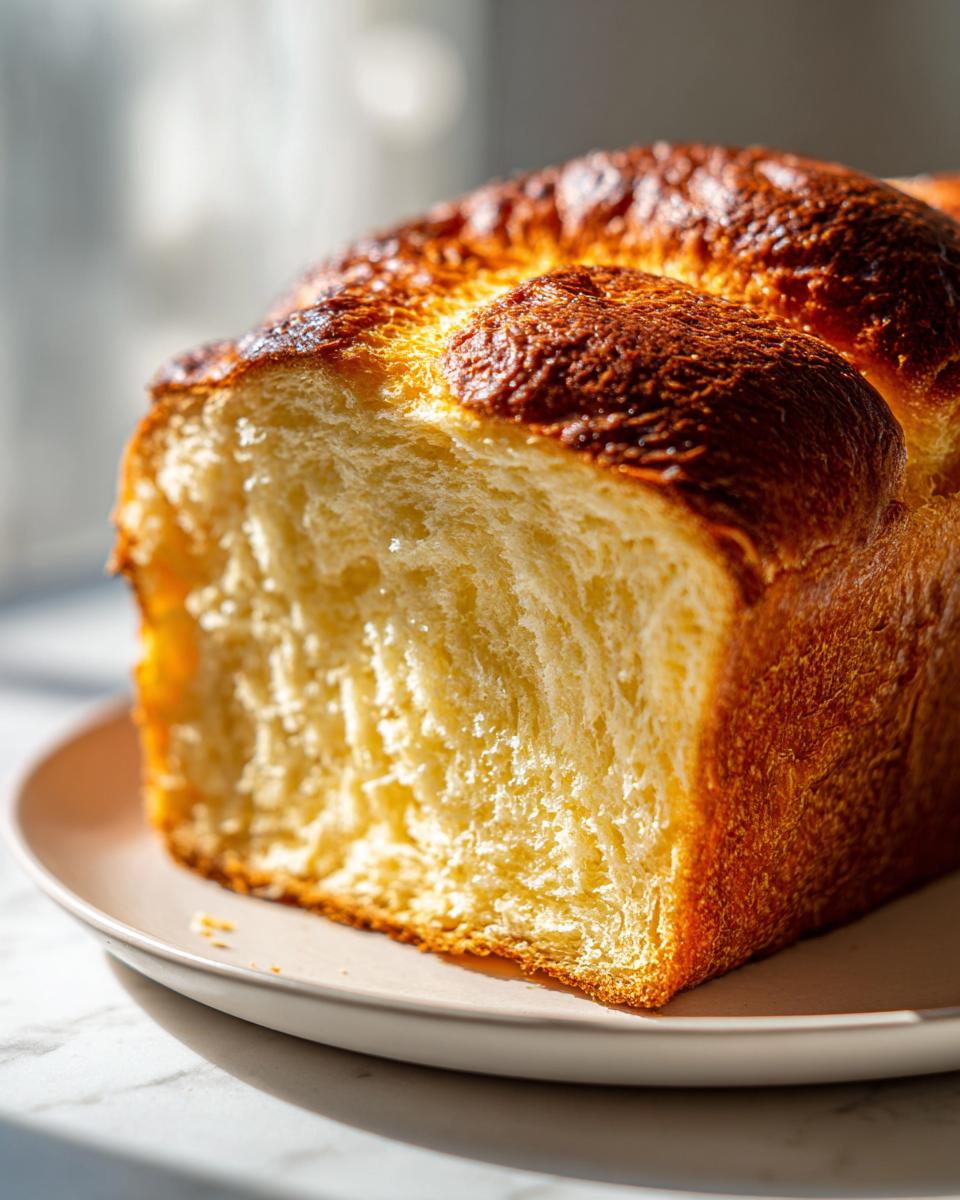
This classic, rich batch of brioche bread yields about 12 generous slices when baked in a standard loaf pan. The high butter and egg content means that, unsurprisingly, it’s richer than standard white bread, but the flavor payoff is massive!
- Serving Size: 1 slice
- Calories: 310
- Fat: 15g (Includes about 9g Saturated Fat)
- Carbohydrates: 38g
- Sugar: 12g
- Protein: 7g
- Cholesterol: 75mg
- Sodium: 250mg
See? That little bit of sugar and fat really bumps up the flavor profile, which is why we use this dough when we want something truly special. Keep these numbers in the back of your mind, but focus on how good this bread tastes fresh out of the oven!
Share Your brioche bread Baking Success
Wow! I am so proud of you if you made it all the way through this process. Making perfect brioche bread takes dedication, but seeing that finished, golden loaf makes all that patient stirring and resting completely worth it. Now that you’ve mastered this classic technique, I genuinely want to see what you’ve created!
This community is built on sharing wins, troubleshooting tough spots, and celebrating delicious results. If you tried this Overnight Proofed Loaf, please take a moment to leave a rating at the top of the page. Even just a quick star rating helps other home cooks feel confident jumping into this rich french bread recipe.
Did you have a favorite moment? Was it the smell while it baked? Did you make it into those amazing brioche hamburger buns recipe I mentioned? Tell me everything in the comments below! Which ingredient detail made the biggest difference for you?
And please, snap a picture! Tag us on social media when you share your shots of that beautiful, buttery crumb. There’s nothing better than seeing someone use these streamlined methods to achieve something that usually feels reserved for fancy bakeries.
If you ran into a snag or have a question that still hasn’t been answered, you can always reach out directly through my contact page here: Drop me a line. I’m always listening and ready to help you solve that last little kitchen puzzle!
PrintClassic Overnight Proofed Brioche Loaf

Make a rich, buttery brioche loaf using an overnight proofing method for the best texture and flavor. This recipe focuses on technique for a soft, airy crumb.
- Prep Time: 30 min
- Cook Time: 35 min
- Total Time: 13 hours 5 minutes
- Yield: 1 loaf (about 12 slices) 1x
- Category: Baking
- Method: Mixing and Proofing
- Cuisine: French
- Diet: Vegetarian
Ingredients
- 1 cup whole milk, lukewarm
- 2 1/4 teaspoons active dry yeast
- 1/2 cup granulated sugar, divided
- 4 large eggs, room temperature
- 4 cups all-purpose flour, plus more for dusting
- 1 teaspoon salt
- 1 cup (2 sticks) unsalted butter, cold and cut into 1-inch cubes
Instructions
- Combine the lukewarm milk, yeast, and 1 tablespoon of the sugar in a small bowl. Let stand for 5 to 10 minutes until foamy.
- In the bowl of a stand mixer fitted with the dough hook, combine the flour, remaining sugar, and salt. Mix briefly on low speed.
- Add the yeast mixture and the eggs to the dry ingredients. Mix on low speed until a shaggy dough forms, about 2 minutes.
- Increase the mixer speed to medium-low and knead for 5 minutes. The dough will be sticky.
- Add the cold butter cubes one piece at a time, waiting about 30 seconds between each addition. After all butter is added, continue kneading on medium-low speed for 10 to 15 minutes until the dough is smooth, elastic, and pulls away from the sides of the bowl. This enriched dough technique takes time.
- Place the dough in a lightly oiled bowl, cover tightly with plastic wrap, and refrigerate for at least 12 hours, or up to 24 hours, for the long fermentation.
- The next day, gently punch down the cold dough. Shape it into a loaf and place it in a greased 9×5 inch loaf pan.
- Cover the pan loosely and let the dough proof at room temperature for 2 to 3 hours, or until it has nearly doubled in size.
- Preheat your oven to 375 degrees Fahrenheit. Brush the top of the loaf lightly with an egg wash (1 egg beaten with 1 teaspoon water) for a perfect golden brown bread crust.
- Bake for 30 to 35 minutes, or until the top is deep golden brown and an instant-read thermometer registers 200 degrees Fahrenheit in the center.
- Cool the brioche loaf in the pan for 10 minutes before turning it out onto a wire rack to cool completely.
Notes
- For soft dinner rolls making, divide the dough into 12 equal pieces after the first rise and shape into balls before the final proof.
- If your dough feels too sticky during mixing, add flour one tablespoon at a time, but avoid adding too much, as high hydration enriched dough is expected.
- This loaf is excellent sliced thick for brioche bread for french toast.
Nutrition
- Serving Size: 1 slice
- Calories: 310
- Sugar: 12
- Sodium: 250
- Fat: 15
- Saturated Fat: 9
- Unsaturated Fat: 6
- Trans Fat: 0
- Carbohydrates: 38
- Fiber: 1
- Protein: 7
- Cholesterol: 75