
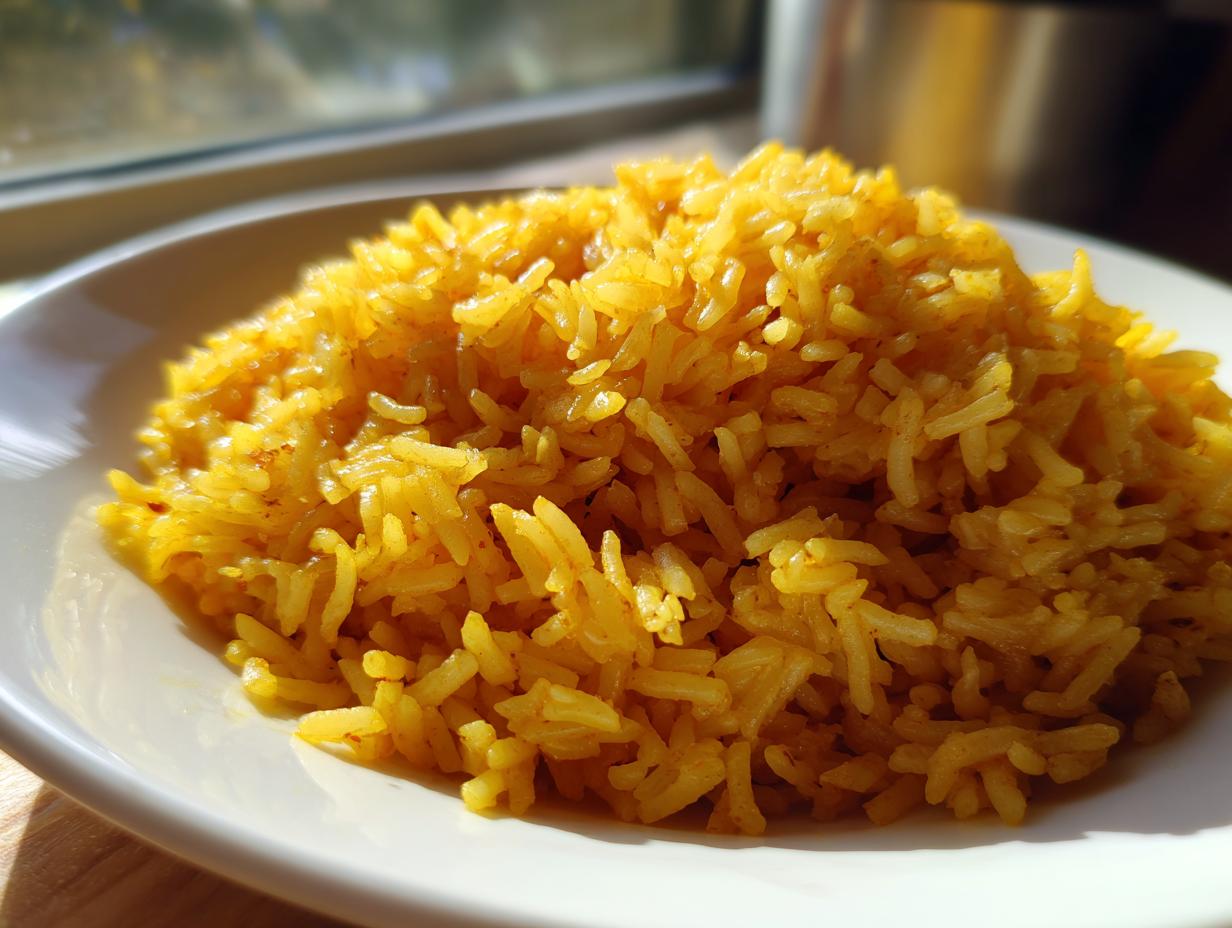
Are you tired of boring, white heaps of rice on the side of your plate? Me too! Getting that deep, vibrant, golden color without sacrificing texture can feel like a huge production, but trust me, it doesn’t have to be. Here at Dishicious, we focus on efficient, reliable cooking, which is Leo Grant’s project management approach coming out in the kitchen! That’s why I am so excited to share this recipe for Quick & Flavorful Garlic Turmeric Rice. It delivers that incredible color and earthy spice complexity you want from aromatic turmeric rice, all on the stovetop in about 30 minutes flat. Dinner just got easier—and way prettier!
- Why This Garlic Turmeric Rice is Your New Favorite Easy Rice Side Dish
- Gathering Ingredients for Your Buttery Turmeric Rice
- Step-by-Step Instructions for Simple Stovetop Rice
- Tips for Perfect Golden Turmeric Rice
- Variations: Beyond Basic Turmeric Rice
- Serving Suggestions for Rice Recipes for Curry Night
- Storage and Reheating Instructions for Leftover Turmeric Rice
- Frequently Asked Questions About Making Yellow Rice
- Nutritional Snapshot of This Quick 30 Minute Rice
- Share Your Vibrant Side Dishes
Why This Garlic Turmeric Rice is Your New Favorite Easy Rice Side Dish
Honestly, you’ll want to make this recipe every single week once you see how fast it comes together and how much flavor you get for the effort. It’s reliability in a pot, which is exactly what our Dishicious philosophy is all about!
- It’s genuinely fast—we’re talking 30 minutes total time.
- Plus, it looks amazing! That vibrant yellow color really pops next to anything you put it next to.
- It pairs perfectly with so many meals, making it a go-to anti-inflammatory side.
Quick 30 Minute Rice Preparation
Seriously, don’t let the color fool you into thinking this takes forever. From start to finish, this turmeric rice is ready in just 30 minutes. That means you can have a gorgeous, aromatic side dish on the plate almost as fast as ordering takeout.
Flavorful Yellow Rice Recipe with Aromatic Spices
This isn’t just colored rice; it’s bursting with flavor! We use buttery goodness, earthy turmeric, and plenty of fragrant garlic. That combination is what makes this truly a Flavorful Yellow Rice Recipe that wakes up your dinner table. It has that wonderful warmth you look for in Indian-inspired dishes without all the fuss.
Perfect Gluten Free Rice Sides
If you’re worried about dietary restrictions, don’t be! This recipe is naturally gluten free, rice and spices being the main players here. It’s an incredibly easy and colorful option for anyone needing safe, reliable Gluten Free Rice Sides.
Gathering Ingredients for Your Buttery Turmeric Rice
Okay, let’s talk about what you need for this stunning dish. One of the best parts about this recipe is that you won’t need to run to some specialty spice shop! Everything here is standard pantry fare, meaning you can whip this up on a Tuesday night without planning for weeks. This recipe is built for speed and accessibility, just the way Leo likes it!
This batch is scaled perfectly to feed four people as a substantial side dish, but it doubles beautifully if you’re feeding a bigger crowd.
Ingredient Clarity and Preparation
Before we start the stove, let’s get your components ready to go. This prevents us from panicking when we need to throw things in quickly!
- We start with 1 tablespoon of butter or some good olive oil to get things cooking—butter helps build that rich base for our Buttery Turmeric Rice.
- Chop up one small onion very finely; you want it soft, not chunky.
- Two cloves of garlic need a good, fine mince. Don’t use the jarred stuff if you can help it; fresh garlic makes a huge difference here!
- You’ll need 1 1/2 cups of basmati rice. This is important: you absolutely must rinse that rice thoroughly under cold water until it runs clear. Trust me on this; rinsing removes the extra starch that makes rice gummy.
- For color and earthy goodness, measure out 1 teaspoon of ground turmeric, plus a half teaspoon of salt and a pinch of black pepper.
- Finally, you need 2 1/4 cups of plain water or low-sodium broth. If you use broth, you’ll get an even deeper flavor profile, which is a great trick to know for better side dishes in general.
Step-by-Step Instructions for Simple Stovetop Rice
This is where the project management mindset really pays off! Since we prepped everything, these steps fly by. We are going to sauté our flavor builders first, then toast the rice and spices—that toasting step is crucial for the texture and color of our turmeric rice. Then we cover it and let the magic happen with zero interference!
Sauté Aromatics and Toast the Turmeric Rice
First things first, get a medium saucepan on the stove over medium heat and melt your butter or warm up that oil. Toss in your finely chopped onion and let it cook until it’s nice and soft. That usually takes about 4 minutes; you just want them translucent, not brown.
Quickly add your minced garlic next. You only want to cook this for about 1 minute until you can really smell that lovely aroma. Be careful here—burnt garlic is bitter, and we want aromatic, not angry, rice!
Now, bring in the dry stuff! Stir in your rinsed rice, the ground turmeric, salt, and pepper. This is the toasting part, so keep stirring constantly for a full minute. You need every single grain coated in that beautiful yellow spice. This simple coating step helps ensure you get that vibrant color everywhere, making it a fantastic looking side dish.
Simmering and Resting for Fluffy Results
Once everything is toasted and smells amazing, go ahead and pour in your water or broth. Bring that whole mixture up to a rolling boil—you want to see significant bubbles!
The minute it hits that boil, drop the heat down *immediately* to the absolute lowest setting your stove offers. Cover that saucepan so it’s sealed tight. Now, this is the hardest part for me: you must let it simmer undisturbed for exactly 15 minutes. Do not peek! Lifting the lid releases the steam we need to cook the rice perfectly. This attention to time is what separates okay rice from the perfect rice you see in those photos.
When 15 minutes are up, kill the heat completely. Don’t be tempted to stir! Leave the pot sitting right there on the warm burner, still covered, for another 10 minutes. This resting period allows the steam to finish working its magic and separates the grains beautifully. After that final rest, grab a fork—not a spoon!—and gently fluff the rice before serving. A successful stovetop rice relies on this rest, much like knowing how a great side dish needs to relax before hitting the plate.
Tips for Perfect Golden Turmeric Rice
See? That recipe is the blueprint, but I want to share a couple of little tricks I’ve picked up over the years. These aren’t in the core instructions because they are extra details that guarantee you get that professional-looking, absolutely perfect batch of rice every time. When you follow these tips, you move past just making rice and start making Golden Turmeric Rice that people actually rave about.
Achieving the Best Color and Texture in Your Turmeric Rice
The two biggest pitfalls people run into with any rice recipe are clumpiness or lackluster color. We solved the clumpiness by stressing that rinsing step! Remember I told you to rinse the basmati until the water ran clear? That gets rid of the surface starch. If you skip that, you end up with something closer to sticky rice than the fluffy side dish we are aiming for. It keeps our turmeric rice light and separate.
Now for the color—turmeric is potent, but if you don’t toast it in the fat (the butter or oil) with the rice grains before the water goes in, it can sometimes look streaky or muddy once cooked. By stirring it in for that minute with the dry grains, you essentially bloom the spice gently, ensuring that bright, cheerful yellow color coats every single grain of rice perfectly. That’s how you get that gorgeous visual appeal!
And finally, my favorite little flourish that I put in the notes: a tiny squeeze of fresh lemon juice right before serving after you fluff it. Don’t add it during cooking! Adding it right at the end brightens up the earthy flavor of the turmeric instantly. It’s subtle, but it makes the entire dish taste fresher. Try it—it’s a game-changer for elevating this buttery turmeric rice!
Variations: Beyond Basic Turmeric Rice
Okay, so once you’ve mastered the basic, fluffy, garlic-infused turmeric rice, you’re probably thinking, “What else can I do with this?” Because that’s what I do! If you’ve ever seen those gorgeous creamy rice dishes floating around, this is your chance to pivot your perfect starting recipe into something even more special. It’s so flexible, which is exactly why this is such a reliable recipe to keep in your back pocket. We can easily transform this into other crowd-pleasers.
Making Coconut Turmeric Rice
If you want to take your side dish up about five notches in creaminess and richness, you absolutely need to try making Coconut Turmeric Rice. The technique is almost identical to what we just did! Instead of using 2 1/4 cups of boring old water or broth, swap that out for the same amount of full-fat coconut milk. Don’t use the beverage kind you put in your coffee; go for the canned coconut milk.
When the coconut milk simmers, it melts into the rice grains, coating them in rich sweetness. It gives the whole dish a tropical vibe that pairs amazingly well with spicy main courses. If you want to peek at a great example of how this creamy texture comes out, check out this inspiration on creamy coconut variations over here. It turns the simple turmeric rice into something truly decadent!
Adding Lemon to Your Turmeric Rice
Now, if you’re looking for brightness instead of richness, we bring in the lemon! This is the easy variation I mentioned in the notes, and it completely wakes up the earthiness of the turmeric. You don’t want to add the juice while it’s boiling, though, because the high acidity can mess with the starch structure. Wait until the very end.
Once you’ve fluffed the rice with your fork after that essential 10-minute rest—that’s when you do the magic. Stir in about one teaspoon of fresh lemon juice. If you have a lemon handy, add a pinch of zest too! That combination delivers a fantastic, zesty hit that balances the buttery base perfectly. It makes the whole dish sing! For more ideas on brightening up rice dishes, I have a fantastic lemon rice recipe you might want to bookmark for next time.
Serving Suggestions for Rice Recipes for Curry Night
So, you’ve got your gorgeous, fluffy, golden rice hot off the stove—now what? That’s the final step in the efficient cooking process: pairing it smartly! This aromatic basmati rice just brightens up any plate, which means it’s practically begging for something robust and flavorful to sit next to it. We made this recipe knowing it would be the perfect vessel for absorbing delicious sauces and spices. Think of this as the foundation for a fantastic dinner!
What Pairs Well with Flavorful Yellow Rice Recipe
Honestly, this turmeric rice shines brightest when served alongside saucy dishes. You know those amazing, deeply flavored meals that need something mild and fragrant to soak up every last drop? That’s this rice!
My absolute favorite use is pairing it with a rich curry. If you’re looking for an easy way to make a show-stopping weeknight meal, try my slow-cooker version of Crockpot Butter Chicken. The creamy tomato sauce sinks right down through the turmeric grains, and the flavor combination is just unbeatable. It’s honestly the best way to serve this rice, in my opinion.
But don’t stop at curry! This rice is also an incredible side for anything coming off the grill. Grilled fish, chicken kebabs, or even just simple roasted vegetables benefit from this buttery yellow rice base. Think lighter proteins—the turmeric and garlic are earthy enough to stand up to strong marinades without fighting the main flavor. You could even serve it underneath something like my Smothered Chicken and Rice recipe if you want a one-pot wonder that looks way more complicated than it actually is. It really is the most versatile side dish!
Storage and Reheating Instructions for Leftover Turmeric Rice
We all know that feeling: you made a perfect batch of rice, but you only ate half! That’s the beauty of this recipe—it stores like a dream, and because we rinsed that basmati, you don’t end up with a solid brick the next day. Keeping your leftovers fresh is super important for both taste and safety, and a little bit of planning means you get delicious, vibrant turmeric rice again tomorrow!
Keeping Your Rice Fresh
The moment the rice cools down a bit, you need to get it into an airtight container. Don’t let it sit on the counter cooling off for hours; best practice is to get it into the fridge relatively quickly once it’s at room temperature.
When stored correctly in a properly sealed container, this rice is good to go for about three to four days in the refrigerator. Any longer than that, and the texture starts to go downhill, even with the spices. Honestly, though, I rarely have leftovers past day two because everyone gobbles it up!
Reheating for Best Texture
When you’re ready for your second helping of this amazing turmeric rice, the main goal is to reintroduce moisture without making it mushy. If you try to microwave it straight from the fridge, it will seize up and get dry around the edges.
Here’s my method: transfer the portion you want to eat into a microwave-safe bowl. Add just a tiny splash of water—seriously, maybe a teaspoon or two for a single serving. Cover the bowl, either with a plate or a damp paper towel, and microwave it in short bursts, stirring in between, until it’s steaming hot all the way through. The added moisture turns into steam and softens those grains right back up!
If you’re reheating a larger batch on the stovetop, use your smallest saucepan. Add a tablespoon of broth or water, set the heat to low, cover it immediately, and let it steam gently for about five minutes. That slow, steamy reheat is the secret to avoiding dry edges and keeping that bright, buttery flavor intact.
Frequently Asked Questions About Making Yellow Rice
I always get tons of questions whenever I post this recipe, which is wonderful! It just means people are excited to try making their own vibrant, flavorful rice at home. Since this recipe is built on simple steps, most concerns pop up right before or right after cooking. Here are the most common things folks ask me about getting that perfect stovetop result. If you ever have another question, just drop it in the comments!
Can I use long-grain white rice instead of Basmati for this turmeric rice?
You absolutely can, yes. Basmati is my preference because it naturally cooks up long and fluffy, but any long-grain white rice will work in a pinch. The main thing you have to remember is that different rice types absorb water differently. Basmati is a little particular, which is why we use the specific 1:1.5 water-to-rice ratio. If you use a standard long-grain white rice, you might need to add an extra quarter cup of water, and you definitely want to check it right at the 15-minute mark instead of waiting for the full rest, just to be safe.
What is the best way to make this a ‘Healthy Spiced Rice’?
That’s an easy fix, and it touches right into the healthy appeal of turmeric! If you’re trying to lean into the healthier side of this spiced rice, swap out the tablespoon of butter for olive oil—that keeps the fat profile a bit better. Then, instead of using plain water for the liquid, use a low-sodium broth. Extra seasoning without extra salt, right? The turmeric does most of the heavy lifting in terms of health benefits. If you are interested in other easy, healthy options like those cheesy crackers, check out my recipe for Rice Krispie Cheddar Crackers!
How do I prevent the garlic from burning during the ‘Garlic Butter Rice Sides’ step?
I have a major pet peeve about burnt garlic—it ruins the whole batch! Remember, the goal in those first few minutes is to soften the onions first. The onions take about four minutes because they have more water to release. Once those onions are soft, you add the garlic, and you only cook it for about 60 seconds until you can really smell it coming through.
If you add the garlic at the same time as the onion, it burns while the onion is still getting soft. Timing is everything, especially when you’re whipping up Garlic Butter Rice Sides quickly. Once the garlic is fragrant, immediately toss in the dry rice and spices to coat it. That stops the cooking process right away!
Nutritional Snapshot of This Quick 30 Minute Rice
I know a lot of people look for that golden color because they are adding turmeric for its amazing health benefits. While I focus mostly on making sure the flavor and ease of preparation are spot-on here at Dishicious—Leo’s main goal is simplicity, remember?—it’s always nice to have a general idea of what you’re eating. This Quick 30 Minute Rice isn’t heavy, but it does provide a solid serving base for your meal.
Based on the standard measurements in the recipe, here is a rough idea of what’s in one serving (that’s about 3/4 cup of cooked rice):
- Calories: around 240
- Fat: about 5 grams
- Carbohydrates: roughly 45 grams (that’s where the energy is!)
- Protein: 4 grams
- Sugar: super low, only about half a gram!
Disclaimer on Nutritional Estimates
Now, you know I have to say this—I’m not a nutritionist, I’m just a cook who loves efficient recipes! These numbers are just good estimates based on the ingredients listed, like the butter, the basmati, and the spices. If you use olive oil instead of butter, or use a different type of broth, those numbers will shift a little bit.
If you are tracking things super closely, you should always double-check packaged goods, like low-sodium broth, against their labels. But for a general weeknight side dish, this gives you a great idea of what you are sitting down to enjoy! It’s a wholesome, simple carbohydrate base that lets your main course shine.
Share Your Vibrant Side Dishes
Alright, my friend, we did it! We took simple pantry staples and engineered a beautiful, bright, and unbelievably easy side dish. This turmeric rice is the definition of what we aim for here at Dishicious: maximum flavor payoff for minimal kitchen hassle. I truly hope this becomes a staple for your busy weeknights.
Now, I need your help to keep building this community of smart, efficient cooks! Did you make it? Did you serve it alongside those amazing cranberry meatballs I keep bragging about, or did you pair it with a big bowl of curry?
Please come back and leave a rating for this Flavorful Yellow Rice Recipe below—it helps other busy cooks know they can trust the method. Even better, snap a picture and tag me on social media! I absolutely love seeing how you all bring these streamlined recipes to life on your dinner tables. Happy cooking, and here’s to making every single meal count!
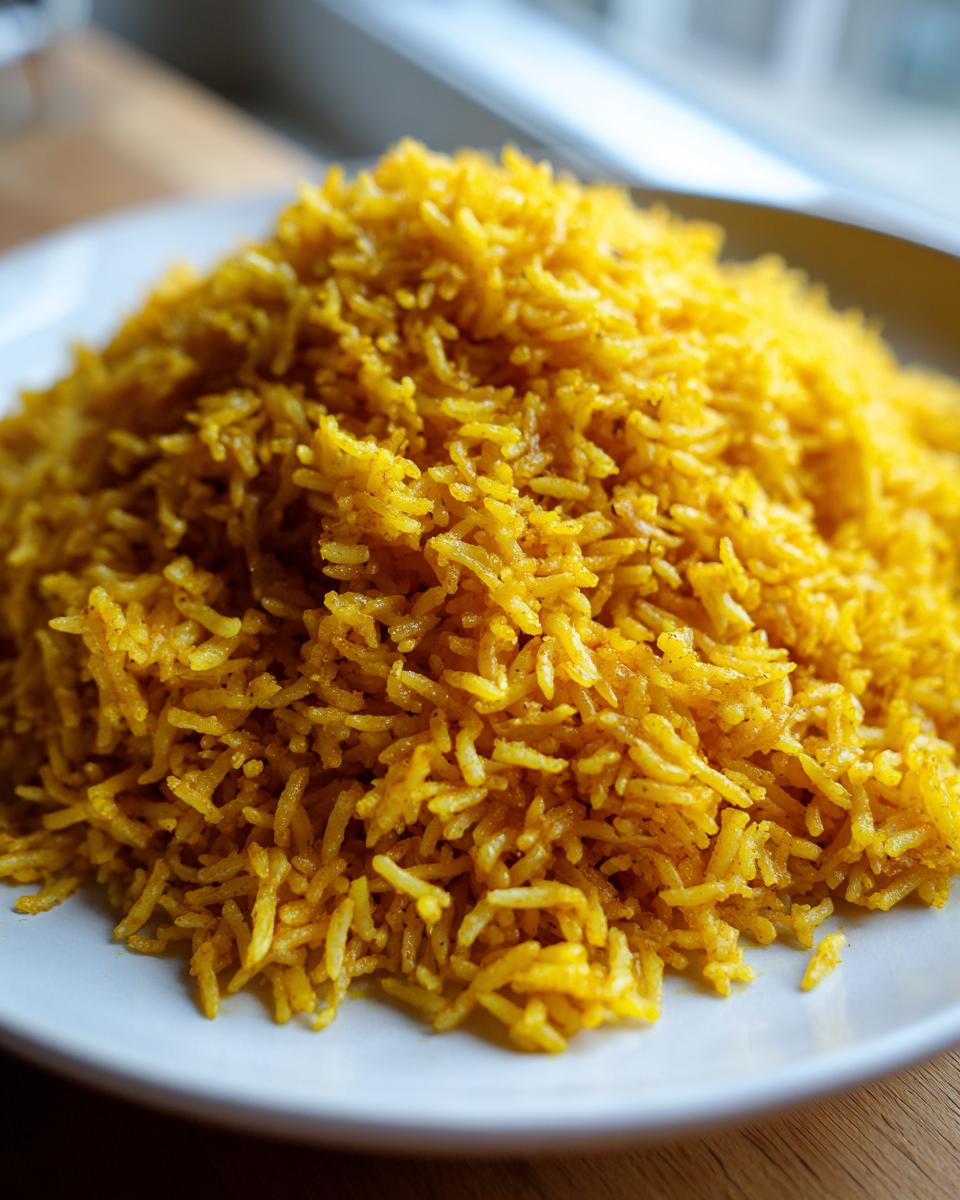
PrintQuick & Flavorful Garlic Turmeric Rice
Make this simple, aromatic turmeric rice side dish featuring garlic and butter. It cooks fast on the stovetop and delivers a vibrant yellow color perfect for pairing with curries or grilled food.
- Prep Time: 5 min
- Cook Time: 25 min
- Total Time: 30 min
- Yield: 4 servings 1x
- Category: Side Dish
- Method: Stovetop
- Cuisine: American
- Diet: Gluten Free
Ingredients
- 1 tbsp butter or olive oil
- 1 small onion, finely chopped
- 2 cloves garlic, minced
- 1 1/2 cups basmati rice, rinsed
- 1 tsp ground turmeric
- 1/2 tsp salt
- 1/4 tsp black pepper
- 2 1/4 cups water or low-sodium broth
Instructions
- Melt the butter or heat the oil in a medium saucepan over medium heat.
- Add the chopped onion and cook until soft, about 4 minutes.
- Add the minced garlic and cook for 1 minute until fragrant. Do not let the garlic burn.
- Stir in the rinsed rice, turmeric, salt, and pepper. Cook for 1 minute, stirring constantly to coat the grains.
- Pour in the water or broth. Bring the mixture to a boil.
- Once boiling, reduce the heat to the lowest setting, cover the saucepan tightly, and simmer for 15 minutes without lifting the lid.
- Remove the saucepan from the heat and let it stand, covered, for an additional 10 minutes.
- Fluff the rice gently with a fork before serving.
Notes
- For a brighter flavor, stir in 1 teaspoon of fresh lemon juice after fluffing the rice.
- Rinsing the basmati rice removes excess starch, helping the final dish stay fluffy.
- This recipe is naturally gluten free.
Nutrition
- Serving Size: 3/4 cup cooked
- Calories: 240
- Sugar: 0.5
- Sodium: 280
- Fat: 5
- Saturated Fat: 2
- Unsaturated Fat: 3
- Trans Fat: 0
- Carbohydrates: 45
- Fiber: 1
- Protein: 4
- Cholesterol: 5