
Are you tired of that endless search for the perfect, truly moist chocolate cake that doesn’t dry out before you can enjoy the second slice? I get it. Most recipes promise decadence but deliver disappointment. That’s why I’m bringing you the recipe that changed everything in my busy kitchen. This isn’t just another recipe; it’s a streamlined, foolproof masterpiece. Following the approach Leo Grant uses—treating cooking like project management—we’ve optimized every step to ensure you get that deep, rich cocoa flavor and velvety texture, every single time. If you love deep **chocolate cake**, you have to try this ultimate dessert. For those who crave something even darker, check out my tips for a real death by chocolate cake later on!
- Why This Ultimate Moist Chocolate Cake Recipe Works Every Time
- Gathering Your Ingredients for the Perfect Chocolate Cake
- Step-by-Step Instructions for Your Homemade Chocolate Cake
- Tips for the Best Chocolate Cake Baking Experience
- Variations on Your Classic Chocolate Cake
- Storage and Reheating Instructions for Your Chocolate Cake
- Frequently Asked Questions About This Chocolate Cake Recipe
- Estimated Nutritional Data for This Chocolate Cake Slice
- Share Your Ultimate Chocolate Dessert Creation
Why This Ultimate Moist Chocolate Cake Recipe Works Every Time
So many recipes out there promise you a moist chocolate cake recipe, but then they end up crumbly by lunchtime, right? Not this one. We engineered this method specifically to eliminate dryness, making it brilliantly foolproof. Seriously, this is the recipe I turn to when failure isn’t an option. If you love complex, rich flavors, this base is even better than my chocolate caramel toffee crunch cake for sheer decadence!
The magic? It all comes down to our liquids. We use buttermilk because its acidity reacts beautifully with the baking soda, giving us lift and tenderness. But the real game-changer is the cup of hot, strong brewed coffee stirred in at the end. Don’t worry, your chocolate cake won’t taste like a latte! The heat blooms the cocoa powder, waking up that intense chocolate flavor, and it dissolves everything perfectly. This combination guarantees a fudgy, velvety texture that stays moist for days. I remember making this for my cousin’s last-minute birthday when my usual go-to failed me. It was rich, deeply satisfying, and honestly, it saved the party!
Key Ingredients for a Rich Chocolate Cake
When you’re aiming for that decadent feeling, ingredient quality really counts. I insist on using a high-quality, unsweetened cocoa powder here; cheap cocoa powder just tastes dusty, and we want deep, dark flavor! Also, remember those liquids we talked about—the buttermilk and the hot coffee are non-negotiable for creating the perfect structure. If you can’t find buttermilk, I’ll show you my easy hack in the next section, but trust me, these core components make this the foolproof chocolate cake you’ll keep forever. It’s all about building flavor layers from the start!
Gathering Your Ingredients for the Perfect Chocolate Cake
Okay, now that you know *why* this rich chocolate cake hits differently, let’s get organized. Organization is key—that’s my project manager side coming out! You don’t want to be reaching for the coffee when you should be mixing the dry ingredients. We need to separate these lists, so we don’t accidentally add the frosting cocoa powder into the cake batter, which would be a total disaster!
For the Decadent Chocolate Cake Layers
These are the building blocks for your ultimate dessert. Measure everything precisely, take your time, and remember—we need that coffee piping hot!
- 2 cups all-purpose flour
- 2 cups granulated sugar
- 3/4 cup unsweetened cocoa powder (the good stuff!)
- 2 teaspoons baking soda
- 1 teaspoon baking powder
- 1 teaspoon salt
- 1 cup buttermilk
- 1/2 cup vegetable oil
- 2 large eggs
- 1 teaspoon vanilla extract
- 1 cup hot strong brewed coffee (seriously, make it strong!)
Now, quick note on the buttermilk—if your fridge is empty of it, don’t panic! Just take 1 tablespoon of white vinegar or lemon juice, put it in a measuring cup, and then fill it up to the 1-cup line with regular milk. Let it sit for about five minutes until it looks slightly curdled. That’s your homemade buttermilk, and it works like a charm for this chocolate layer cake!
For the Rich Chocolate Frosting
This frosting comes out so creamy and velvety; it’s practically sinful. The absolute most important thing here is that your butter MUST be properly softened. If it’s cold, your frosting will be lumpy, and nobody wants chunky chocolate frosting, trust me.
- 1 cup unsalted butter, softened (room temp is best, slightly squishy, but not melted!)
- 3 1/2 cups powdered sugar
- 1/2 cup unsweetened cocoa powder
- 1/2 cup milk or heavy cream
- 1 teaspoon vanilla extract
We measure the powdered sugar and cocoa powder carefully for this, but don’t worry about sifting unless you have a really lumpy bag of confectioner’s sugar. A good, strong mixer handles everything!
Step-by-Step Instructions for Your Homemade Chocolate Cake
Alright, let’s get this baking project moving! Following clear steps is how we make sure this easy homemade chocolate cake comes out perfectly dense and moist, just like we planned. Don’t rush the steps; precision here means flavor later. Once you see how simple the process is, you’ll realize that baking truly great cake isn’t complicated—it just needs the right sequence. If you’re looking for another great sequential recipe, check out my guide on making the Muffuletta Sandwich!
Mixing the Ultimate Chocolate Dessert Batter
First things first, let’s get that oven preheated to 350°F (175°C), and make sure your two 9-inch round pans are greased and floured up perfectly. In your largest bowl, whisk together all your dry stuff: the flour, sugar, the first batch of cocoa powder, baking soda, baking powder, and salt. Get rid of any lumps now! Next, add your buttermilk, oil, eggs, and vanilla extract right into that dry mix. Use your electric mixer on medium speed and beat this for a solid two minutes. It should look thick. Now, for the crucial part: carefully stir in that hot, strong brewed coffee. Be careful stirring, as it will splatter a little. When you’re done, I need you to see that the batter is super thin—don’t panic! That thin texture is exactly what you want for moistness.
Baking and Cooling the Chocolate Cake Layers
Divide that thin batter evenly between your two ready pans. Pop them into the preheated oven and bake them for around 30 to 35 minutes. You need to test them near the end—a wooden pick inserted right into the center should come out clean, which means we’ve achieved that perfect cook. Here is a timing trick I learned: let the cakes cool in those pans for exactly 10 minutes. Don’t go over! After 10 minutes, you need to invert them gently onto wire racks to cool completely. If you leave them in too long, they can stick, and nobody wants a broken layer before frosting time.
Creating the Velvety Chocolate Cake with Frosting
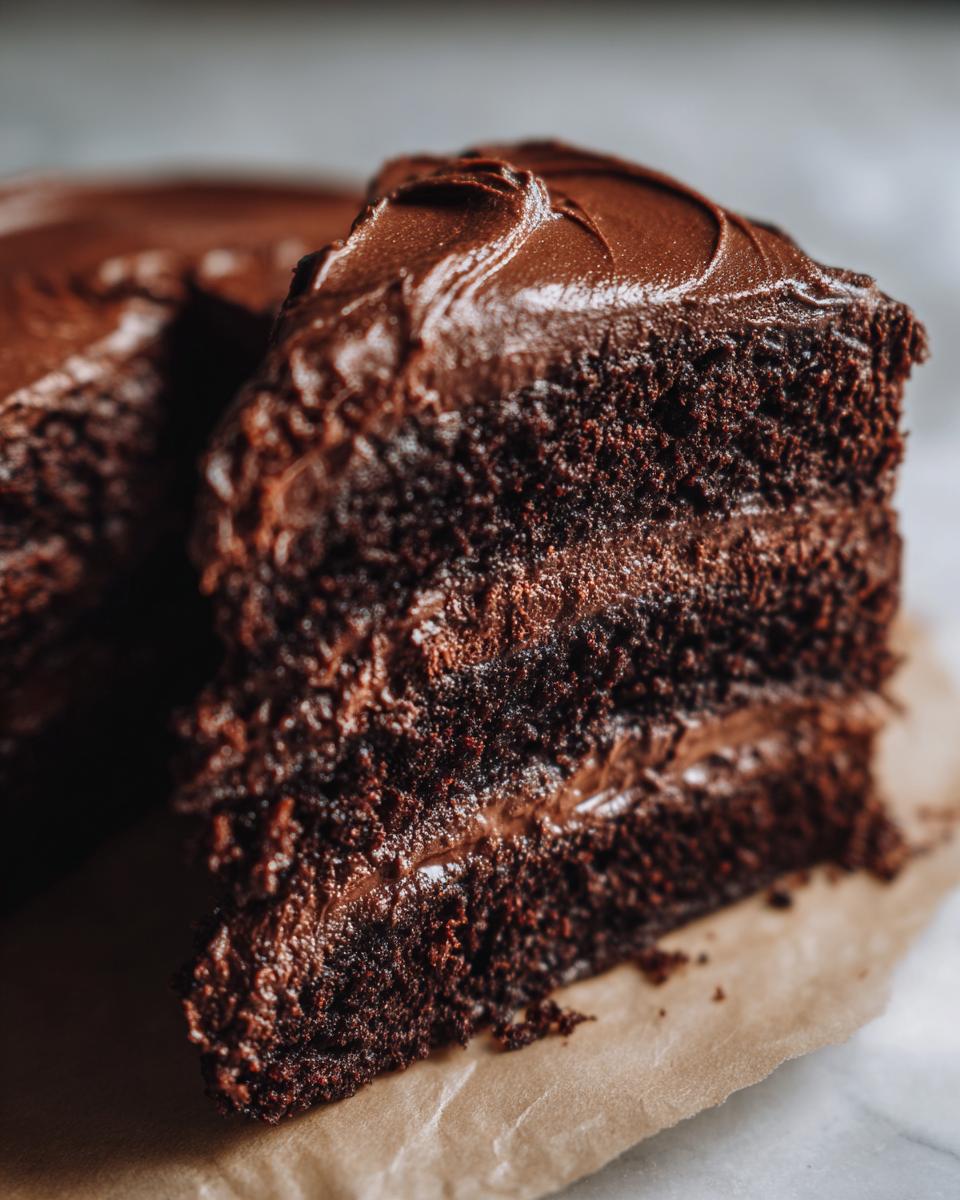
While the layers cool—and I mean *completely* cool, or the frosting will just melt into a puddle—it’s time for the rich chocolate frosting. Forget adding everything at once! Start by beating that softened butter until it’s nice and creamy; this creates the base texture. Now, slowly alternate adding the powdered sugar, the frosting cocoa powder, and the milk or cream. Keep beating until it’s smooth, then stir in that final teaspoon of vanilla. Once the cake layers are totally cool to the touch, you can stack them, frost them, and slather that irresistible topping all over the top and sides. Look at that gorgeous, velvety result!
Tips for the Best Chocolate Cake Baking Experience
Okay, listen up, because this section holds the real gold for nailing the chocolate cake tips you need to impress everyone. We already covered the hot coffee, but let’s talk about maximizing that deep flavor. If you want to kick the richness up a notch—more so than you’d find in some online guides like this one—substitute a teaspoon of instant espresso powder right in with your coffee. It deepens that cocoa note without adding more bitterness. You simply must try it.
Also, I have a hard rule about the cocoa powder, even for the frosting: SIFT IT. Cocoa powder clumps up worse than anything else in the pantry, and those dry pockets ruin a smooth texture fast. Sifting the dry ingredients (especially the cocoa and powdered sugar) is a non-negotiable step for me.
Finally, after you add that hot coffee to the batter—and you saw how thin it got, right?—stop mixing immediately! Seriously. Over-mixing the batter once the final liquid is added develops gluten, and gluten is the enemy of a tender, velvety cake. Mix just until smooth. This systematic approach, focusing on preparation and careful staging, is how we guarantee this delicious outcome every time. For making creamy sides, don’t forget my technique for creamy fluffy buttery sides!
Variations on Your Classic Chocolate Cake
The best part about having a solid, reliable base recipe like this is how easy it is to pivot! Since this is already such a structurally sound chocolate cake, you can play around without the fear of total collapse. It’s like having the perfect toolbox for any small baking project you decide to tackle. If you’re looking for something unique, maybe try this alongside my recipe for pumpkin cobbler!
If you’re craving something ultra-dense and chewy—closer to a brownie texture—you can easily tweak this into a fudgy chocolate cake. To do this, I usually pull back on about half a cup of that hot coffee and add in one extra egg yolk instead. The extra fat from the yolk helps bind everything and yields that deeply satisfying weight without losing too much moisture.
What if you’re baking for a huge crowd or a potluck? Scrap the round layers and turn this into a quick sheet cake! Just pour the entire batter you have—yes, all of it—into a greased and floured 9×13 inch pan. Since the depth is shallower, the baking time will drop slightly, maybe around 28 to 30 minutes total. You’ll need to adjust the frosting amount, of course, but this format is fantastic for easy serving and travel.
And of course, this is your blueprint for the ultimate birthday chocolate cake. When you stack those two moist layers high with that rich frosting, maybe add some colorful sprinkles around the base, and you have a showstopper. It delivers that deep chocolate satisfaction that kids and adults go absolutely crazy for!
Storage and Reheating Instructions for Your Chocolate Cake
You’ve made the ultimate **chocolate cake**, and now the real test begins: keeping it perfect until you eat the last glorious slice! This recipe is designed to be moist, but how you store it really changes things, especially once that rich frosting is on there.
If you used my recommended frosting recipe and you plan on eating the cake within two days, room temperature storage is actually my preference. Covering it loosely with a cake dome or even loosely tented foil keeps the cake layers soft and the frosting looking glossy. The butter in the frosting firms up nicely at room temp, but the cake stays perfectly tender. Don’t put it in the fridge unless your kitchen is sweltering hot!
Putting a frosted cake in the **refrigerator** overnight can sometimes suck a little moisture out, making the cake just a touch firmer than ideal. If you absolutely have to refrigerate it—maybe you made it for a party on Friday and need it Saturday afternoon—just make sure you pull it out at least two hours before serving. Let it come back to room temperature so the butter in the cake and frosting can soften up again. That’s key to restoring that velvety texture we worked so hard to achieve.
Now, what about reheating a slice? This is my secret weapon for making leftover cake taste freshly baked: microwaving it! Grab a single slice, put it on a plate, and zap it for about 10 to 15 seconds—just long enough to warm through the chocolate chips (if you added any) and soften the crumb. It melts the frosting slightly, making that slice taste ridiculously fudgy and fresh out of the oven again. Trust me, that little blast of heat makes all the difference for those hard-to-resist second servings!
Frequently Asked Questions About This Chocolate Cake Recipe
I knew you’d have questions! When you find a truly reliable recipe like this chocolate cake, you start wondering about all those little tweaks you might want to try, or what to do if you run out of an ingredient mid-bake. I’ve gathered the most common things folks ask me about this recipe. If you need more help, you can browse my tried-and-true advice for things like apricot glazed baked chicken!
Can I use regular milk instead of buttermilk in this chocolate cake?
Oh, absolutely! I totally get it; buttermilk isn’t always in everyone’s fridge. If you only have regular milk, remember the quick fix I mentioned earlier? It works perfectly! Just take 1 cup of regular milk, stir in 1 tablespoon of white vinegar or lemon juice, and let it sit on the counter for about five minutes until it curdles up just a bit. That acts just like buttermilk in terms of acidity, reacting with the baking soda to make sure your cake rises beautifully and stays tender. It’s a totally valid shortcut for this chocolate cake recipe.
What is the best way to make this a ‘Rich Chocolate Cake’ without adding more sugar?
If you want that flavor to be deeper, darker, and super rich chocolate cake status without making it overly sweet, you need to focus purely on boosting that cocoa intensity, not the sugar balance. My top recommendation, which I use when I really want an intense flavor, is adding that instant espresso powder. Instead of using 1 cup of coffee, use 1 cup of hot water and dissolve about 1 or 2 teaspoons of instant espresso powder into it before stirring it into the batter. Espresso doesn’t add coffee flavor, but what it *does* do is amplify the natural chocolate notes beautifully. Alternatively, just use slightly more high-quality cocoa powder—maybe an extra tablespoon—and make sure you sift it well!
Can I make the layers ahead of time for this ‘Chocolate Layer Cake’?
Yes, you can totally get a jump start on prepping this chocolate layer cake! Baking ahead is a lifesaver, especially when you’re planning a big event. Once your layers are completely cool—and I mean cool to the center, not even a hint of warmth—you need to wrap each layer tightly in plastic wrap first. Then, wrap that whole package again in aluminum foil. This double layer protects against freezer burn and stops them from drying out. You can keep them on the counter for a day, but I usually freeze them. They’ll be perfect for up to two months this way. Just let them thaw on the counter, still wrapped, for a few hours before unwrapping and frosting. It keeps the crumb super fresh!
Estimated Nutritional Data for This Chocolate Cake Slice
I know some of you are tracking everything, and some of you just want to know the damage before diving into this ultimate **chocolate cake**! So, as part of keeping things totally transparent—just like Leo likes his projects organized—here are the estimated numbers for one slice of this **decadent chocolate cake**.
Remember, this is just an estimate, and results will vary based on whether you use milk or heavy cream in the frosting, or exactly what brand of oil you grab from the pantry. But it gives you a good baseline reference for your tracking!
- Serving Size: 1 slice
- Calories: 450
- Fat: 25g
- Saturated Fat: 13g
- Carbohydrates: 60g
- Sugar: 55g
- Protein: 5g
- Cholesterol: 60mg
Here’s the fine print, because we need to be thorough: These figures are calculated based on the exact recipe amounts listed above, divided into 12 slices, using standard commercial ingredients. If you go heavy on the frosting, expecting a massive wedge, your numbers are going to climb quickly! But if you stick to these measurements, you end up with a reasonably proportioned slice of incredibly rich **homemade chocolate cake**.
Share Your Ultimate Chocolate Dessert Creation
Well, we did it! We successfully navigated the process for what I firmly believe is the most reliable, deeply flavored, and seriously moist chocolate cake you’ll ever bake from scratch. It’s exactly the kind of straightforward, delicious result I aim for with every recipe here on Dishicious.
Now comes the best part—I need to know how yours turned out! Did you stick strictly to the hot coffee method, or did you try sneaking in some espresso powder for that deeper cocoa punch? Did you keep the frosting simple, or did you decorate your chocolate layer cake like it was going into a magazine spread?
Please, please, please leave a rating below. If this recipe delivered the richness and moisture you were looking for, give it five stars! Every rating helps other busy home cooks find their new favorite go-to dessert. I absolutely love reading your comments and seeing what modifications you made. If you tried it out, let me know below in the comments section!
And if you loved how efficiently this came together, you should definitely check out my recipe for pumpkin blondies next time you are ready for a truly chewy, spiced treat. Happy baking, and enjoy every last crumb of your ultimate chocolate dessert!
PrintThe Ultimate Moist Homemade Chocolate Cake with Rich Chocolate Frosting
Make this rich, moist, and decadent chocolate cake from scratch. This foolproof recipe delivers deep cocoa flavor and velvety layers perfect for any celebration.
- Prep Time: 20 min
- Cook Time: 35 min
- Total Time: 55 min
- Yield: 12 servings 1x
- Category: Dessert
- Method: Baking
- Cuisine: American
- Diet: Vegetarian
Ingredients
- 2 cups all-purpose flour
- 2 cups granulated sugar
- 3/4 cup unsweetened cocoa powder
- 2 teaspoons baking soda
- 1 teaspoon baking powder
- 1 teaspoon salt
- 1 cup buttermilk
- 1/2 cup vegetable oil
- 2 large eggs
- 1 teaspoon vanilla extract
- 1 cup hot strong brewed coffee
- 1 cup unsalted butter, softened (for frosting)
- 3 1/2 cups powdered sugar (for frosting)
- 1/2 cup unsweetened cocoa powder (for frosting)
- 1/2 cup milk or heavy cream (for frosting)
- 1 teaspoon vanilla extract (for frosting)
Instructions
- Preheat your oven to 350°F (175°C). Grease and flour two 9-inch round cake pans.
- In a large bowl, whisk together the flour, sugar, 3/4 cup cocoa powder, baking soda, baking powder, and salt.
- Add the buttermilk, oil, eggs, and 1 teaspoon vanilla extract to the dry ingredients. Beat with an electric mixer on medium speed for two minutes.
- Carefully stir in the hot coffee until the batter is smooth. The batter will be thin.
- Pour the batter evenly into the prepared cake pans.
- Bake for 30 to 35 minutes, or until a wooden pick inserted into the center comes out clean.
- Let the cakes cool in the pans for 10 minutes before inverting them onto a wire rack to cool completely.
- Prepare the frosting: In a large bowl, beat the softened butter until creamy.
- Gradually add the powdered sugar and 1/2 cup cocoa powder, alternating with the milk/cream, beating until smooth.
- Stir in the remaining 1 teaspoon vanilla extract. Beat until the frosting is light and fluffy.
- Once the cakes are completely cool, frost the layers and stack them. Spread frosting over the top and sides of the cake.
Notes
- For an even richer flavor, substitute instant espresso powder for some of the coffee granules.
- If you do not have buttermilk, mix 1 tablespoon of white vinegar or lemon juice into 1 cup of regular milk and let it sit for 5 minutes before using.
- This recipe works well for cupcakes; bake for 18-20 minutes.
Nutrition
- Serving Size: 1 slice
- Calories: 450
- Sugar: 55g
- Sodium: 300mg
- Fat: 25g
- Saturated Fat: 13g
- Unsaturated Fat: 12g
- Trans Fat: 0.5g
- Carbohydrates: 60g
- Fiber: 3g
- Protein: 5g
- Cholesterol: 60mg