
We all have those recipes that instantly transport us back to simpler times—that sweet, slightly hazy memory of a familiar cafeteria treat. For me, making food that simplifies life while maximizing flavor is the whole point of Dishicious. That’s why I spent time optimizing the classic lunch lady peanut butter bars. Forget juggling multiple pans or waiting around for ovens to preheat; this is our blueprint for achieving that perfect, nostalgic, three-layer texture with zero baking required. As a former project manager, I’ve streamlined this process so you get maximum payoff—that wonderfully chewy, creamy, chocolate-topped square—with the least amount of kitchen time. Trust me, these decadent peanut butter squares are engineered for success.
- Why You Will Love These Nostalgic Peanut Butter Bars
- Gathering Ingredients for Classic lunch lady peanut butter bars
- Step-by-Step Instructions for lunch lady peanut butter bars
- Tips for the Best lunch lady peanut butter bars Texture
- Variations on School Cafeteria Treats
- Storage and Making Ahead for your lunch lady peanut butter bars
- Frequently Asked Questions About lunch lady peanut butter bars
- Estimated Nutritional Data for lunch lady peanut butter bars
- Share Your Childhood Favorite Desserts Experience
Why You Will Love These Nostalgic Peanut Butter Bars
If your goal is reliable, satisfying dessert without turning the oven on, you’ve found your match. These Nostalgic Peanut Butter Bars are designed to fit right into a busy schedule. We focus strictly on efficiency here at Dishicious. If you need another guaranteed win, check out my ideas for homemade copycat breadsticks, but first, let’s focus on the bars.
-
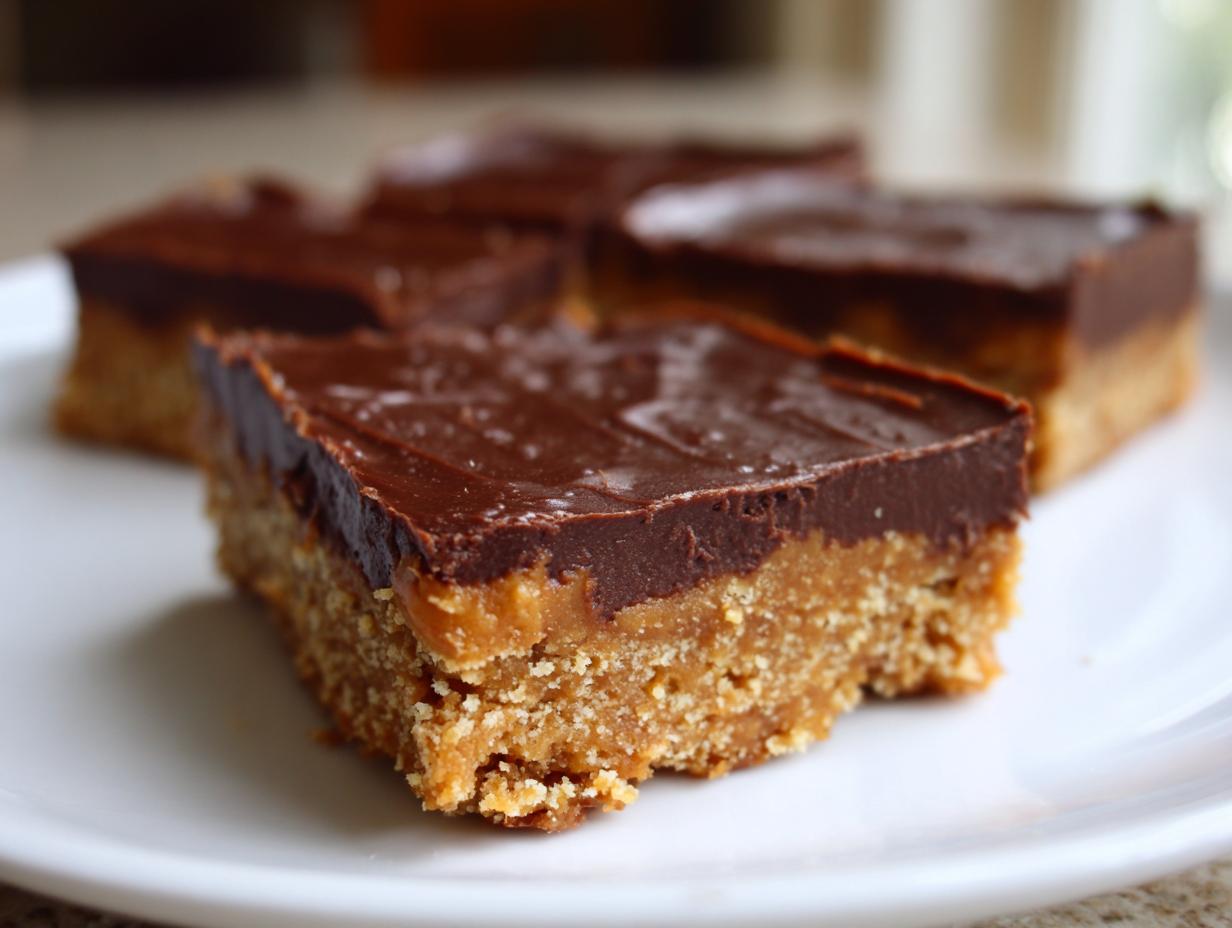
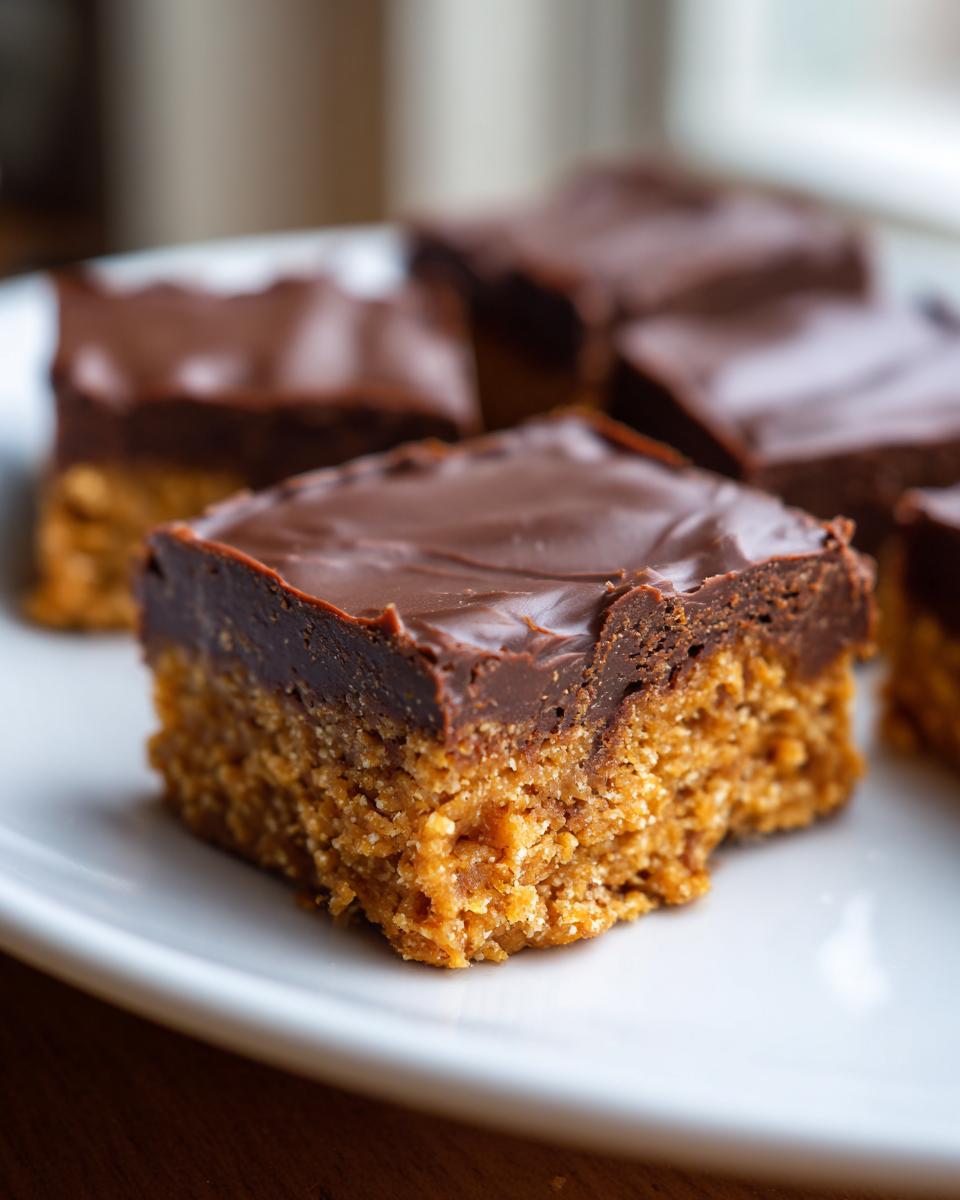
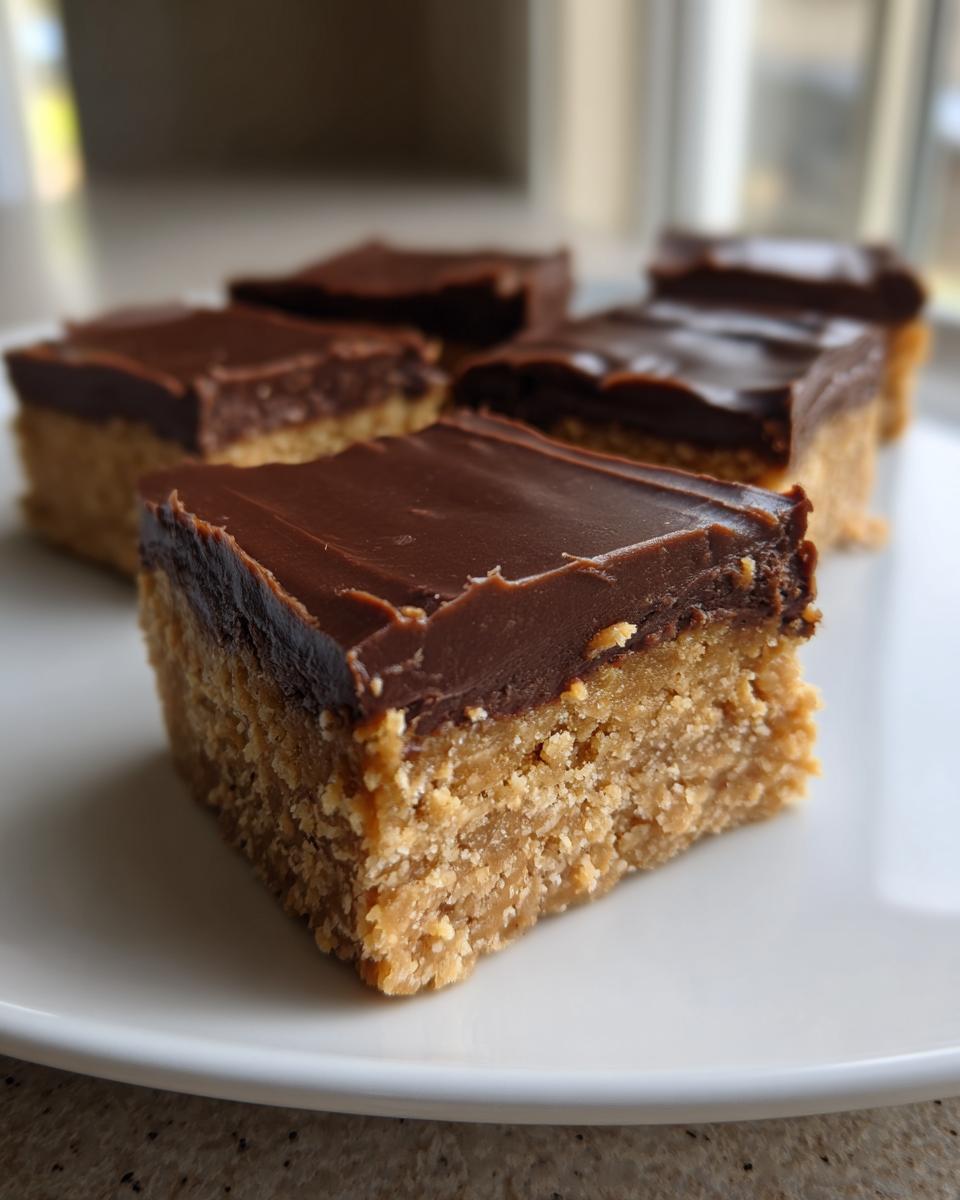
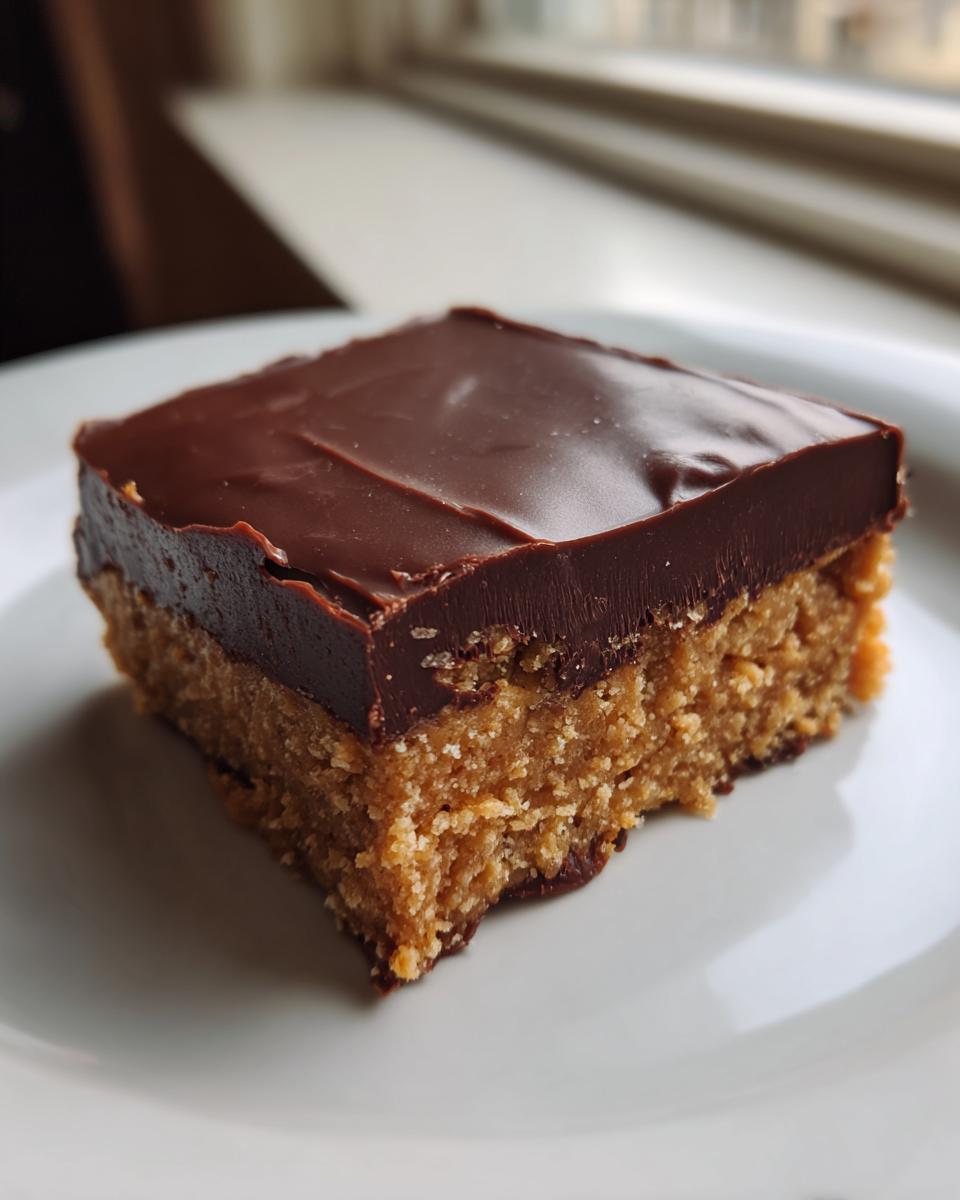
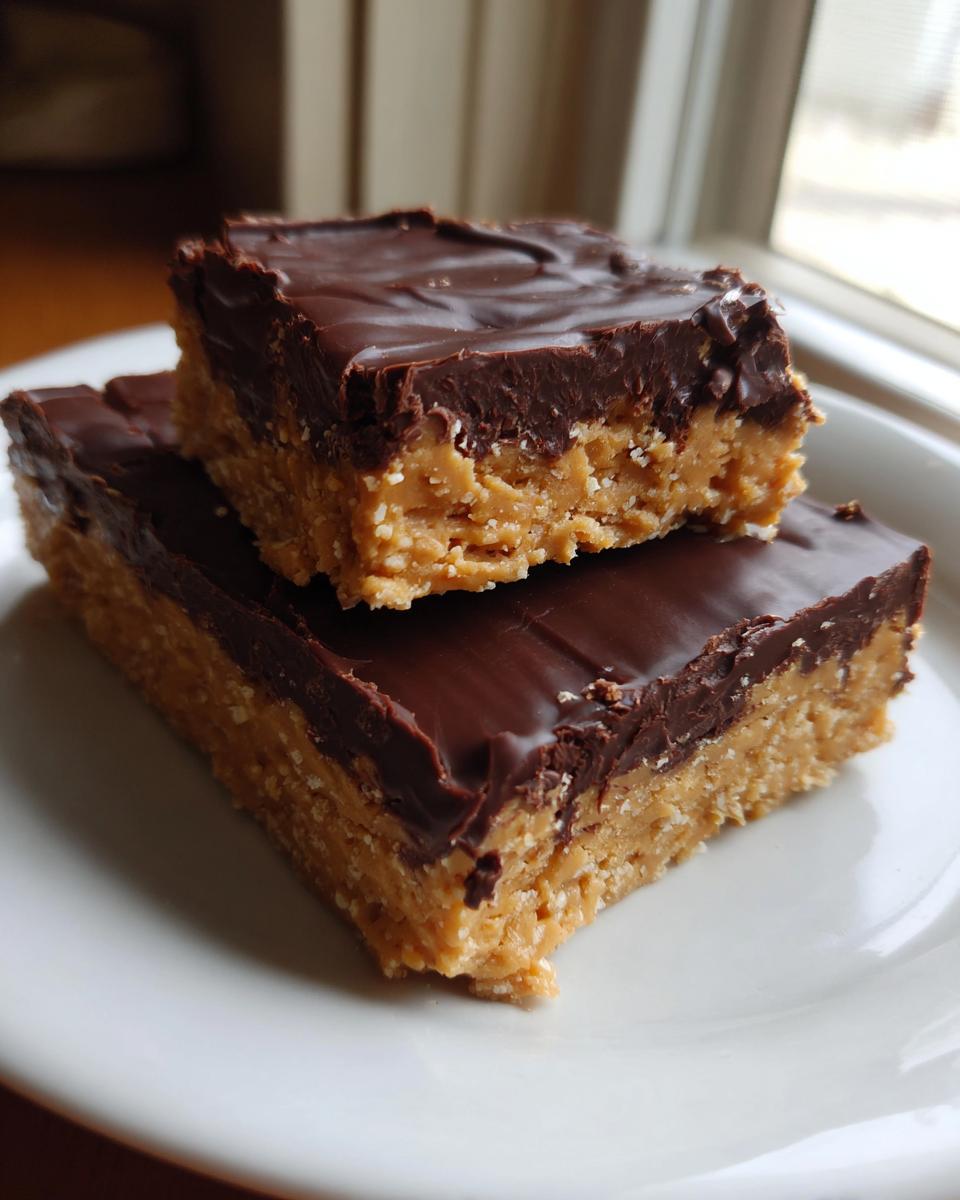
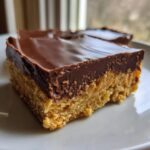
Simple, Layered Perfection
You get three distinct textures working together: a firm, slightly chewy base, that unbelievably smooth peanut butter filling, and the rich chocolate finish. They really are the definition of Chewy and Creamy Bars.
-
Minimal Effort, Maximum Reward
Because these are Easy No Bake Bars, cleanup is a breeze. You can whip up the layers while dinner simmers. They end up being perfect for grab-and-go moments, making them excellent Homemade Lunch Treats for the whole family.
Gathering Ingredients for Classic lunch lady peanut butter bars
Approaching this recipe like an engineering project means we need the right inputs, exactly as specified. I won’t let you substitute critical items here, especially when we’re aiming for that signature texture. Stick to the measurements below for the greatest success with these Classic American Bars. We need specific items for each layer to ensure structural integrity and that famous taste.
Base Layer Components
For the foundation of our Peanut Butter Graham Cracker Bars, you absolutely must have your ingredients measured correctly. Remember, we need two full cups of graham cracker crumbs—don’t skimp!
- 1 cup (2 sticks) unsalted butter, softened (this needs to be genuinely soft, not melted)
- 1 cup creamy peanut butter (no natural, oily stuff, please!)
- 1 cup powdered sugar
- 1 teaspoon vanilla extract
- 2 cups graham cracker crumbs
Chocolate Topping Ingredients for lunch lady peanut butter bars
This final layer seals the deal and gives us that rich, decadent finish that makes them a true Chocolate Peanut Butter Dessert. The topping is simple, but the ratio is important for spreadability.
- 1 1/2 cups semi-sweet chocolate chips
- 1/2 cup creamy peanut butter (the texture here needs to match the base layer’s consistency)
Step-by-Step Instructions for lunch lady peanut butter bars
Since we’re aiming for efficiency, we treat this like a production line; everything moves forward once the previous stage is complete. This structured approach ensures you end up with the perfect Simple Layered Dessert, not a sloppy mess. Remember that parchment overhang we laid down earlier? That’s your project management tool for easy removal later on!
Preparing the Base and Setting Up the Pan
First things first: get that 8×8 inch pan lined with wax paper, allowing the paper to stick up over the sides. That overhang is non-negotiable for lifting these out cleanly later. Now, you’ll work on the base. In one big bowl, beat together the softened butter, the cup of peanut butter, powdered sugar, and vanilla until it’s completely smooth—no gritty sugar bits allowed! Once that’s mixed well, stir in your two cups of graham cracker crumbs until everything is incorporated. Press this mixture firmly and evenly into the bottom of your prepped pan. It needs time to firm up, so pop it straight into the freezer while you handle the chocolate.
Creating the Creamy Chocolate Peanut Butter Topping
This happens quickly, but you need to be careful with the microwave! Take your chocolate chips and the remaining half-cup of peanut butter and put them in a microwave-safe bowl. I always melt chocolate in short bursts. Heat it for 30 seconds, stir really well—even if it doesn’t look melted—then repeat the 30-second cycle, stirring hard between each, until it’s silky smooth. If you just blast it, you’ll scorch the chocolate, and that ruins the whole experience! Once it’s glossy, pour that beautiful mixture right over your chilled base. Spread it quickly and evenly to seal in all that peanut butter goodness. You can see a fantastic method demonstrated by others here: Lunch Lady Bars.
Chilling and Serving Your lunch lady peanut butter bars
The hardest part of this recipe is waiting. The chocolate layer needs to set up completely. Pop the pan back into the refrigerator for a minimum of two hours. You want that top layer firm to the touch; otherwise, cutting will be messy. Pro tip: when you take them out, let them sit on the counter for about ten minutes before you slice them. This slight warming prevents the chocolate from cracking sharply as you cut. Use those parchment handles to lift the entire slab out onto a cutting board, then slice into 16 neat squares. These bars are perfect for no-bake treats!
Tips for the Best lunch lady peanut butter bars Texture
We’re aiming for the structure of the Best Peanut Butter Bar Recipe here, and that requires minor adjustments post-chilling. My process relies on controlling variables, even in cooling. If you follow the instructions in the previous section, you’ve got a rock-solid foundation, but small tweaks make the difference between a good bar and a great one.
Achieving the Perfect Cut
I notice a lot of people rush this part—they pull the bars out of the fridge and immediately try to slice them. That usually results in jagged, cracked chocolate tops. Don’t fight the glass transition! Make sure you let the entire pan sit on the counter for about ten minutes before you start cutting. This lets the chocolate soften just enough so your knife glides right through, giving you those incredibly clean edges we strive for.
Ingredient Consistency for lunch lady peanut butter bars
This is a huge point for structural integrity. Everywhere you see peanut butter listed—the base filling and the chocolate topping—it needs to be that standard, processed creamy kind. If you use a natural peanut butter, the oils separate out when chilled, turning your lovely smooth layers grainy. We want those cohesive, Chewy and Creamy Bars, remember? For more dessert efficiency tips, you can look at how I approach creamy fudge, which requires a similar temperature control mindset. If you want to see a great visual example of timing, check out these tips from Linda: Lunch Lady Peanut Butter Bars.
Variations on School Cafeteria Treats
Even a streamlined recipe like our lunch lady peanut butter bars can handle small tweaks to customize it for your routine. Keeping things simple is key, but sometimes you just need a little change-up. These ideas allow you to explore other Retro Dessert Recipes without compromising that essential layered structure. Think of these as optimization upgrades!
Crust Swaps for lunch lady peanut butter bars
If you run out of graham crackers, don’t panic and head to the store. You can substitute vanilla wafer crumbs for a slightly sweeter base, or use crushed shortbread cookies for a buttery crunch. Since we are keeping this no-bake, no extra steps required! If you’re feeling adventurous and want to briefly bake the base layer (remember that optional note?), vanilla wafers hold up really well to a quick ten minutes in the oven.
Chocolate Topping Alternatives
The semi-sweet chocolate is classic for a reason, but everyone has different preferences. If you know your crowd prefers less intense chocolate, swap in milk chocolate chips instead. Or, for a really grown-up twist on these School Cafeteria Treats, add just the smallest pinch of flaky sea salt right on top of the warm, newly poured chocolate layer. It cuts the sweetness just enough. For great cookie variations, you can check out my ideas for soft gingerbread cookies.
Storage and Making Ahead for your lunch lady peanut butter bars
Because the base layer relies on butter and peanut butter to set up, these bars are fantastic for making ahead—perfect for that next event where you need a reliable Potluck Friendly Peanut Butter Recipe. I always use an airtight container lining the bottom with a sheet of parchment paper first, just to keep things tidy. They store beautifully in the refrigerator for up to a week. If you need them to last longer, pop them into the freezer! They freeze really well for up to two months. If you’re looking for other dependable make-ahead items, you might want to review my streamlined process for homemade mayonnaise, which also benefits from good storage management. You can find another simple, tested recipe similar to these here: easy Lunch Lady Peanut Butter Bars.
Frequently Asked Questions About lunch lady peanut butter bars
I get a ton of questions about these bars, which makes sense—when you’re chasing a specific nostalgic flavor, the details really matter! I’ve gathered the most common queries here so you can approach this recipe with total confidence. These details are all about ensuring you get that textbook texture we discussed.
Are lunch lady peanut butter bars truly no-bake?
Yes, the main version I laid out relies entirely on chilling to set, making them fantastic Easy No Bake Bars. However, if you prefer an extra-firm, almost shortbread-like base, you can absolutely press the crumb mixture into the pan and bake it for about 10 minutes at 350°F before you let it cool completely. That’s totally optional, though. For me, the no-bake method is faster!
Can I use natural peanut butter in these bars?
I strongly advise against it, honestly. We are aiming for those smooth, Chewy and Creamy Bars. Natural peanut butter has liquid oil that separates out when chilled, which means your base layer ends up greasy and crumbly instead of dense and cohesive. Stick to standard, shelf-stable creamy peanut butter for both the base mixing and the chocolate swirl.
What makes these ‘lunch lady’ bars?
It’s all about the throwback sensation! These are named that because they perfectly replicate the simple, satisfying, layered squares you used to get as School Cafeteria Treats. They are reliable, usually use pantry staples, and you never need fancy techniques—just mix, press, and chill. It’s pure, delicious nostalgia in bar form. If you are looking for other dependable family favorites, check out my thoughts on homemade cranberry sauce!
Estimated Nutritional Data for lunch lady peanut butter bars
Now, because we treat recipes like projects, we need to account for the final output, right? Running the numbers gives us a clear picture of what we are working with here. Please keep in mind that since this is a homemade recipe and ingredient brands can vary widely, these figures are estimates based on standard calculations for 16 servings. When you’re making these delicious Decadent Peanut Butter Squares, focus on the flavor first, but it’s good to know the baseline!
If you enjoy reliable estimates for hearty meals, you should absolutely check out my detailed breakdown for the Cowboy Cornbread Casserole. Here are the estimates for our lunch lady peanut butter bars:
- Serving Size: 1 bar
- Calories: 310
- Total Fat: 20g
- Carbohydrates: 30g
- Protein: 7g
We’re looking at a solid amount of energy content here, mostly coming from the fats and sugars, as expected in a classic, satisfying dessert. These numbers confirm why they are such a hit at potlucks—they deliver that rich, classic taste everyone craves in a single square!
Share Your Childhood Favorite Desserts Experience
Now that you’ve streamlined the process and hopefully enjoyed a taste of nostalgia, I really want to hear from you. At Dishicious, we’re all about results and building a community where simple cooking wins. Did these lunch lady peanut butter bars take you right back to the elementary school cafeteria? I’m eager to see your results!
If you made a batch, please take a moment to rate this recipe. Setting a 5-star rating lets me know that my project management approach to this recipe worked perfectly for you. Knowing this recipe serves up that classic, satisfying flavor makes all the optimization worth it.
What memories do these bars trigger for you? Were you a fan of any other specific Childhood Favorite Desserts that I should perhaps try to streamline next? Drop your stories and feedback in the comments below. And if you snap a picture of your perfectly layered, chilled squares, tag us! I love seeing the physical proof of simplified, delicious results. You can also check out other reliable favorites like my hearty lentil soup, but come back and tell me about these bars!
If you’re looking for outside inspiration on how others approached these classic treats, you can check out this external link for reference: Easy Lunch Lady Peanut Butter Bars.
PrintClassic Layered Lunch Lady Peanut Butter Bars
Make these easy, no-bake Lunch Lady Peanut Butter Bars for a nostalgic, chewy, and creamy chocolate peanut butter dessert that reminds you of school cafeteria treats.
- Prep Time: 15 min
- Cook Time: 0 min
- Total Time: 2 hours 15 min
- Yield: 16 servings 1x
- Category: Dessert
- Method: No-Bake
- Cuisine: American
- Diet: Vegetarian
Ingredients
- 1 cup (2 sticks) unsalted butter, softened
- 1 cup creamy peanut butter
- 1 cup powdered sugar
- 1 teaspoon vanilla extract
- 2 cups graham cracker crumbs
- 1 1/2 cups semi-sweet chocolate chips
- 1/2 cup creamy peanut butter (for topping)
Instructions
- Line an 8×8 inch baking pan with parchment paper, leaving an overhang for easy removal.
- In a large bowl, beat the softened butter, 1 cup peanut butter, powdered sugar, and vanilla extract until smooth.
- Stir in the graham cracker crumbs until fully combined. This forms the base layer.
- Press the base mixture evenly into the prepared pan. Place the pan in the freezer while you prepare the topping.
- In a microwave-safe bowl, combine the chocolate chips and the remaining 1/2 cup of peanut butter. Microwave in 30-second intervals, stirring well after each, until the mixture is smooth and melted.
- Pour the chocolate mixture over the chilled peanut butter base. Spread evenly to cover the entire surface.
- Refrigerate the bars for at least 2 hours, or until the chocolate topping is firm.
- Use the parchment paper overhang to lift the bars from the pan. Cut into squares before serving.
Notes
- For a cleaner cut, let the bars sit at room temperature for 10 minutes before slicing.
- If you prefer a firmer base, you can bake the crust layer at 350°F (175°C) for 10 minutes, then cool completely before adding the filling.
- Use creamy peanut butter for the best texture in both the base and the filling.
Nutrition
- Serving Size: 1 bar
- Calories: 310
- Sugar: 25
- Sodium: 180
- Fat: 20
- Saturated Fat: 8
- Unsaturated Fat: 12
- Trans Fat: 0
- Carbohydrates: 30
- Fiber: 1
- Protein: 7
- Cholesterol: 25