
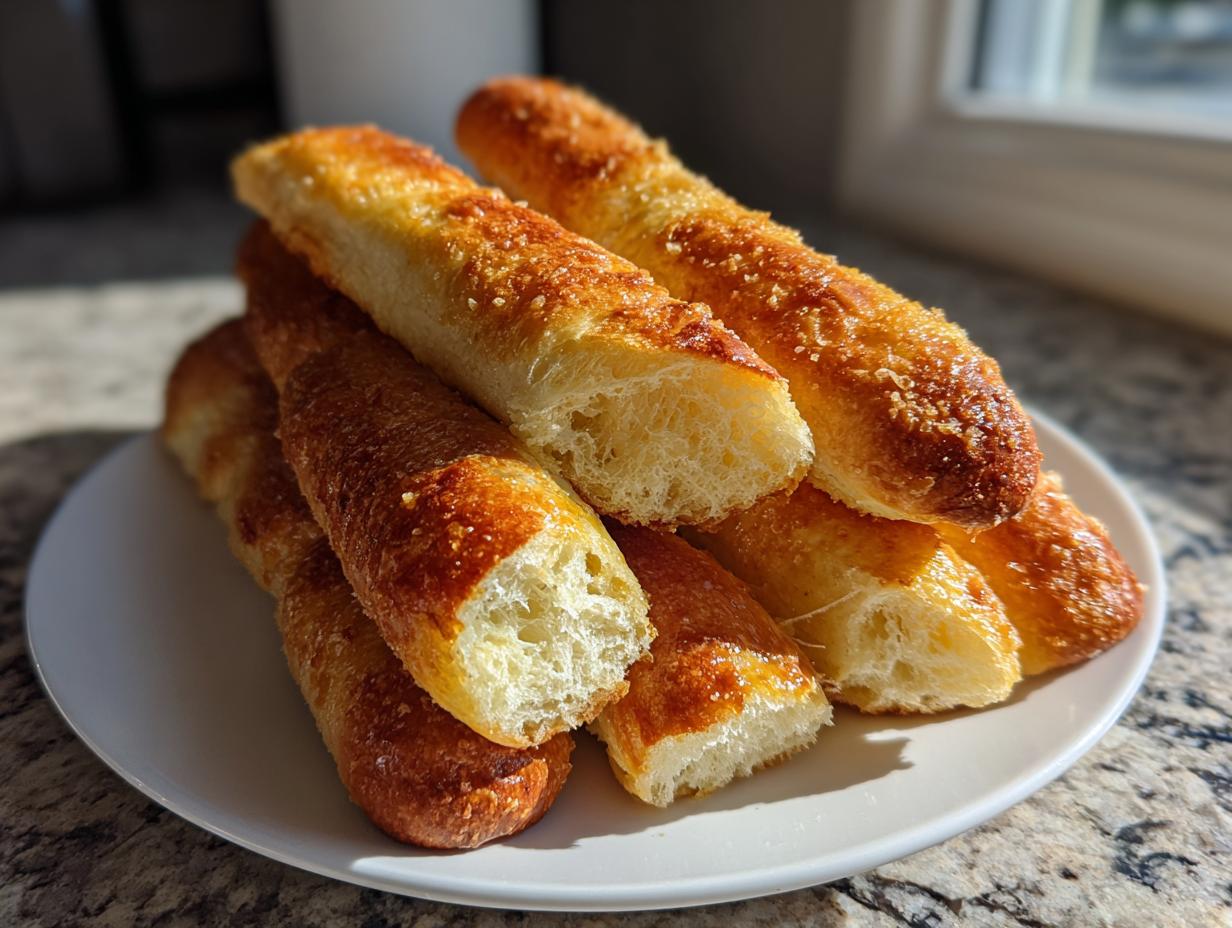
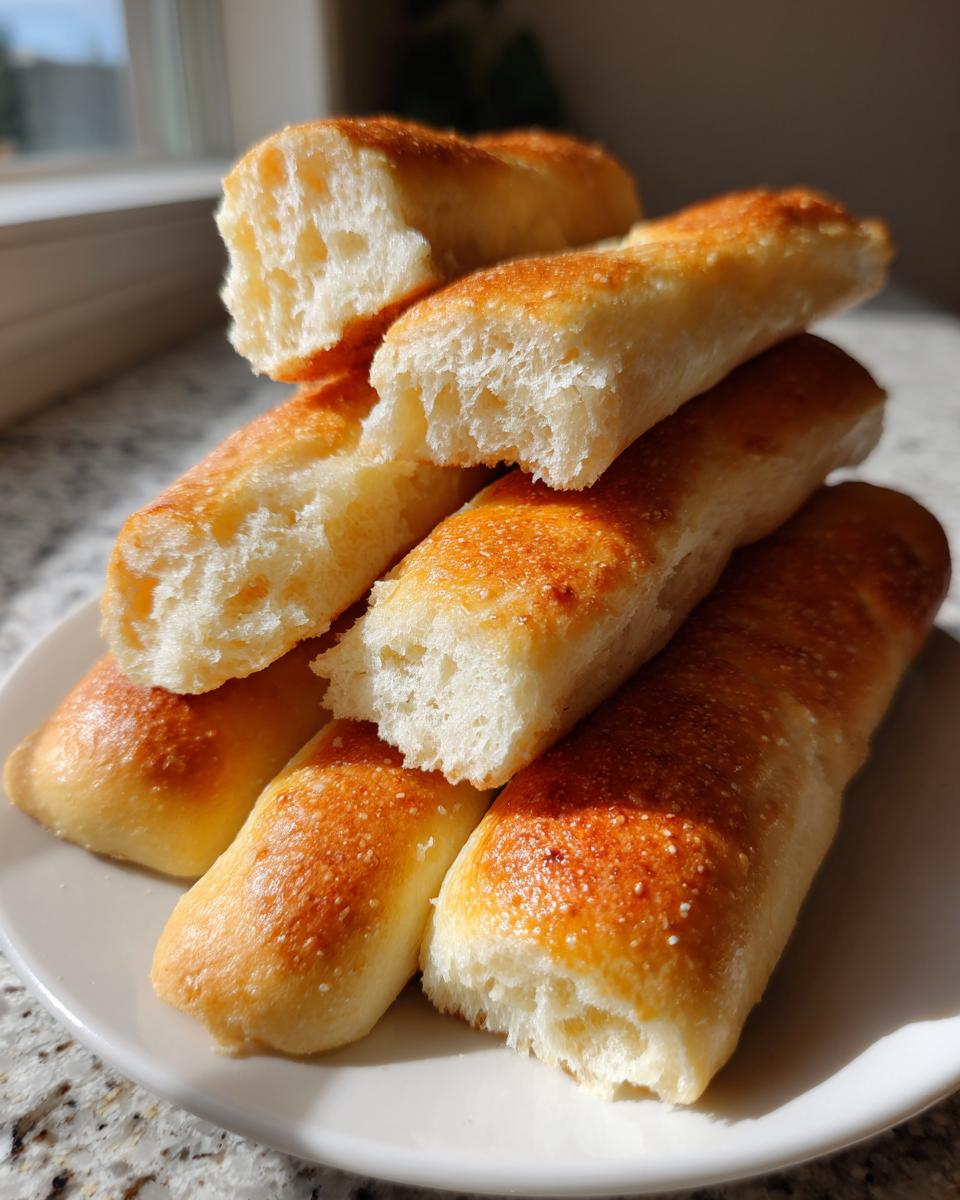
You know that moment, right? You’re halfway through dinner, or maybe you just need a serious comfort food fix, and all you can think about is that warm, endless supply of golden, buttery breadsticks from your favorite Italian place. Forget paying for takeout or settling for dry, disappointing versions—I’ve streamlined the process to bring that restaurant quality right into your kitchen. This is my Easy Homemade Copycat Olive Garden Breadsticks Recipe, and trust me, it hits every single note: soft, fluffy, and absolutely drenched in garlic butter.
As the founder here at Dishicious, I approach recipes like a project manager, eliminating wasted steps. I’ve optimized this dough process so you get that unbeatable texture without complex fermentation timetables. These aren’t just any breadsticks; they are the ultimate weeknight win, guaranteed to be the best side dish you’ve made all month. If you love our famous copycat salad, you absolutely have to try these, too! Pair these breadsticks with it for a full appetizer spread!
- Why This Copycat Olive Garden Breadsticks Recipe Works
- Ingredients for Perfect Homemade Breadsticks
- How to Prepare the Best Breadsticks Step-by-Step
- Tips for Making Perfect Copycat Breadsticks
- Serving Suggestions for Your Homemade Breadsticks
- Storage and Reheating Your Garlic Breadsticks
- Frequently Asked Questions About Making Breadsticks
- Estimated Nutritional Data for These Breadsticks
- Share Your Experience Making Our Breadsticks
Why This Copycat Olive Garden Breadsticks Recipe Works
Look, the goal here is maximum flavor impact with minimum project downtime. You don’t need complicated bread recipes taking up your entire evening. This is why these easy breadsticks are a staple for me:
- The yeast management is simple, giving you a quick but reliable rise for that signature fluff.
- We hit that authentic top-tier flavor with a generous brush of garlic butter right out of the oven.
- You get incredibly buttery soft breadsticks every single time without needing specialized equipment.
- It’s a foolproof method that delivers a restaurant-quality side dish fast.
Ingredients for Perfect Homemade Breadsticks
When I break down any baking project, clarity on the parts list is non-negotiable. Success with these breadsticks starts with having the exact components ready to go. We keep this list lean because the magic is in the combination, not complexity.
- 1 1/2 cups warm water (must be about 110°F—check that temp!)
- 2 1/4 teaspoons active dry yeast
- 2 tablespoons granulated sugar
- 4 cups all-purpose flour
- 1 teaspoon salt
- 1/4 cup vegetable oil
- 1/2 cup (1 stick) unsalted butter, melted (for the topping)
- 1 tablespoon garlic powder (for the topping)
- 1 teaspoon dried parsley (for the topping)
That’s it! The dough uses oil for softness, and the butter, garlic powder, and parsley are reserved strictly for that craveable, brushed-on finish later. Have everything measured out before you start activating that yeast.
How to Prepare the Best Breadsticks Step-by-Step
When I mapped out this project, I focused heavily on the efficiency of the rising schedule, which is where most home bakers lose time. Follow these steps exactly, and you’ll have incredible results in under two hours, which is pretty fast for homemade breadsticks. We’ll get the yeast happy first, then focus on structure, and finish with that essential flavor punch.
Activating Yeast and Mixing the Bread Stick Dough
First things first: we need proofed yeast. Pour your warm water (remember, 110°F is the sweet spot—too hot kills it!) into a bowl. Whisk in the sugar, then sprinkle the yeast right on top. We let it sit undisturbed for a solid five to ten minutes. I look for a thick, bubbly foam layer; if it doesn’t foam, your yeast is dead, and we have to start this part over. Don’t skip this check!
Once you’ve got that beautiful foam, it’s time to build the dough structure. Add the flour, salt, and vegetable oil directly into the yeast mixture. Start mixing by hand or on low speed with your mixer until everything just comes together into a shaggy mass. We’re holding off on the hard work for just a moment!
Kneading and Rising for Fluffy Breadsticks
Now, we get to the kneading phase—this builds the gluten structure that traps all that air, which is what delivers that famous, buttery soft texture. Turn the dough out onto a lightly floured counter and work it for about seven minutes. You are looking for dough that feels smooth and springs back when you poke it lightly. It should no longer be sticky, but definitely still pliable.
Transfer that smooth dough into a lightly oiled bowl—make sure you turn it over so the top gets a little slicked with oil too. Cover it up tight. Find the warmest, draft-free spot in your kitchen. Let it ride for a full hour, or until it’s doubled in size. If your kitchen is chilly, turn the oven off after preheating it for two minutes, and let the dough rise inside the warm, dark oven.
Shaping, Baking, and Applying the Garlic Butter Topping
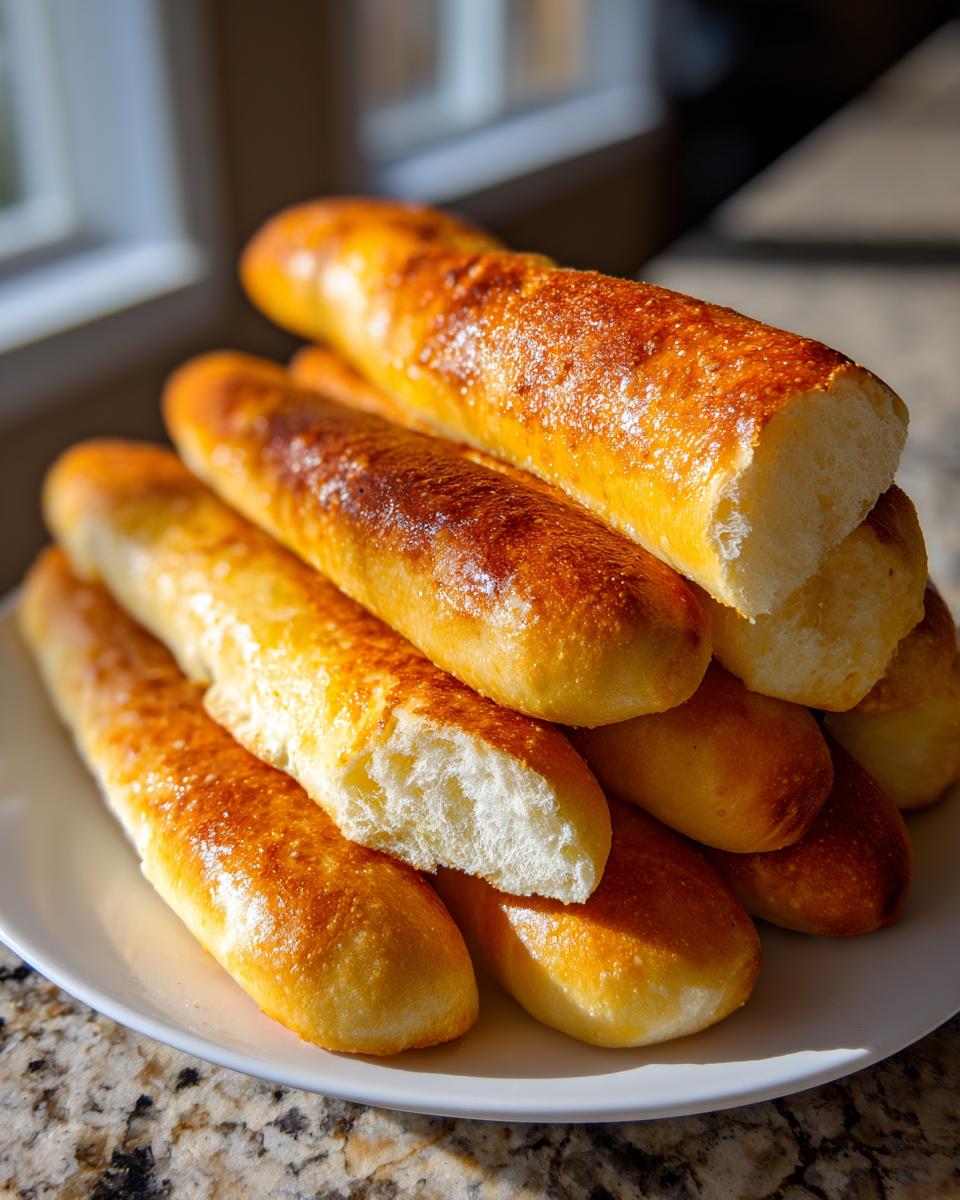
While the dough is finalizing its rise, get your oven up to 400°F (200°C) and line a baking sheet—using parchment paper here is a major time saver for cleanup later. Gently punch the air out of the dough. Divide it into twelve equal dollops. Roll each piece into a long stick, about 10 to 12 inches long. Lay them out on the sheet with a little breathing room.
Bake these beauties for 10 to 12 minutes until they look just barely golden. Now for the best part: the topping! As soon as those garlic breadsticks hit the counter, you brush that melted butter mixed with garlic powder and parsley all over them. The heat of the breadsticks sucks right up that butter, infusing every pore with flavor. You will absolutely smell your entire house change the moment you pull them out. For more bread-making insights, check out my guide on easy yeast bread for beginners or see how I structure whole wheat baking projects.
Tips for Making Perfect Copycat Breadsticks
Even with a streamlined recipe like this, sometimes you want to customize the output or tweak the process to fit your schedule. As a strategist in the kitchen, I always look for ways to enhance baseline performance. If you’re looking for variations beyond just plain garlic breadsticks, I’ve got you covered. Some of these tips were noted right on my original recipe file!
Achieving Cheesy Breadsticks Variations
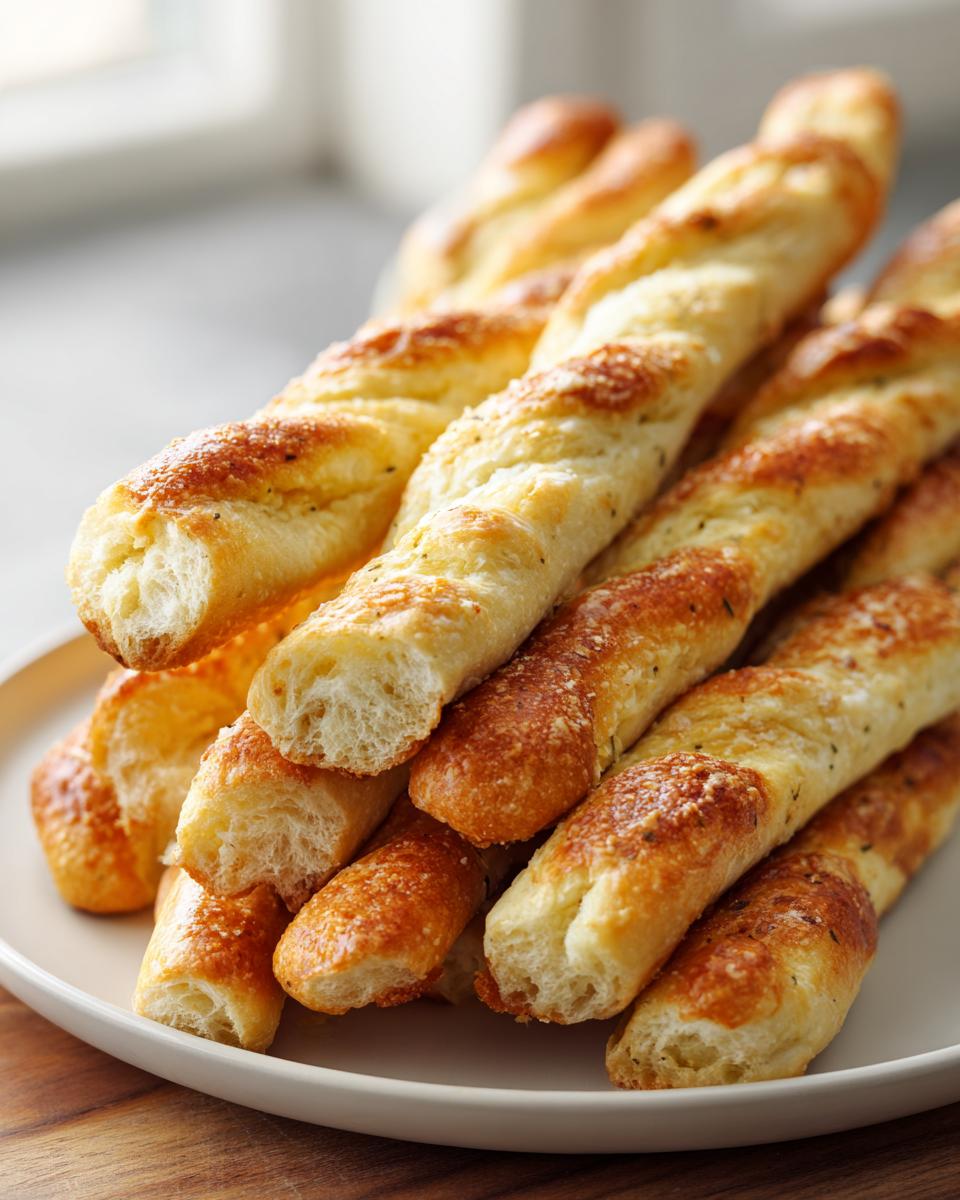
If you want to upgrade these from a savory side to a true cheese pull experience, this is so simple, you almost feel like you’re cheating. Right after you pull those hot breadsticks out of the oven and brush on the garlic butter, immediately sprinkle grated Parmesan cheese generously over everything. It melts right into the herbs and butter, creating these gorgeous, crispy spots.
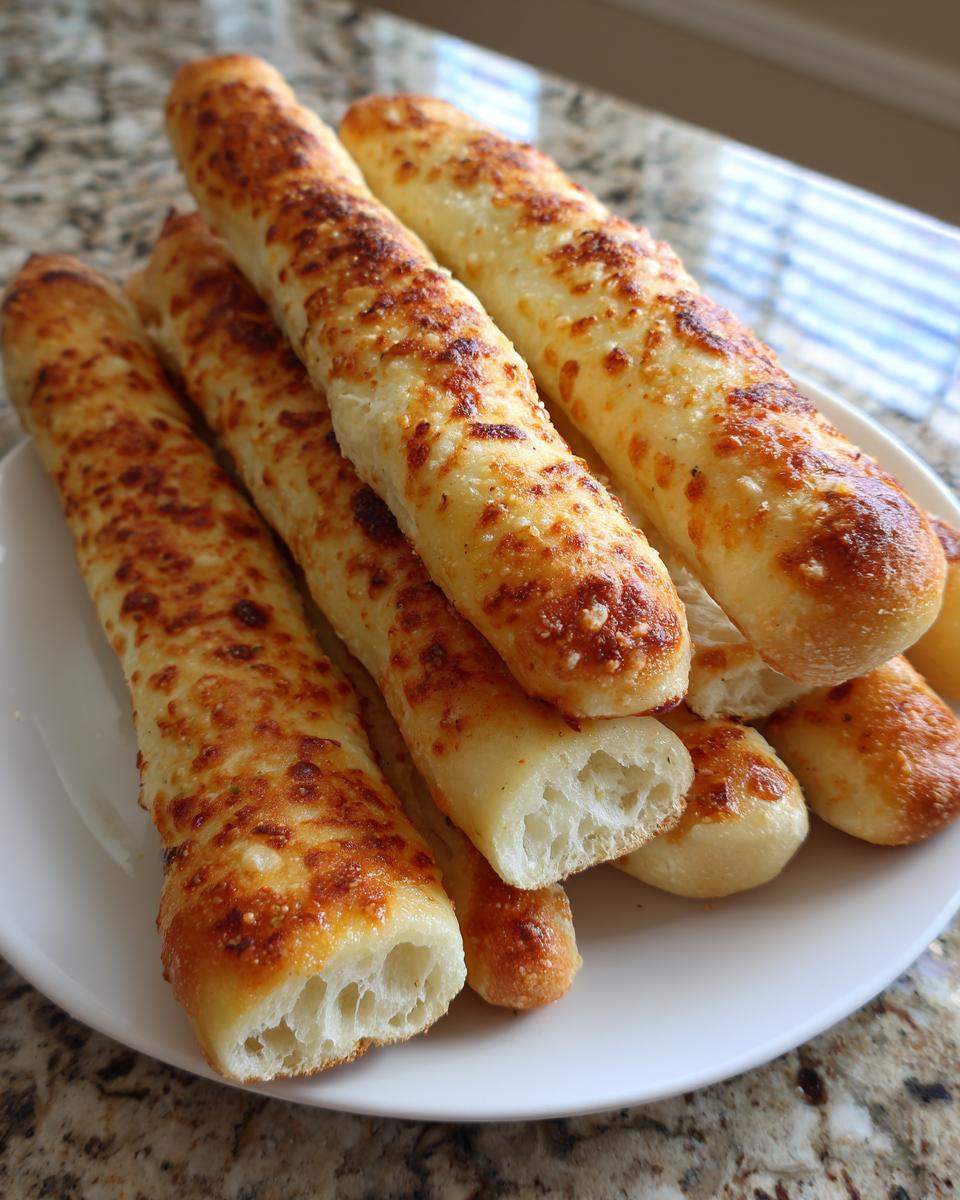
For an even richer flavor profile, sometimes I’ll mix a tablespoon of finely grated Parmesan right into the butter and spice mixture before brushing. It adds complexity. If you’re serving these with my Onion Dip, cheese breadsticks are a must!
Troubleshooting Your Bread Stick Dough
Dough is fussy. It’s the least predictable part of any bread project, which is why some folks avoid making homemade bread altogether. Don’t let it intimidate you; you just need a plan when things go sideways.
If your dough isn’t rising well or seems overly sluggish, it usually means the water temperature for the yeast was too high, or your kitchen is simply too cold. Don’t panic and dump it. Just move the bowl somewhere warmer—maybe near a pilot light or the top of the fridge. If your dough is too sticky after the initial knead, resist the urge to dump in a full cup of flour. Slowly add just one or two tablespoons at a time until it’s manageable. Less flour keeps them soft, remember?
If you are seriously short on time, you can look into expedited yeast methods, like this great 1-Hour Garlic Breadsticks recipe, but note that an extended initial rise always gives you a slightly superior chew. It’s a trade-off between time efficiency and ultimate texture.
Serving Suggestions for Your Homemade Breadsticks
So, you’ve mastered the dough and brushed on enough garlic butter to justify calling these mandatory, not optional. Now, what are you serving these phenomenal dinner side breadsticks with? The beauty of this recipe is that it functions equally well as a filling appetizer spread or the perfect companion to a main course.
Honestly, the minute they come out of the oven, they are perfect just dipped in marinara sauce. But if you’re trying to build a fuller meal, you’ve got to lean into that Italian side dishes territory. These are fantastic for soaking up sauces—and I mean *all* the sauce.
For a full comfort experience, you absolutely need to pair them with a great soup. I highly recommend making my Pasta e Fagioli Copycat; the texture contrast between the hearty soup and these fluffy sticks is just incredible. It’s soup and breadsticks perfection, plain and simple.
If you’re looking for a main dish, these are the ideal companion for anything creamy. You can’t go wrong dipping them into my Easy Chicken Alfredo. Honestly, I’ve seen entire meals derailed because everyone focused more on the appetizer breadsticks than the actual main course. Just make sure you serve them immediately—that brief window when they are piping hot and the butter is still glistening is when they are at peak performance!
Storage and Reheating Your Garlic Breadsticks
Okay, we’ve established that these are best enjoyed moments after they get that final butter bath, but what happens when you have leftovers? Because honestly, no one *ever* plans on having leftovers of these phenomenal garlic breadsticks, but it happens. My project here is making sure you don’t end up with a disappointing, stale hockey puck the next day.
The enemy here is moisture evaporation. Once these cool, they firm up significantly. If you plan to keep them, do so at room temperature in an airtight container or a zip-top bag. You want zero air exposure. Do not refrigerate them, ever. Refrigeration is the death knell for soft bread; it speeds up staling faster than anything else.
If you are prepping these ahead of time or making a massive batch, I recommend freezing them un-topped. Bake them fully, let them cool completely, and then freeze the plain breadsticks in a heavy-duty freezer bag. When you are ready to eat them, you can skip the thawing step entirely.
The Best Way to Reheat Breadsticks
Reheating is key to bringing back that fresh-from-the-oven texture. Forget the microwave; it heats unevenly and makes them chewy and tough—a total project failure!
For the best results, I lean toward the oven. Set your oven to 350°F (175°C). If you kept the butter topping off, brush the breadsticks lightly with a touch more melted butter, maybe even a tiny sprinkle of garlic powder again, right before they go in. Bake these for about 5 to 7 minutes. This slow, steady heat brings the interior back to fluffy perfection and crisps the outside just slightly.
If you are reheating breadsticks that already have the full garlic butter topping on them, wrap them loosely in foil first. The foil traps the steam and keeps them moist while the heat warms them through. Pop them in that 350°F oven for about 8 to 10 minutes. When they are piping hot, unwrap them, and you’re done. Perfect homemade breadsticks reborn!
Frequently Asked Questions About Making Breadsticks
When I roll out a new baking project, I always end up with a few lingering questions about ingredient substitutions or timeline adjustments. It’s good practice to have these answers ready so you aren’t guessing mid-bake. Here are the top things people ask when trying to achieve the best breadsticks recipe at home.
Can I swap all-purpose flour for bread flour in this recipe?
That’s a common question when optimizing your bread recipes! Yes, you absolutely can substitute bread flour for the all-purpose flour here. Bread flour has a slightly higher protein content. What this means for your final product is that your bread stick dough will be slightly chewier and have a bit more structure. If you prefer an ultra-fluffy, melt-in-your-mouth texture, stick with AP flour. If you want something with a slightly firmer, more traditional ‘crust’ feel, bread flour is a great option. Just watch the moisture; you might need an extra teaspoon or two of water.
How long do these buttery soft breadsticks stay soft after cooling?
This is where that generous layer of butter really earns its keep. If you store them properly—and I mean airtight at room temperature, as we discussed—these buttery soft breadsticks will stay pleasantly soft for about 24 hours. After that, they definitely start to lose that fresh-baked quality. My strategy is always to freeze any leftovers immediately if I know we won’t eat them the next day. If you need a reliable guide for other doughs, check out my full resource on baking recipes for bread.
Can I make the dough ahead of time and freeze it?
Absolutely, one of the best optimizations you can make for busy weeknights is prepping the dough ahead! Once the dough has gone through its first rise and you’ve punched it down, you can divide and shape the sticks, place them on a lined baking sheet, and freeze them solid. Once frozen, transfer them to a freezer bag. This allows you to pull out just a few at a time later when you need an instant appetizer breadsticks fix. They bake perfectly straight from frozen; just add about 5-7 minutes to your bake time.
What if I don’t have active dry yeast? Can I use instant yeast?
Yes! Most modern recipes are pretty flexible here. If you are using instant yeast, you can completely skip the proofing step (Step 1). Just whisk the instant yeast directly into your flour mixture when you add the other dry ingredients. You’ll still need that initial hour for the rise, but you skip the 10-minute wait time for the foam, which saves you about ten minutes right at the start of your project!
Estimated Nutritional Data for These Breadsticks
As a kitchen strategist, providing accurate estimations goes hand-in-hand with efficiency. If you’re planning your meals or tracking intake, it’s crucial to know what you’re working with here. Remember that these numbers are estimates derived directly from the recipe yield of 12 breadsticks. Because these are homemade, they can easily fluctuate based on how generously you brush on that incredible garlic butter topping!
I’ve broken down the macro data below based on a single breadstick serving size. See? We can have indulgent, delicious comfort food without sacrificing our focus on balanced eating. This data should help you easily incorporate these fantastic sides into your weekly meal plan.
- Serving Size: 1 breadstick
- Calories: 180
- Fat: 6g (Saturated Fat: 3g)
- Carbohydrates: 29g
- Protein: 4g
- Sugar: 2g
- Sodium: 250mg
Notice the fat content comes primarily from that rich unsalted butter we use to soak these breadsticks post-bake. Since we keep the recipe structure very simple and rely on basic flour, the nutrition profile stays straightforward. These are definitely best enjoyed fresh, but knowing the data helps you plan refills!
Share Your Experience Making Our Breadsticks
Alright, project complete! You’ve successfully navigated the dough, dodged the rising pitfalls, and brushed on what is probably the most flavorful garlic butter known to humankind. Now comes the crucial feedback step. I need to know how this specific workflow performed for you. Did you manage to keep the rise time efficient? Were these the buttery soft breadsticks you were aiming for?
Jump down to the comment section below. I want to see your final reports! Rate this bread recipes project out of five stars. Whether you followed the instructions exactly, or if you came up with a brilliant modification—like adding a pinch of cayenne to the garlic butter for a little kick—I want to hear about it. Sharing your results helps us all refine the process for the next person coming to visit Dishicious.
If you loved how easy it was to get restaurant quality at home, please share this guide! Sharing is the easiest way to show support for these streamlined methods we develop here. It helps me keep focusing my energy on turning complex cooking into simple, achievable wins for busy people like us.
Go ahead and treat your family to these amazing appetizer breadsticks tonight. For more easy wins in that department, check out my whole collection of appetizers and snacks!
PrintEasy Homemade Copycat Olive Garden Breadsticks Recipe

Make soft, buttery, garlic breadsticks at home that taste just like the popular restaurant version. This straightforward recipe delivers fluffy breadsticks perfect as an appetizer or dinner side.
- Prep Time: 20 min
- Cook Time: 12 min
- Total Time: 92 min
- Yield: 12 breadsticks 1x
- Category: Side Dish
- Method: Baking
- Cuisine: American
- Diet: Vegetarian
Ingredients
- 1 1/2 cups warm water (110°F)
- 2 1/4 teaspoons active dry yeast
- 2 tablespoons granulated sugar
- 4 cups all-purpose flour
- 1 teaspoon salt
- 1/4 cup vegetable oil
- 1/2 cup (1 stick) unsalted butter, melted
- 1 tablespoon garlic powder
- 1 teaspoon dried parsley
Instructions
- Combine the warm water, yeast, and sugar in a large bowl. Let this mixture sit for 5 to 10 minutes until it becomes foamy. This shows the yeast is active.
- Add the flour, salt, and vegetable oil to the yeast mixture. Mix with a spoon or stand mixer until a shaggy dough forms.
- Knead the dough on a lightly floured surface for about 5 to 7 minutes until it is smooth and elastic.
- Place the dough in a lightly oiled bowl, turning it once to coat. Cover the bowl with plastic wrap or a clean kitchen towel. Let the dough rise in a warm spot for 1 hour, or until it doubles in size.
- Preheat your oven to 400°F (200°C). Line a large baking sheet with parchment paper.
- Punch down the risen dough gently. Divide the dough into 12 equal pieces. Roll each piece into a long, thin breadstick shape, about 10 to 12 inches long. Place the breadsticks on the prepared baking sheet, leaving a small space between them.
- Bake for 10 to 12 minutes, or until the breadsticks are lightly golden brown.
- While the breadsticks bake, prepare the topping. Melt the butter in a small saucepan or microwave-safe bowl. Stir in the garlic powder and dried parsley.
- Remove the hot breadsticks from the oven. Brush the garlic butter mixture generously over the tops of the warm breadsticks immediately after they come out of the oven.
- Serve your homemade breadsticks warm as a perfect dinner side dish or appetizer.
Notes
- For cheesy breadsticks, sprinkle grated Parmesan cheese over the garlic butter topping right after brushing it on.
- If you want faster results, look for a 1 hour breadsticks recipe variation, though this standard rise time yields the best texture.
- You can use bread machine yeast if you have it; use the same measurement as active dry yeast.
Nutrition
- Serving Size: 1 breadstick
- Calories: 180
- Sugar: 2
- Sodium: 250
- Fat: 6
- Saturated Fat: 3
- Unsaturated Fat: 3
- Trans Fat: 0
- Carbohydrates: 29
- Fiber: 1
- Protein: 4
- Cholesterol: 10