
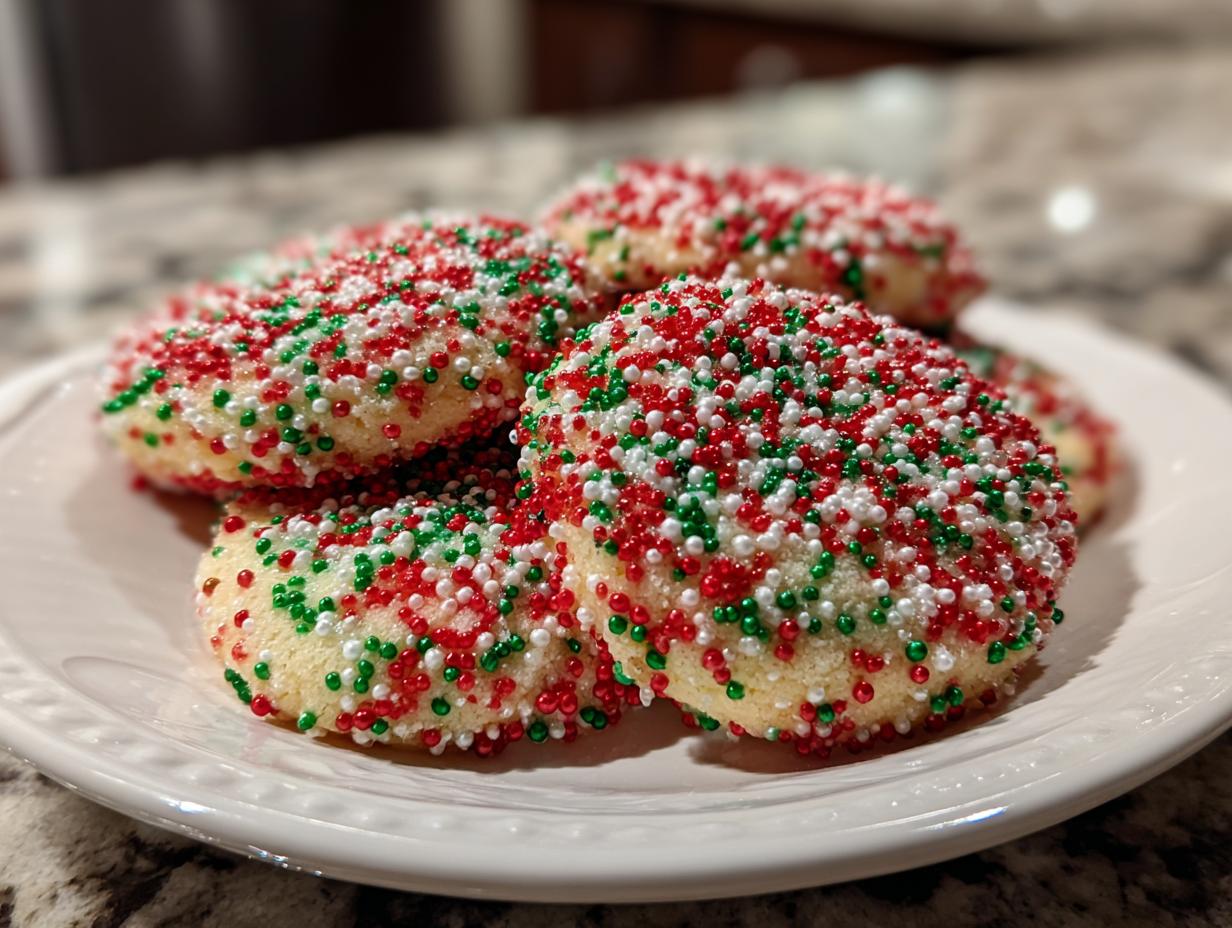
Holiday baking season arrives, and right away, I feel that familiar squeeze of the clock. We all want those gorgeous, festive treats, especially ones that look as fun as they taste, but who has time for dough chilling and complicated decorating? That’s exactly why I engineered the perfect batch of christmas sprinkle cookies. These aren’t just any sugar cookies; these are guaranteed soft and chewy, packed with color, and here’s the critical part: they require absolutely no chilling time whatsoever. As the founder of Dishicious, I approach baking like a project manager—we strip away any unnecessary steps. This recipe skips the waiting game so you can efficiently move from creaming butter to delivering a tray of colorful cookies in under an hour.)
If you need a foolproof recipe that delivers that melt-in-your-mouth experience for cookie exchanges or just making the kids happy, this is it. You can check out similar reliable methods in my guide on soft-cut-out-sugar-cookie-recipe, but trust me, this no-chill sprinkle version is the holiday superhero you need.
- Why These Are the Best Christmas Sprinkle Cookies for Your Holiday Baking
- Ingredients for Soft & Chewy Christmas Sprinkle Cookies
- How to Prepare Perfect Christmas Sprinkle Cookies (No Chill Method)
- Tips for Success with Holiday Sprinkle Cookies
- Variations for Your Christmas Cookie Exchange Recipes
- Storage and Make-Ahead for Simple Christmas Treats
- Serving Suggestions for Holiday Dessert Ideas
- Frequently Asked Questions About Baking These Cookies
- Nutritional Estimate for Your Festive Baking Projects
Why These Are the Best Christmas Sprinkle Cookies for Your Holiday Baking
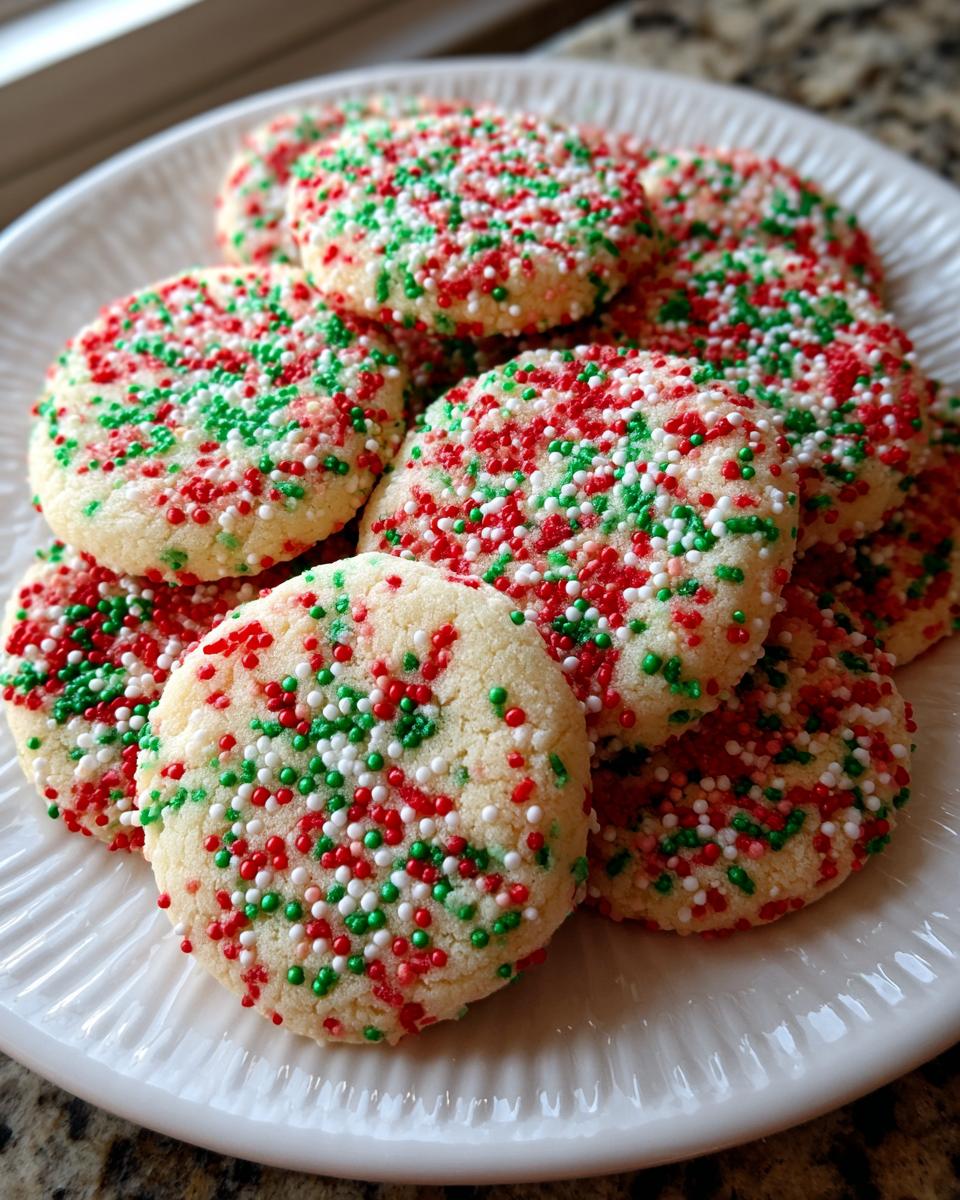
Listen, the beauty of holiday baking is supposed to be the joy, not the waiting! That’s why I love this specific formulation for christmas sprinkle cookies so much. We are hitting all the must-haves here: they bake up gloriously soft and chewy Christmas cookies, and because the fat-to-flour ratio is dialed in just right, we can skip the tedious dough chilling entirely. That means more time for sipping cocoa and less time waiting for the fridge timer.
They are the definition of easy Christmas baking. You mix it, you roll it, and boom—instant festive color straight onto the sheet pan. If you need even more reliable results for cutout styles, you can always check my guide on soft-chewy-cutout-sugar-cookies, but these no-chill beauties are perfect for stuffing into tins for cookie exchanges. For another festive hit that’s tried and tested, see classic-holiday-sprinkle-cookies.
Ingredients for Soft & Chewy Christmas Sprinkle Cookies
Alright, here is the official project breakdown for your ingredients list. I keep this simple and reliable, which is why these turn out so consistently good. Precision matters here, especially when you’re trying to avoid that dreaded spread during baking. Trust me, hitting these measurements is key to getting that perfect soft center.
Remember, we are aiming for buttery holiday cookies that just melt in your mouth. Make sure your butter is actually soft—not oily or melted—for the creaming step.
Dry Ingredients
- 2 3/4 cups all-purpose flour
- 1 teaspoon baking powder
- 1/2 teaspoon baking soda
- 1/2 teaspoon salt
Wet Ingredients and Flavorings
- 1 cup unsalted butter, softened (this is important!)
- 1 cup granulated sugar
- 1 large egg (room temperature is always best)
- 1 teaspoon vanilla extract
The Festive Sprinkles
This is where the fun happens! You need two batches of sprinkles because we are mixing some in for internal color and rolling the outside for maximum visual impact. I love using a mix of red, green, and white jimmies and nonpareils for texture variety.
- 1/2 cup Christmas sprinkles (the ones you mix right into the dough)
- 1/4 cup extra Christmas sprinkles for rolling (make sure this dish is shallow so coating is easy!)
How to Prepare Perfect Christmas Sprinkle Cookies (No Chill Method)
This is where the project management lens really helps us streamline things! We are moving fast here, so get your baking sheets ready with parchment paper before you even touch the mixer. Remember, we’re skipping the chill step, which means your batter consistency has to be spot-on right out of the bowl to prevent spreading later.
Mixing the Dough: Achieving Softness
First things first: we need that light, fluffy base. Get your stand mixer (or hand mixer) going on medium speed and cream that softened butter and granulated sugar together. You want it pale and fluffy—this takes 3 to 4 minutes. This step incorporates the air that keeps these christmas sprinkle cookies chewy later on.
Once you hit that fluffy stage, beat in your egg and vanilla extract. Just mix until it barely comes together. Now, for the dry ingredients: whisk your flour, baking powder, baking soda, and salt together in a separate bowl first. Add this dry mix to the wet ingredients slowly, mixing on low speed. The crucial thing Leo always stresses? Stop mixing the *second* you see the last streak of flour disappear. Seriously, stop! Overmixing develops gluten, and we want tender, not tough, cookies.
Finally, gently fold in that first half-cup of sprinkles using a spatula. Don’t use the mixer for this part; we don’t want those colors to bleed into the entire dough mass. We want specks of festive color!
Coating and Shaping Your Festive Vanilla Cookies
Time to get messy! Grab that shallow dish with your remaining 1/4 cup of sprinkles ready to go. Use a cookie scoop or a tablespoon to portion out your dough into balls—I aim for about 1.5 tablespoons each—to keep them uniform. Uniformity is key for even baking, right?
Roll each dough ball thoroughly in those external sprinkles until it’s completely coated in red, green, and white joy. Place them about two inches apart on your prepared sheets. Next, gently flatten them just a bit. I usually use the bottom of a small, flat drinking glass or the palm of my hand to press them down slightly. This small press ensures they don’t end up as giant dome-shaped mounds and helps them spread perfectly for that classic look that makes these Festive vanilla cookies so appealing.
Baking Times and Visual Cues
Get that oven preheated to 350°F (175°C). We are baking these hot and fast because we want that chewy center. Slide your trays in and set your timer for 9 minutes.
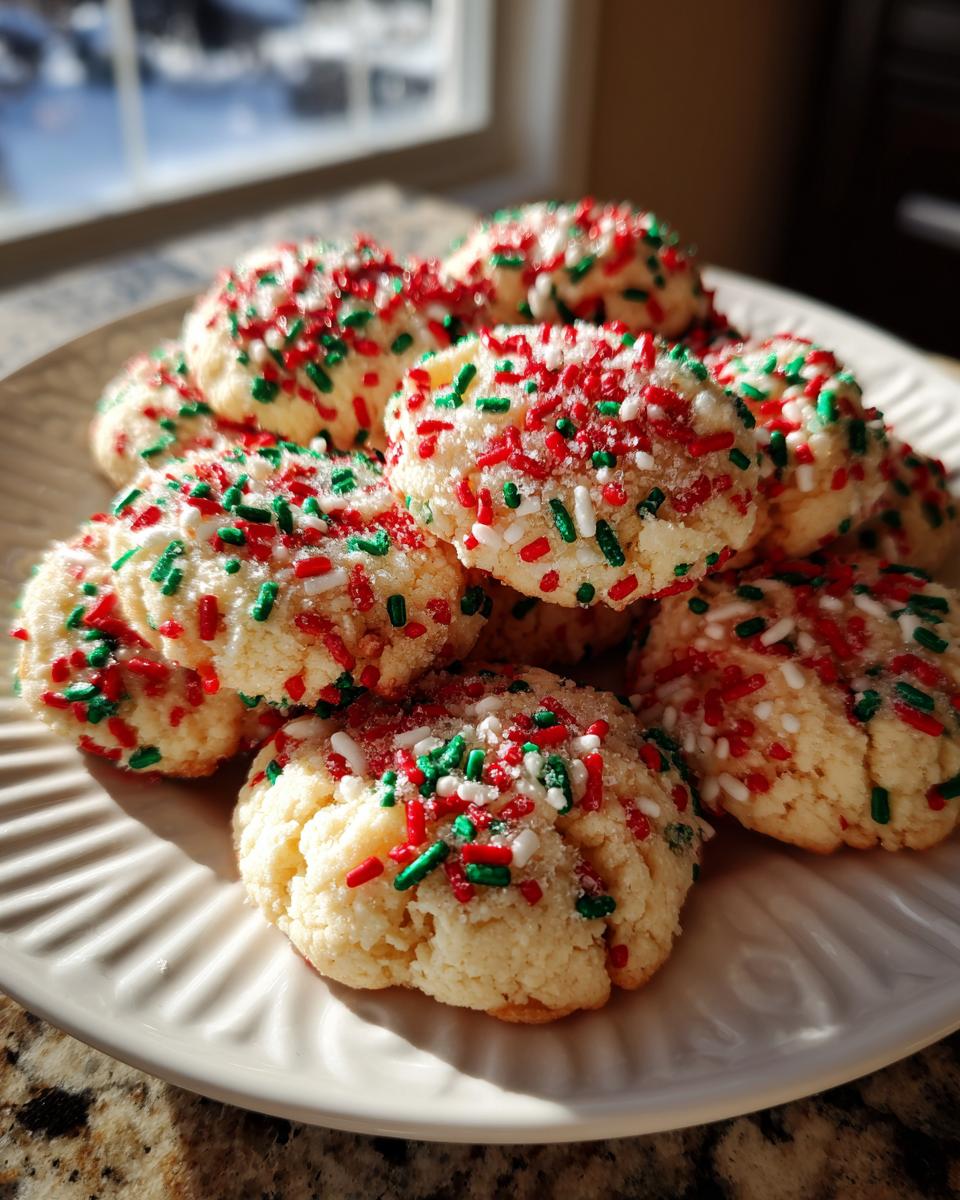
Don’t rely on the timer alone, though! You need to watch for the visual cues. The edges of the cookies should look set—like they aren’t wobbling anymore—but the very center should still look a little soft if you peek quickly. Pull them out right when you see that—they finish cooking on the hot pan. If you wait until the center looks totally dry, you’ll end up with a crunchy cookie, and we specifically engineered these to be delicious treats without needing a complicated glaze, thanks to that perfect bake time. Let them hang out on the baking sheet for about five minutes before moving them carefully to a wire rack to cool completely. If you’re looking for flavor boosts on other holiday bakes, check out my recipe for maple-cookies-brown-sugar-brown-butter-glaze for inspiration!
Tips for Success with Holiday Sprinkle Cookies
Baking is smart science, not guesswork, and for these crowd-pleasing holiday sprinkle cookies, a few professional tweaks make the difference between good and utterly fantastic. We don’t want our vibrant colors bleeding out or our soft cookies hardening up halfway through the party. Think of this as the quality control checklist to make sure your batch is worthy of any cookie recipes for parties list.
Choosing the Right Sprinkles for Color and Texture
This is purely strategic: you have two main choices for sprinkles, and they behave differently. If you want that classic, soft-on-the-bite cookie, stick mainly to jimmies (the long, thin ones). They offer great color without adding a lot of hard crunch. Nonpareils (the tiny little balls) add a satisfying textural pop, but if you use too many, they can make the outside feel a bit crunchy, which we are trying to avoid in this soft batch.
A huge efficiency tip? Look for pre-mixed holiday sprinkle blends. They usually have the perfect ratio of red, green, and white. Be warned, though—if you’re using cheap, intensely colored sprinkles, mix them into the dough very last and try not to overwork them, or you’ll end up with boring, pale green dough instead of flecks of color. For general pantry staples that simplify your whole baking routine, check out my guide on easy-homemade-copycat-olive-garden-breadsticks.
Troubleshooting Common Issues
Let’s talk about what happens when the project goes sideways. The biggest concern with these no-chill cookies is over-spreading, which makes them thin and crispy instead of thick and chewy. If your cookies spread into flat pancakes, it almost always means one of two things: one, your butter was too warm and oily when creaming, or two, your oven temperature wasn’t hot enough during those initial crucial minutes.
If the edges are crisp but the center is raw, your oven might be running cold, or you simply need another minute in there. Remember the visual cue: set edges, soft center. If you pull them out and they look slightly too puffy, don’t panic! They will deflate slightly as they cool on the pan, which settles them into that perfect, slightly thicker structure we want. You need reliable results when feeding a crowd!
Variations for Your Christmas Cookie Exchange Recipes
While this formula is rock solid for classic festive cheer, I know the holiday season calls for mixing things up! If you want to elevate these beyond the basic sugar cookie base for a big Christmas cookie exchange, here are a few tweaks that still keep the texture irresistibly soft. Remember, the ‘no chill’ base is fantastic because it handles mix-ins exceptionally well without turning into a brick dough.
I’ve seen folks use these same proportions and swap out just one element for a completely new profile. It’s all about maximizing flavor impact with minimal extra effort—that’s the efficient way to handle your holiday dessert ideas!
My favorite big upgrade, which I see pop up a lot in searches, is adding chips. You absolutely need to try adding white chocolate chips. They complement the vanilla and the sprinkles perfectly. If you do this, fold in about 1/2 cup of good quality white chocolate chips right along with your first batch of sprinkles.
Another great way to introduce complexity is through extracts. Vanilla is classic, but try replacing half the vanilla extract (use 1/2 teaspoon) with almond extract. That little hint of almond is super cozy and pairs incredibly well with that buttery base. For those who want to explore advanced flavor pairings, check out my thoughts on getting richness in my maple-fudge-recipe-creamy-easy/.
For an even more pronounced citrus note—excellent for cutting through the sweetness—use the zest of one small orange along with the vanilla. The citrus scent alone screams holiday baking, and it works surprisingly well with the red and green colors going in!
Storage and Make-Ahead for Simple Christmas Treats
One of the best things about these cookies being so sturdy and soft is that they are fantastic for making ahead. When you’re planning for big holiday events, you need reliable Simple Christmas treats you can count on, and storage is key to maintaining that chewy texture we worked so hard to engineer.
Airtight Storage for Maximum Freshness
Once these christmas sprinkle cookies are completely cool—and I mean totally, 100% cool, otherwise they steam up and get soggy—you want to store them in a truly airtight container. Any air exposure will start drying them out, and we worked hard to avoid that! A heavy-duty plastic container with a tight-fitting lid works perfectly. If you stack them, use parchment paper or wax paper squares between the layers. This prevents the sprinkles on the top of one cookie from sticking to the bottom of the next one.
Stored properly at room temperature, these will stay deliciously soft for at least five days. Honestly, I think they taste even better on day two after the vanilla flavor has really settled in. If you’re making them for a party a week away, that’s absolutely fine!

Freezing Instructions for Busy Bakers
If you need to get ahead of the game, freezing is where your project management skills shine. You have two options here, and both are simple.
For freezing baked cookies: Wait until they are completely cool, stack them with parchment dividers, and seal them tightly in a freezer-safe bag or container. They hold up beautifully in the freezer for up to two months. When you need them, just pull out the amount you want and let them thaw on the counter for about an hour. Do not try to rush the thaw in the microwave, or you risk getting those hard edges.
For freezing the dough (if you want fresh-baked cookies later): This is my preferred method because nothing beats the smell of fresh cookies right before guests arrive. Scoop the dough balls, roll them in the sprinkles, and place the finished, unbaked balls on a baking sheet. Freeze them solid on the tray (about an hour). Once they are rock-hard balls, transfer them to a freezer bag. When you decide to bake, take them straight from the freezer, place them on your parchment-lined sheet, and add about 2 to 3 minutes to the baking time listed in the instructions. It’s an easy win, seriously. For other make-ahead ideas that save time during the holidays, check out my recipe for easy-homemade-cranberry-sauce-recipe; it’s a total time-saver.
Serving Suggestions for Holiday Dessert Ideas
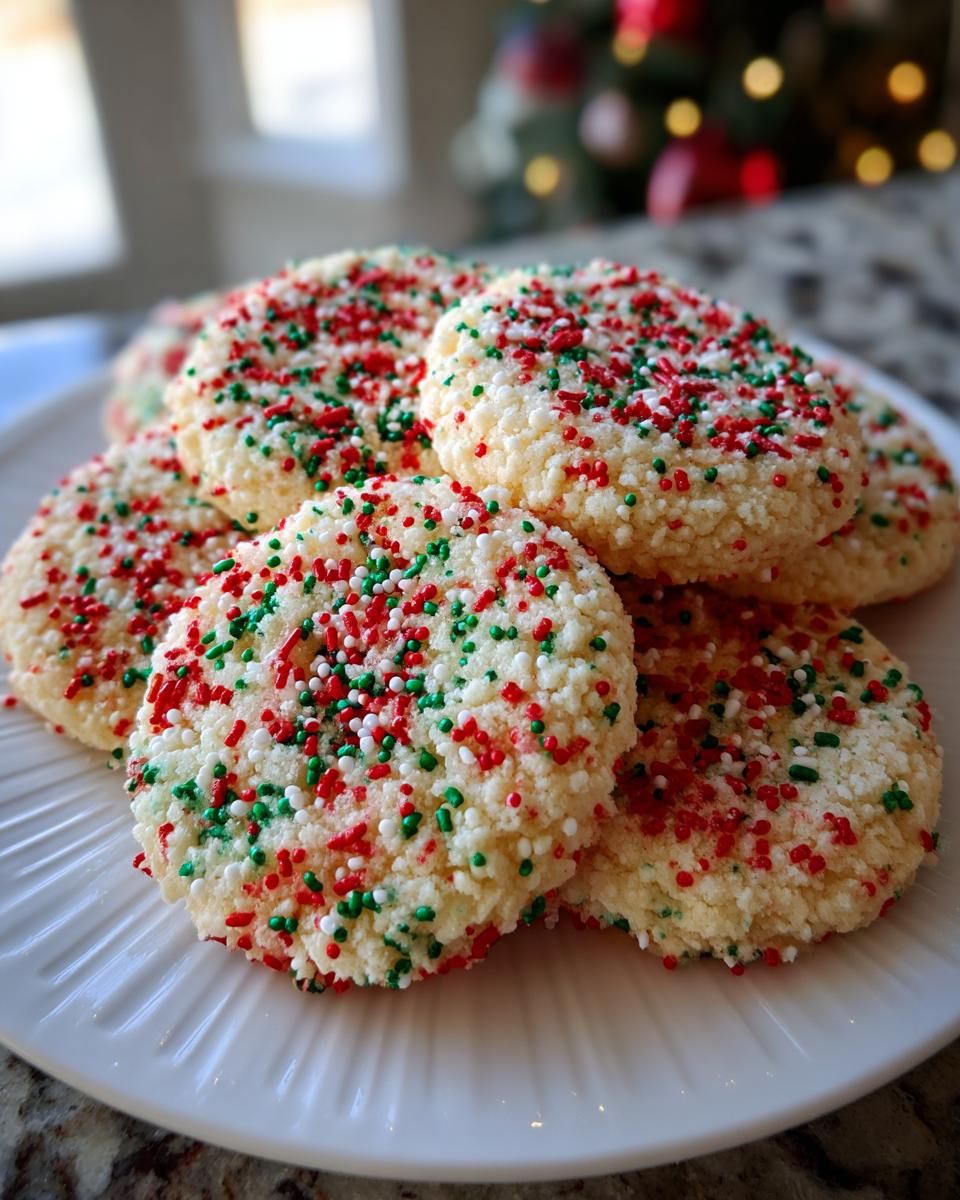
When you’ve optimized your time to produce these beautiful, buttery christmas sprinkle cookies, you need to present them like the work of art they are! Because these cookies are so rich and delightfully simple—they don’t have heavy icing or fillings—they pair beautifully with almost anything you serve at your holiday gathering. We’re talking about complementary profiles here; think warmth, creaminess, or a little bit of tartness to cut through that sweetness.
For your full range of holiday dessert ideas, these cookies are sturdy enough to handle a place on any dessert platter. Since they are essentially vanilla-forward sugar cookies, they act as the perfect neutral base surrounded by richer items like fudge or rum balls.
Here are my go-to pairings for maximizing the impact of these colorful treats:
- Warm Beverages are Non-Negotiable: A fresh-brewed coffee or a classic hot chocolate elevates these cookies immediately. The melted chocolate with the buttery shortbread texture? Perfection. If you’re serving kids, you have to try homemade options—check out my recipe for easy-homemade-strawberry-milk-recipe; it’s shockingly good and feels much more special than store-bought stuff.
- The Milk Factor: If you’re setting out a plate for Santa (or just for the late-night snackers), don’t forget the milk! These are rich enough that regular dairy milk works great, but if you want to jazz it up, maybe add a dash of cinnamon or nutmeg to the milk itself.
- Serving Alongside Fruit: To keep the platter balanced, place these cookies next to something slightly tart. Think bowls of fresh clementines, sliced pears, or maybe even some cranberry sauce cubes if you’re serving them as part of a larger buffet spread. The buttery notes just sing when juxtaposed with a little acidity.
If you’re packaging these up for gifts, package about four cookies per bag with a little tag—that’s the perfect portion size for a neighbor or coworker. They really offer that instant festive vibe without needing complicated decorating.
Frequently Asked Questions About Baking These Cookies
When you’re doing easy Christmas baking, it’s normal to have a few questions about protecting that perfect soft texture. I get asked the same things over and over again about these christmas sprinkle cookies, so I pulled the most common queries right here. Hitting these small details ensures your batch is absolutely perfect for that busy holiday cookie exchange.
Can I substitute the sprinkles for colored sugar?
You absolutely can! But know that you are trading texture for color saturation. Colored sanding sugar is made of tiny, sharp crystals, so when you roll the dough in it, you get a much crunchier, almost sparkly shell on the outside. Jimmies (the rod-shaped ones) we used in the recipe dissolve a bit more into the surface, contributing to that overall soft chew. If you use sanding sugar, you’ll have a beautiful, vibrant look, but the texture will be noticeably crisper on the surface. For the softest results, stick to the jimmies, or use a 50/50 mix of both if you want that hard crunch with your softness!
Why are my cookies spreading too much?
This is the enemy of the no-chill method! If your cookies are spreading out into thin, greasy discs, it’s usually one of two process errors. First: temperature. If your butter was too warm—almost melted—when you creamed it, it won’t hold the structure when it hits the heat. It just melts away immediately. Second: measurement error on the dry side. If you packed your flour into the measuring cup instead of spooning it in lightly and leveling it off, you didn’t add enough flour to support the fat content, so the dough was too slack.
Next time, verify your butter temp and make sure those four cups of flour are measured correctly! If you’re looking for other ways to simplify cooking processes around the holidays, check out my tips for easy-one-pot-enchilada-pasta to see how I tackle weeknight optimization.
Are these ‘Christmas sugar cookies with sprinkles’ suitable for freezing?
Yes, these Christmas sugar cookies with sprinkles freeze like champs, which is great for anyone prepping way ahead of time! As I mentioned before, freezing the unbaked dough balls is the superior strategy here. Scoop them, roll them in the outer sprinkles, freeze them solid on a sheet, and then bag them airtight. They bake up just as beautifully, maybe needing just two extra minutes in the oven straight from frozen. If you freeze them baked, they are fine for a couple of months, but you sometimes lose a tiny bit of that fresh-from-the-oven springiness. For the absolute best texture, always freeze them raw!
Nutritional Estimate for Your Festive Baking Projects
Look, as someone who approaches recipes like an engineer, I always believe in giving you the full data set on what you’re making. While these are fantastic christmas sprinkle cookies, and they are based on simple ingredients, remember that nutritional tracking can vary wildly based on the exact brands of butter, the size of your egg, and how heavily you roll those sprinkles on. Consider these figures serving suggestions based on my yield calculations, not a guarantee etched in stone!
I use standard USDA data for these estimates, calculated per cookie yield (24 total). If you are looking at making healthier swaps or just want to see how this stacks up against other seasonal bakes, knowing the baseline is important. For example, you can see the quick prep time here means they are a highly efficient way to get a flavorful dessert on the table compared to recipes that require extensive chilling or multiple steps, like my easy-cheesy-ham-veggie-egg-bake-casserole which requires more assembly time.
Here is the quick breakdown for one cookie:
- Serving Size: 1 cookie
- Calories: 160
- Sugar: 12g
- Fat: 8g
- Saturated Fat: 5g
- Carbohydrates: 20g
- Protein: 2g
- Cholesterol: 30mg
The sugar content is right where you’d expect for a classic sugar cookie base, and the fat comes predominantly from that good quality butter that gives these their amazing melt-in-your-mouth quality. Enjoy them responsibly, and remember, they are much better for you than stress-baking something overly complicated!
PrintSoft & Chewy Christmas Sprinkle Sugar Cookies (No Chill)
Make these soft and chewy Christmas sprinkle sugar cookies without needing to chill the dough. This easy recipe uses simple ingredients to create festive, colorful cookies perfect for holiday parties and cookie exchanges.
- Prep Time: 15 min
- Cook Time: 11 min
- Total Time: 26 min
- Yield: 24 cookies 1x
- Category: Dessert
- Method: Baking
- Cuisine: American
- Diet: Vegetarian
Ingredients
- 1 cup unsalted butter, softened
- 1 cup granulated sugar
- 1 large egg
- 1 teaspoon vanilla extract
- 2 3/4 cups all-purpose flour
- 1 teaspoon baking powder
- 1/2 teaspoon baking soda
- 1/2 teaspoon salt
- 1/2 cup Christmas sprinkles (red, green, and white jimmies or nonpareils)
- 1/4 cup extra Christmas sprinkles for rolling
Instructions
- Preheat your oven to 350°F (175°C). Line baking sheets with parchment paper.
- In a large bowl, cream together the softened butter and granulated sugar until light and fluffy.
- Beat in the egg and vanilla extract until just combined.
- In a separate bowl, whisk together the flour, baking powder, baking soda, and salt.
- Gradually add the dry ingredients to the wet ingredients, mixing on low speed until just combined into a dough. Do not overmix.
- Fold in the 1/2 cup of Christmas sprinkles into the dough.
- Place the extra 1/4 cup of sprinkles for rolling into a shallow dish.
- Scoop the dough into balls, about 1.5 tablespoons each. Roll each ball in the extra sprinkles until fully coated.
- Place the coated dough balls onto the prepared baking sheets, leaving about 2 inches between them. Gently press down slightly on the top of each ball with the bottom of a glass or your palm to flatten slightly.
- Bake for 9 to 11 minutes, or until the edges are set but the centers still look soft.
- Let the cookies cool on the baking sheets for 5 minutes before transferring them to a wire rack to cool completely.
Notes
- For extra soft cookies, use a mix of red, green, and white jimmies and nonpareils for the coating.
- If you prefer a slightly thicker cookie, chill the dough balls for 15 minutes before rolling in sprinkles and baking.
- These are excellent for cookie exchanges because they look festive without needing complex icing.
Nutrition
- Serving Size: 1 cookie
- Calories: 160
- Sugar: 12
- Sodium: 105
- Fat: 8
- Saturated Fat: 5
- Unsaturated Fat: 3
- Trans Fat: 0
- Carbohydrates: 20
- Fiber: 0
- Protein: 2
- Cholesterol: 30