
If you’ve ever picked up a slice of bakery bread and thought, “How do they get it *this* soft?” — I’ve got great news. You can absolutely replicate that cloud-like texture right here in your own kitchen. My name is Leo Grant, and when I started Dishicious, it was because I was tired of complicated recipes that wasted my time. I bring a project manager’s efficiency to the kitchen, meaning we strip away the fluff and focus only on the steps that deliver maximum flavor and texture. This foolproof recipe for condensed milk bread is proof of that philosophy. We use the natural richness of the milk to achieve that signature soft homemade bread feel without needing fussy techniques. You can check out our approach to other reliable baking projects, like our easy homemade bread bowls, to see how we get results every time. Trust me, once you try this loaf, it becomes your new go-to!
- Why This Sweetened Condensed Milk Bread Recipe Works (The Dishicious Method)
- Ingredients for the Soft & Fluffy Condensed Milk Loaf
- Step-by-Step Instructions for Perfect Condensed Milk Bread
- Tips for Bakery Style Bread at Home with Condensed Milk Bread
- Equipment Needed for This Enriched Yeast Bread
- Storage and Reheating Instructions for Your Condensed Milk Bread
- Serving Suggestions for Sweet Breakfast Bread
- Frequently Asked Questions About Making Condensed Milk Bread
- Nutritional Estimates for This Rich Flavor Bread
Why This Sweetened Condensed Milk Bread Recipe Works (The Dishicious Method)
When I engineered this recipe, I wanted straightforward ingredients to deliver a level of softness usually reserved for professional bakeries. The beauty of using sweetened condensed milk is that it handles multiple jobs at once. If you’re looking for your new favorite easy yeast bread beginner recipe, this is it!
Here’s the breakdown of why this specific condensed milk bread outperforms the standard loaf:
Achieving the Tender Crumb Bread Texture
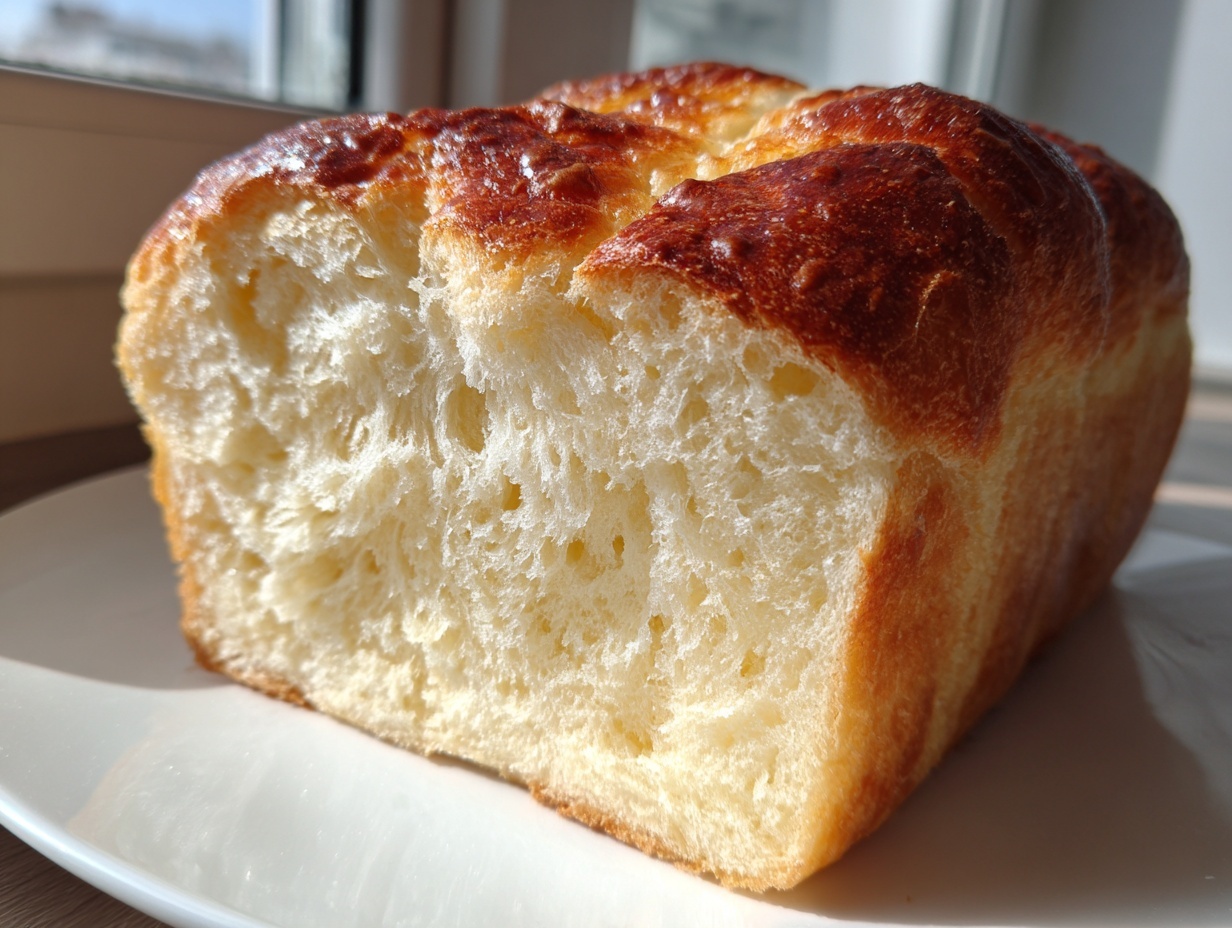
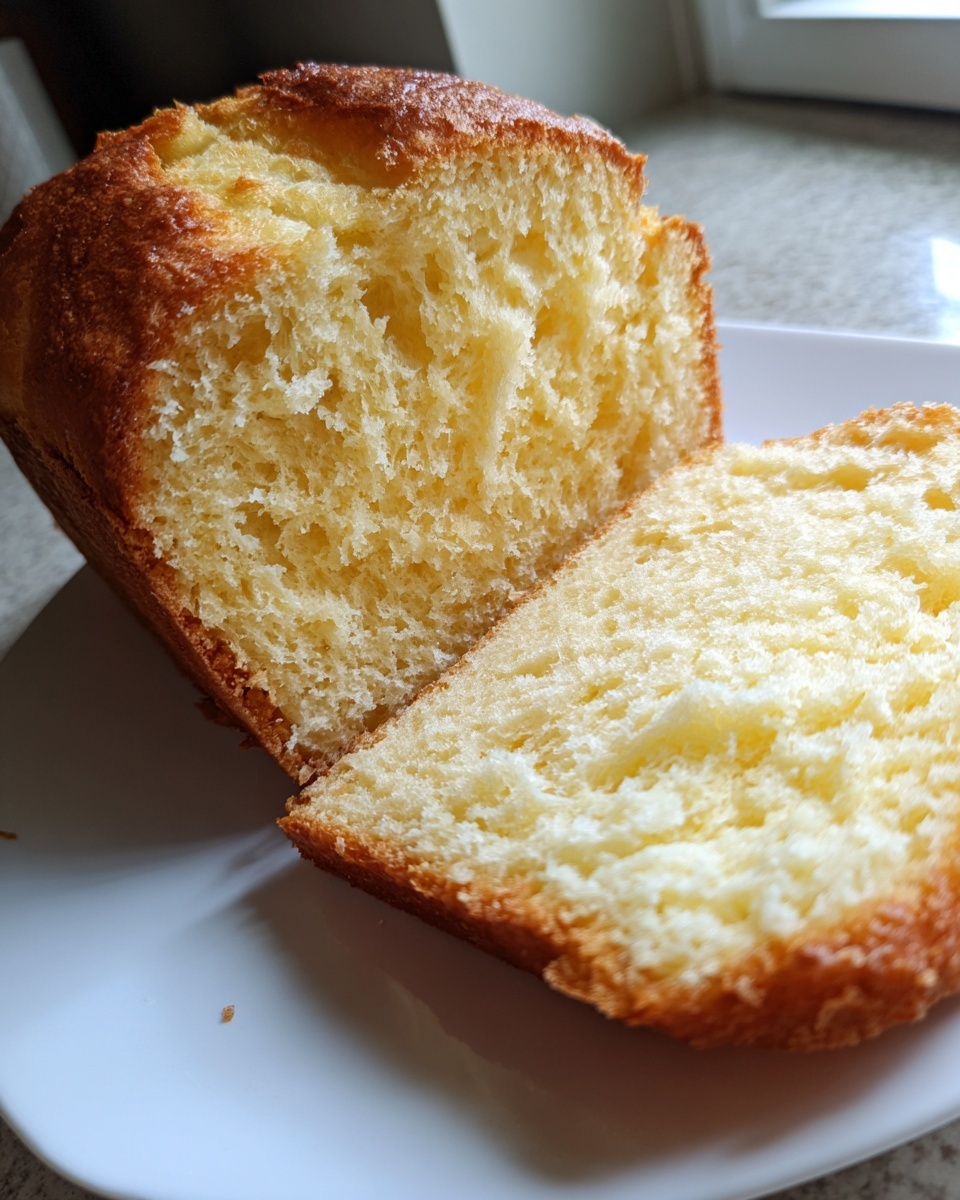
It’s all about the sugar and fat content in that can! The high sugar stabilizes the dough structure but also keeps the final crumb incredibly moist. This richness ensures you get that desirable, melt-in-your-mouth tender crumb bread texture that you just don’t get using plain sugar and milk.
A Beginner Bread Recipe That Eliminates Guesswork
I know yeast can be intimidating, but we’ve streamlined this process. Because the liquid is already enriched, the dough manages itself really well. This isn’t some complex, lengthy technique; it’s smart baking designed to be reliable, making it the perfect easy sweet bread baking project for anyone new to yeast.
Ingredients for the Soft & Fluffy Condensed Milk Loaf
Alright, let’s talk ingredients. The success of this condensed milk bread really hinges on using everything at the right temperature. When the milk and eggs are ready—that means room temperature for the latter—the dough comes together so much smoother, which is the first step toward that bakery-style interior. Don’t rush this part; letting your egg sit out for 30 minutes makes a difference!
When you gather your components, you’ll notice we are keeping things lean because the condensed milk does most of the heavy lifting flavor-wise. Here is exactly what you need to have on hand for one incredible condensed milk loaf:
First up, you’ll need 1 cup of warm milk—and I mean *warm*, aim for about 105 to 115°F. If it’s too hot, you’ll deactivate your 2 1/4 teaspoons of active dry yeast, and we can’t have that! Then comes the star: 1/4 cup of sweetened condensed milk. This brings the sweetness and the richness we are aiming for.
Make sure the 1 large egg you use isn’t cold! Combine that with 1/4 cup of melted, unsalted butter. For your structure, you’ll need 3 cups of all-purpose flour, plus a little extra just for dusting later on. Don’t forget the 1 teaspoon of salt to balance the sweetness. I also noted 1 tablespoon of optional granulated sugar; I usually throw this in because I like my sweet breakfast bread just a touch sweeter, but you can absolutely skip it if you prefer.
Step-by-Step Instructions for Perfect Condensed Milk Bread
This is where the project management mindset really pays off—everything moves in a logical flow to ensure we develop that amazing structure. If you follow these timing cues, you won’t have to worry about troubleshooting tough dough. We aren’t using any complicated additions here, but precision matters for achieving the best condensed milk bread results. For a look at how we handle other dough projects, check out my thoughts on sourdough sandwich bread for comparison.
Activating Yeast and Mixing the Dough
First things first: wake up that yeast! In your big mixing bowl, combine your warm milk and the yeast packets. The temperature is critical here; it must be between 105°F and 115°F. Too cool, and the yeast sleeps; too hot, and they die. You’re waiting about 5 to 10 minutes until it gets foamy—that’s the sign it’s ready to work for us. Once it’s bubbly, whisk in the sweetened condensed milk, the room-temperature egg, and the melted butter until it looks unified. This is the flavor base for your entire bread with condensed milk.
Kneading and the First Rise of Your Sweet Homemade Bread
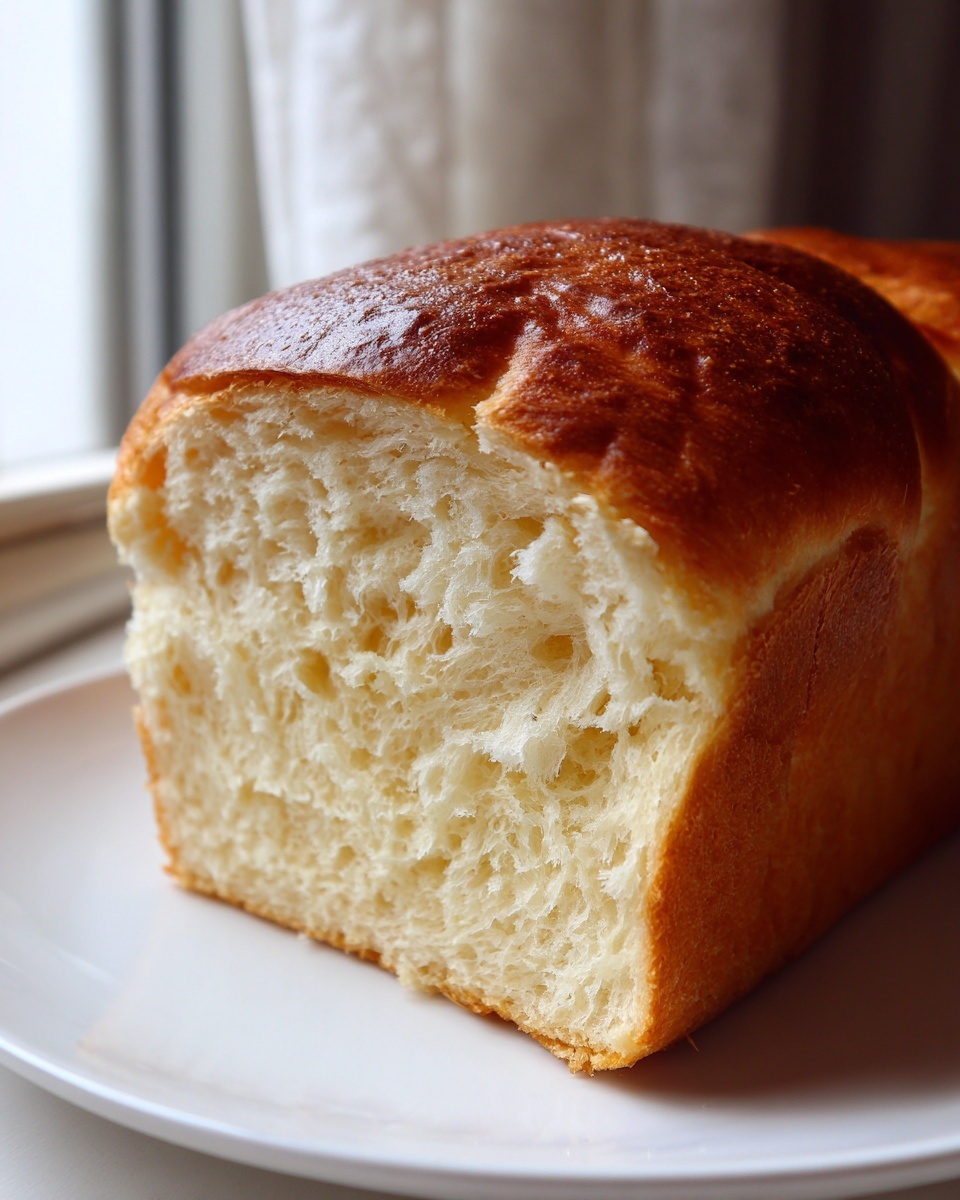
Time to marry the wet and dry. Whisk your flour and salt (and sugar, if you’re using it) separately, then gradually add the dry mix to your wet ingredients. Once a shaggy dough ball forms, turn it onto your lightly floured counter. Now, knead with purpose for a solid 8 to 10 minutes. You’re looking for that perfect, smooth, elastic texture—it should feel very soft, confirming you’re on track for soft homemade bread. Place that smooth dough into an oiled bowl, cover it up, and let it chill out in a warm spot for 1 to 1.5 hours, or until it’s doubled in size.
Shaping and Baking the Final Condensed Milk Loaf
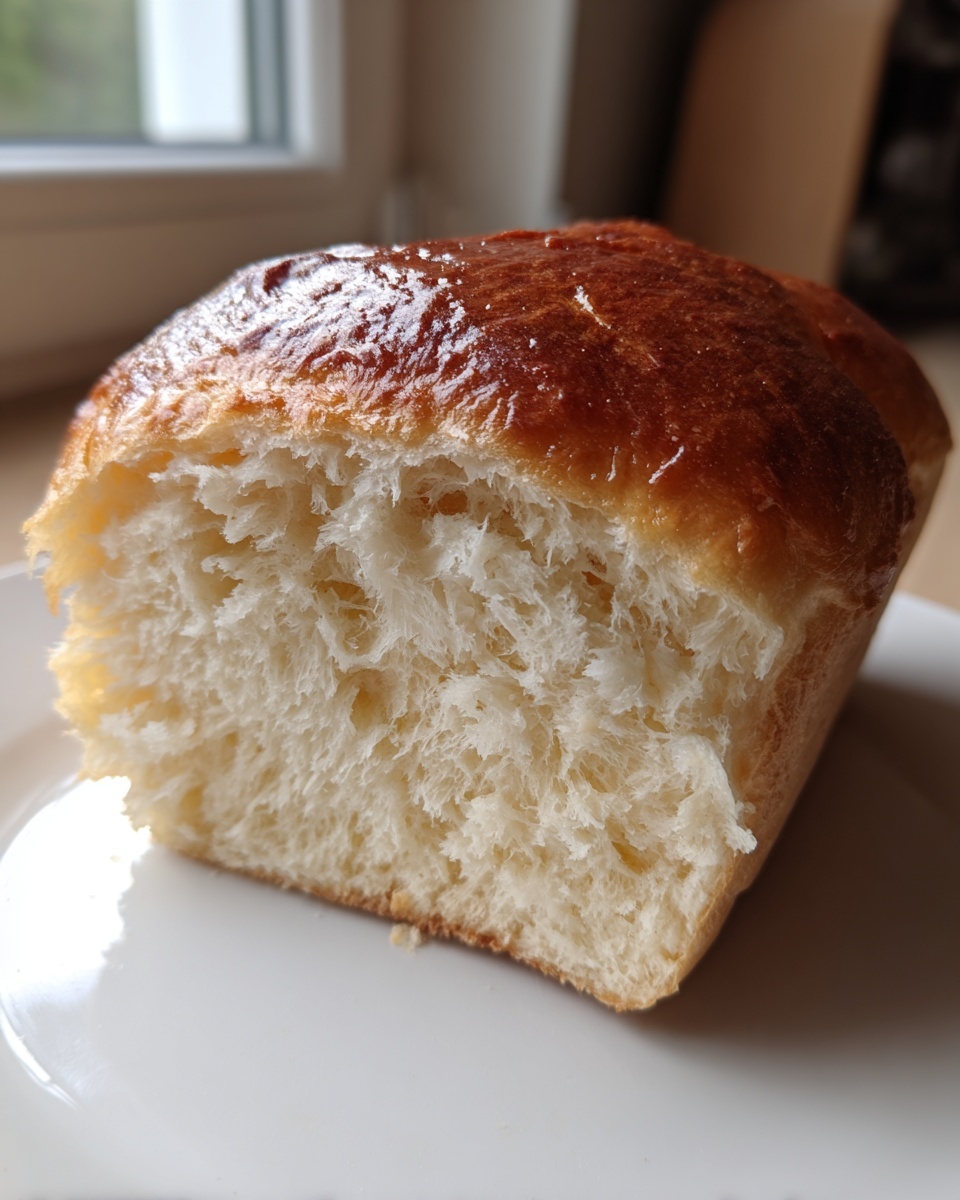
Gently punch the air out of your risen dough. Shape it carefully into a log and tuck it into your greased 9×5 inch loaf pan. Cover it loosely again and let it have a second, shorter rise—about 30 to 45 minutes. We want it crested about an inch over the pan rim. Preheat your oven to 350°F (175°C). Bake for 30 to 35 minutes. For ultimate confidence, pull it out when the top is golden and use an instant-read thermometer: 200°F internally means you’ve nailed the technique for this condensed milk loaf.
Tips for Bakery Style Bread at Home with Condensed Milk Bread
Okay, now that you’ve baked the loaf, let’s talk about keeping that beautiful texture locked in. My goal is always to give you tips that work just as well as the initial bake. Since this condensed milk bread is so rich due to the condensed milk, moisture retention is fantastic, but how you treat it afterwards matters! We want that bakery-style result to last.
When the loaf comes out of the pan, you *must* let it cool completely on a wire rack. If you try slicing it while it’s warm, you’ll compress that delicate structure we worked so hard for, and it won’t have that airy fluffy milk bread quality. Trust me on this one; patience pays off here. If you are interested in other enriched doughs, you should definitely check out my recipe for cinnamon rolls with heavy cream—they share a similar enriched dough principle!
If you aren’t eating the whole thing right away—and let’s be honest, who can resist a slice or two?—it freezes like a dream. Slice it completely first, then wrap the pieces tightly before tossing them in the freezer. When you need a slice, just pop it right into the toaster!
Expert Advice for Maximizing Sweet Bread Rolls Flavor
Speaking of options, don’t just stick to the loaf pan! If you want an even quicker bake time and even softer edges, turning this dough into sweet bread rolls is a fantastic move. You just divide the dough into 12 equal pieces and nestle them close together in a greased 9×13 inch pan. The steam from each roll baking against its neighbor keeps them extra pillowy. Also, remember that tip about room temperature eggs? That’s doubly important for rolls, as it helps the yeast activate evenly across all those smaller pieces!
Equipment Needed for This Enriched Yeast Bread
Before you even think about waking up your yeast, a good project manager gets the toolkit ready, right? Having everything staged ensures that when you add ingredients, you aren’t scrambling around looking for a whisk while your milk cools down. For this specific enriched yeast bread, we aren’t asking for anything too exotic—just the standard reliable tools that every home baker should have in their arsenal.
Here’s the essential gear you should pull out and set on your counter before you start mixing. Preparation is efficiency, folks!
- Large Mixing Bowls: You need at least two. One for activating the yeast and mixing the wet ingredients, and another for whisking your dry flour mix. Don’t try to mix everything in one bowl initially; it gets messy fast.
- 9×5 Inch Loaf Pan: This is crucial for shaping the final loaf. Make sure you grease this pan really well, or if you’re really serious about non-stick assurance, grab some parchment paper to line the bottom.
- Whisk and Rubber Spatula/Scraper: A whisk is perfect for blending the liquid base, and a sturdy spatula is your best friend for scraping down the sides of the bowl when you start incorporating the flour.
- Plastic Wrap or Clean Kitchen Towel: You need something to cover the bowl tightly for the first rise, and something more loosely draped for the second rise in the pan.
- Measuring Cups and Spoons: Precision is non-negotiable in baking, especially when we are dealing with yeast activation. Make sure your milk measuring cup is accurate for that temperature check!
- Wire Cooling Rack: I cannot stress this enough. Once the bread is done, it needs air circulation underneath immediately, or the bottom will get soggy, ruining that beautifully light crumb structure we worked for.
Storage and Reheating Instructions for Your Condensed Milk Bread
Okay, you’ve baked this beautiful, rich, and wonderfully sweet loaf. Now, the final project step: storage. Because this condensed milk loaf is so naturally enriched—thanks to all that fat and sugar—it actually stays soft for longer than a standard white bread. However, improper storage is the quickest way to compress that amazing, airy texture we worked for. We need to lock in that tenderness!
My core rule, which I apply to everything from this bread to my vegan banana bread recipe, is this: never store bread warm. You have to let it cool completely, like, stone cold, on the wire rack before you even think about wrapping it up. Trapped steam equals sweat, and sweat equals a gummy crust, which ruins the whole point of soft homemade bread!
Here is the optimized storage plan for your condensed milk bread:
- Counter Storage (1-2 Days): If you think you’ll eat the whole loaf quickly, wrap it tightly in plastic wrap, and then place that wrapped loaf into a large zip-top bag. This really protects the crust texture. Keep it on the counter, not in the fridge—cold temps accelerate staling, which we definitely want to avoid!
- Freezing for Later: This is my preferred method for maximum freshness retention. As I mentioned before, slice the loaf *completely* first. Then, place wax paper or parchment between the slices, stack them together, and wrap the entire stack tightly in plastic wrap, followed by a layer of foil or a freezer bag. This keeps the slices separate and prevents freezer burn.
When you want a slice or two, just pull what you need. You can toast the frozen slices directly—they heat up beautifully! If you want the whole loaf restored, let it thaw on the counter for a few hours before you plan to eat it. You won’t believe how close to fresh-baked it tastes when you warm it up in a low oven for about five minutes!
Serving Suggestions for Sweet Breakfast Bread
Honestly, the hardest part of making this condensed milk bread is waiting for it to cool so I can slice it! But once you do, the ways you can enjoy this tender loaf are endless. Because it already has that touch of dairy richness and sweetness from the condensed milk, it stands up beautifully on its own as a perfect sweet breakfast bread, but it also plays well with toppings. You don’t need to overcomplicate things here; simple is often best when the bread itself is this good.
If you’re eating it the same day it comes out of the oven, try it just barely warm—not hot, remember!—with a light smear of good salted butter. That slight melt that seeps into the soft crumb? Perfection.
For a slightly more substantial morning treat, this loaf makes incredible toast. It crisps up gorgeously on the edges while staying relatively soft in the middle. Spread on some high-quality strawberry jam, maybe some orange marmalade—something tart cuts through the richness nicely. It’s also fantastic slathered with honey or a drizzle of maple syrup. It’s definitely sturdy enough to handle that moisture.
But here’s my favorite trick when I have a half-loaf left over: French Toast! Forget dry, standard white bread; this sweet homemade bread is practically begging to be dipped. The condensed milk locks in so much moisture that when you dip it in your egg mixture, it absorbs just enough without getting soggy or falling apart. You get this amazing, custardy interior when it hits the pan. It cooks up beautifully golden, and honestly, you might not even need syrup because the bread is already that subtly sweet. If you’re looking for other easy weekend brunch ideas after you finish your bread, you should check out my sheet pan pancakes—same efficiency, different morning joy!
Frequently Asked Questions About Making Condensed Milk Bread
I get a lot of questions about this recipe because once people see how soft homemade bread this turns out, they start wondering about tweaking it. That’s totally fair! I believe in knowing the ‘why’ behind the steps. Think of this as your troubleshooting session to make sure your bake is foolproof. I’ve addressed the biggest concerns I hear from folks trying to achieve that perfect rise and texture.
Can I substitute granulated sugar for condensed milk in this bread recipe?
That’s a tricky one. You absolutely can substitute *some* of the sugar, but you can’t replace the entire amount of sweetened condensed milk with plain white sugar and expect the same result. The condensed milk isn’t just sugar; it’s milk solids and fat that have been reduced down. That combination is what gives us that incredibly tender structure and rich flavor profile. If you swap it out for just granulated sugar, you’ll end up with a leaner dough that won’t have that signature melt-in-your-mouth quality. You’ll miss out on what makes this condensed milk bread so special!
What is the best way to ensure I get fluffy milk bread every time?
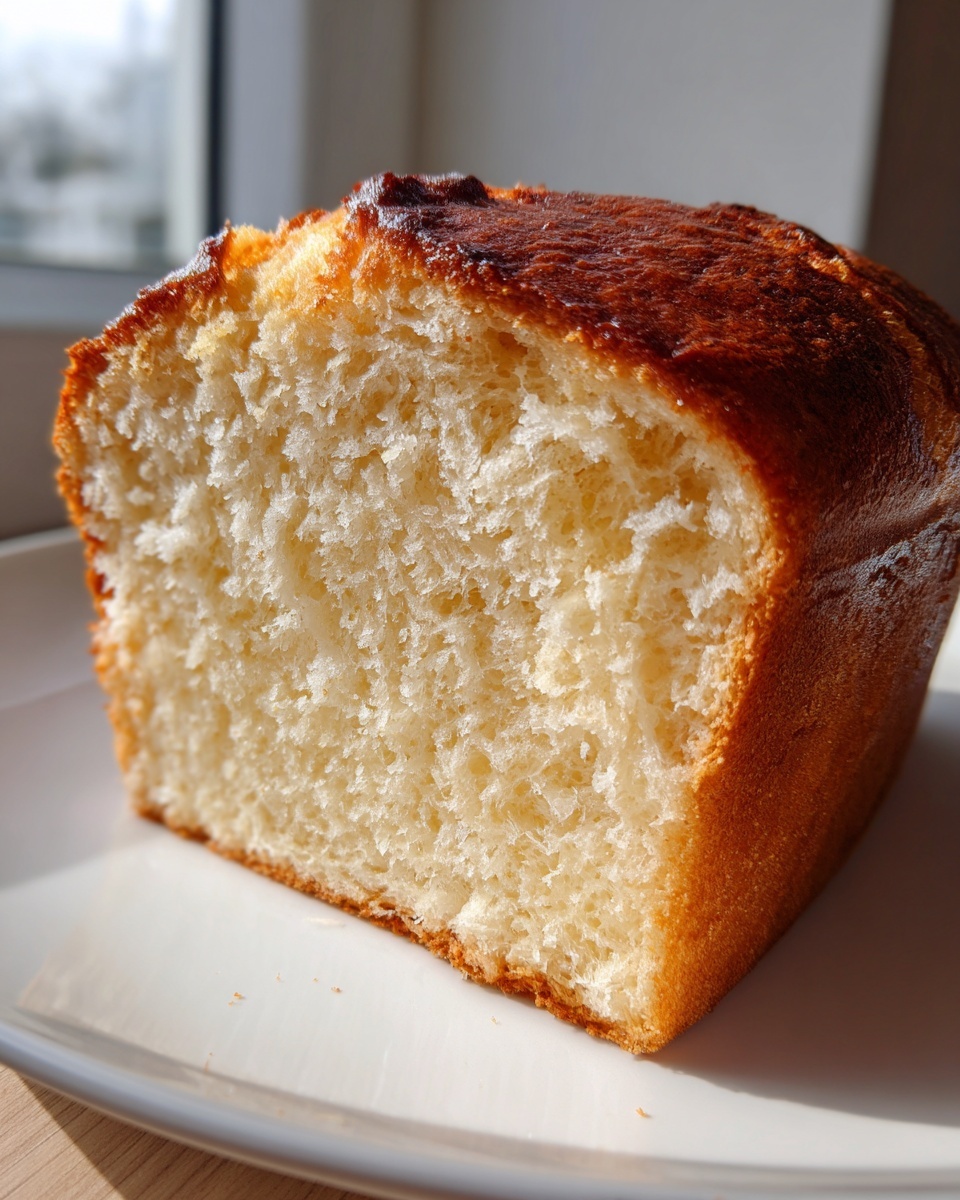
If your goal is maximum fluffiness, there are two non-negotiable steps we covered in the guide. First, you have to knead it fully. Don’t skimp on those 8 to 10 minutes; you need that gluten network to develop strength. That network is what traps all the gas produced by the yeast. Second, patience during the rise is key. If your kitchen is a little cool, your dough will take longer than 1.5 hours to double. Don’t rush it! Letting it rise completely is the secret to producing true fluffy milk bread that stretches beautifully and doesn’t collapse.
Is this recipe too sweet for basic sandwiches?
That’s a great question regarding the sweetness level! I consider this recipe a perfect middle ground—it’s definitely sweeter than a standard sandwich loaf, but it’s not as overtly sweet as a dessert loaf or cinnamon roll dough. It’s perfect for a sweet breakfast bread or alongside dinner. If you are making it purely for savory sandwiches, you might find it slightly too sweet. In that case, I’d suggest omitting the optional tablespoon of granulated sugar and perhaps cutting back the condensed milk by about 10% next time, but for the intended richness, stick to the recipe!
Can I use instant yeast instead of active dry yeast in this recipe?
Yes, you certainly can switch over to instant yeast if that’s what you have on hand! Since instant yeast doesn’t need that warm milk bath to wake up, you can skip Step 1 entirely. Just whisk your instant yeast directly into your dry ingredients (the flour, salt, and sugar). Then, when you mix the wet ingredients, just make sure your milk is still warm (105°F–115°F), but you don’t need the waiting period. This is a great way to speed up the prep time for your easy sweet bread baking process! If you are interested in exploring other methods for achieving ultimate softness, you might want to look into the science behind tangzhong milk bread alternative sometime.
Nutritional Estimates for This Rich Flavor Bread
I always include the nutritional breakdown because, while we aren’t aiming for low-calorie here—this is a treat, after all!—it’s important to know what you’re enjoying. Remember, this is your rich flavor bread, and the condensed milk does add some natural sugars and fats that contribute to that amazing texture.
However, you have to take these numbers with a grain of salt. Since this recipe uses real ingredients and everyone’s measuring technique varies slightly (even mine!), these figures are estimates based on standard calculations for one slice of the condensed milk loaf. This is just an estimate, not a guarantee, so please keep that in mind. It’s all about serving confidence, not strict dieting!
Here’s the estimated breakdown per slice:
- Serving Size: 1 slice
- Calories: 185
- Sugar: 8g
- Sodium: 180mg
- Fat: 4g
- Saturated Fat: 2g
- Trans Fat: 0g
- Carbohydrates: 30g
- Fiber: 1g
- Protein: 5g
- Cholesterol: 25mg
See? Not bad for such a decadent, soft slice of heaven! It’s a worthwhile investment for a slice of true sweet homemade bread.
PrintSoft & Fluffy Sweetened Condensed Milk Loaf Bread
This recipe delivers bakery-style soft and fluffy bread using sweetened condensed milk for a rich flavor and tender crumb. It is a simple, reliable recipe perfect for beginners.
- Prep Time: 20 min
- Cook Time: 35 min
- Total Time: 2 hours 5 minutes
- Yield: 1 loaf (about 12 slices) 1x
- Category: Breakfast
- Method: Baking
- Cuisine: American
- Diet: Vegetarian
Ingredients
- 1 cup warm milk (about 105-115°F)
- 2 1/4 teaspoons active dry yeast
- 1/4 cup sweetened condensed milk
- 1 large egg, room temperature
- 1/4 cup unsalted butter, melted
- 3 cups all-purpose flour, plus more for dusting
- 1 teaspoon salt
- 1 tablespoon granulated sugar (optional, for slight extra sweetness)
Instructions
- Activate the yeast: In a large bowl, combine the warm milk and yeast. Let it sit for 5 to 10 minutes until foamy.
- Mix wet ingredients: Add the sweetened condensed milk, egg, and melted butter to the yeast mixture. Whisk until combined.
- Combine dry ingredients: In a separate bowl, whisk together the flour, salt, and optional sugar.
- Form the dough: Gradually add the dry ingredients to the wet ingredients, mixing until a shaggy dough forms.
- Knead the dough: Turn the dough out onto a lightly floured surface. Knead for 8 to 10 minutes until the dough is smooth and elastic. It will feel soft.
- First rise: Place the dough in a lightly oiled bowl, turning to coat. Cover the bowl with plastic wrap or a clean towel. Let it rise in a warm place for 1 to 1.5 hours, or until doubled in size.
- Shape the loaf: Gently punch down the risen dough. Shape it into a log and place it into a greased 9×5 inch loaf pan.
- Second rise: Cover the loaf pan loosely and let the dough rise again in a warm spot for 30 to 45 minutes, or until the dough has crowned about 1 inch over the rim of the pan.
- Bake: Preheat your oven to 350°F (175°C). Bake for 30 to 35 minutes, or until the top is golden brown and the internal temperature reaches 200°F (93°C).
- Cool: Remove the bread from the pan immediately after baking and cool completely on a wire rack before slicing to maintain the tender crumb structure.
Notes
- For the softest texture, ensure your milk is warm, not hot, to avoid killing the yeast.
- Using room temperature eggs helps the dough mix more evenly.
- This bread freezes well once completely cooled; slice before freezing for easy portions.
- If you prefer rolls instead of a loaf, divide the dough into 12 equal pieces and bake them close together in a 9×13 inch pan.
Nutrition
- Serving Size: 1 slice
- Calories: 185
- Sugar: 8
- Sodium: 180
- Fat: 4
- Saturated Fat: 2
- Unsaturated Fat: 2
- Trans Fat: 0
- Carbohydrates: 30
- Fiber: 1
- Protein: 5
- Cholesterol: 25