
When you think about classic Southern desserts, I bet your mind immediately goes to something rich, creamy, and served in a big casserole dish, right? Those are wonderful, but let’s be honest, sometimes they are a project. That’s why I engineered this incredible solution: the Banana pudding parfait. We take everything you love—vanilla wafers, sweet custard, and fresh bananas—and transform it into individual servings that look fancy but take almost no time.
This is pure Dishicious logic at work. As the founder, Leo Grant, I know that busy schedules shouldn’t stop you from eating the best comfort food. This recipe minimizes fuss by ditching the oven and relying on quick steps. We streamline the process so you can get that perfect, creamy texture in minutes. Don’t you want the satisfaction of serving a showstopper dessert without spending all day on it? I know I do. If we can simplify logistics in project management, we can absolutely simplify a beloved recipe for faster enjoyment. You can check out more of our optimized dessert recipes right here.
- Why This Banana Pudding Parfait is Your New Favorite Easy Southern Dessert
- Essential Components for Your Banana Pudding Parfait
- How to Assemble Your Individual Pudding Parfait
- Expert Tips for the Ultimate Banana Pudding Parfait
- Making Ahead and Storing Your Banana Pudding Parfait
- Variations on the Classic Banana Pudding Parfait
- Equipment Needed for This Layered Dessert
- Frequently Asked Questions About Banana Pudding Parfait
- Estimating Nutritional Data for Your Banana Pudding Parfait
Why This Banana Pudding Parfait is Your New Favorite Easy Southern Dessert
Listen, if you love that deep, nostalgic flavor of proper banana pudding but hate the commitment of a big bake, this parfait is your answer. It hits all the high notes of the classic version but is perfectly optimized for speed. It delivers that comforting taste without the stress—that’s the Dishicious promise!
- Individual Servings: No messy scooping! Everyone gets a beautiful, pre-layered glass.
- Zero Baking Required: We’re talking about a purely assembly-based classic dessert.
- Lightning Fast Prep: Total prep time is only about 15 minutes.
- Classic Flavor Maintained: You get the true taste of the South, just faster.
This is, hands down, the best easy southern dessert for last-minute guests or when you just need a sweet fix tonight.
Speed and Simplicity: Engineering the Perfect Banana Pudding Parfait
I treated this assembly like a mini project plan. We streamline everything. You mix the pudding, then you start layering. The only time sink here is the chilling. We are looking at about an hour and fifteen minutes total time, but honestly, 75 minutes of that is just the fridge doing the heavy lifting. That chilling time is essential for letting those vanilla wafers get just the right amount of soft soak. It’s efficient, it’s delicious, and it is ready when you are!
Essential Components for Your Banana Pudding Parfait
When Leo designed this recipe, the number one goal was accessibility. You shouldn’t have to hunt specialty stores for this comfort food staple. Every single item listed below is something you can grab on your regular grocery run. Seriously, if you have a box of vanilla wafers and some milk, you’re already halfway there. We aren’t messing around with obscure custard powders or rare vanilla beans here. We’re keeping it simple, classic, and reliable so you can focus on the fun part—the layering. This is the foundation for a flawless layered dessert.
Ingredient Clarity for Layered Dessert Success
- 1 (3.4 ounce) package instant vanilla pudding mix
- 2 cups cold milk
- 1 teaspoon vanilla extract
- 1 (8 ounce) container frozen whipped topping, thawed
- 1 box vanilla wafers
- 3 ripe bananas, sliced
How to Assemble Your Individual Pudding Parfait
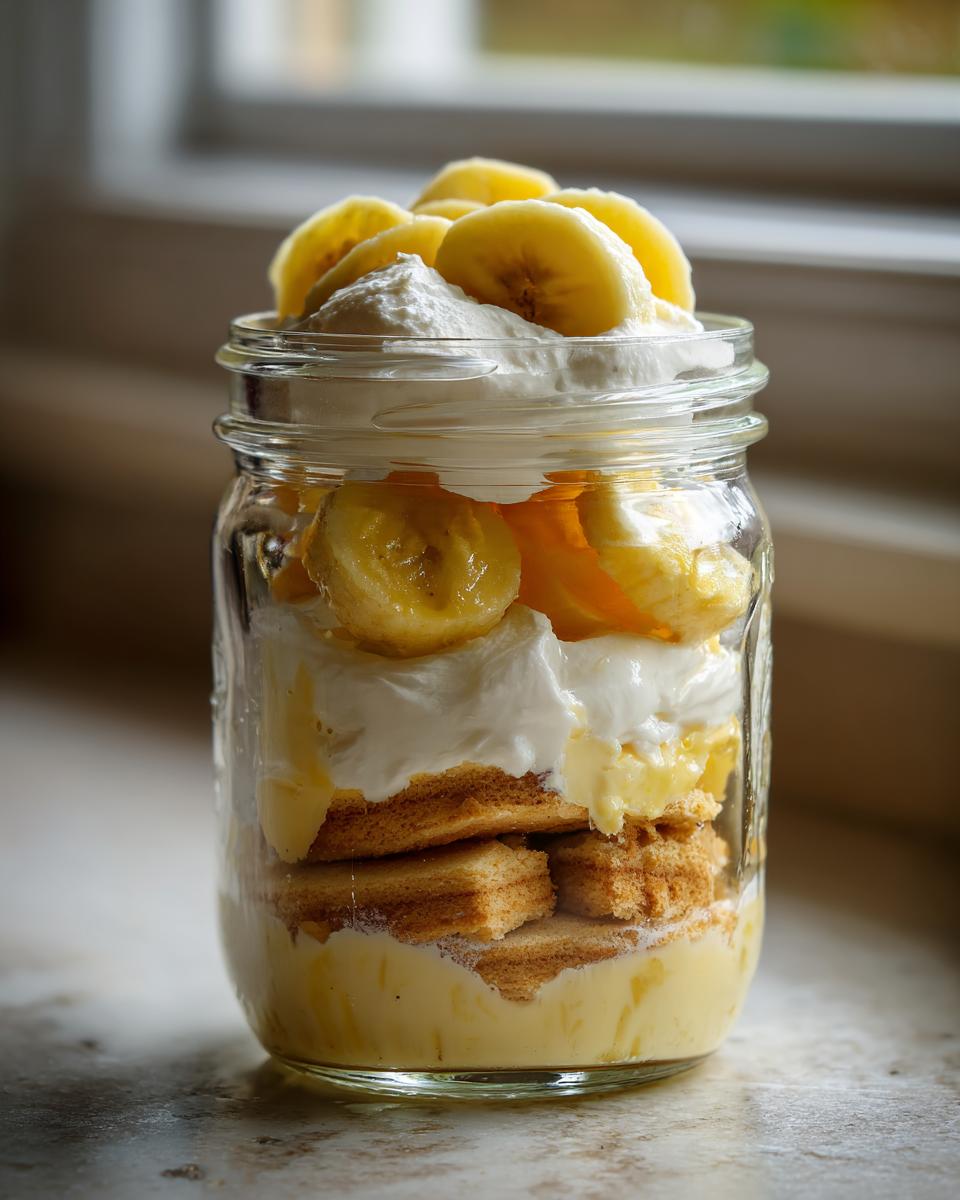
Alright, the ingredients are ready, and now comes the satisfying part: putting it all together! Since we aren’t baking anything, structure is everything here. We want distinct stripes of cookie, fruit, and cream in every glass. This methodical approach ensures that every time you grab one of these individual pudding servings, you get the perfect bite.
Step 1: Creating the Creamy Banana Pudding Base
First things first, we tackle the pudding. Get your cold milk into a bowl—remember, cold milk is crucial for instant pudding to set up right! Whisk in that pudding mix. Don’t overdo it, just whisk hard for about two minutes until it starts getting thick. Stir in the vanilla extract once you’re done. Now, the key here is the whipped topping. Take half of your thawed topping and *gently* fold it in. I mean fold, guys! Don’t use the whisk again; we need to keep all those tiny air bubbles we just incorporated. We want it fluffy, not deflated.
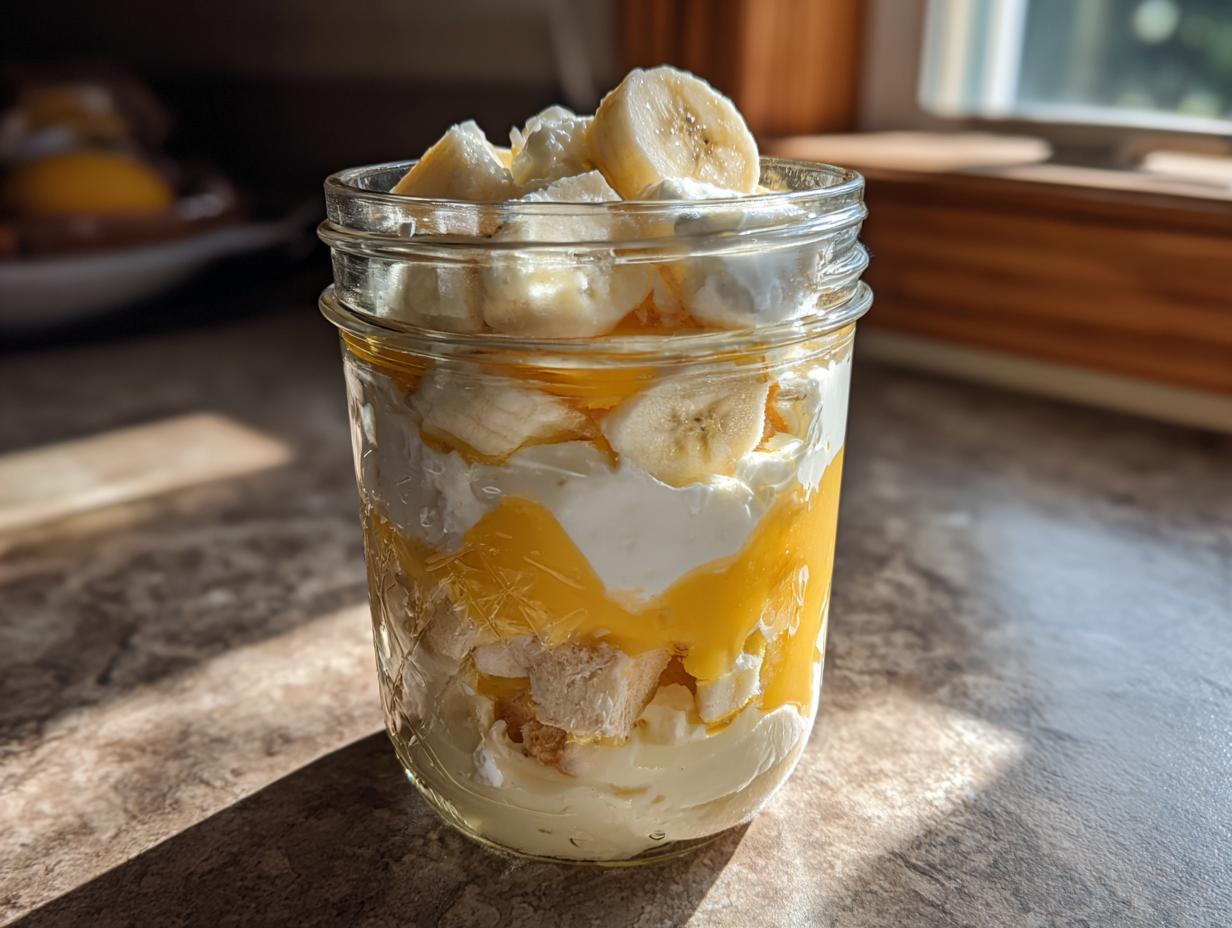
Step 2: Building the Perfect Banana Pudding Parfait Layers
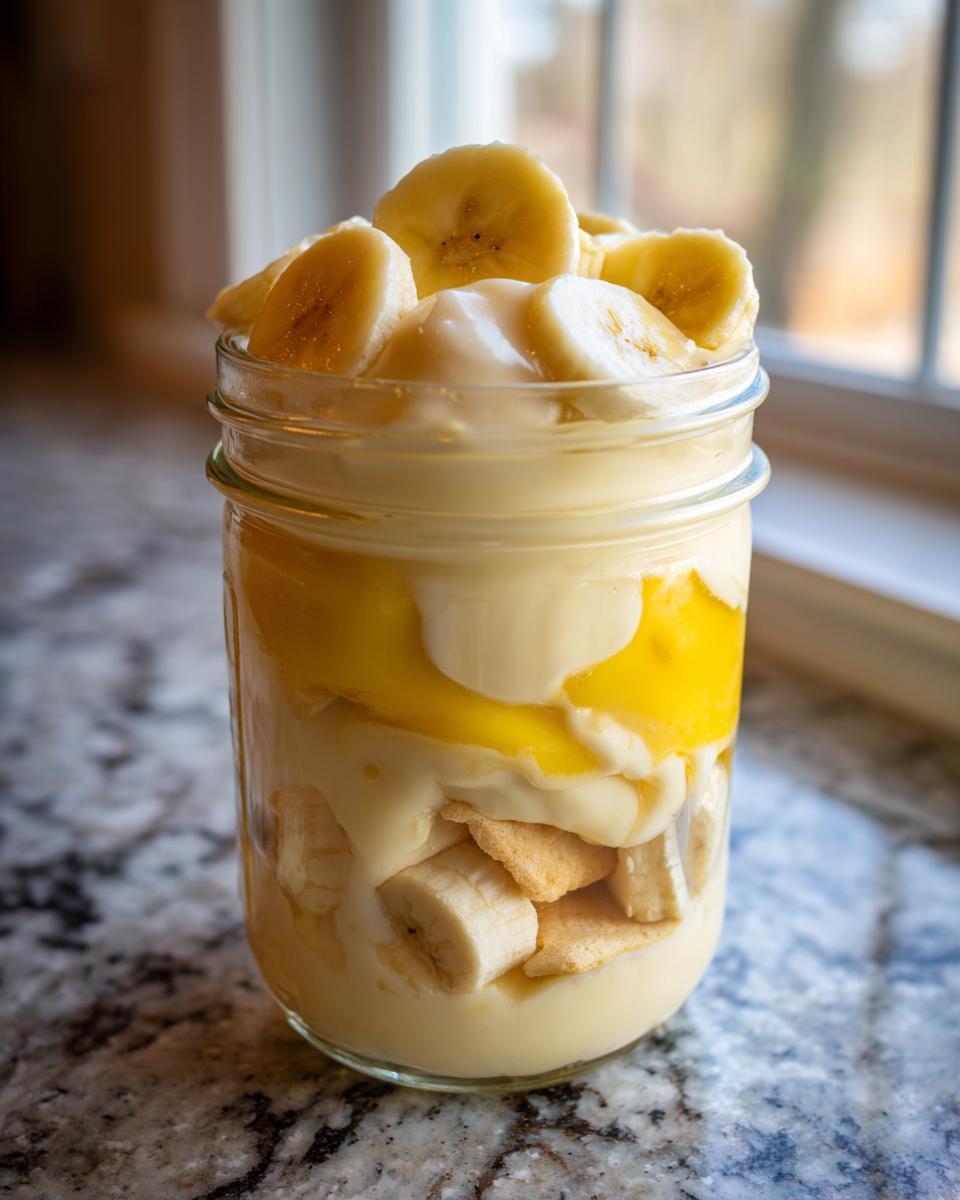
Time to grab those four lovely glasses or jars. Think of this as constructing a sturdy but delicious building block system. Start with a layer of vanilla wafers at the bottom of each glass. Next, lay down a nice, even scattering of your sliced bananas over those wafers. Then, we scoop on that glorious pudding mixture—make sure you spread it evenly across all four portions. You’re going to repeat that entire process!
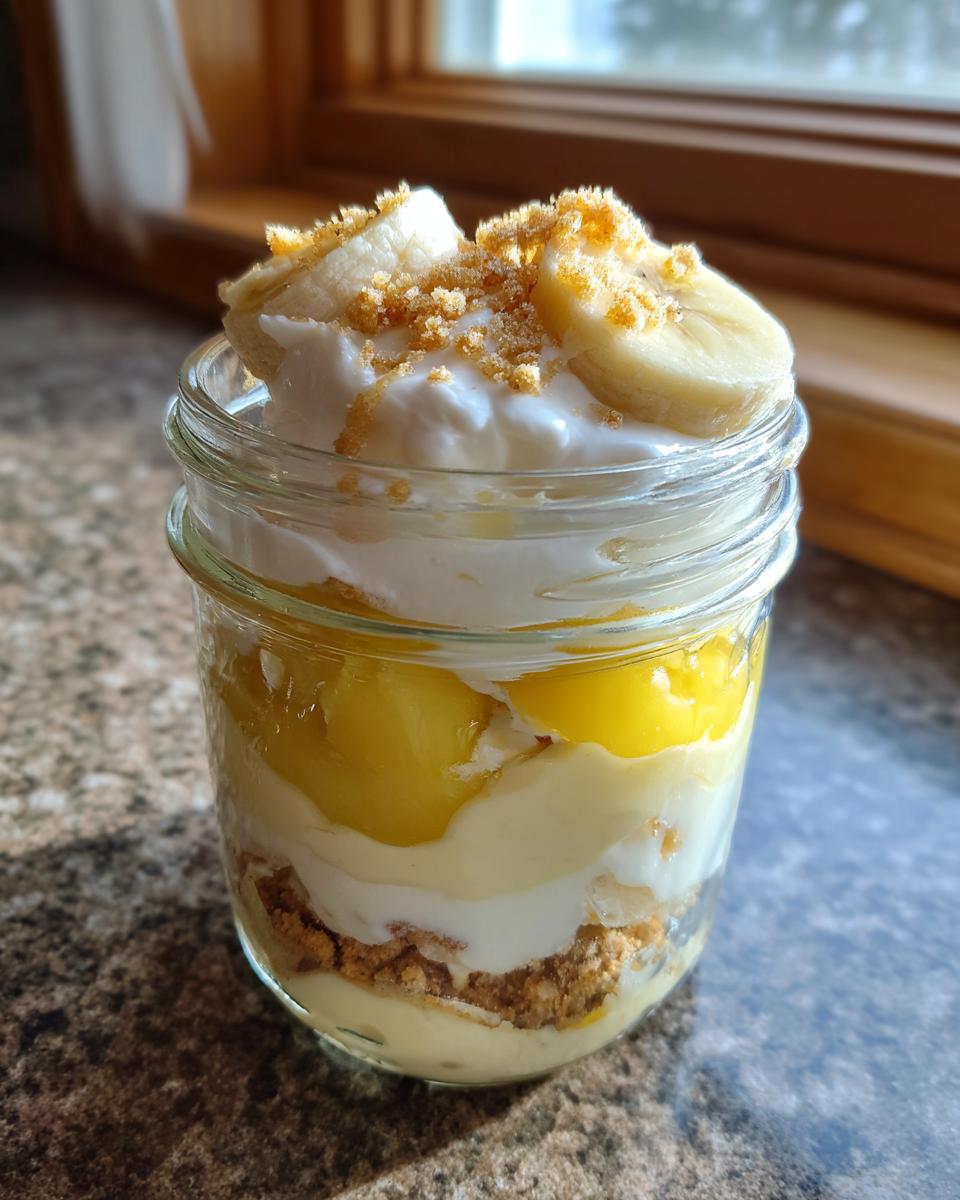
Add another layer of wafers, then more bananas. Top that off with the rest of your creamy pudding mix. This layering technique is what guarantees you get a perfect cross-section look when you serve up this beautiful layered dessert. If you want to see some amazing serving vessel inspiration, check out some other great options here!
Expert Tips for the Ultimate Banana Pudding Parfait
So, we’ve got the assembly down, but if you want this Banana pudding parfait to go from “good” to “I need the recipe,” you need to know a couple of my little production secrets. It’s all about material sourcing and timing. Don’t skip the chilling, but don’t let your bananas sit out too long before you layer them, either. Little details like this are what separate the quick dessert from the truly unforgettable one.
Banana Selection and Pudding Texture Adjustments
The recipe calls for ripe bananas, but here’s the critical note: I actually prefer them slightly firm, approaching yellow with just a hint of green on the tips. Why? Because soft bananas turn to mush when they sit in the pudding, even for an hour. Slightly firm slices hold their shape perfectly when you cut into that gorgeous stack. Now, about the pudding consistency—if you’re prepping these for a crowd and worried about the structure lasting, you can absolutely adjust the milk. If the instructions call for 2 cups of milk, try using 1 and 3/4ths cups instead. This makes your banana pudding base much thicker, which can help prevent the layers from sliding around if your parfaits are going to travel somewhere!
Making Ahead and Storing Your Banana Pudding Parfait
One of the best features of this dessert, honestly, is that it’s basically designed to be made ahead of time. That’s efficiency I can get behind! You want to assemble the entire layered dessert structure—wafers, bananas, pudding—and then cover those glasses tightly. I usually use some cling wrap pressed right down onto the surface of the pudding layer, then cover the whole thing.
You absolutely need that chilling time, which is why the total time is over an hour. That hour in the fridge isn’t just for cooling everything off; it’s essential for the vanilla wafers. They need time to absorb just a tiny bit of moisture from the pudding. If you eat them immediately, the wafers are too crunchy and stand out. But after an hour, they soften perfectly, providing that melt-in-your-mouth texture we expect from true banana pudding.
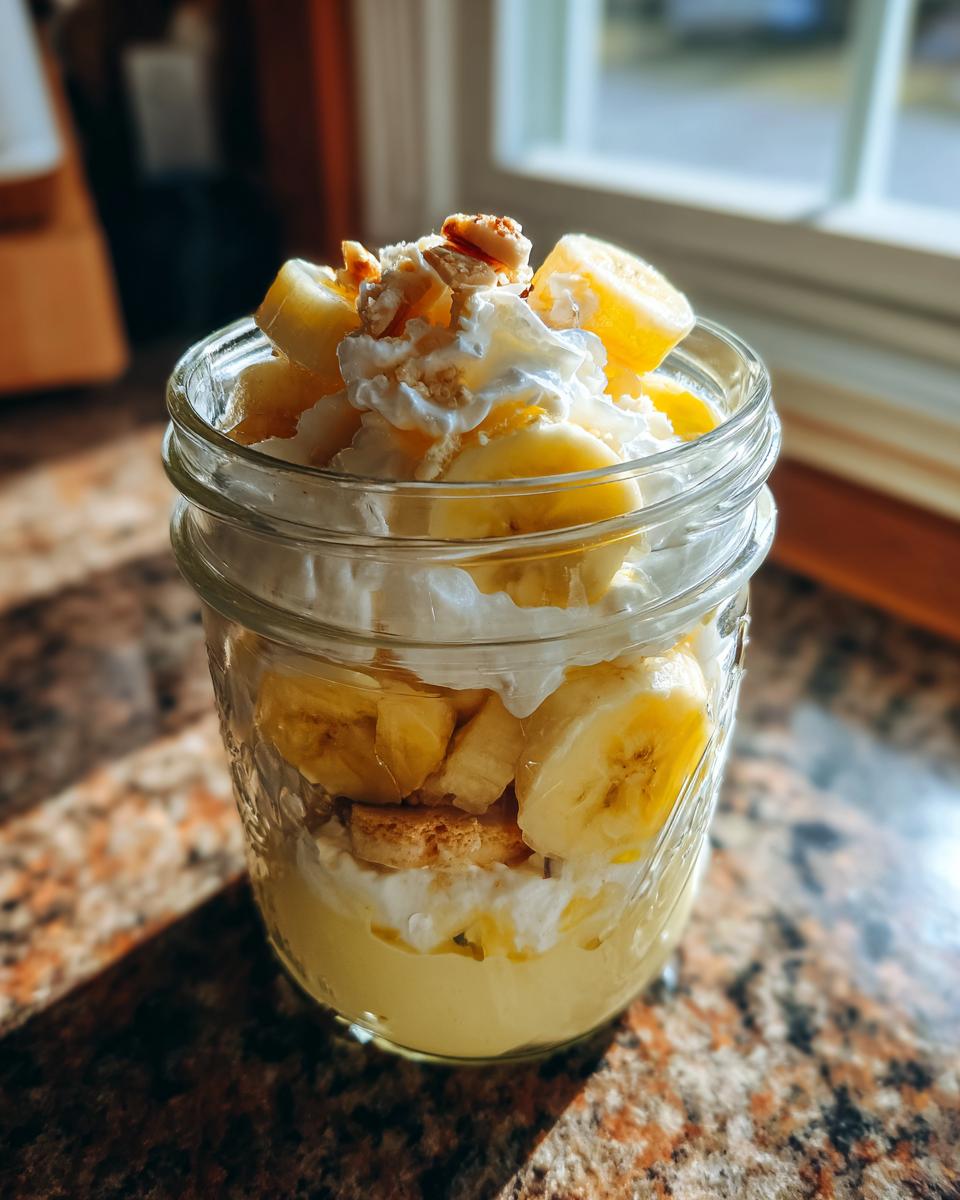
Now, here is my one hard rule here: Wait to add that final dollop of whipped topping garnish until right before you serve them. If you put it on ahead of time, it tends to weep or deflate while sitting in the fridge. Just assemble the bulk of the parfaits, chill them, and then add that final decorative touch right when you pull them out. That gives you a beautiful, professional finish with zero last-minute stress!
Variations on the Classic Banana Pudding Parfait
While this recipe is perfect as is—it’s optimized, after all!—sometimes you just want to shake things up a tiny bit without turning the whole project upside down. Keeping the integrity of the Banana pudding parfait structure is key, but we can certainly swap out the supporting cast elements. This is where you can inject a little bit of your own kitchen personality into Leo’s streamlined method.
If you’re having trouble finding Nilla Wafers, or maybe you just want a different crunch, try substituting with shortbread cookies or even crushed Biscoff cookies. The Biscoff adds a little caramel element that pairs shockingly well with the bananas. Trust me, it’s a game-changer!
For flavor depth, you can ditch the plain vanilla extract and use vanilla bean paste instead. You’ll get those little black specks in your pudding, which makes the whole thing look incredibly professional. It’s a simple switch that really elevates the creamy base of the dessert parfait.
And because I love warm spices, if you are using the slightly firmer bananas, a tiny, tiny pinch of ground cinnamon mixed in with your pudding powder during the initial whisking stage can be fantastic. It gives it a subtle warmth that grounds the sweetness. Experiment a little, but remember, keep the layers consistent for the best bite every time! If you’re looking for more ways to customize desserts, check out more easy recipes here.
Equipment Needed for This Layered Dessert
If you’re approaching this like I do—as a project manager—you want your required assets listed before you even turn the stove on, right? Since this is a total no-bake situation, the equipment list is super short and sweet. There are no fancy stand mixers or complicated gadgets required for this delightful individual pudding assembly. I designed this specifically so you don’t need to run out and buy specialty tools just to satisfy a craving.
You literally just need the basics that almost everyone has sitting in a drawer already. Focus on having everything clean and accessible before you start whisking, and the 15-minute prep time will be accurate. No delays, no hunting for tools—just smooth, efficient layering!
- Medium Mixing Bowl: For bringing the pudding and whipped topping together.
- Whisk: A sturdy one is best for that initial pudding thickening.
- Rubber Spatula: This is essential for gently folding in the whipped topping without collapsing the air!
- Measuring Cups and Spoons: Accuracy matters in the smaller details, even in quick recipes.
- Four Individual Serving Glasses or Jars: This is what turns it into a proper layered dessert and not just, well, a bowl of pudding.
Frequently Asked Questions About Banana Pudding Parfait
I get asked these questions all the time when people first try this streamlined version of the classic. It’s helpful to get these little workflow kinks ironed out upfront so your experience making this easy southern dessert is as smooth as possible. Don’t worry if you need to make small tweaks; that’s just smart cooking!
Can I use real bananas, or should they be slightly green?
Absolutely use real bananas! However, I stressed using slightly firm ones for a reason. If your bananas are overly soft or starting to get those brown sugar spots, they will turn into banana mush once they sit in the pudding. For a structurally sound layered dessert where the fruit holds its shape, slightly firm, bright yellow bananas are your ticket.
How long will this banana pudding parfait last in the fridge?
Because we are using fresh fruit, I recommend eating these within 24 hours for the absolute best texture. Anything past that, and the wafers get *too* soft, dissolving almost completely, and the bananas might start to brown, even when submerged. If you have leftovers, the main thing to remember is that the texture will change dramatically. You can see some other great make-ahead tips for snacks over here.
Can I substitute the instant pudding mix with homemade custard?
You totally can! If you want to kick the flavor up a notch and you have the extra 15 minutes, go for it. My note mentions that homemade custard provides a richer flavor. Just know that homemade custard often sets up differently than the powdered mix. If you notice your homemade version is thinner than the instant mix, you might want to cut back on the milk by about a quarter cup when you mix it, just to ensure you still get those defined layers!
Why do I have to chill them if there’s no baking involved?
This is critical for texture, not just temperature! If you eat these right after assembly, the vanilla wafers will be sharp and crunchy against the soft pudding, which isn’t the authentic experience. Chilling for at least an hour allows the wafer edges to soften just enough so they seamlessly blend into the sweetness. It takes that sharp crunch and turns it into a perfectly tender, cookie-like layer.
Estimating Nutritional Data for Your Banana Pudding Parfait
As the kitchen strategist on Dishicious, I believe in transparency, even when it comes to the numbers. While this recipe is engineered for speed and simple ingredients, we still need to know what we’re eating, right? Providing clear nutritional estimates helps you fit this delicious dessert parfait into your everyday busy schedule without guesswork. Since we are using standard, off-the-shelf components—like specific pudding mix brands or standard whipped topping tubs—these figures are solid benchmarks.
Remember, this is an estimate based on the ingredients listed. If you substitute the vanilla wafers for something higher in fiber, or if you opt for a low-fat whipped topping, those numbers will shift slightly. Think of this as your roadmap for enjoying this rich, creamy treat smartly.
- Serving Size: 1 parfait
- Calories: 350
- Sugar: 45g
- Sodium: 250mg
- Fat: 15g
- Saturated Fat: 8g
- Unsaturated Fat: 7g
- Trans Fat: 0g
- Carbohydrates: 55g
- Fiber: 2g
- Protein: 5g
- Cholesterol: 15mg
We’re hitting that sweet spot of indulgent comfort food that doesn’t break the bank on ingredients or time. Enjoying a beautiful individual pudding doesn’t have to be a nutritional mystery!
PrintEasy Southern Banana Pudding Parfait
Create individual servings of this classic Southern dessert using simple layers of vanilla wafers, creamy pudding, and fresh bananas. This layered dessert parfait is quick to assemble.
- Prep Time: 15 min
- Cook Time: 0 min
- Total Time: 1 hour 15 min
- Yield: 4 servings 1x
- Category: Dessert
- Method: No Bake
- Cuisine: American
- Diet: Vegetarian
Ingredients
- 1 (3.4 ounce) package instant vanilla pudding mix
- 2 cups cold milk
- 1 teaspoon vanilla extract
- 1 (8 ounce) container frozen whipped topping, thawed
- 1 box vanilla wafers
- 3 ripe bananas, sliced
Instructions
- Prepare the pudding: Whisk the instant vanilla pudding mix with the cold milk in a medium bowl for two minutes until slightly thickened. Stir in the vanilla extract.
- Fold in the whipped topping: Gently fold half of the thawed whipped topping into the pudding mixture until just combined.
- Assemble the parfaits: In four individual glasses or jars, start layering the ingredients. Place a layer of vanilla wafers at the bottom of each glass.
- Add banana slices over the wafers. Spoon a layer of the pudding mixture over the bananas.
- Repeat the layers: Add another layer of vanilla wafers, followed by more banana slices, and top with the remaining pudding mixture.
- Garnish: Top each parfait with a dollop of the remaining whipped topping.
- Chill: Refrigerate the banana pudding parfaits for at least one hour before serving to allow the wafers to soften slightly.
Notes
- For a richer flavor, you can substitute homemade custard for the instant pudding.
- Use slightly firm bananas so they hold their shape when slicing.
- You can make these ahead of time, but wait to add the final whipped topping garnish until just before serving.
Nutrition
- Serving Size: 1 parfait
- Calories: 350
- Sugar: 45g
- Sodium: 250mg
- Fat: 15g
- Saturated Fat: 8g
- Unsaturated Fat: 7g
- Trans Fat: 0g
- Carbohydrates: 55g
- Fiber: 2g
- Protein: 5g
- Cholesterol: 15mg