
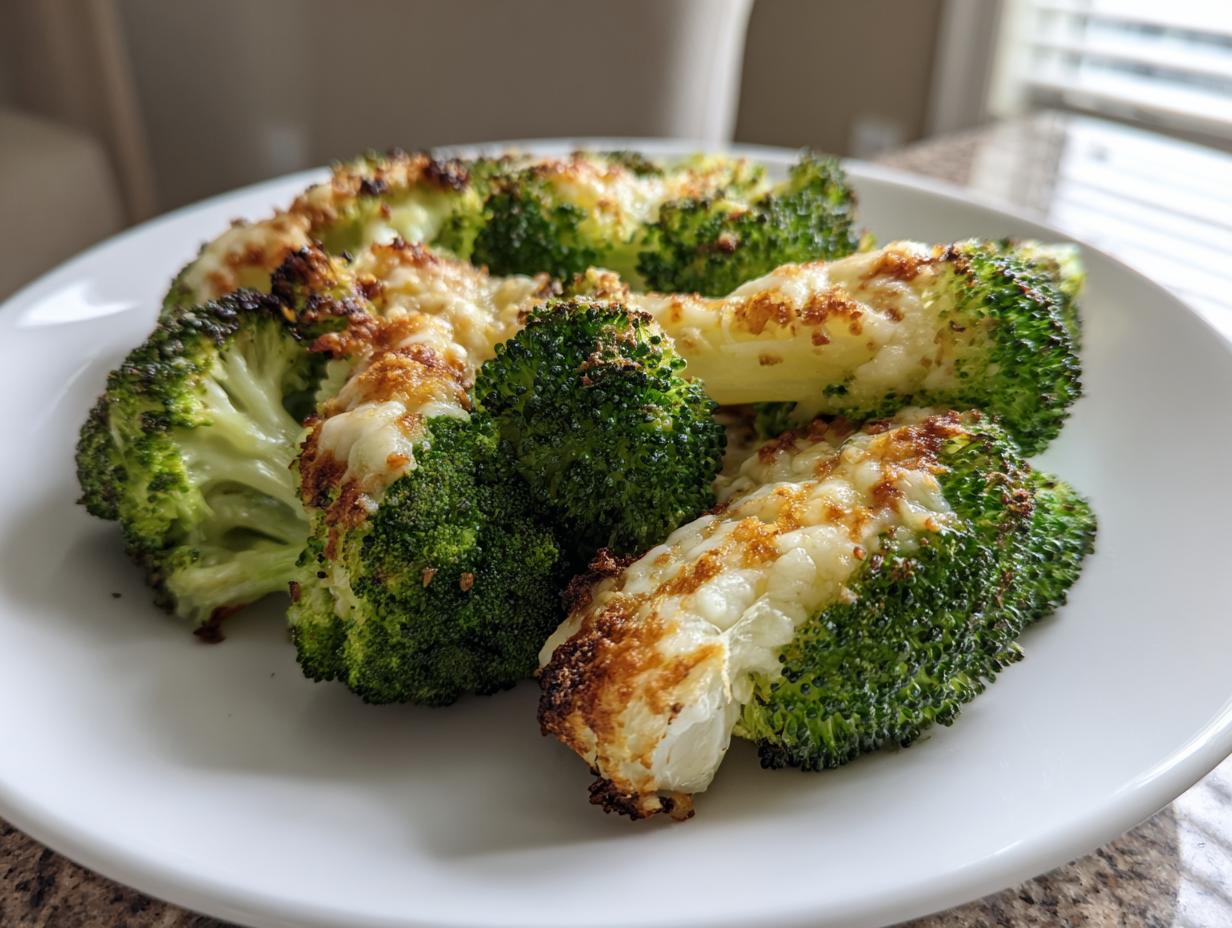
Let’s be honest: too often, vegetables are the casualty of a busy weeknight. You want a healthy side dish, but you end up with soggy, sad steamed broccoli. That’s where my project management approach to cooking comes in. We’re treating this side dish like a project that needs streamlining for maximum impact! I developed this method to deliver maximum flavor with absolute minimum fuss. I promise you, this isn’t just another recipe; this is The Best Ever Crispy Garlic Parmesan Roasted Broccoli. We nail that perfect texture—crispy on the outside, fork-tender inside—every single time. Trust me, this is the reliable, efficient vegetable blueprint you’ve been searching for.
- Why This Garlic Parmesan Roasted Broccoli is Your New Weeknight Staple
- Ingredients for the Best Crispy Roasted Broccoli with Parmesan
- How to Prepare Perfect Oven Roasted Broccoli Step-by-Step
- Expert Tips for Perfect Roasted Broccoli Every Time
- Flavor Variations for Your Roasted Broccoli
- Serving Suggestions for This Healthy Vegetable Side Dish
- Storage and Reheating Instructions for Roasted Broccoli
- Frequently Asked Questions About Roasted Broccoli
- Share Your Crispy Roasted Broccoli Success
Why This Garlic Parmesan Roasted Broccoli is Your New Weeknight Staple
Look, I’ve optimized a lot of processes, and this is my gold standard for a quick side dish. We aren’t boiling this; we are harnessing high heat to transform it. Because roasting is so efficient, you can actually get this done while your main entree is handling itself. This is how you feed your family well without feeling like you spent all night prepping vegetables.
- It’s lightning fast! We are talking under 30 minutes total time, making it one of the fastest quick side dish recipes out there.
- It delivers texture perfection. No more mush! We are aiming for that beautiful contrast everyone wants in their oven roasted broccoli.
Achieving Tender and Crispy Broccoli Texture
The secret here is commitment to high heat—we preheat the oven to 425°F before anything touches the pan. Then, arrangement is everything. If you pile your florets up, steam gets trapped, and you get a soggy mess. We spread them out in one single layer on the sheet pan. This allows the heat to hit every surface, which creates those glorious little charred, crispy roasted broccoli edges we are looking for. It’s pure chemistry, folks.
The Power of Simple Roasted Broccoli Seasoning
We rely on just a few ingredients to carry the whole flavor load, which is the core of this efficient method. The duo of fresh garlic (added halfway so it doesn’t burn!) and salty Parmesan cheese is unbeatable. This specific combination turns simple broccoli into something incredibly addictive. Honestly, if you need an easy broccoli recipe upgrade, pinning this combination down is the key to weeknight success.
Ingredients for the Best Crispy Roasted Broccoli with Parmesan
Since we are focusing on efficiency here, I made sure the ingredient list is super short. You probably have everything in your fridge right now! Remember, high quality matters when you only use a few things, so grab the best Parm you can find (the stuff in the green shaker bottle just won’t cut it for that cheesy crisp). Here is what you need for about four servings of this amazing roasted broccoli with parmesan.
- 1 large head of broccoli, cut into uniform florets. (Uniformity is efficiency, friends!)
- 2 tablespoons olive oil (Use good quality stuff; it really does make a difference in the final flavor profile.)
- 1/2 teaspoon kosher salt (Always salt before roasting!)
- 1/4 teaspoon black pepper
- 3 cloves garlic, minced very finely (You don’t want huge chunks sticking out and burning.)
- 1/2 cup grated Parmesan cheese (Freshly grated tastes best for that final topping.)
How to Prepare Perfect Oven Roasted Broccoli Step-by-Step
Okay, this is where we execute the project plan. Because we are optimizing for texture, timing needs to be precise. We’re not just throwing things in the oven and hoping for the best; we’re applying high heat strategically to get that signature crisp. Stick to these steps, and you’ll have beautiful, simple roasted broccoli ready before your main dish is even halfway done. This recipe is so straightforward, you can practically manage it while answering emails!
- We start cold and fast: Preheat your oven to a blasting 425°F (220°C). Line one of your large baking sheets with parchment paper. Trust me on the paper; cleanup is non-existent later.
- In a big bowl, toss those florets with the olive oil, salt, and pepper until everything is coated evenly.
- Spread the seasoned broccoli out onto the prepared baking sheet. Remember the golden rule: single layer only! If they overlap, they steam. We want oven roasted broccoli, not steamed broccoli.
- Roast this naked broccoli for exactly 10 minutes. This first blast starts the caramelization process.
- Pull the sheet out. Sprinkle on the minced garlic and toss it gently right there on the pan.
- Back into the oven it goes for another 5 minutes. The heat will be activating that pungent garlic without burning it.
- Last step, cheese time! Pull it out again. Quickly toss with that grated Parmesan.
- Return it for the final 3 to 5 minutes. Watch it closely until the cheese melts and the edges are perfectly browned up. Serve this quick side dish recipe immediately! If you want to see my method for making sheet pan meals that include protein, check out my sheet pan pancakes guide for cross-application techniques.
Prep Work: Drying and Coating the Florets
This detail is crucial for achieving truly crispy roasted broccoli. If you washed your broccoli and it’s still wet, the oil won’t stick properly to the surface; it just moves around in the water, leading to sogginess. Before you even touch the oil, take a clean kitchen towel or a wad of paper towels and physically pat those florets dry. If you skip this step, you are sacrificing crispiness before you even turn the oven on. It might seem like extra effort, but it’s a non-negotiable step in my book for the best texture outcome.
Timing the Additions for Garlic Roasted Broccoli
Why do we wait to add the garlic and cheese? It’s all about ingredient breakdown points. Fresh minced garlic is delicate; if you add it at the beginning with the oil, the high roasting temperature burns it, and you get a harsh, bitter flavor, right? So, we roast for 10 minutes first. Then we add the garlic for a quick 5 minutes. The Parmesan goes in last because it melts and browns beautifully in just a few minutes. If you add the cheese too early, it can dry out or even turn slightly bitter before the broccoli itself is tender. Timing is everything for this garlic roasted broccoli!
Expert Tips for Perfect Roasted Broccoli Every Time
You’ve got the instructions down, but sometimes the execution needs a little strategist oversight. When I first started simplifying vegetable cooking, I made every mistake possible—usually ending up with hot, green mush. These tips are the small adjustments I made to my process that turned this roasted broccoli from ‘fine’ to ‘must-make-weekly.’ They focus on consistency and maximizing surface area, which is key if you crave that crispy finish.
The Sheet Pan Rule: Avoid Overcrowding for Crispy Roasted Broccoli
I can’t stress this enough: single layer, people! This is the single biggest failure point for anyone trying to make crispy roasted broccoli. Your high-heat roasting process needs dry, circulating air around every floret. If you stack them, what happens? Steam. Vegetable sweat! If your head of broccoli looks like it’s practically swimming on the pan, you need to grab a second sheet pan. It’s an extra step, sure, but using two pans guarantees you get that beautiful charring instead of sad, steamed bits. Better to use two pans than ruin the texture on one.
Ensuring Uniform Cooking for Sheet Pan Broccoli
Think about it: a giant stalk end will take way longer to soften than a tiny little crown. If the tiny bits are perfect, the bigger pieces are still raw. If you wait for the big pieces to cook, the small ones have incinerated. The project management solution? Uniformity in cutting. Try to make sure all your florets are roughly the same size. I aim for pieces about the size of a large marble. This guarantees that when the timer goes off, every single piece of your sheet pan broccoli is tender and ready to go, whether it’s nestled next to the salty olive oil or sitting on the edge.

When you are ready for more simplified cooking blueprints, I’ve mapped out some great ones for savory sides, like my one-pot creamy pasta, which shares the same efficient ethos.
Flavor Variations for Your Roasted Broccoli
As much as I love the simplicity of the garlic Parmesan combo, sometimes you need a little curveball to keep things interesting, right? That’s the beauty of this base recipe—it’s perfectly engineered to accept flavor additions without compromising that crispy texture we worked so hard for. These are small tweaks, not complicated recipe overhauls, which fits perfectly with our efficient cooking style.
Making Lemon Roasted Broccoli
If you want something brighter, especially for spring or summer meals, switch gears to a zippier profile. Right at the very end, when you pull the pan out after the first 15 minutes (before the Parmesan if you’re using it, or just before the final bake if you aren’t), add about one teaspoon of fresh lemon zest. If you’re going straight to serving, squeeze a little fresh juice over the hot broccoli too. This really brightens up the flavor of the simple roasted broccoli.
Spicy Broccoli Seasoning Ideas
For those of us who like a little kick with our veggies, this is super easy to adapt. Before the broccoli even hits the oil, mix in a small pinch of red pepper flakes—maybe a quarter teaspoon to start. Alternatively, a tiny dash of cayenne pepper tossed in with the salt and pepper adds a subtle warmth that lingers. This creates an easy flavor profile that elevates it beyond a standard veggie side for dinner!
If you want to explore other reliable herb blends, check out my guide on garlic herb roasted veggies; the concept is the same—high heat, good oil, great herbs!
Serving Suggestions for This Healthy Vegetable Side Dish
This crispy roasted broccoli is engineered to be the perfect supporting actor on your dinner plate. Since it cooks so fast, it’s ideal for when you need a reliable, healthy vegetable side dish that pairs well with nearly anything. It’s fantastic alongside a baked salmon fillet if you’re keeping things light, or honestly, the rich garlic-Parmesan flavor holds up beautifully next to something hearty. Try it next time you make my super efficient baked ranch chicken—it’s a complete, flavor-packed, low-effort meal right there!
Storage and Reheating Instructions for Roasted Broccoli
We all know that the best way to eat this crispy roasted broccoli is fresh out of the oven—that’s when the char is perfect and the Parmesan is just melting. However, sometimes life happens, and we need leftovers! Good news: this recipe handles itself well for meal prep, which speaks volumes about its solid structure. You can definitely store leftovers, but we have to manage our expectations about the texture.
Per my testing notes, you can keep your keto friendly broccoli side in an airtight container in the fridge for up to three days. Make sure it’s cooled completely before sealing it up, otherwise, you will just trap moisture and defeat the purpose of roasting it in the first place!
How to Reheat to Maximize Crispness
This is the critical moment for getting your leftovers back in shape. I know it’s tempting to just toss it in the microwave because it’s fast, but trust me, the microwave guarantees sogginess. If you want to salvage any of that beautiful crispiness from your original oven roasted broccoli, you have to use dry heat again.
Your best bet is the toaster oven or a regular oven set to about 375°F. Spread the cooled broccoli back on a clean, dry baking sheet—no oil needed, the initial oil will still be there. Heat it for about five to seven minutes. You are not trying to cook it again; you are just trying to drive off the residual fridge moisture. It won’t be quite as crunchy as the first time, nothing truly can, but it will be warm, tender, and flavorful enough to enjoy as a great veggie side for dinner.
Frequently Asked Questions About Roasted Broccoli
When you are optimizing a recipe, questions always pop up, especially around texture and dietary needs. This easy broccoli recipe is rock solid, but here are the quick answers to the common operational questions I get all the time regarding how to roast broccoli perfectly.
Can I use frozen broccoli for this roasted broccoli recipe?
This is a tricky one, because frozen equals wet, and wet equals mush. If you absolutely must use frozen, you first need to thaw the florets completely—maybe even microwave them for a minute to help release the ice water. The most important bit? You have to dry them out! Lay them on paper towels and press hard. If they aren’t bone dry before oiling, you’ll end up with steamed, sad broccoli. Fresh is always better for the crispy result, but drying aggressively makes frozen passable!
Is this an easy broccoli recipe for beginners?
Absolutely, yes! I designed Dishicious recipes for efficiency, and this is prime example. If you can use a box grater and spread things on a baking sheet, you can nail this. There’s minimal chopping, and the timing of adding the garlic and cheese is easy to manage. It’s a reliable, foolproof method that builds confidence fast. It’s also a fantastic keto friendly broccoli side since it relies only on vegetables, oil, and cheese!
If you want to pair this with a main that keeps the low-carb theme going, check out my blueprint for the keto chicken parmesan recipe.
Share Your Crispy Roasted Broccoli Success
Alright, that’s the whole blueprint for turning that humble head of broccoli into something truly spectacular. We’ve streamlined the process, added that killer garlic Parmesan punch, and created a genuinely reliable easy vegetable recipe that you can trot out any night of the week.
Now, this is where we close the feedback loop. I need to know how this efficiency upgrade worked in your kitchen! Did you achieve that perfect crispy roasted broccoli texture? Did you go rogue with the seasoning blend? Don’t keep that success story to yourself!
Go ahead and leave a star rating right below this text—let other home cooks know if this one made the cut as your new go-to simple roasted broccoli method. And please, drop a comment! I genuinely love hearing about your specific results, especially if you tried one of the flavor variations we talked about. If you have any other questions or want to share feedback on optimizing other weeknight meals, you can always reach out via my contact form.
Happy roasting, everyone. Get that crunch!
PrintThe Best Crispy Garlic Parmesan Roasted Broccoli

This recipe delivers perfectly roasted broccoli with crispy edges and a tender center using simple ingredients. It is a quick, healthy vegetable side dish ideal for weeknight dinners.
- Prep Time: 10 min
- Cook Time: 18 min
- Total Time: 28 min
- Yield: 4 servings 1x
- Category: Side Dish
- Method: Roasting
- Cuisine: American
- Diet: Vegetarian
Ingredients
- 1 large head of broccoli, cut into uniform florets
- 2 tablespoons olive oil
- 1/2 teaspoon kosher salt
- 1/4 teaspoon black pepper
- 3 cloves garlic, minced
- 1/2 cup grated Parmesan cheese
Instructions
- Preheat your oven to 425°F (220°C). Line a large baking sheet with parchment paper for easy cleanup.
- Place the broccoli florets in a large bowl. Drizzle with olive oil and sprinkle with salt and pepper. Toss until the broccoli is evenly coated.
- Spread the seasoned broccoli in a single layer on the prepared baking sheet. Do not overcrowd the pan; use two sheets if necessary to ensure crisping.
- Roast for 10 minutes.
- Remove the pan from the oven. Sprinkle the minced garlic evenly over the broccoli. Toss gently.
- Return the pan to the oven and roast for another 5 minutes.
- Remove the pan again. Sprinkle the grated Parmesan cheese over the hot broccoli and toss quickly to coat.
- Return to the oven for a final 3 to 5 minutes, or until the cheese is melted and the broccoli edges are nicely browned and crispy.
- Serve immediately as a healthy side dish.
Notes
- For extra crispy roasted broccoli, ensure your florets are dry before tossing with oil. Pat them with a paper towel if needed.
- If you prefer a lemon roasted broccoli flavor, add 1 teaspoon of fresh lemon zest with the Parmesan cheese at the end.
- This recipe works well for meal prep; store leftovers in an airtight container in the refrigerator for up to 3 days.
Nutrition
- Serving Size: 1 serving
- Calories: 110
- Sugar: 2
- Sodium: 250
- Fat: 8
- Saturated Fat: 3
- Unsaturated Fat: 5
- Trans Fat: 0
- Carbohydrates: 7
- Fiber: 3
- Protein: 5
- Cholesterol: 8