
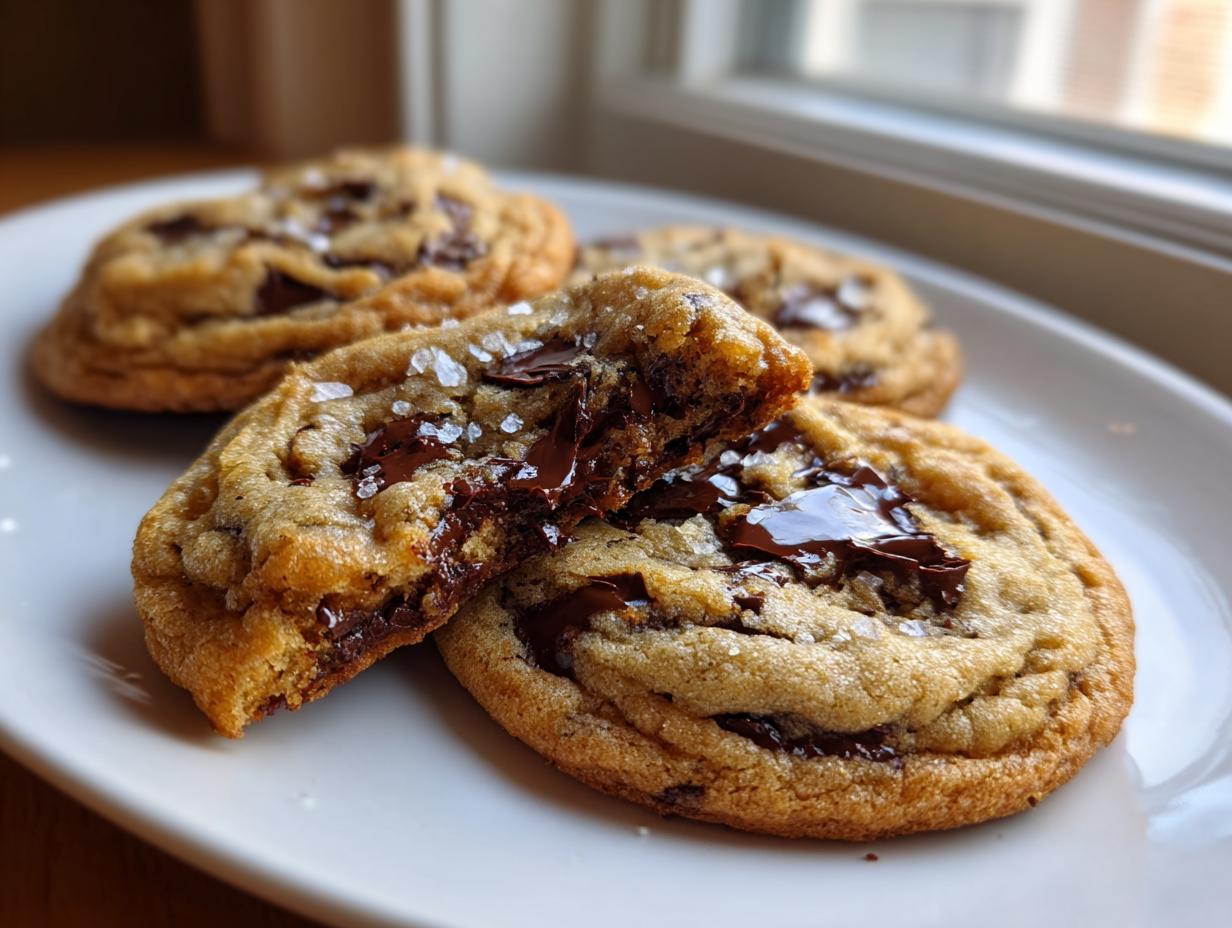
If you think you know the best chocolate chip cookie out there, hold up a second. We’re not just making the classic here; we’re applying a little project management strategy to elevate it. When I was trying to shave time off my weeknight dinners, I figured out that upgrading simple things delivers massive flavor payoff for minimal extra effort. That’s exactly what happens when you make these brown butter chocolate chip cookies. Browning the butter isn’t just extra work; it’s the blueprint for maximum nutty, caramelized flavor and that perfect intersection of chewy center and crispy edge cookies. Trust me, this upgrade is non-negotiable for the classic recipe fans.
- Why This Brown Butter Chocolate Chip Cookies Recipe Works (The Flavor Upgrade)
- Ingredients for the Ultimate Brown Butter Chocolate Chip Cookies
- Step-by-Step Instructions for Perfect Brown Butter Chocolate Chip Cookies
- Tips for Success: Baking Gourmet Chocolate Chip Cookies
- Ingredient Notes and Substitutions for Brown Butter Chocolate Chip Cookies
- Storage and Reheating Instructions for Your Brown Butter Cookies
- Serving Suggestions for These Brown Butter Chocolate Chip Cookies
- Frequently Asked Questions About Brown Butter Chocolate Chip Cookies
- Recipe Metrics and Dietary Information
Why This Brown Butter Chocolate Chip Cookies Recipe Works (The Flavor Upgrade)
When you look at a recipe, you need to know the core function of each step, right? That’s my project manager brain kicking in. Browning butter is the single biggest flavor booster we can inject into this dough. It takes basic fat and transforms it into something deep, toasty, and profoundly nutty. It’s the easiest way to get those amazing brown butter cookies.
- The milk solids in the butter toast while cooking, creating intense caramelized flavor cookies.
- This foundational toastiness means you get those rich, nutty chocolate chip cookies without adding any extra nuts!
- We use specific sugar ratios alongside this butter to lock in moisture and deep sweetness.
It’s about optimizing the process. We don’t just mix; we build flavor from the first swirl of the pan. If you want that upgrade, you have to trust the browning.
Achieving the Perfect Texture: Crispy Edge Cookies and Soft Center Cookies
Texture control is where most recipes fall apart, but we’ve nailed it here. The specific ratio of brown sugar to white sugar helps keep the edges thin and crisp while the molasses in the brown sugar promotes chewiness throughout the center.
Plus, the mandatory chilling step isn’t just for flavor development—it controls spread during baking. This ensures you get those delightful chewy chocolate chip cookies that look like they came straight from a high-end bakery every time. It’s structure meeting deliciousness!
Ingredients for the Ultimate Brown Butter Chocolate Chip Cookies
When we talk about building these gourmet chocolate chip cookies, every item on this list matters, because we need reliability. Remember, I’m looking for efficiency—no obscure ingredients here, just simple things treated exceptionally well!
Grab your measuring cups; here is exactly what you need to gather before we start the brown butter magic. This clarity builds trust, so make sure you have everything weighed or measured out correctly before you start cooking, especially the butter!
- 1 cup (226g) unsalted butter (This is what we brown!)
- 1 cup (200g) packed light brown sugar
- 1/2 cup (100g) granulated sugar
- 2 large eggs, room temperature—this is important for creaming!
- 1 tablespoon vanilla extract
- 2 1/4 cups (270g) all-purpose flour
- 1 teaspoon baking soda
- 1 teaspoon kosher salt
- 1 1/2 cups (255g) semi-sweet chocolate chips or chopped chocolate
- Flaky sea salt, for sprinkling on top
See? Straightforward list. Getting those eggs warm helps them blend seamlessly into the cooled brown butter later on. And I really encourage you to chop up a good bar of chocolate instead of relying only on chips—it gives you those beautiful puddles in your chocolate chip cookies. But if chips are what you have, use them! We just want to guarantee a great outcome.
Step-by-Step Instructions for Perfect Brown Butter Chocolate Chip Cookies
Okay, this is where the magic happens, and because we’re aiming for perfection here, we need clarity and process. Think of this like building one of those beautiful bakery style cookies—each step is crucial for the final structure. This whole process is laid out logically so we avoid any messy surprises later. Get your pan ready; we’re starting with the butter.
- Place the butter in a light-colored saucepan over medium heat. You need light-colored so you can actually see those milk solids turning brown! Cook, swirling often, until the butter melts, foams up, and then the foam starts subsiding. You will see nice deep brown bits forming at the bottom, and the whole kitchen will smell wonderfully nutty. This usually takes about 5 to 8 minutes.
- Crucially: Immediately pour that brown butter into a heatproof bowl—glass or ceramic is great—to stop the cooking process instantly. If you leave it in the hot pan, it will burn! Let it cool for a solid 15 minutes. You want it slightly solidified but clearly still soft and malleable, not hard like cold butter.
- In a large bowl, whisk that cooled brown butter with the brown sugar and granulated sugar until everything looks thoroughly combined and a bit textured.
- Beat in your two room-temperature eggs one at a time, mixing well after each one goes in. Then, stir in the vanilla extract. Don’t worry about overmixing this stage; we’re building the wet base.
- In a separate medium bowl, take two minutes to whisk together your dry ingredients: the flour, baking soda, and kosher salt. Keep it simple.
- Now, add the dry ingredients to your wet mixture, mixing on low speed just until you see everything disappear into the dough. Stop right there—seriously, don’t mix one second more!
- Fold in your 1 1/2 cups of chocolate chips or chopped chocolate by hand using a spatula.
- Cover the dough tightly and put it in the refrigerator. I know, I know, you want cookies now, but we commit to the schedule for these homemade chocolate chip cookies.
- Preheat your oven to 375°F (190°C) once the chilling time is up. Line baking sheets generously with parchment paper. Get those dough balls ready—about 2 tablespoons each—and place them 2 inches apart because they will spread a little.
- Bake for 10 to 13 minutes. The edges should be beautifully golden brown, but the centers must still look slightly underbaked or gooey.
- Let them sit right on the hot baking sheet for 5 minutes to finish setting up before carefully moving them to a wire rack to cool down completely. Don’t forget that sprinkle of flaky sea salt right on top while they are warm!
Mastering the Browning Butter Technique for Brown Butter Cookies
This is the expert move that separates a good cookie from a truly incredible one. When you start melting the butter, it foams up like crazy—that’s just the water evaporating. Don’t panic! Keep swirling gently. What you’re waiting for are the tiny white milk solids at the bottom of the pan to start changing color. They go from white to tan, and then you want them to turn a deep, rich brown.
Stop cooking the second you see that deep brown color and smell that intense, toasty aroma. That smell—that’s the key indicator; it smells like caramelized hazelnuts! Pour it out immediately into a cool bowl because the residual heat will keep cooking it, and you want to avoid that bitter black stage at all costs.
The Critical Chilling Step for Chewy Brown Butter Chocolate Chip Cookies
Listen, if you skip this chilling period for your brown butter chocolate chip cookies, I can’t guarantee the result, and honestly, why bother? That 2-hour minimum isn’t just about letting the dough firm up so it doesn’t turn into greasy flat pancakes. It’s about allowing those deep, nuanced flavors from the browned butter time to fully permeate the entire dough.
The chilling allows the flour to fully hydrate around the fat, which is essential for that satisfyingly chewy chocolate chip cookies texture. If you’re patient, the dough will hold its shape better, ensuring those thicker, **soft center cookies** you’re dreaming of. If you can, let it go for 24 hours; it deepens that lovely caramelized flavor cookies note even more!
Tips for Success: Baking Gourmet Chocolate Chip Cookies
So, you’ve browned the butter, chilled the dough, and you’re ready for the final bake. Even with a foolproof process like this, small details make the difference between a good cookie and the kind of **gourmet chocolate chip cookies** everyone begs you to make again. Since I’ve tested this workflow against dozens of batches, I have a few hard-and-fast rules to share to ensure your **brown butter chocolate chip cookies** are perfect every single time.
First, let’s look at the notes I pulled directly from the original testing sheets. These are the non-negotiables:
- Browning butter correctly is key; watch for the milk solids to turn deep brown, not black. If you see smoke, you’ve gone too far, and you might need to start that one batch over.
- Chilling the dough develops the caramelized flavor from the brown butter and prevents excessive spreading, leading directly to those fantastic **chewy chocolate chip cookies**. Seriously, don’t rush this part.
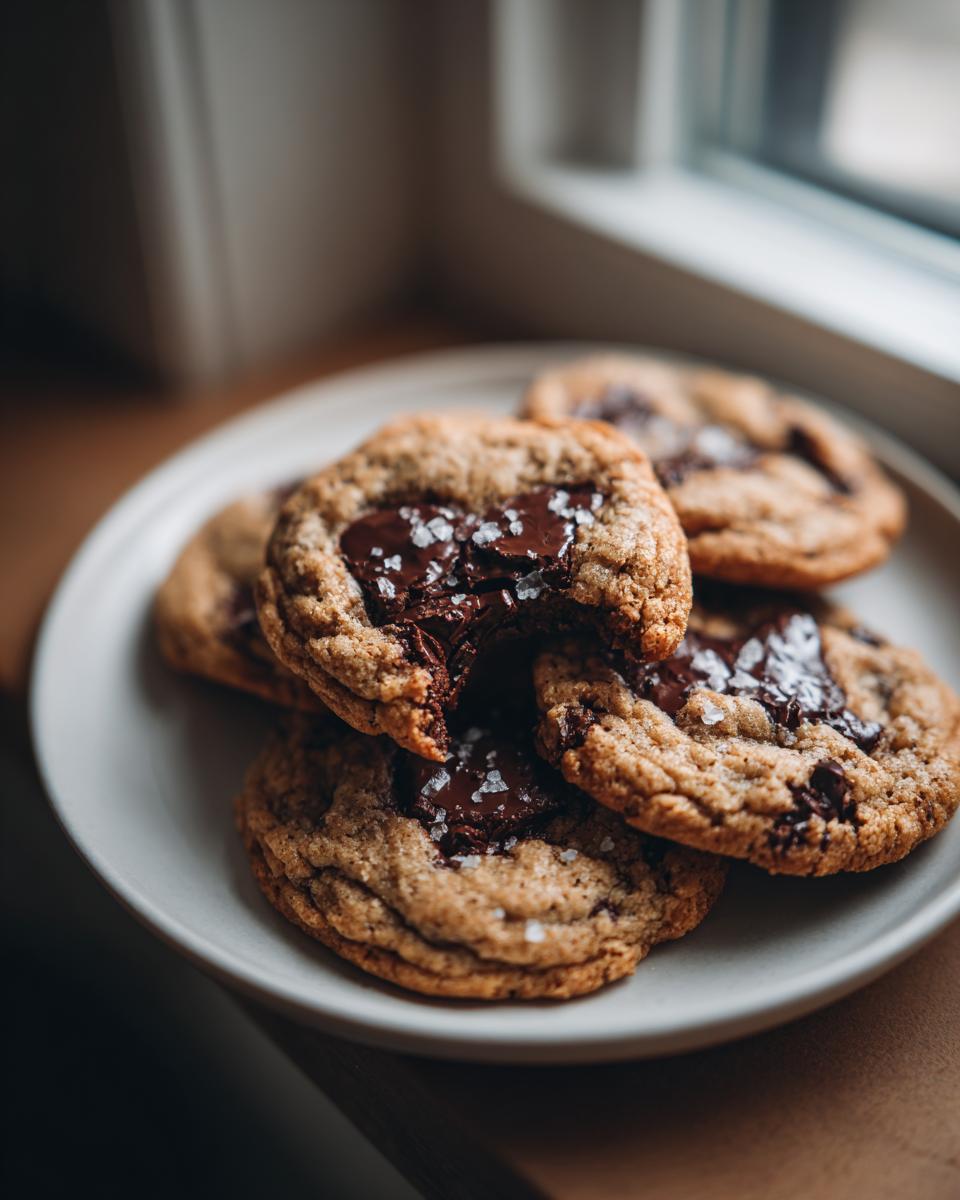
- Use high-quality chocolate chunks instead of chips if you can. The way they melt creates those beautiful pools of glossy chocolate that signal a superior bake.
Now for my project management insight, which really focuses on consistency. The biggest variable in home baking is often the flour measurement. If you scoop aggressively with your measuring cup, you are packing in way more flour than you think, which leads to dry, cakey results instead of the desired texture.
My tip for reliable results is to use a kitchen scale every time, but if you don’t have one, use the “spoon and level” method. Gently spoon the flour into your measuring cup until it overflows, and then use the flat back of a knife to sweep off the excess. This ensures you are getting the exact 270 grams required for perfect balance in these **brown butter cookies**.
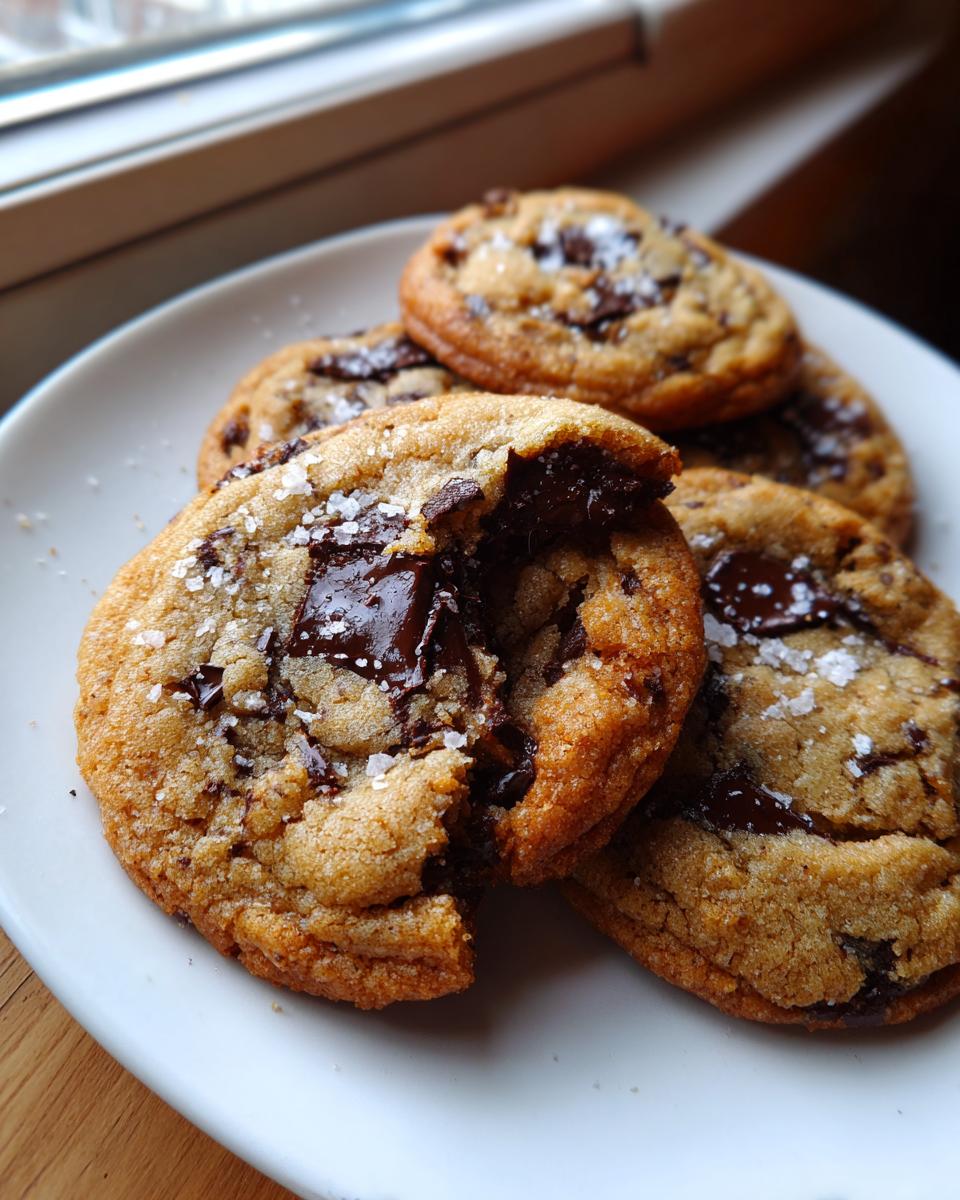
Follow those guidelines, and you’ll have cookies that have the ideal **crispy edge cookies** texture supporting that wonderful, nutty center. You can find some other great testing philosophies over at Levain-style cookie recipes, but for these, stick to the plan!
Ingredient Notes and Substitutions for Brown Butter Chocolate Chip Cookies
I know what you’re thinking: what if I’m out of unsalted butter? Or what if I only have milk chocolate chips on hand? When dealing with the complexity of brown butter chocolate chip cookies, the quality and type of your core fat really matter. Since we’ve already done the work to create that intense, toasty flavor, we don’t want inferior ingredients muddying the waters! My philosophy is built on reliability, so stick to these rules for that perfect crunch and chew.
First, the butter. We absolutely need unsalted butter here. Why? Because we are adding salt separately (Kosher salt, specifically, for better control), and the salt level in salted butter varies wildly between brands. If you use salted butter, your browned butter chocolate chip cookies might end up tasting too sharp or just plain salty. We want balanced sweet and nutty, not salty!
Next, let’s talk chocolate. The recipe calls for semi-sweet, which is perfect for balancing the deep sweetness from the brown sugar and the rich butter. You can certainly use milk chocolate, but it tends to melt thinner and sweetens the cookie too much, which can fight the nutty flavor. Dark chocolate chunks are fantastic if you like a more intense chocolate punch, especially in these **gourmet chocolate chip cookies**.
If you’re looking for a substitution for the eggs, honestly, it’s tough. Eggs provide structure, emulsification, and moisture. If you absolutely must substitute one egg (maybe you only have one left), you could try a flax egg mixture, but be aware that you are sacrificing some of the texture that makes these the ultimate chocolate chip cookie recipe.
For more great flavor component ideas, maybe check out how we incorporate cheesecake into our cheesecake cookie variations. But for these brown butter cookies, focus on keeping the butter unsalted and the chocolate high quality!
Storage and Reheating Instructions for Your Brown Butter Cookies
Making a huge batch of these amazing cookies is tempting, right? They are truly melt in your mouth cookies when fresh, but they keep surprisingly well if you structure the storage step correctly. Since we are managing a project here, proper preservation is key to minimizing waste and maximizing enjoyment!
Once your cookies have cooled completely on the wire rack—and I mean completely, otherwise you’ll just steam them in the container—it’s time to seal them up. The best way to maintain that fantastic texture is by storing them in a truly airtight container. A simple Tupperware container or even a nice zip-top bag works, as long as you press out as much air as possible.
If stored correctly at room temperature, these cookies stay wonderfully soft and chewy for about four to five days. If you need them to last longer than that, you can absolutely freeze them! Lay the cooled cookies flat on a small tray, place that tray in the freezer for about an hour until solid, and then transfer them all into one heavy-duty freezer bag. They are great frozen for up to three months.
And here’s my favorite efficiency hack for enjoying them later: reheating! When you pull one out of the container or the freezer, you just need a quick burst of warmth to bring that chocolate back to that gooey state. Pop a cookie on a microwave-safe plate for about 10 to 15 seconds. It warms up just enough to make the edges crispier again and gets the chocolate molten. That’s how you guarantee a fresh-baked experience on day three!
Serving Suggestions for These Brown Butter Chocolate Chip Cookies
We spent all this time engineering the perfect cookie—the ultimate structure, the deep nutty flavor—so we need to serve them right! Honestly, these brown butter chocolate chip cookies are so rich and sophisticated they almost feel like dessert all on their own. But if you want to complete the experience, I always lean toward simple pairings that let that caramelized flavor shine through.
First up, the classic pairing, but elevated: Milk. Forget just grabbing a glass from the fridge. If you have about five minutes, making a quick hot chocolate transforms the entire evening. You can check out my simple recipe for frozen hot chocolate, but even a standard warm cup lets you dunk these right in there until the edges are soft and soaked.
For those of you who prefer a coffee break instead of a dessert finale, these cookies are dynamite with strong black coffee or an espresso shot. The slight bitterness and roast of the coffee really play up the toasty notes we worked so hard to develop when browning the butter. It’s a fantastic afternoon pick-me-up!

However, my absolute favorite configuration, especially if I’ve just pulled a batch of these glorious brown butter cookies from the oven, is to serve them warm with vanilla bean ice cream. The contrast between the ice cream’s cool sweetness and the warm, slightly gooey chocolate and nutty edges? That’s what I call a successful project completion. It’s how you turn a simple cookie into a truly decadent treat!
Frequently Asked Questions About Brown Butter Chocolate Chip Cookies
I know you’ve got questions! Anytime we upgrade a classic recipe, there are always points where things might look a little different than what you’re used to. As a home cook who relies on a clear process, I want to make sure you feel totally confident tackling these brown butter chocolate chip cookies. These FAQs cover the common stumbling blocks so you can trust your results.
Can I make these cookies without browning the butter?
You totally can, and that’s the beauty of having a reliable base recipe! If you just melt your butter (or use softened butter), you’ll end up with standard, tasty, homemade chocolate chip cookies. However, you will completely lose that signature, complex, rich flavor we developed here. The **nutty chocolate chip cookies** flavor simply won’t be there; it will taste like a great regular cookie, not an upgraded one. For the absolute best outcome, brown the butter! If you are looking for other chewy cookie styles, check out my approach to perfection over at soft and chewy cutout cookies.
What is the best way to get crispy edge cookies?
This is all about controlling spread and controlling the bake time, which we covered in the procedure. You need two things working together to get those perfect crispy edge cookies supporting a soft middle.
- Chilling is key: Make sure you let that dough chill for the minimum two hours. Cold dough spreads slower, meaning the edges have more time to set up that crispness before the center finishes baking.
- Watch the clock: When baking, you must pull them when the centers *still look slightly underbaked*. The residual heat on the pan finishes cooking them to that gorgeous **soft center cookies** stage without letting the edges burn or harden up too much.
Don’t let them bake until the very center looks dry, or you’ll lose the chewiness we worked for. Trust the visual cues for those **chewy chocolate chip cookies**!
How do I know when the butter is perfectly browned?
This is the most common hang-up, but honestly, use your nose! You’re waiting for the foam to subside after the initial boil, and the milk solids at the bottom will start turning lovely shade of golden brown. The second you smell that rich, toasty, nutty aroma—that’s your cue! It smells like toffee or hazelnuts mixed with butter. If you wait much longer than that, the solids will go from brown to black really fast. Immediately pour it out of the hot pan when you smell that rich scent. That toasted butter smell is the heart of these **brown butter cookies**, so pay attention!
Do I really need to chill the dough for these brown butter chocolate chip cookies?
Yes, you absolutely do. Leaving it out makes for flat, overly greasy cookies because the browned butter solids, which are currently softer than regular butter, will spread too fast in the oven. Plus, chilling is when the flavors marry. It’s the difference between a decent cookie and a truly standout batch of **best chocolate chip cookies**. It’s about efficiency: one extra step now saves you from throwing out a tray of flat puddles later!
Can I substitute the brown sugar for more white sugar?
No, I really advise against it for this recipe. Brown sugar brings molasses, which does two major things: it adds moisture, which is critical for **soft center cookies**, and it adds that slight acidic quality that reacts with the baking soda to give you that perfect lift and chew. If you swap it all for granulated sugar, you’ll end up with a cookie that spreads too much and tastes much flatter, skipping out on the beautiful depth that makes these **ultimate chocolate chip cookie recipe** cookies so good.
Recipe Metrics and Dietary Information
When I map out a recipe, I like knowing exactly what the time commitment is required upfront. Just like any project timeline, you need to know the inputs to expect the output! Here is the breakdown for this **cookie recipe upgrade**. Remember, because we introduced that wonderfully rich brown butter, the time includes necessary cooling and chilling phases which are vital for the flavor profile.
These metrics are based on the instructions provided, but keep in mind that actual times can vary depending on your oven calibration and how long you decide to chill the dough. These are my established targets for baking success:
- Prep Time: 20 min
- Cook Time: 13 min
- Total Time: 2 hours 33 min (This accounts for the minimum 2-hour chill!)
- Yield: 18 cookies
- Category: Dessert
- Method: Baking
- Cuisine: American
- Diet: Vegetarian
We strive for complete transparency in our results here at Dishicious. Since we’re focused on delivering the **best chocolate chip cookies** results, I’ve also compiled the estimated nutritional information below. Please treat these numbers as a helpful guideline rather than a hard guarantee, as ingredient brands and exact measurements can shift these totals.
We calculate this based on 18 cookies from the full batch, providing a good framework for tracking your indulgence. It’s really helpful when planning out your week!
Estimated Nutrition Per Cookie (Based on Ingredients Listed)
- Calories: 220
- Sugar: 18g
- Sodium: 150mg
- Fat: 12g
- Saturated Fat: 7g
- Trans Fat: 0g
- Carbohydrates: 28g
- Fiber: 1g
- Protein: 3g
- Cholesterol: 45mg
If you’re looking for more great, efficient baking projects—often with a focus on maximizing comfort flavor—you can always browse my full collection of dessert recipes. Happy baking!
PrintThe Ultimate Chewy Brown Butter Chocolate Chip Cookies
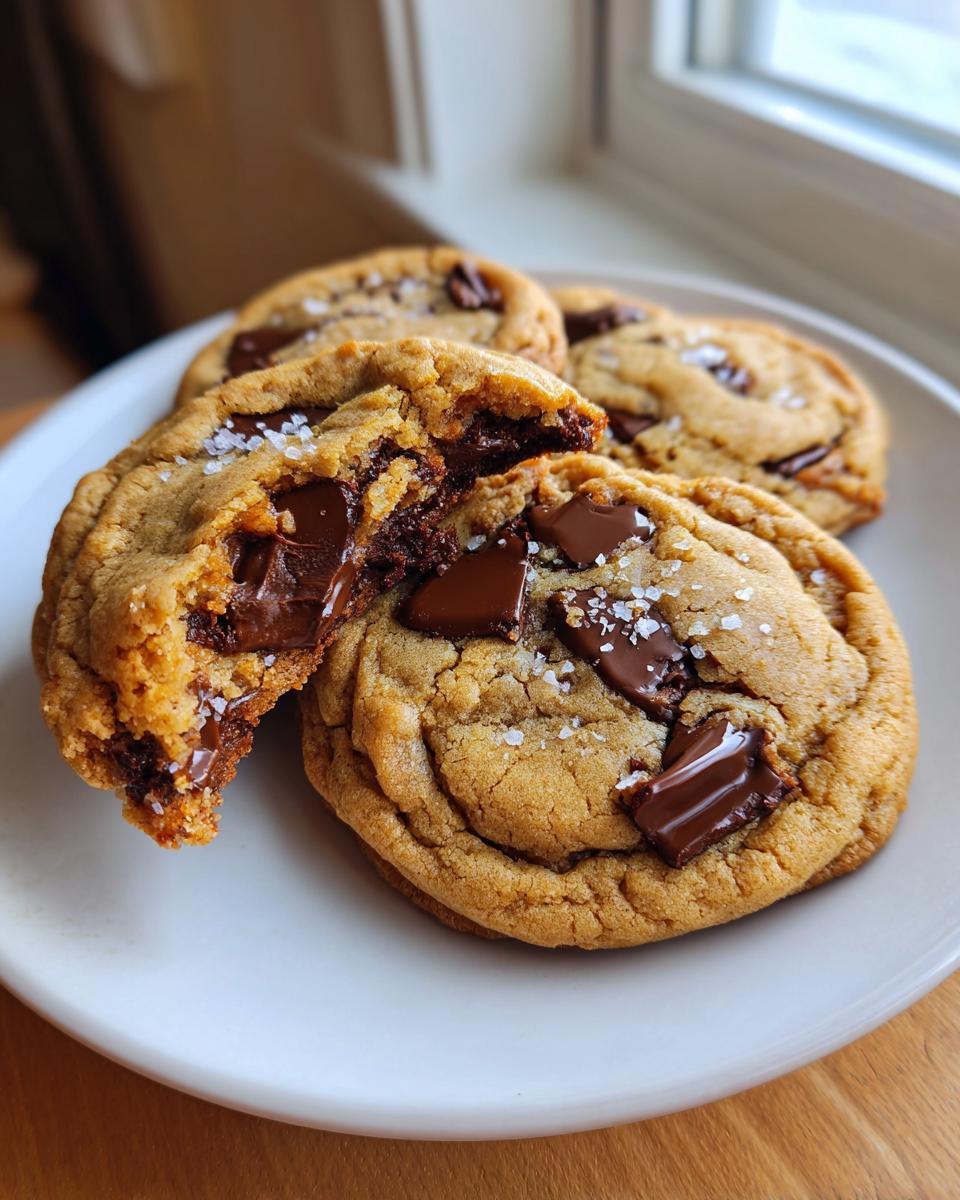
This recipe uses browned butter to create a rich, nutty flavor and achieves the perfect texture: soft centers with crispy edges. This is your go-to for gourmet chocolate chip cookies.
- Prep Time: 20 min
- Cook Time: 13 min
- Total Time: 2 hours 33 min
- Yield: 18 cookies 1x
- Category: Dessert
- Method: Baking
- Cuisine: American
- Diet: Vegetarian
Ingredients
- 1 cup (226g) unsalted butter
- 1 cup (200g) packed light brown sugar
- 1/2 cup (100g) granulated sugar
- 2 large eggs, room temperature
- 1 tablespoon vanilla extract
- 2 1/4 cups (270g) all-purpose flour
- 1 teaspoon baking soda
- 1 teaspoon kosher salt
- 1 1/2 cups (255g) semi-sweet chocolate chips or chopped chocolate
- Flaky sea salt, for sprinkling
Instructions
- Place the butter in a light-colored saucepan over medium heat. Cook, swirling often, until the butter melts, foams, and then brown bits form at the bottom and the butter smells nutty. This takes about 5 to 8 minutes. Immediately pour the brown butter into a heatproof bowl to stop the cooking process. Let it cool for 15 minutes until it is slightly solidified but still soft.
- In a large bowl, whisk the cooled brown butter with the brown sugar and granulated sugar until well combined.
- Beat in the eggs one at a time, mixing well after each addition. Stir in the vanilla extract.
- In a separate medium bowl, whisk together the flour, baking soda, and kosher salt.
- Gradually add the dry ingredients to the wet ingredients, mixing on low speed until just combined. Do not overmix.
- Fold in the chocolate chips.
- Cover the dough and chill in the refrigerator for at least 2 hours, or up to 3 days, for best flavor and texture.
- Preheat your oven to 375°F (190°C). Line baking sheets with parchment paper.
- Scoop the dough into balls, about 2 tablespoons each, and place them 2 inches apart on the prepared sheets. Sprinkle the tops with flaky sea salt.
- Bake for 10 to 13 minutes, or until the edges are golden brown and the centers look slightly underbaked.
- Let the cookies cool on the baking sheet for 5 minutes before transferring them to a wire rack to cool completely.
Notes
- Browning butter correctly is key; watch for the milk solids to turn deep brown, not black.
- Chilling the dough develops the caramelized flavor from the brown butter and prevents excessive spreading, leading to chewy chocolate chip cookies.
- Use high-quality chocolate chunks instead of chips for a better melt and texture.
Nutrition
- Serving Size: 1 cookie
- Calories: 220
- Sugar: 18g
- Sodium: 150mg
- Fat: 12g
- Saturated Fat: 7g
- Unsaturated Fat: 5g
- Trans Fat: 0g
- Carbohydrates: 28g
- Fiber: 1g
- Protein: 3g
- Cholesterol: 45mg