When you’re hosting, the last thing you need is a recipe that adds stress, right? I’m Leo, and that’s why I built Dishicious—to cut through the complexity. We all want those show-stopping, unbelievably delicious Classic deviled egg results for our parties, but nobody wants lumpy filling or cracked shells. Trust me, I’ve optimized hundreds of recipes, and this one is my absolute failsafe for the ultimate party food. We are delivering creamy, perfectly seasoned results every single time you make them. Forget fussy techniques; this is the streamlined plan for the best deviled eggs you’ve ever served.
- Why This Classic Deviled Egg Recipe Works Every Time
- Ingredients for the Ultimate Classic Deviled Egg Filling
- Step-by-Step Instructions for Perfect Classic Deviled Eggs
- Tips for Next-Level Classic Deviled Egg Presentation
- Making Classic Deviled Eggs for Picnics and Travel
- Variations on the Classic Deviled Egg Flavor Profile
- Storage and Make-Ahead Strategy for Classic Deviled Eggs
- Frequently Asked Questions About Classic Appetizers
- Nutritional Estimate for Classic Deviled Eggs
Why This Classic Deviled Egg Recipe Works Every Time
When I approach a classic appetizer like this, my goal isn’t just to make it taste good—it’s to engineer it so it *never* fails. That’s the Dishicious method in action! We focus on controlling the variables so you get reliable, professional-looking results every single time you whip up these classic appetizers. This specific approach guarantees easy peeling and that unbelievably smooth yolk center you’re looking for. If you’re looking for more go-to snacks, check out my curated list of appetizers and snacks.
- Precise timing ensures eggs peel cleanly, avoiding that frustrating, torn white.
- We mash the yolks until they are lump-free, guaranteeing that creamy texture.
- The balance of Dijon and vinegar cuts the richness perfectly—no bland filling here!
Foolproof Hard-Boiled Eggs for the Best Classic Deviled Egg
This is where most people lose the battle. Eggs that stick to the shell mean shredded whites and wasted time. I set the timer meticulously: a hard, rolling boil for exactly 12 minutes, then straight into an ice bath until they are totally cold. That rapid temperature shift is the secret handshake between the egg and the shell membrane. It ensures the membrane pulls away cleanly. If you nail this step, prepping the yolks for that extra-smooth filling becomes so much easier.
Ingredients for the Ultimate Classic Deviled Egg Filling
Okay, let’s look at what we need. Since we are focusing on classic flavor and smooth texture, we aren’t loading this up with a bunch of extras. Every single ingredient here has a job to do to deliver the best results for your party food platter. Keep your measurements precise here; it matters for that perfect creamy consistency we are aiming for.
- 12 large eggs (The basis for our egg recipes!)
- 1/2 cup mayonnaise (Use your favorite, full-fat works best)
- 1 tablespoon Dijon mustard
- 1 teaspoon white vinegar
- 1/4 teaspoon salt
- 1/8 teaspoon black pepper
- Paprika, for garnish (Don’t skip this—it gives it that beautiful color!)
Step-by-Step Instructions for Perfect Classic Deviled Eggs
Now that we have the components ready—perfectly peeled whites and separated yolks—it’s time for the assembly phase. Think of this like putting together an efficient operation; everything needs to run smoothly to maximize flavor and minimize mess. Once you master this process, you’ll whip up perfect deviled eggs for any occasion, whether it’s National Egg Day or just Tuesday.
- First, mash those yolks! Take your time here; this is critical for the texture.
- Combine all your wet ingredients—mayonnaise, Dijon, vinegar, salt, and pepper—right into that bowl of mashed yolks.
- Mix everything until it’s totally incorporated. If you’re stirring by hand like I usually do, scrape down the sides a couple of times to make sure everything is evenly distributed.
- Gently spoon or pipe that beautiful, creamy filling back into the empty egg white halves resting on your platter.
- Finally, don’t rush the finish! Sprinkle a light dusting of paprika over the top. Then, and this is non-negotiable, you need to chill them for at least 30 minutes. They firm up beautifully when cold. If you’re looking for other great make-ahead recipes where timing is everything, take a peek at my make-ahead egg muffins.
Achieving the Smooth Yolk Filling of a Classic Deviled Egg
If your goal is that ultra-creamy, almost whipped texture for your classic appetizers, you must pay attention to the mashing. I smash the yolks with a fork until they look like fine sand. Seriously, no lumps allowed! My favorite trick, which I use when presenting for a big event, is to press the mashed yolks through a fine-mesh sieve before adding any mayonnaise. This little extra step guarantees that professional, velvety smooth yolk filling every single time. It takes just a minute more but makes a massive difference in presentation and mouthfeel.
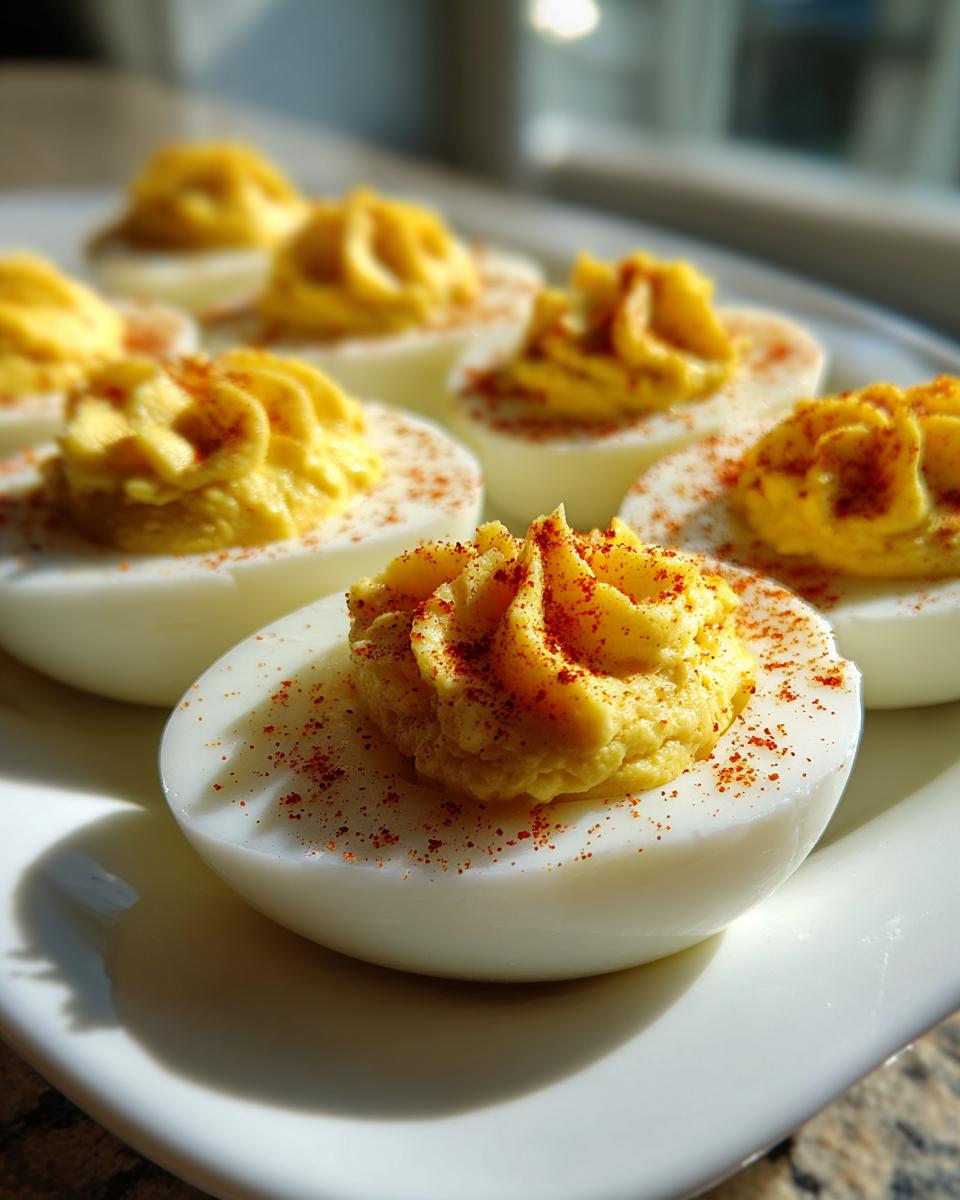
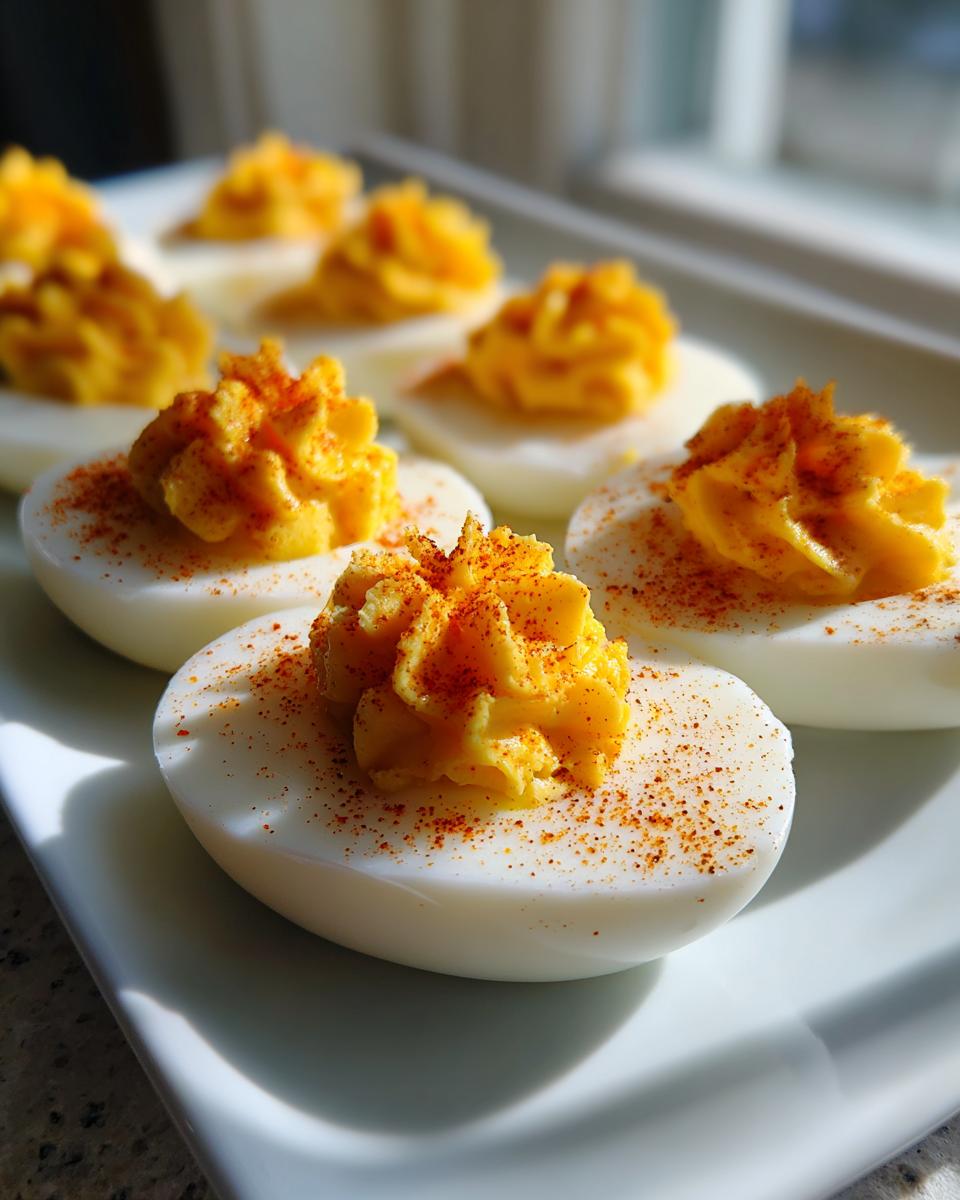
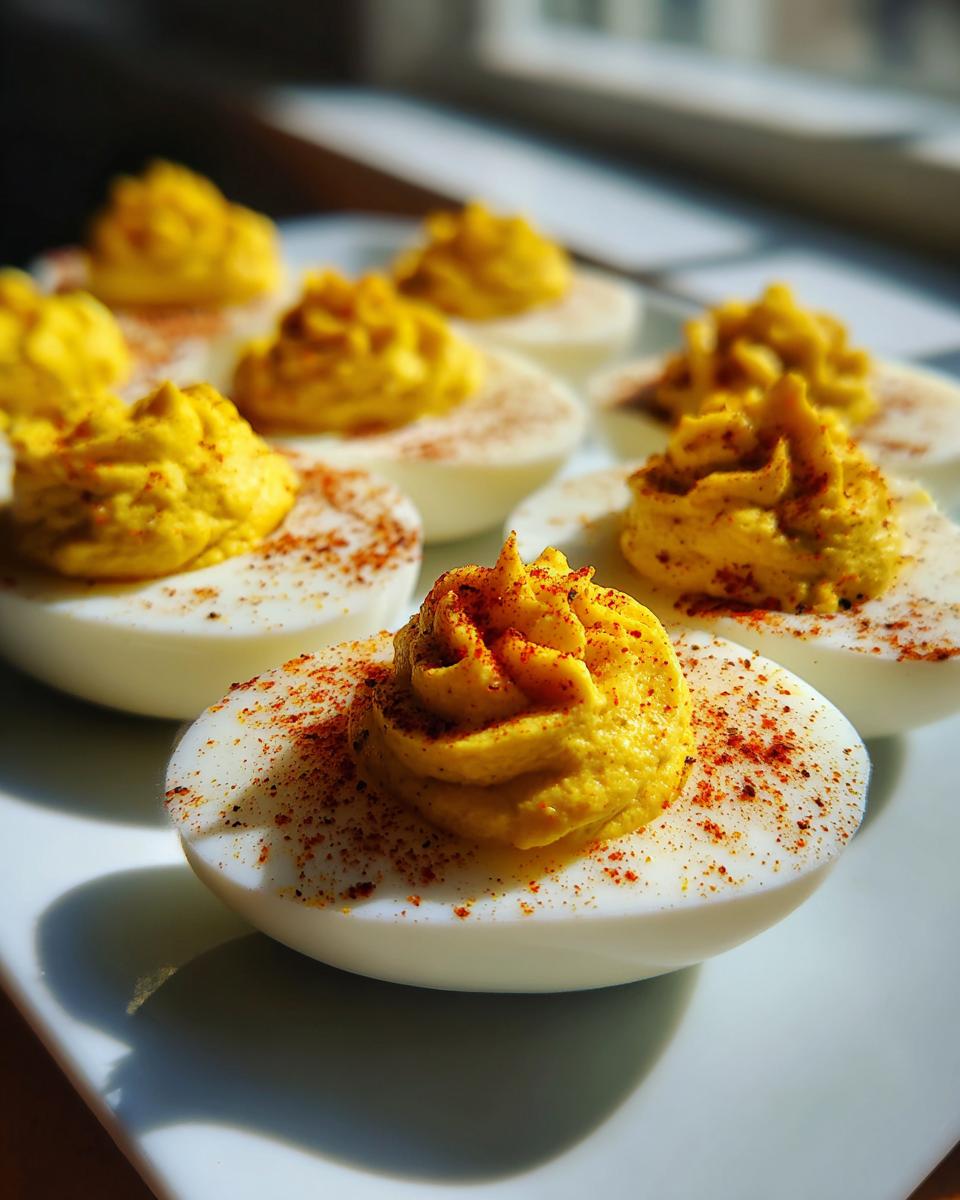
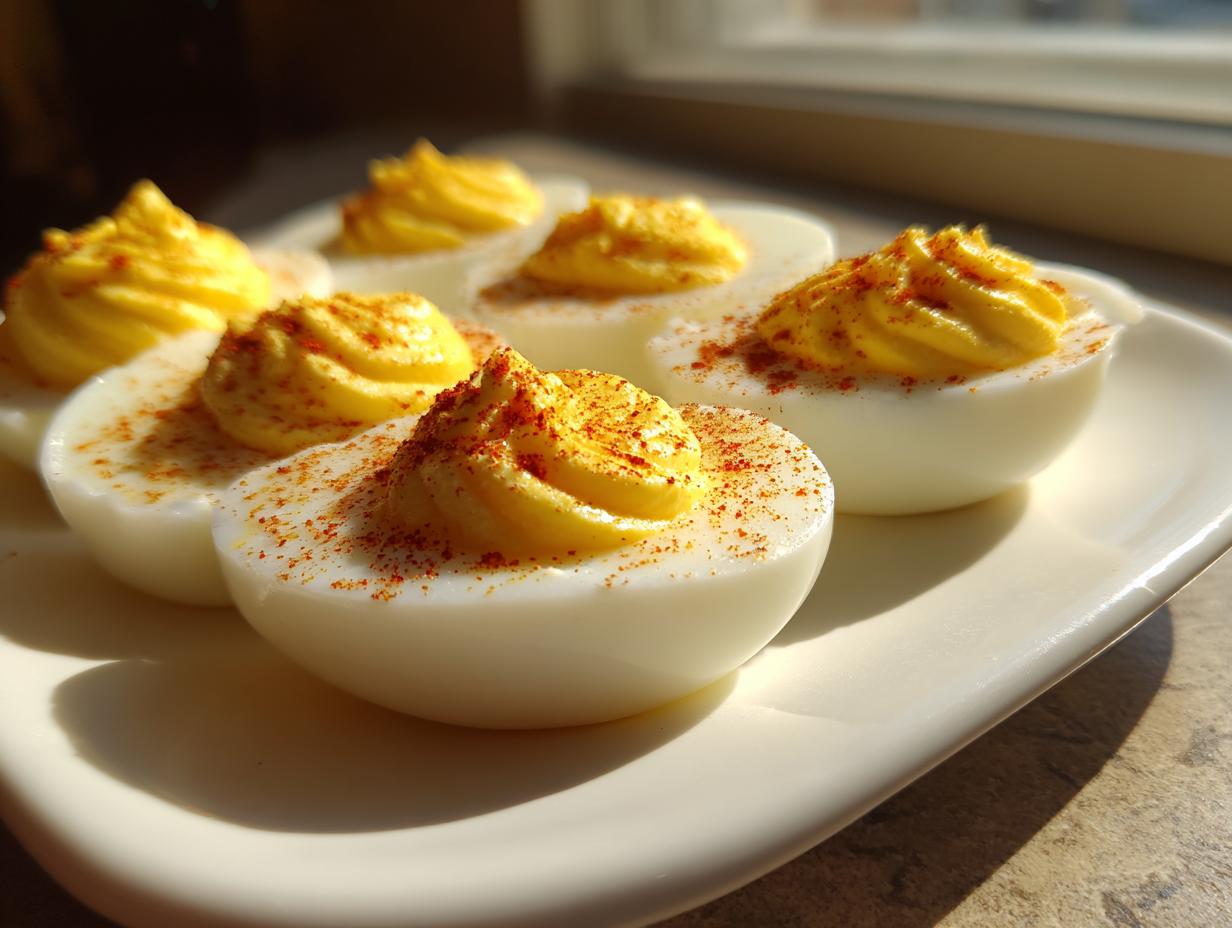
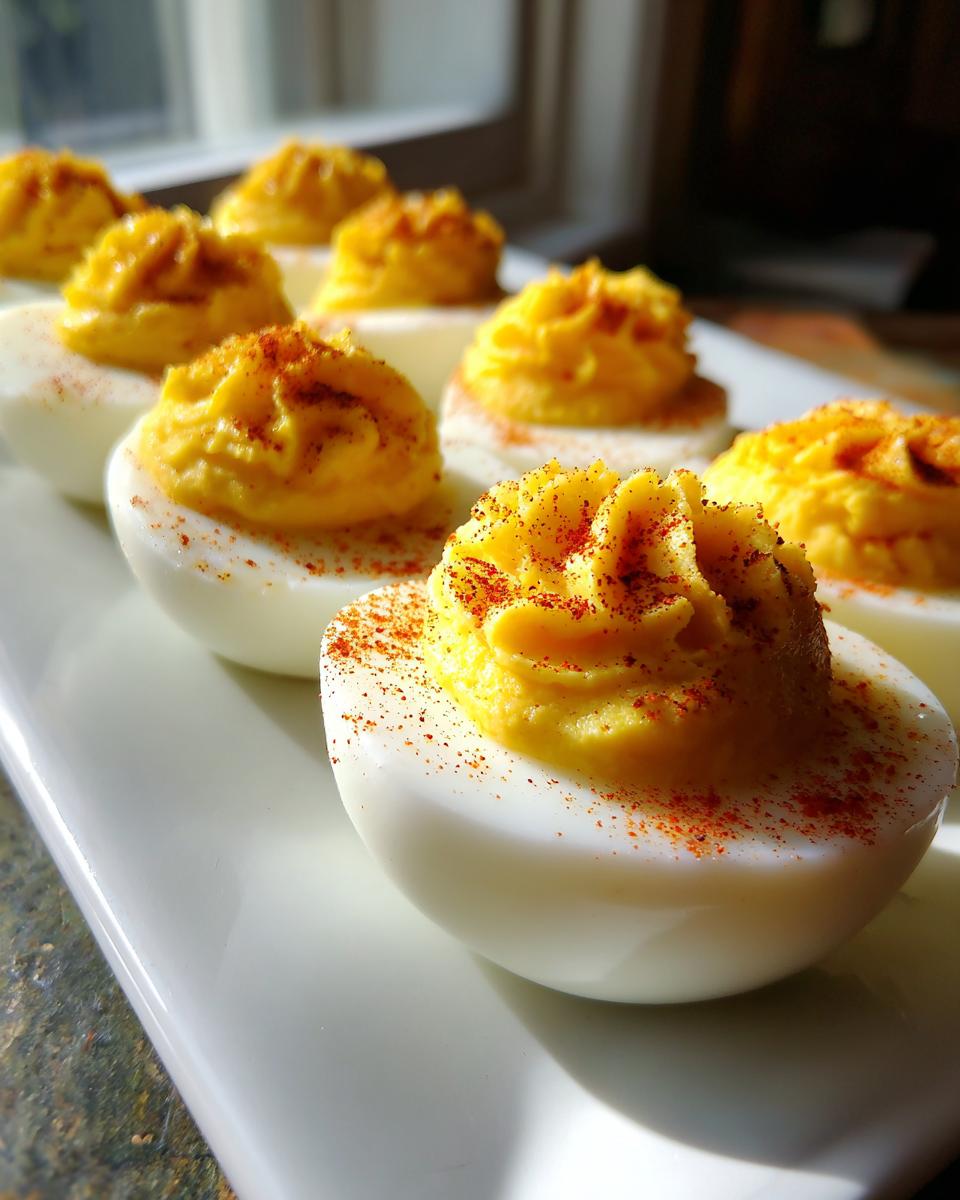
Tips for Next-Level Classic Deviled Egg Presentation
So, you’ve nailed the internal structure—the flavor profile is dialed in, and the filling is perfectly smooth. Great job! But since these are ultimate party food centerpieces, presentation is the final optimization step. You don’t need fancy equipment, but a little technique goes a long way. If you’re aiming for that professional catering look, I always recommend using a piping bag fitted with a large star tip, not just a spoon. It makes the filling look intentional and elegant!
If piping seems like too much hassle, just use a small spoon and swirl the filling gently to create peaks. For garnish, the paprika is classic, but feel free to experiment with chopped chives or a tiny sprinkle of finely diced pimento. This is about presentation efficiency, making sure everything looks as good as it tastes before your guests dive in.
Speaking of making things look sharp, if you are ever looking for tips on mastering structure in frostings, it reminds me of my notes on making stable buttercream—it’s all about control!
Making Classic Deviled Eggs for Picnics and Travel
We’ve perfected these deviled eggs for the kitchen counter, but what about taking them outside? Since they are such fantastic picnic food, you need a strategy for safe transport. Rule number one for anything mayo-based: keep them cold! Don’t fill the egg whites until you are actually ready to leave, or at least pack the filling separately.
When transporting, the best project management move is to use a dedicated deviled egg carrier or, in a pinch, a 12-cup muffin tin covered tightly with plastic wrap. This keeps them upright and prevents that smooth filling from smearing everywhere. Always pack them in a cooler with plenty of ice packs, especially if they’ll be sitting out for a while. While you’re thinking about make-ahead chillable items, check out this great ham salad recipe that travels just as well!
Variations on the Classic Deviled Egg Flavor Profile
I preach streamlining, but that doesn’t mean you can’t play with the flavor just a tiny bit, right? We want the core flavor of these classic appetizers to sing, but sometimes you need a little personalized kick. I always keep my ingredient list simple, but if you want to customize your batch for a different crowd, I have a few tried-and-true tweaks that work beautifully with the smooth base we just created.
If you’re feeling a little zesty, swap out the white vinegar for apple cider vinegar. It adds a slightly fruitier tang that complements the yolk beautifully. Some people love adding a half teaspoon of sweet pickle relish during the mixing stage—that gives you texture *and* tang.
For a little heat, just a quick dash of your favorite hot sauce works wonders, or maybe three drops of liquid smoke if you want a savory twist. If you enjoy those deeper, complex flavors, you could even consider swapping the Dijon for a spicy brown mustard, or heck, try mixing in a tablespoon of a good remoulade sauce if you want maximum flavor impact!
Storage and Make-Ahead Strategy for Classic Deviled Eggs
Planning ahead is half the battle when entertaining, and these deviled eggs are perfect for that. You can absolutely make these ahead, but the genius move is keeping the components separate until the last minute. Peel your eggs and keep the whites covered tightly in the fridge. You can mix the smooth yolk filling up to a full day in advance—just store it in an airtight container.
When you’re ready to serve, fill the whites and garnish. This prevents the filling from weeping or the paprika from soaking in. Filled eggs last great for about two days in the fridge, but honestly, with how fast these disappear at parties, you probably won’t have leftovers! For more streamlined make-ahead dishes, you should look at my enchilada recipe.
Frequently Asked Questions About Classic Appetizers
Even with a foolproof system, folks always have questions about their favorite egg recipes. I get it! Cooking is about practice and problem-solving. Here are the most common snags people run into when making their own batch of deviled eggs. Address these issues upfront, and you’ll look like a kitchen pro. If you’re planning a brunch event soon, checking out my easy breakfast and brunch ideas might give you some extra inspiration!
If your yolks look a little grey or grainy, it just means you overcooked them slightly, or they cooled too slowly. My 12-minute, ice-bath method helps prevent that entirely! Also, while these are great classic appetizers, they do brown slightly if left uncovered too long, which is why chilling them promptly is important.
Can I use homemade mayonnaise in my Classic deviled egg recipe?
Absolutely, yes! In fact, I encourage it when you have the time. Homemade mayo, with its fresh flavor, makes the filling taste even richer. If you want to take that ultimate step in quality control for your deviled eggs, check out my guide for making your own stabilized mayonnaise!
What’s the trick to peeling soft-boiled eggs easily?
It all goes back to that initial shock! You must transfer the eggs immediately after the 12 minutes are up straight into a bowl brimming with ice water. Let them sit for at least 15 minutes. The sudden temperature change causes the egg white to contract away from the shell membrane, making peeling smooth and frustration-free. It’s pure physics!
How far in advance can I prep these for my party?
I always recommend preparing the filling one day ahead and keeping the empty whites separate. Fill them right before you chill them for serving. If you fill them too early, the acid in the filling can start to slightly break down the egg white structure, which nobody wants.
Are these eggs safe to serve at a long event, like for National Egg Day?
Food safety is crucial, and since these are mayo-based, they need to stay cold. If they are sitting out on a buffet, try to keep the platter nestled over a larger tray of ice underneath. Don’t let them linger unrefrigerated for more than two hours total, standard food safety practice for party food applies here!
Nutritional Estimate for Classic Deviled Eggs
Okay, let’s talk numbers for a second, just to round out the project plan for these amazing healthy lunch ideas, though these are clearly better as appetizers! Since we are dealing with simple ingredients here—eggs, mayo, mustard—it’s pretty straightforward. Remember, this is just an estimate based on standard ingredients and my typical portioning. If you opt for light mayo or use less of it, your numbers will shift!
This table gives you a quick overview per serving (which is two halves, or one whole egg):
- Serving Size: 2 halves
- Calories: 90
- Fat: 8g
- Protein: 3g
- Sodium: 110mg
- Carbohydrates: 0.5g
- Cholesterol: 95mg
The fat content comes primarily from the egg yolks and the mayonnaise, which is what gives us that unbelievable, rich texture. But look at that protein count! These are satisfying party food that actually gives you something for the effort. It’s all about balance, even when making the best breakfast and brunch items!
PrintClassic Deviled Eggs: The Ultimate Party Appetizer

Make creamy, perfectly seasoned deviled eggs with an extra-smooth yolk filling. This foolproof recipe is ideal for any gathering, including National Egg Day.
- Prep Time: 20 min
- Cook Time: 12 min
- Total Time: 47 min
- Yield: 24 halves 1x
- Category: Appetizer
- Method: Boiling and Mixing
- Cuisine: American
- Diet: Vegetarian
Ingredients
Scale- 12 large eggs
- 1/2 cup mayonnaise
- 1 tablespoon Dijon mustard
- 1 teaspoon white vinegar
- 1/4 teaspoon salt
- 1/8 teaspoon black pepper
- Paprika, for garnish
Instructions
- Place eggs in a large saucepan and cover with cold water by one inch. Bring water to a rolling boil over high heat.
- Once boiling, remove the pan from the heat, cover it, and let the eggs stand for exactly 12 minutes.
- Immediately transfer the eggs to an ice bath (a bowl of ice and water) and let them cool completely, about 15 minutes.
- Peel the cooled eggs. Slice each egg in half lengthwise. Gently scoop the yolks into a medium bowl.
- Place the empty egg white halves on a serving platter.
- Mash the yolks thoroughly with a fork until no lumps remain.
- Add the mayonnaise, Dijon mustard, vinegar, salt, and pepper to the mashed yolks. Mix until the filling is completely smooth and creamy.
- Spoon or pipe the yolk mixture back into the egg white halves.
- Sprinkle the tops of the filled eggs with paprika before serving.
Notes
- For the smoothest filling, press the mashed yolks through a fine-mesh sieve before mixing with the other ingredients.
- Chill the finished deviled eggs for at least 30 minutes before serving for the best texture.
- Use a piping bag with a star tip for a professional look on your party food.
Nutrition
- Serving Size: 2 halves
- Calories: 90
- Sugar: 0.5
- Sodium: 110
- Fat: 8
- Saturated Fat: 2
- Unsaturated Fat: 6
- Trans Fat: 0
- Carbohydrates: 0.5
- Fiber: 0
- Protein: 3
- Cholesterol: 95