
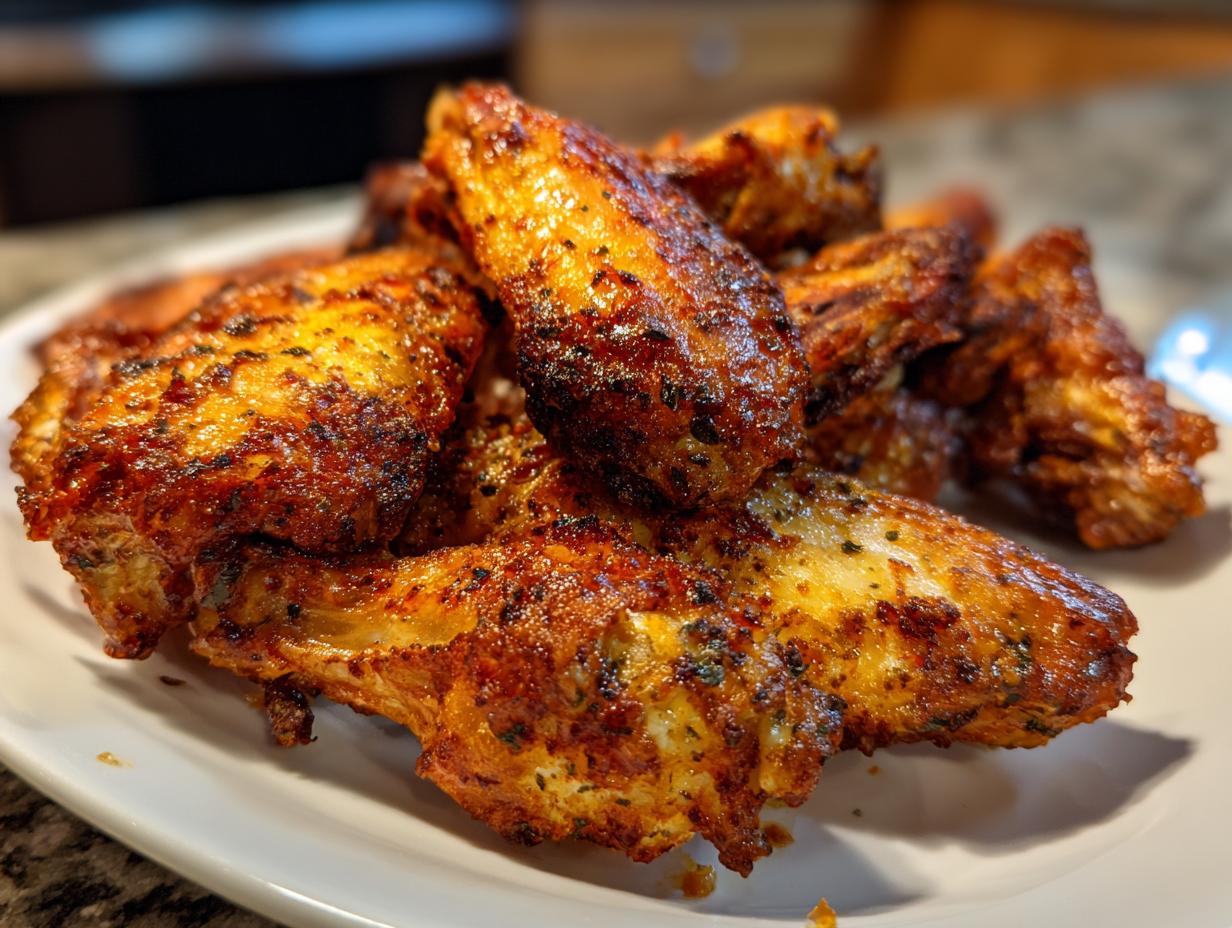
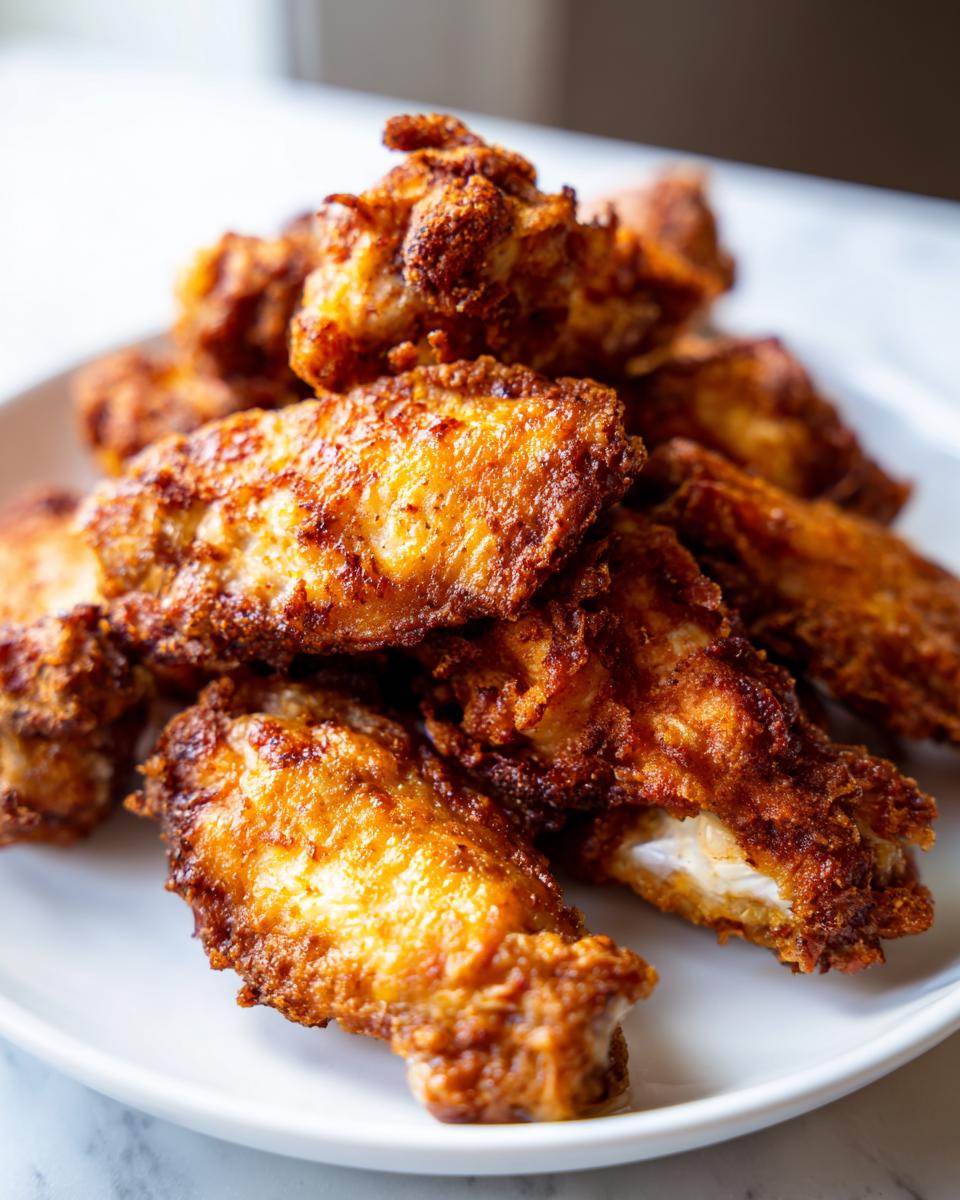
Oh, the heartbreak of a beautiful chicken wing that comes out of the oven looking pale and tasting suspiciously—dare I say it—soggy? We’ve all been there. That’s why when I started treating my kitchen like a project to be optimized, the first target on my list was the elusive, perfectly crunchy wing. Forget deep frying; that’s just excess mess we don’t need on a weeknight! This recipe for **crispy baked chicken wings** is the solution I engineered. It’s all about efficiency and reliability, giving you that shatter-crisp skin, every single time, using nothing but your oven. Trust me, these are the ultimate No Fry Crispy Wings you’ve been searching for.
- Why This is the Best Recipe for Crispy Baked Chicken Wings
- Essential Ingredients for Ultra-Crispy Baked Chicken Wings
- Step-by-Step Instructions: How To Make Crispy Baked Wings
- Flavor Variations for Your Crispy Baked Chicken Wings
- Tips for Achieving Juicy Inside Crispy Outside Wings Every Time
- Serving Suggestions for Game Day Chicken Wings
- Storage and Reheating Instructions for Crispy Baked Chicken Wings
- Frequently Asked Questions About Crispy Baked Chicken Wings
- Nutritional Estimate for Crispy Baked Chicken Wings
- Share Your Perfect Crispy Baked Chicken Wings
Why This is the Best Recipe for Crispy Baked Chicken Wings
If you’re like me, you want that perfect crunch without spending half your evening wading through oil. That’s the promise here: we deliver Juicy Inside Crispy Outside Wings in under an hour, total! Seriously, you get maximum crunch without any deep-fry drama. This method beats everything else because it relies on one non-negotiable trick. It might sound strange, but it’s the **Secret to Crispy Wings**. You’re going to use baking powder, and once you see the results, you’ll never go back. This streamlined approach makes perfect wings manageable for a Tuesday night, not just for big events. If you love this efficient style, you should check out my Asiago Chicken Bake too!
The Science Behind the Chicken Wings Baking Powder Trick
Okay, so why baking powder and not just salt? It’s chemistry, folks! Baking powder slightly raises the pH level on the chicken skin’s surface. This tiny adjustment helps break down the proteins in the skin, essentially helping the moisture escape while it bakes. When the moisture leaves, the skin gets super dry and thin, which equals crunch! If you can find it, always grab the aluminum-free baking powder; it just tastes cleaner. Trust me on this step; it’s the game changer for any Oven Baked Chicken Wings recipe.
Essential Ingredients for Ultra-Crispy Baked Chicken Wings
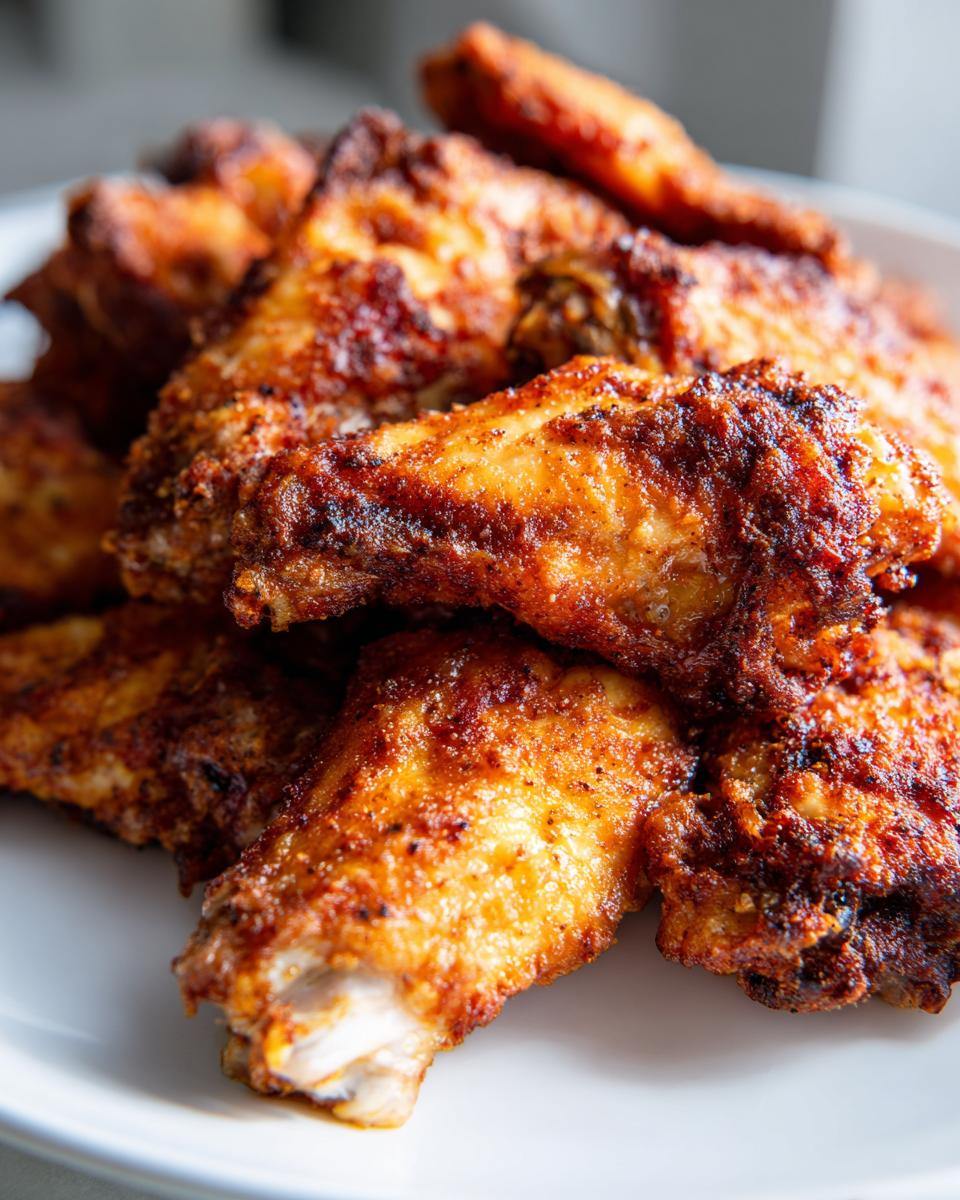
For this project to succeed, we need the right components ready to go. Don’t stress, though; these are pantry staples! You’ll need 2 pounds of chicken wings—make sure you separate the flats from the drumettes so they cook evenly. For the magic coating, grab 1 tablespoon of baking powder (remember the aluminum-free tip!), 1 teaspoon each of kosher salt, garlic powder, and onion powder, plus half a teaspoon each of pepper and paprika. That’s it for the base seasoning! If you’re planning to sauce them up later, have about 2 tablespoons of melted butter or your favorite hot sauce ready to toss them in right after they come out.
Ingredient Substitutions and Notes for Perfect Crispy Baked Chicken Wings
Let’s talk specifics, because Leo Grant taught me that details make or break a project. First, only use baking powder for this; don’t even think about swapping it for baking soda—it’ll taste like soap! This blend of spices creates the best foundation for almost any flavor profile you want to put on your **Crunchy Baked Poultry**. The absolute most important thing you need to do before seasoning is soak those wings in paper towels until you think they are dry, and then dry them some more! Seriously, excess moisture is the enemy of crispiness. If your wings aren’t bone-dry, the baking powder can’t do its job properly.
Step-by-Step Instructions: How To Make Crispy Baked Wings
Alright, this is where the magic of efficiency really kicks in. We aren’t doing complicated marinades or overnight brines here. This is our **Easy Baked Wings Recipe**, designed for maximum results with minimum fuss. Just follow these engineering steps, and you’ll have the best wings you’ve ever made in the oven. Get your equipment ready—the cooling rack is non-negotiable for perfect circulation underneath!
Prepping the Wings and Coating for Maximum Crispiness
First things first: dryness is divine! Grab those flats and drumettes and pat them down with paper towels until they feel totally dry. I mean it, no shortcuts here. Next, in a bowl, whisk together your spice mix with the all-important baking powder. Toss those dry wings into the spice bowl and make sure every single surface is coated well. Then, carefully arrange them on that wire rack on your baking sheet. They absolutely cannot be touching; give them space so the air can flow all around them. That air circulation is key for a great crunch!
The Two-Stage Baking Process for Crispy Baked Chicken Wings
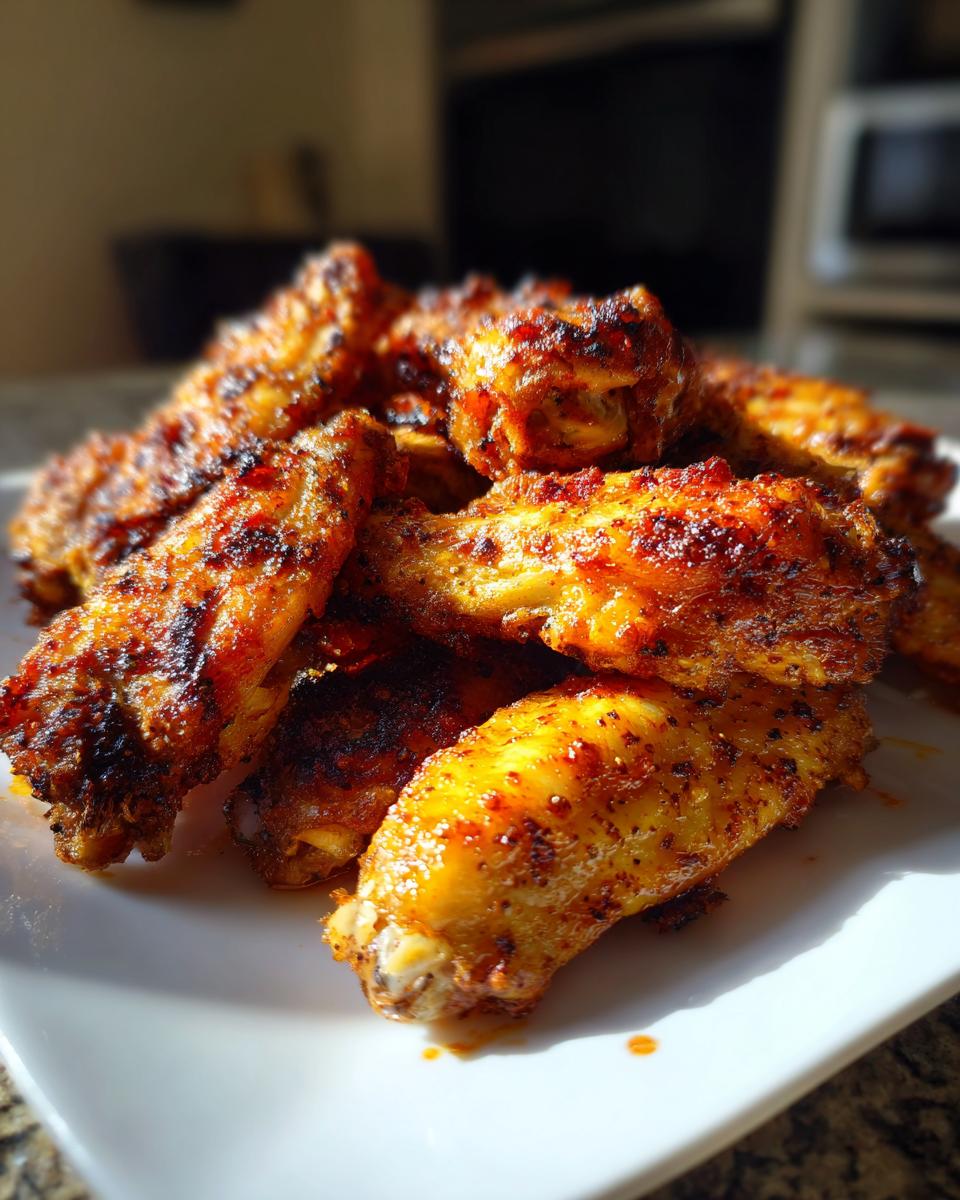
We start hot! Preheat your oven to a roaring 425 degrees F. Slide the tray in and let them bake hard for 20 minutes. This initial blast renders out a ton of that fat. After 20 minutes, pull them out, flip every single wing over carefully—don’t burn yourself! Then, we lower the temperature down to 400 degrees F. Bake for another 20 to 25 minutes until they look golden brown and feel super crisp. If you want that absolute loudest crunch, pull them out at 25 minutes and stick them under the broiler for just 60 seconds, but watch them like a hawk! If you’re serving them sauced, toss them right now. For more easy weeknight efficiency, check out my Chicken Alfredo Stuffed Shells recipe.
Flavor Variations for Your Crispy Baked Chicken Wings
Once you master the base seasoning and the baking process, you basically unlock a whole new world of customizable wings! Since we’ve already handled the hard part—the crispiness—flavoring them up is a breeze. This efficiency is why I love this method for game day or just a Friday night craving. For my Buffalo fans, you just need to toss those hot, fresh-out-of-the-oven wings with your favorite Frank’s RedHot mixed with a knob of melted butter. That creates perfect **Buffalo Baked Wings**. If you prefer that smoky, savory profile, mix up some quality BBQ sauce with a splash of apple cider vinegar for tanginess. Toss them immediately in that sauce, and boom—you have incredible **BBQ Baked Wings**. You can even keep them dry and dust them with store-bought garlic parmesan seasoning! It’s so easy to switch gears. Speaking of easy, you’ll want to try my Cranberry Meatballs sometime too!
Tips for Achieving Juicy Inside Crispy Outside Wings Every Time
We’ve laid out the blueprints for success, but let me consolidate a few non-negotiable tips that guarantee those glorious **Juicy Inside Crispy Outside Wings** results every single time you make a batch. If you nail these three things, you’re golden. First, I cannot stress it enough: the wire rack is your best friend. It lifts the wings so air can circulate underneath, which is the only way to prevent that dreaded soggy bottom. If you skip the rack, you are sacrificing crispiness!
Second, temperature control is vital. We start high to blast the moisture out, and then we drop it to finish cooking the inside gently. Resist the urge to open the oven door constantly, or you’ll just let all that hard-earned heat escape. Speaking of escaping, whatever you do, do not overcrowd the pan. I know it’s tempting when you’re making wings for the whole game day crew, but if the wings are touching, the steam gets trapped, and you just baked yourself a bunch of rubbery wings instead of crunchy ones. Spacing them out ensures that the baking powder coating can work its magic uniformly across the entire surface. Want more grilled burger secrets that focus on juiciness? Check out my guide to juicy burgers! For another great source on crispiness, see this useful article here.
Serving Suggestions for Game Day Chicken Wings
Now that you have perfectly crunchy wings, you need the snacks to match that easy, game-day vibe, right? We aren’t making a five-course meal here; we are aiming for simple, bold pairings. The two classics—celery sticks and carrot sticks—are essential because they give you something cool and crisp to eat between those spicy bites. You absolutely need ranch dressing, and blue cheese dip is a must if you made Buffalo style. If you want something a little heartier but still simple, serve them alongside my famous Cowboy Caviar. It’s easy to scoop and works great as an appetizer starter while the wings are finishing up!
Storage and Reheating Instructions for Crispy Baked Chicken Wings
Look, these babies are best devoured hot right off the rack, but let’s be real—sometimes there are leftovers! If you can’t finish them all, get them into an airtight container and pop them in the fridge as quickly as you can. Do not leave sauced wings sitting out for hours; food safety is part of smart project management!
When you are ready for round two, the microwave is absolutely forbidden—it turns them into sad, chewy sponges. The only way to bring back that glorious crunch is to reheat them in the oven or even an air fryer if you have one. A quick 8 to 10 minutes at 375 degrees F works wonders. If they were naked (no sauce) when you stored them, go ahead and toss with a little melted butter or sauce *after* you reheat them. This keeps the skin from getting gummy!
Frequently Asked Questions About Crispy Baked Chicken Wings
I know you’ve got some lingering questions because when you’re aiming for perfection, details matter! I’ve collected the things I always get asked about this batch of **crispy baked chicken wings** because, remember, we want reliable results every time we cook. These are the shortcuts Leo Grant would approve of!
Can I make these Oven Baked Chicken Wings ahead of time?
Honestly, for the absolute best crunch, you should always bake them the day you plan to serve them. However, if you must prep ahead, bake them completely until they are done, let them cool, and store them uncovered in the fridge overnight if possible, or just sealed tight. When you reheat them, skip the microwave and use about 10 minutes in a 400-degree oven. Crucially, only toss them in your Buffalo or BBQ sauce *after* they are hot again!
What if I don’t have a wire rack for my Easy Baked Wings Recipe?
This is a common kitchen hurdle, but we can engineer around it. If you don’t have a rack, line your baking sheet heavily with foil—this helps a little with cleanup, which is always a win! Then, set your wings directly onto the foil, making sure they are spaced out perfectly so they aren’t touching at all. I have to warn you, though: the bottom won’t get that amazing, head-turning crispiness because the moisture gets trapped underneath. It will still be good, but it won’t be *great* like when you use the rack. For more quick fixes and tasty meals, take a look at my quick and easy dinner ideas!
Can I skip the baking powder entirely?
You technically *can*, but then you are throwing away the core efficiency trick of this entire recipe! If you skip it, you will end up with skin that stays chewy, not shattered-crisp. The powder is essential for drying out the skin so they become the perfect No Fry Crispy Wings we are aiming for. Save yourself the disappointment and just keep some on hand; it’s cheap and lasts forever!
How do I make them spicy if I want Buffalo Baked Wings?
It’s super simple! You just build the foundation of flavor with our dry spice mix first—that’s what gives you the crisp exterior. Once they come out of the oven after that final 20-minute bake, transfer the hot wings to a bowl. Then, take 4 tablespoons of your favorite cayenne-based hot sauce and mix it vigorously with 2 tablespoons of melted, unsalted butter. Pour that mixture over the wings and toss them fast! That heat helps the sauce stick perfectly.
Nutritional Estimate for Crispy Baked Chicken Wings
When we talk about delicious efficiency, we should also quickly look at what goes into our bodies, right? Based on 4 wings per serving, the estimate for this recipe comes out to about 280 calories, 18 grams of fat, and a whopping 26 grams of protein. Now, remember this is just a starting point! If you drench these beauties in a thick, sugary BBQ sauce at the end, those numbers are going up significantly. This estimate assumes you’re having them plain or just tossed lightly in hot sauce. Always check your sauce labels!
Share Your Perfect Crispy Baked Chicken Wings
Wow, that’s it! You’ve mastered the ultimate project: shatter-crisp chicken wings made right in your oven. I want to see them! Please jump down and leave a 5-star rating below if these gave you the crunch you were hoping for. And I really want to know—which sauce variation did you choose for your toss? Did you stick to plain, go Buffalo, or try something totally new? Snap a picture and tag me! If you need to get in touch about the recipe or have suggestions, my contact page is always open!
PrintUltra-Crispy Baked Chicken Wings (No Frying Needed)

Make shatter-crisp chicken wings using only your oven. This simple method, featuring baking powder, delivers juicy meat and crunchy skin without the mess of deep frying.
- Prep Time: 10 min
- Cook Time: 45 min
- Total Time: 55 min
- Yield: 4 servings 1x
- Category: Appetizer
- Method: Baking
- Cuisine: American
- Diet: Low Fat
Ingredients
- 2 lbs chicken wings (flats and drumettes separated)
- 1 tablespoon baking powder (aluminum-free recommended)
- 1 teaspoon kosher salt
- 1 teaspoon garlic powder
- 1 teaspoon onion powder
- 1/2 teaspoon black pepper
- 1/2 teaspoon paprika
- Optional: 2 tablespoons melted butter or hot sauce for tossing after baking
Instructions
- Preheat your oven to 425 degrees Fahrenheit (220 degrees Celsius). Line a large baking sheet with aluminum foil for easy cleanup. Place a wire cooling rack on top of the prepared baking sheet.
- Pat the chicken wings completely dry using paper towels. This step is critical for crispiness.
- In a medium bowl, combine the baking powder, salt, garlic powder, onion powder, black pepper, and paprika.
- Add the dried chicken wings to the bowl. Toss thoroughly until every piece is evenly coated with the dry mixture.
- Arrange the coated wings in a single layer on the wire rack. Do not let the wings touch each other; space them out for air circulation.
- Bake for 20 minutes.
- Flip each wing over. Reduce the oven temperature to 400 degrees Fahrenheit (200 degrees Celsius).
- Bake for an additional 20 to 25 minutes, or until the skin is deeply golden brown and very crisp.
- Remove the wings from the oven. If you are serving them plain, they are ready. If you want sauce, immediately toss the hot wings in your preferred sauce (like Buffalo or BBQ) in a clean bowl.
- Serve immediately with dipping sauces.
Notes
- Using a wire rack allows air to circulate completely around the wings, which prevents the bottom from becoming soggy.
- Baking powder reacts with the chicken skin at high heat, helping to dry out the skin and create a crisp texture. Do not substitute with baking soda.
- For extra crunch after baking, you can briefly broil the wings for 1-2 minutes, watching closely to prevent burning.
Nutrition
- Serving Size: 4 wings
- Calories: 280
- Sugar: 0 g
- Sodium: 350 mg
- Fat: 18 g
- Saturated Fat: 5 g
- Unsaturated Fat: 13 g
- Trans Fat: 0 g
- Carbohydrates: 0 g
- Fiber: 0 g
- Protein: 26 g
- Cholesterol: 90 mg