
Look, sometimes you just need dessert, and you need it fast. We all have those days when takeout is too expensive, but complicated recipes feel like climbing a mountain. That’s exactly why I engineered this easy cherry cobbler. It’s the go-to solution here at Dishicious, born from Leo Grant’s philosophy: maximum flavor with minimum fuss.
This recipe cuts out all the stress, relying on canned cherries to deliver that perfect, sweet-tart filling instantly. You’re looking at a dessert that comes together in about 15 minutes, proving you don’t need hours to create something truly comforting. Seriously, this is your new standard for a quick, no fuss dessert when company shows up unexpectedly.
- Why This easy cherry cobbler Recipe Works for Busy Cooks
- Ingredients for the perfect easy cherry cobbler
- Step-by-Step Instructions for your quick homemade cobbler
- Tips for Success with Your easy baked fruit dessert
- Serving Suggestions for this family friendly cherry dessert
- Storage and Reheating Instructions for easy cherry cobbler
- Frequently Asked Questions about this classic cherry cobbler for beginners
- Estimated Nutritional Data for one serving of easy cherry cobbler
- Share Your Experience Making This Simple Cobbler
Why This easy cherry cobbler Recipe Works for Busy Cooks
I designed this recipe specifically for the schedule I used to keep in Chicago—where takeout was easy but eating well was hard. This isn’t about fancy skills; it’s about efficiency and making sure you get a real dessert on the table without stress. It’s honestly one of the best quick and easy dinners companions you could ask for.
- It’s a true time-saver: Prep time is only 15 minutes, total.
- Zero guesswork: The filling uses pantry staples, so the taste is always balanced.
- Perfect for beginners: This reliability makes it a fantastic beginner baking recipe.
Fast Fruit Cobbler: Quick Assembly Time
When I say fast, I mean it. You’re spending maybe ten minutes just measuring ingredients, and the rest is just stirring and pouring. Because we skip peeling or pitting fruit, this becomes a genuine fast fruit cobbler that goes from counter to oven faster than the delivery guy can find your apartment.
Reliable Results for a Simple Cherry Dessert
The payoff is huge compared to the effort. You get that beautiful, bubbling filling under a tender, crusty topping. This is the very definition of a simple cherry dessert because the filling thickens itself beautifully thanks to the cornstarch. You just mix, drop, and bake. It just works, every time.
Ingredients for the perfect easy cherry cobbler
When we talk about efficient baking, we’re talking about smart ingredient choices. I rely on great pantry staples to make this recipe the absolute easiest option out there. Skipping the tedious prep work means we can turn this into a canned cherry cobbler shortcut without losing any of that comforting dessert flavor. Check out what you need right here:
For the Cherry Filling
This part is where the magic happens with almost zero effort. Remember, keep that syrup! It’s what thickens up everything nicely. You’ll need:
- 2 (15 ounce) cans pitted sweet cherries in heavy syrup, undrained
- 1/2 cup granulated sugar
- 1 tablespoon cornstarch (our secret smooth-maker)
- 1 teaspoon vanilla extract
- 1/4 teaspoon almond extract (Don’t skip this; it elevates the cherry flavor!)
For the Simple Biscuit Topping Recipe
We are making a super quick drop biscuit topping here. It’s tender, slightly rustic, and requires no rolling or fuss. This is the heart of our simple biscuit topping recipe.
- 1 1/2 cups all-purpose flour
- 2 tablespoons granulated sugar
- 1 tablespoon baking powder
- 1/2 teaspoon salt
- 1/2 cup cold unsalted butter, cut into small pieces (keep it super cold!)
- 1/2 cup milk
- 1 large egg, beaten (just for brushing the tops golden)
Step-by-Step Instructions for your quick homemade cobbler
Okay, let’s get this assembly line moving. Since this is designed to be a truly streamlined process—perfect for anyone looking for dessert recipes—I’ve broken down the steps into three quick areas. Follow these, and you’ll have this easy cherry cobbler in the oven before you know it. Confidence booster alert: Don’t worry about perfection here; ‘rustic’ is the goal!
Preparing the Cherry Base
First things first: get your oven hot—375 degrees F is perfect—and give your 8×8 dish a quick grease. Now, for the filling, grab your medium bowl. You are literally dumping everything in: the undrained cherries (yes, syrup and all—that’s flavor!), the sugar, the cornstarch, and both extracts. Give it a gentle stir to combine everything without totally smashing the fruit, then pour that glossy mixture right into your prepared dish.
Mixing and Dropping the Topping Dough
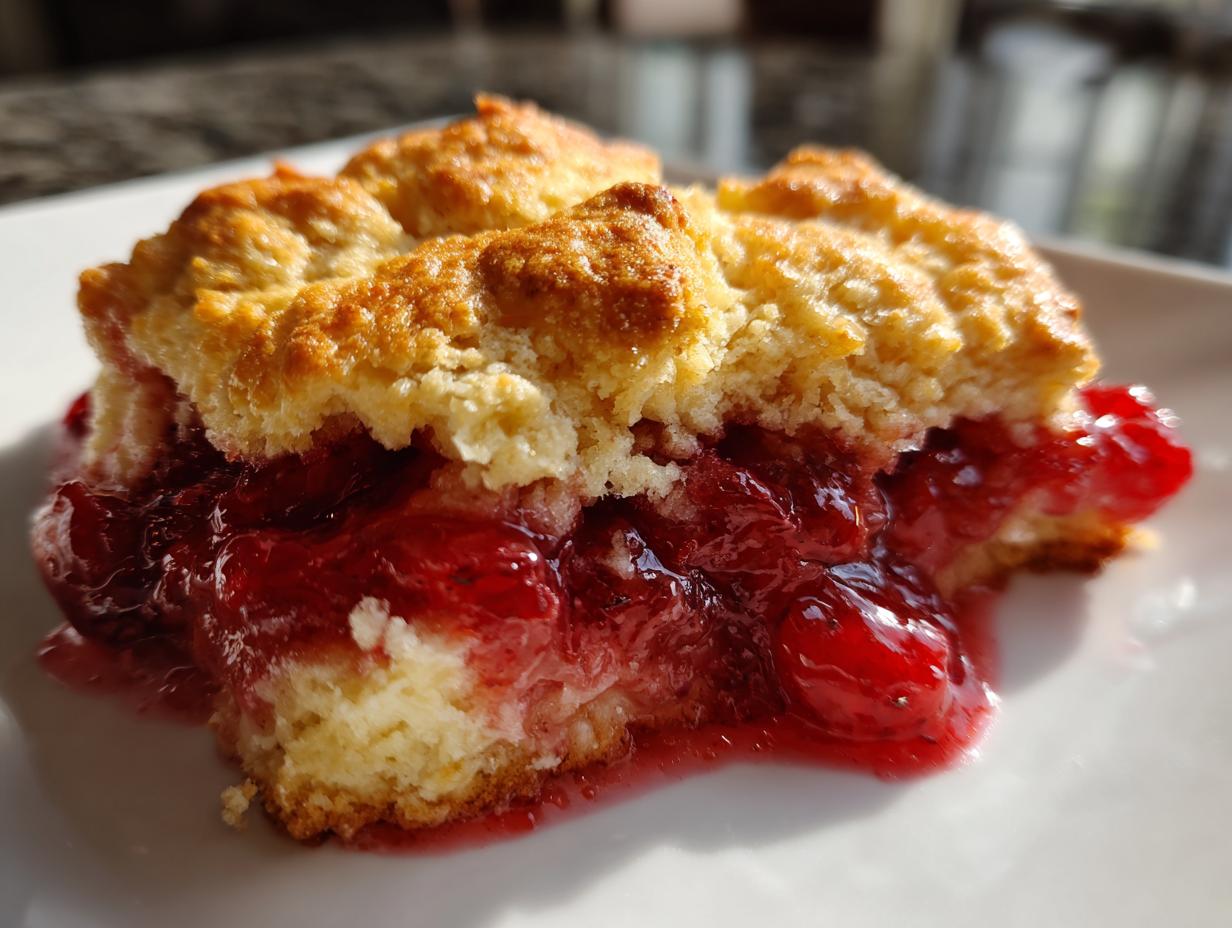
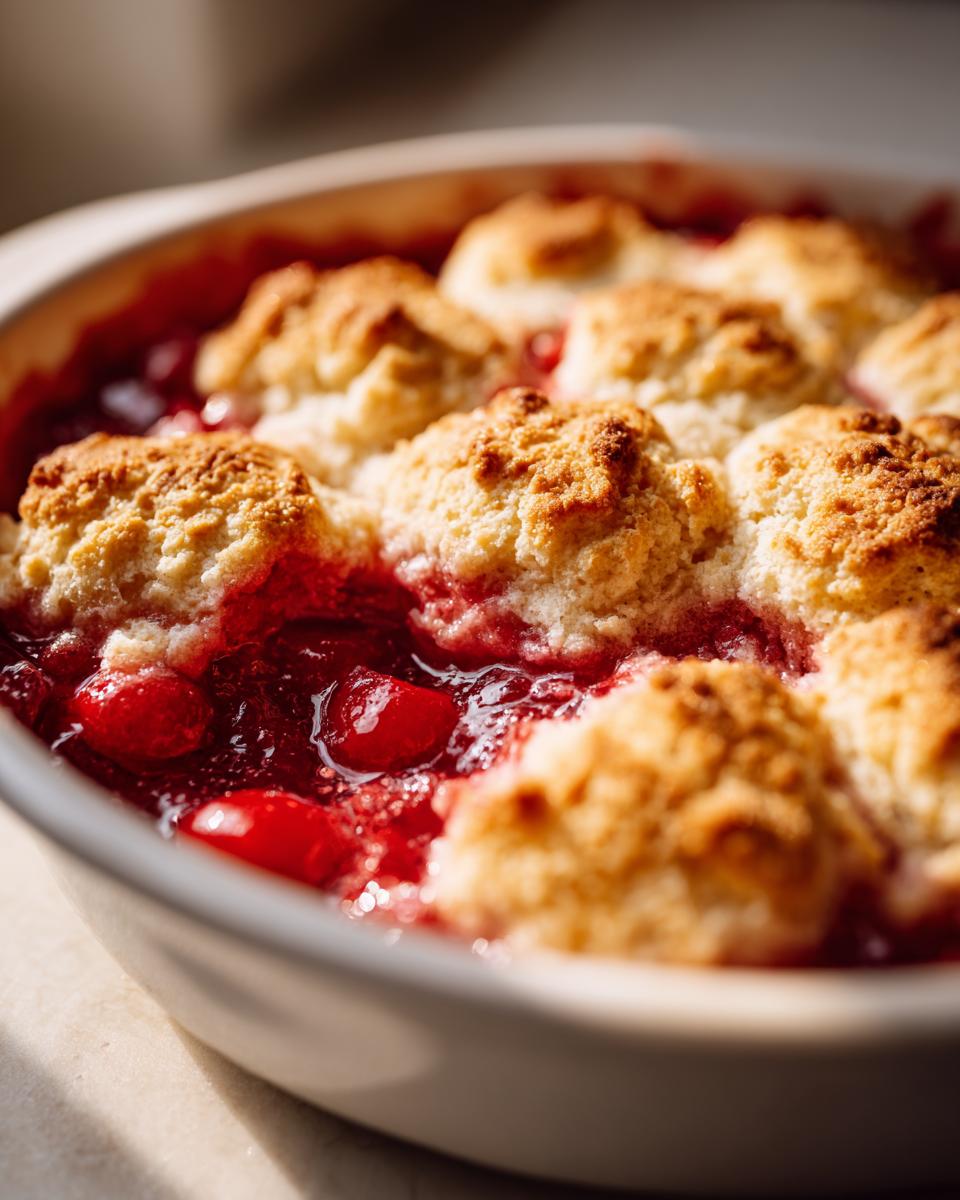
In a separate bowl, quickly whisk your dry topping ingredients together. Now, this is key for that tender biscuit: cut in the cold butter using your fingers or a pastry blender until it looks like coarse, pebbly crumbs. Pour in the milk and stir just until it forms a soft, shaggy dough. Do not overmix! Seriously, stop stirring the second the flour disappears. Drop spoonfuls of this dough randomly over the cherries; you don’t need to cover every spot—gaps let the filling bubble up beautifully. Finally, brush those biscuit tops with the beaten egg for that golden finish.
Baking and Resting the easy cherry cobbler
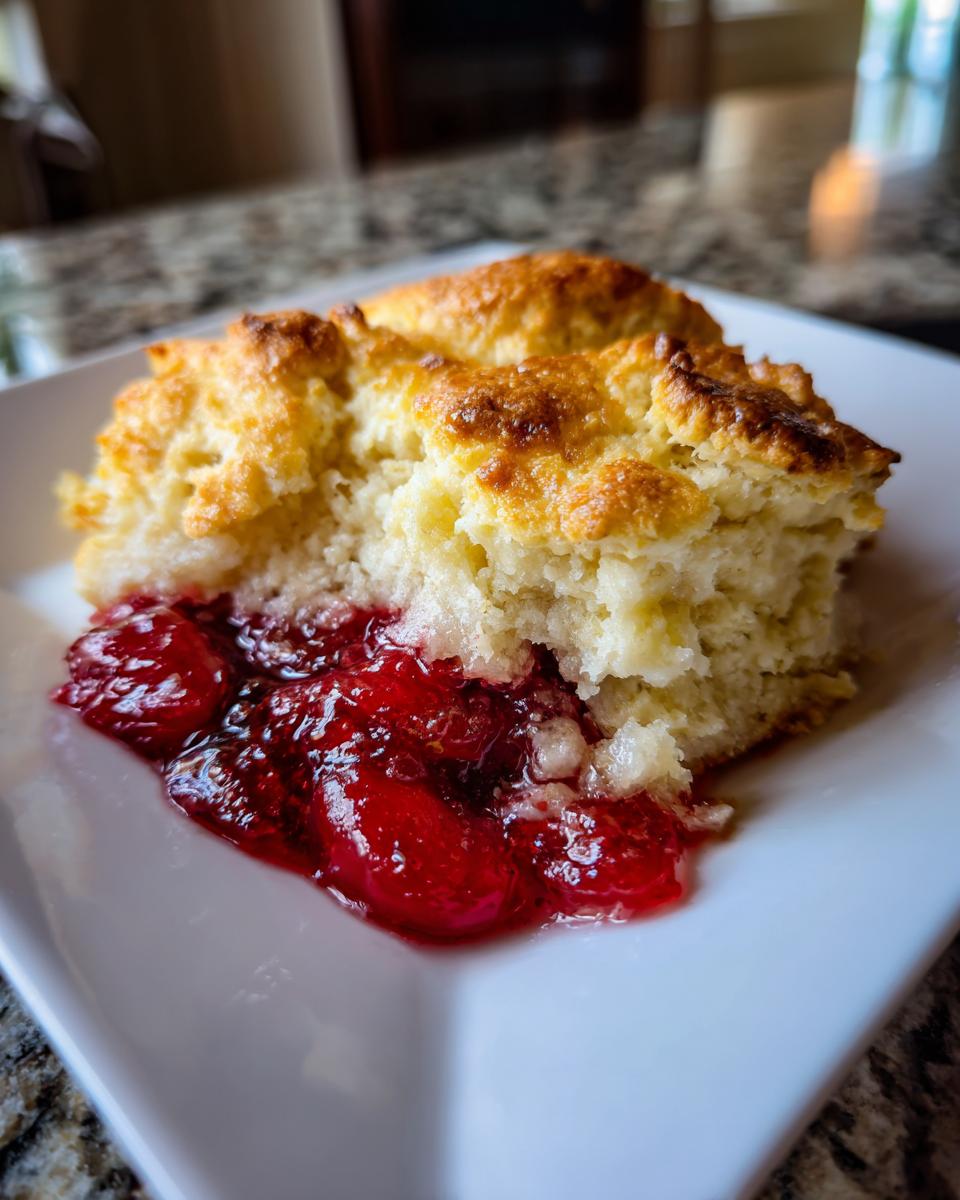
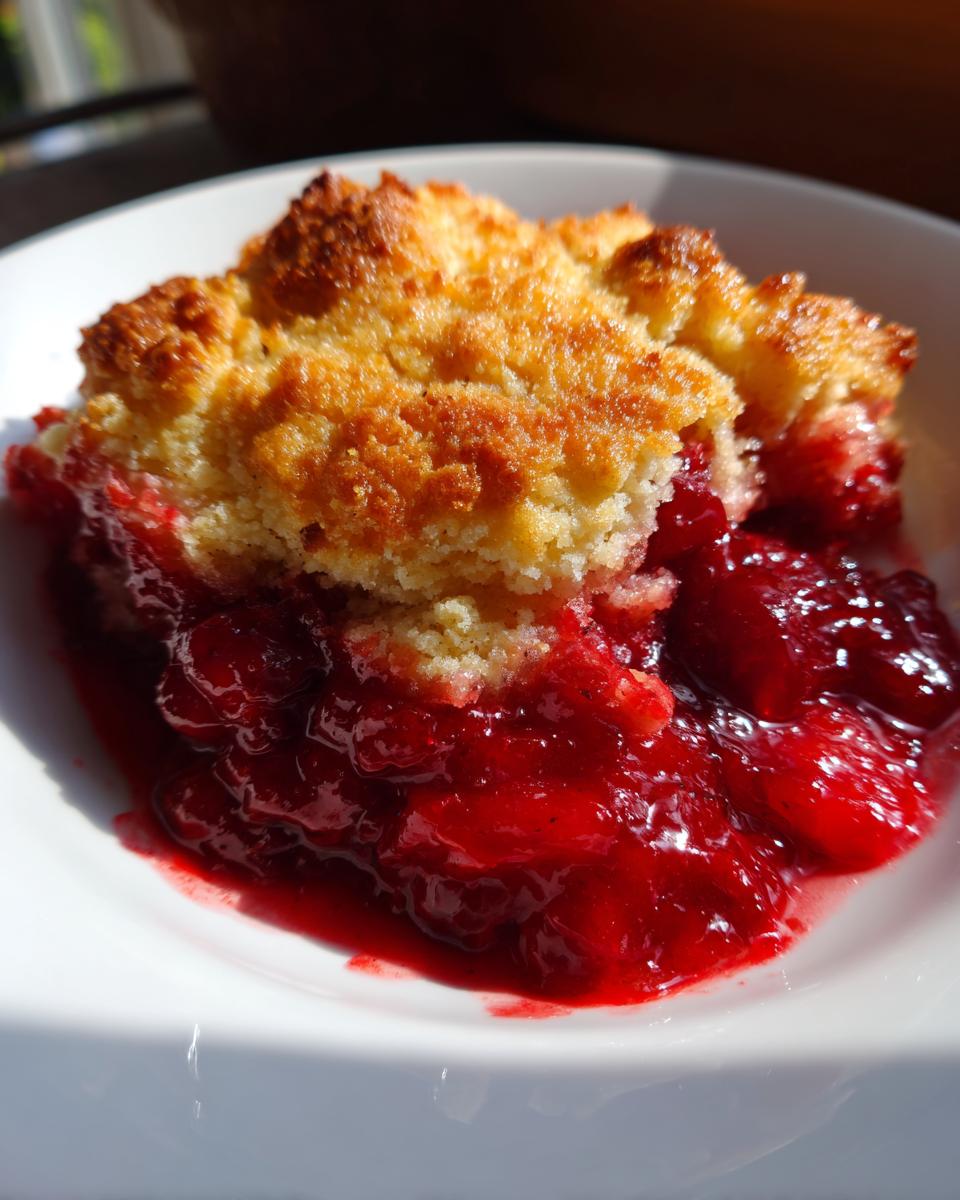
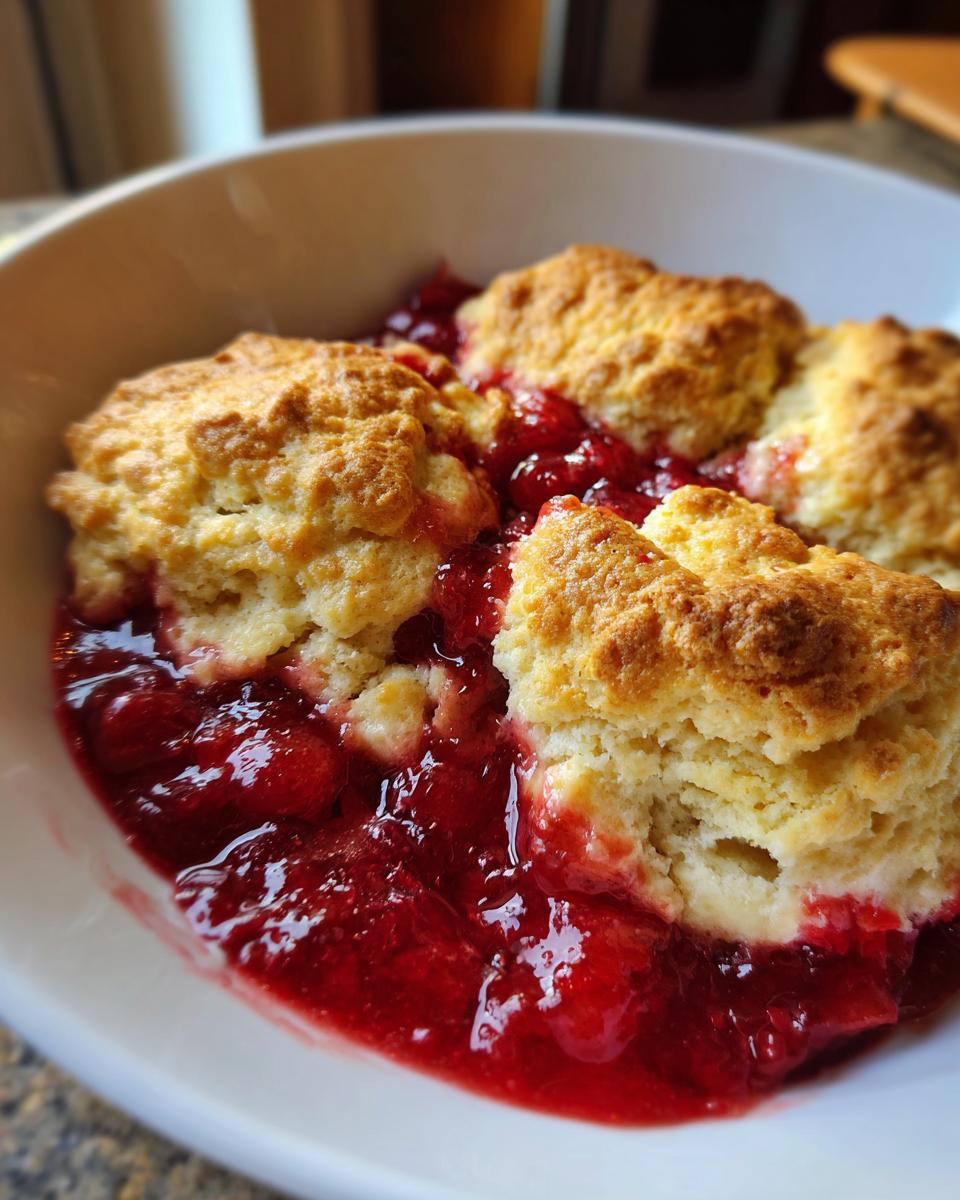
Into the hot oven it goes for about 30 to 35 minutes. You are looking for two visual cues: the topping should be a nice golden brown, and you need to see the cherry filling actively bubbling up around the biscuits. Once it’s out, this part is non-negotiable: let it rest on the counter for at least 15 minutes. This allows the filling to set up just enough so it doesn’t run everywhere when you scoop it out. Trust me on the resting part!
Tips for Success with Your easy baked fruit dessert
Even though this is a super straightforward recipe, a few little tricks make the difference between a good dessert and a showstopper. Since reliability is my whole mission here at Dishicious, let’s talk about how to guarantee success when making this easy baked fruit dessert. You want that topping tender and the fruit perfectly balanced, right? We love simplicity in all our dessert recipes, and these simple adjustments help cement that!
Cherry Selection and Substitutions
I rely on those canned cherries because they bring the syrup needed for the filling to thicken properly, which is a huge time saver. But if you have fresh or frozen cherries lying around? Go for it! If you use frozen, don’t thaw them first; just throw them right into the bowl. You might need to add an extra tiny sprinkle of sugar or cornstarch just to account for the extra water released, but they bake up beautifully.
Achieving the Best Biscuit Texture
The biscuit topping is everything, and the #1 enemy of tender biscuits is heat transfer. Keep that butter absolutely ice-cold when you’re cutting it into the flour mixture. If it starts getting soft or greasy while you’re mixing, just pop the bowl in the freezer for five minutes. Remember what I said about stirring? Stop as soon as the milk is incorporated. Over-stirring develops gluten, and we want tender crumbs, not chewy rocks!
Serving Suggestions for this family friendly cherry dessert
This family friendly cherry dessert is fantastic all by itself, but honestly, it screams for something cool and creamy on top. Since the biscuit topping gets delightfully crisp during baking, serving it warm is the absolute best way to maximize that texture contrast. While the cobbler cools slightly, I usually whip up a quick dollop of vanilla on the side. If you want something really impressive without adding effort, check out my guide for making fluffy, stable vanilla buttercream—a tiny spoonful marries perfectly with the tart cherries.
A scoop of vanilla ice cream is the classic choice, of course. But sometimes, a simple drizzle of heavy cream works too. It’s totally versatile, which is exactly what you want from a reliable recipe!
Storage and Reheating Instructions for easy cherry cobbler
I’m happy to report that this is one of those great leftover desserts. If you actually have any left over—which is rare in my house—storage is incredibly simple. Once the cobbler has cooled down to room temperature, cover the baking dish tightly with plastic wrap or foil. You can keep this easy cherry cobbler on the counter for about a day if your kitchen isn’t too warm, but for best results and freshness, I always stick it in the fridge.
It should keep well in the refrigerator for up to three or four days. When you’re ready for seconds, you definitely want to warm it up to get that topping crisp again. Skip the microwave if you can, because it turns the biscuit topping gummy fast. Instead, reheat individual servings in a toaster oven or regular oven set to about 350 degrees F for about 8 to 10 minutes.
That gentle reheat warms the filling through and crisps that gorgeous drop-biscuit topping right back up. If you want to serve it with ice cream later, warming it just slightly so it’s not piping hot works best. See? This recipe keeps delivering convenience even when it comes to leftovers!
Frequently Asked Questions about this classic cherry cobbler for beginners
I always get a ton of questions when people start baking something new, especially when they want it fast! I tried to engineer this recipe to avoid most issues, but let’s clear up any lingering doubts about speed and texture for this easy cherry cobbler. Thinking ahead about substitutions is smart! If you’re looking for other quick meals to tackle after dessert, I have tons of great easy breakfast and brunch ideas, too.
Can I use fresh cherries instead of canned for this easy cherry cobbler?
Absolutely, you can! Using fresh or frozen cherries turns this into a wonderful easy summer fruit dessert, but it does change the dynamic slightly. Since fresh or frozen cherries don’t come packed in that stabilizing syrup, you need to make a small compensation. I recommend tossing your pitted fresh cherries with the full 1/2 cup of sugar and maybe an extra teaspoon of cornstarch just to make sure you get that nice, thick base you expect.
What is the secret to making this a no fuss cherry dessert?
The secret to keeping this a no fuss cherry dessert is right there in the topping! We are using a drop biscuit, which means you literally mix it until it barely comes together, then you drop spoonfuls onto the fruit. There is zero rolling, zero cutting out shapes, and no need to perfectly cover the entire surface. Plus, relying on the pre-sweetened canned cherries means we skip the hassle of measuring a dozen different flavorings for the filling. It’s all about cutting the complicated steps!
Can I make this cobbler ahead of time?
You definitely can prep elements ahead! The cherry filling mixture holds up perfectly well assembled in the baking dish (covered, in the fridge) for up to 24 hours before you want to bake it. That’s great if you’re planning a big dinner. For the best result though, I wouldn’t drop the topping on until right before you bake it. The biscuit topping stays fluffiest when the butter hasn’t had hours to warm up in the fridge mixed with the milk. Just assemble the whole thing when you’re ready, and bake as directed!
Estimated Nutritional Data for one serving of easy cherry cobbler
I always want to be upfront about what we’re eating here. Since we’re using canned cherries and sugar to keep this an easy cherry cobbler, the nutrition facts definitely lean towards the indulgent side—and that’s okay sometimes!
Since I developed this recipe using standard pantry items available across the US, these numbers are just estimates. If you swap out butter for oil or use unsweetened cherries, your actual results will vary, but this should give you a good benchmark.
- Serving Size: 1 serving
- Calories: 380
- Fat: 18g
- Saturated Fat: 11g
- Carbohydrates: 54g
- Sugar: 35g
- Protein: 5g
- Sodium: 250mg
- Cholesterol: 55mg
Think of this as a comforting, family-style treat where the primary goal is deliciousness and simplicity rather than calorie counting. Serving it warm with that vanilla ice cream definitely bumps up the counts, but trust me, it’s worth every bite!
Share Your Experience Making This Simple Cobbler
Alright, that’s all the planning and baking advice I have for you! Now it’s your turn to take this streamlined recipe and bring it into your kitchen. Seriously, I want to know how this easy cherry cobbler turned out for you and your crew. Did you stick to the simple biscuit topping, or did you sneak in a little cinnamon to the dough? Knowing what works for you helps me keep refining these modern American recipes!
Please share your results below! If you made any small tweaks or substitutions—maybe you tried using frozen cherries or added a pinch of nutmeg—let me know in the comments. Don’t be shy about giving it a star rating, too; your feedback is crucial to confirming that this method delivers reliable results every time. It helps future beginner bakers trust this simple recipe!
If you snap a picture of your golden, bubbling dessert, tag us on social media! We absolutely love seeing our recipes out in the wild. And if you have any questions at all about the process, or maybe need a hand troubleshooting, don’t hesitate to reach out to us directly through the contact page. Happy baking, and enjoy that fast fruit cobbler!
PrintEasy Cherry Cobbler with Simple Biscuit Topping

Make this easy cherry cobbler using canned cherries for a quick, no fuss dessert that is perfect for beginners.
- Prep Time: 15 min
- Cook Time: 35 min
- Total Time: 50 min
- Yield: 6 servings 1x
- Category: Dessert
- Method: Baking
- Cuisine: American
- Diet: Vegetarian
Ingredients
- 2 (15 ounce) cans pitted sweet cherries in heavy syrup, undrained
- 1/2 cup granulated sugar
- 1 tablespoon cornstarch
- 1 teaspoon vanilla extract
- 1/4 teaspoon almond extract
- 1 1/2 cups all-purpose flour
- 2 tablespoons granulated sugar
- 1 tablespoon baking powder
- 1/2 teaspoon salt
- 1/2 cup cold unsalted butter, cut into small pieces
- 1/2 cup milk
- 1 large egg, beaten (for brushing)
Instructions
- Preheat your oven to 375 degrees F. Lightly grease an 8×8 inch baking dish.
- In a medium bowl, combine the undrained cherries, 1/2 cup sugar, cornstarch, vanilla extract, and almond extract. Stir gently to mix. Pour this cherry mixture into the prepared baking dish.
- In a separate bowl, whisk together the flour, 2 tablespoons sugar, baking powder, and salt for the topping.
- Cut in the cold butter using a pastry blender or your fingers until the mixture resembles coarse crumbs.
- Pour in the milk and stir just until a soft dough forms. Do not overmix.
- Drop spoonfuls of the biscuit dough evenly over the cherry filling. You do not need to cover the entire surface; gaps are fine.
- Brush the tops of the biscuits lightly with the beaten egg for a golden finish.
- Bake for 30 to 35 minutes, or until the topping is golden brown and the cherry filling is bubbly.
- Let the cobbler cool for at least 15 minutes before serving.
Notes
- For a richer flavor, substitute half of the canned cherries with frozen or fresh pitted cherries. If using frozen, do not thaw first.
- Serve this classic cherry cobbler warm with a scoop of vanilla ice cream or whipped cream.
- This recipe works well as a fast fruit cobbler for weeknight desserts.
Nutrition
- Serving Size: 1 serving
- Calories: 380
- Sugar: 35
- Sodium: 250
- Fat: 18
- Saturated Fat: 11
- Unsaturated Fat: 7
- Trans Fat: 0
- Carbohydrates: 54
- Fiber: 2
- Protein: 5
- Cholesterol: 55