
When the weather turns cool, or honestly, any time I need a genuine hug in a bowl, nothing beats a classic comfort food recipe. But who has two hours to fuss with pastry when dinner needs to be on the table fast? That’s why I engineered this Ultimate Easy Chicken Pot Pie with Homemade Biscuit Topping. As the founder here at Dishicious, I approach cooking like a project—everything needs to be efficient, reliable, and absolutely packed with flavor. This particular pot pie cuts out all the unnecessary complexity so you get that rich, hearty experience that makes family meal recipes feel special, all done in under an hour. Trust me, this streamlined approach is the secret to consistent weeknight success.
- Why This Ultimate Easy Chicken Pot Pie is a Family Meal Must-Have
- Gathering Ingredients for Your Perfect Pot Pie
- Step-by-Step Instructions to Make This Pot Pie
- Tips for a Flawless Pot Pie Every Time
- Making Your Pot Pie Recipe Freezer Friendly
- Variations: Exploring Vegetarian Pot Pie Options
- Estimated Nutritional Data for This Pot Pie
- Common Questions About Making a Savory Pot Pie
- Share Your Ultimate Easy Chicken Pot Pie Experience
Why This Ultimate Easy Chicken Pot Pie is a Family Meal Must-Have
If you’re looking for reliable comfort food recipes that actually save you time, this is it. I developed this version because I got tired of complicated crust work, yet I refused to sacrifice flavor. This pot pie is designed to deliver that savory, warm feeling you crave without demanding your entire evening. It’s just as satisfying as the classic chicken and dumplings with biscuits, but faster to put together.
- It’s engineered for high payoff: amazing flavor density versus low effort input.
- It uses smart shortcuts to become one of the best family meal recipes you’ll keep on rotation.
Quick Assembly for Busy Weeknights
Seriously, this comes together so fast. The absolute key to speed here is using pre-cooked chicken—rotisserie chicken is your best friend! Once the veggies soften and the quick sauce thickens up, you just stir everything together. From start to finish, the filling is done before you even finish preheating the oven.
Superior Homemade Biscuit Topping Recipe
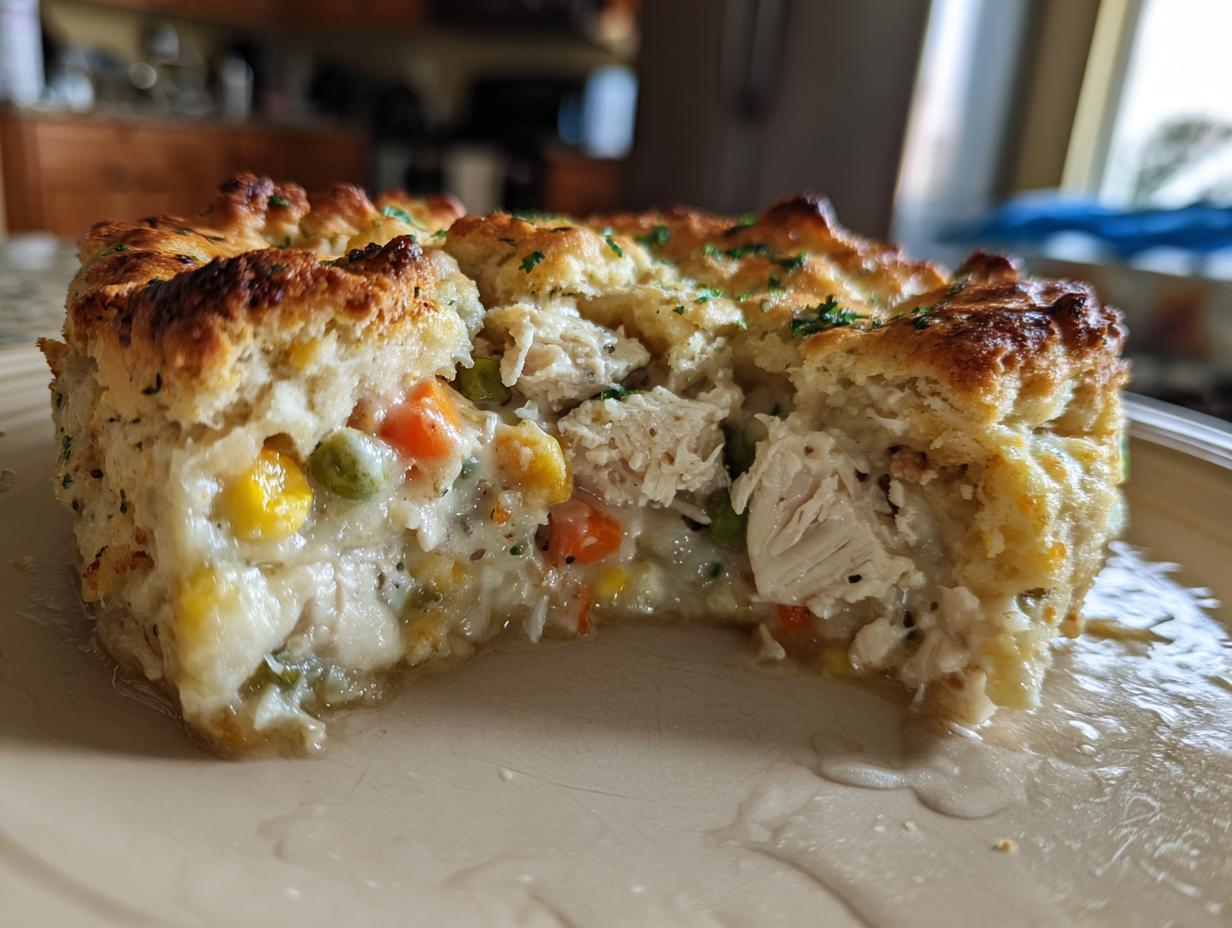
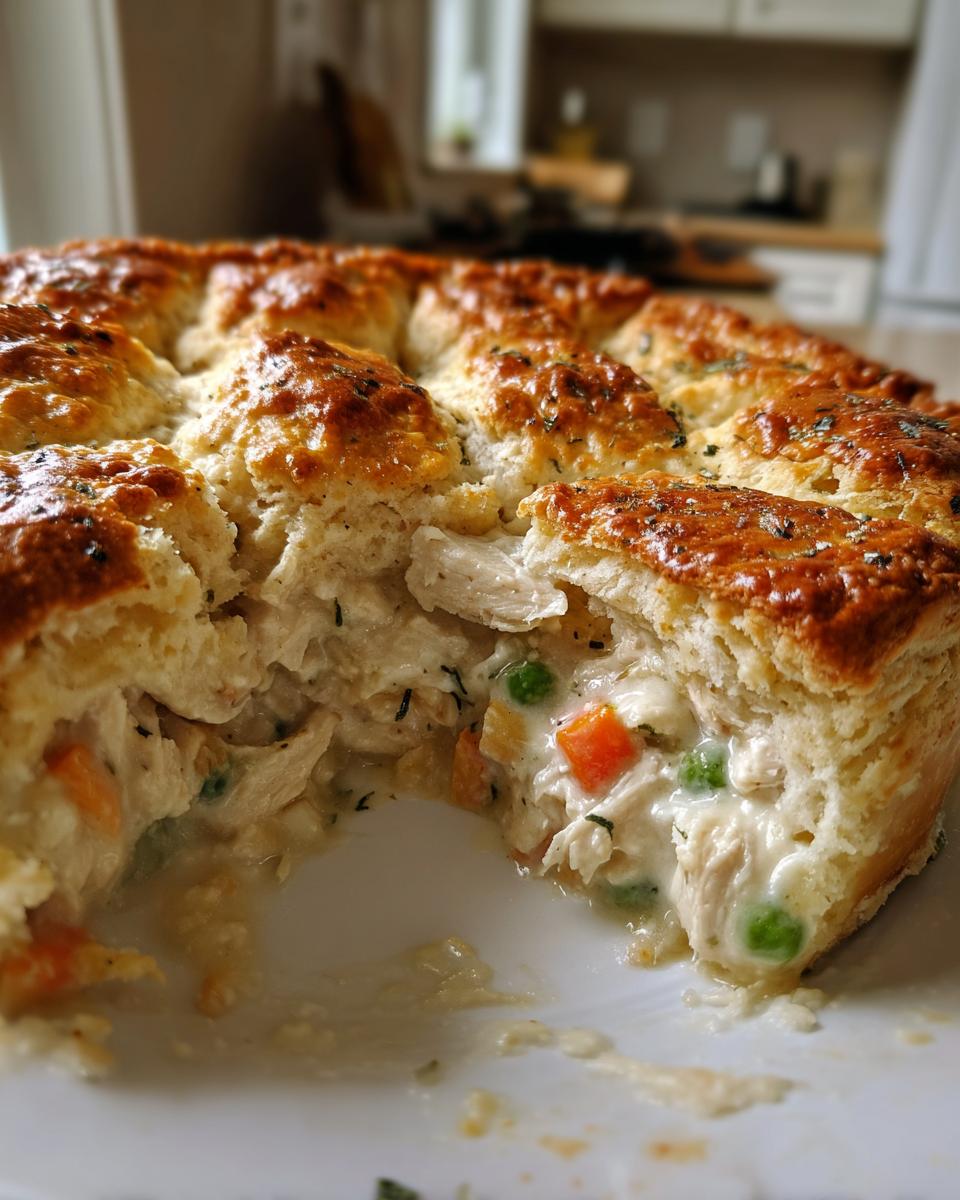
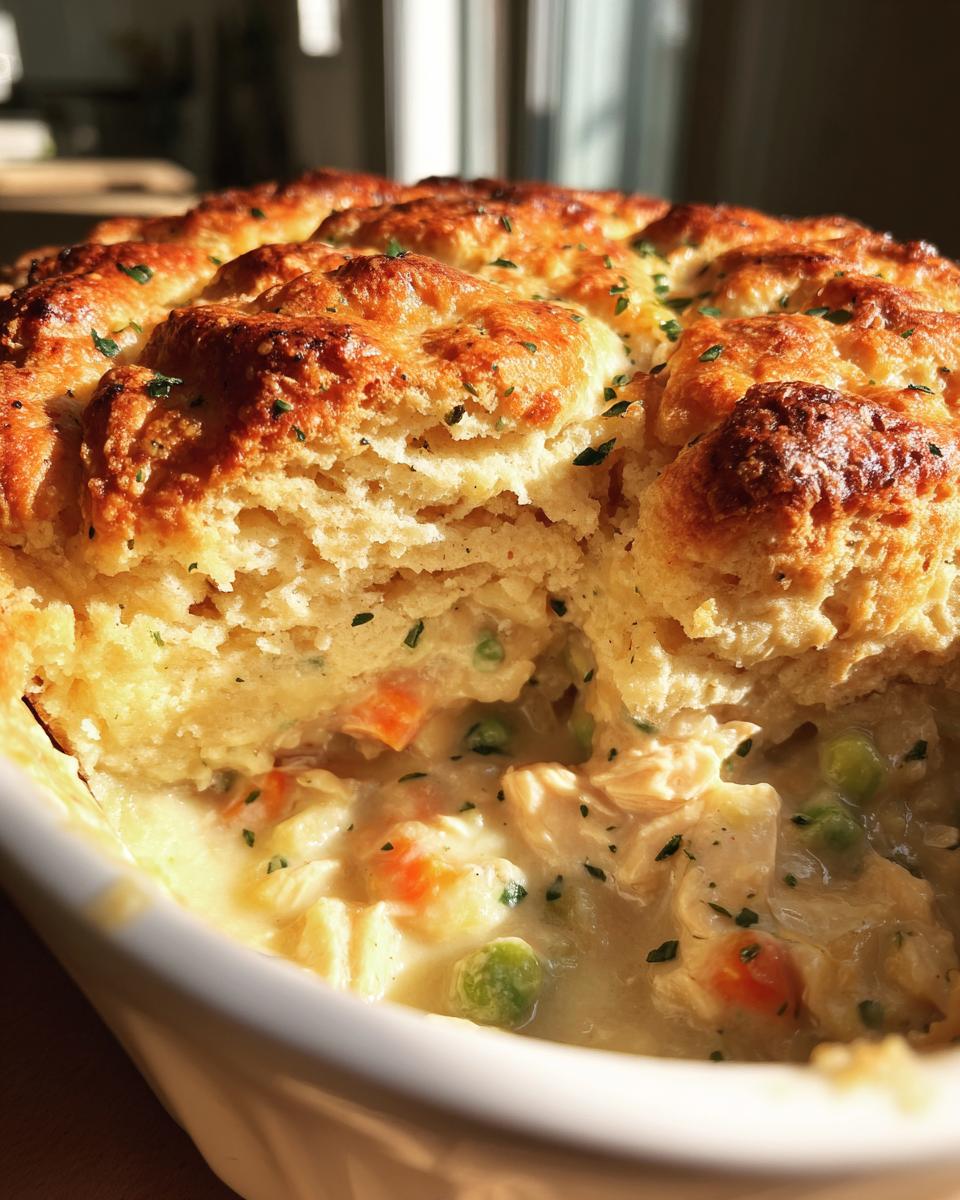
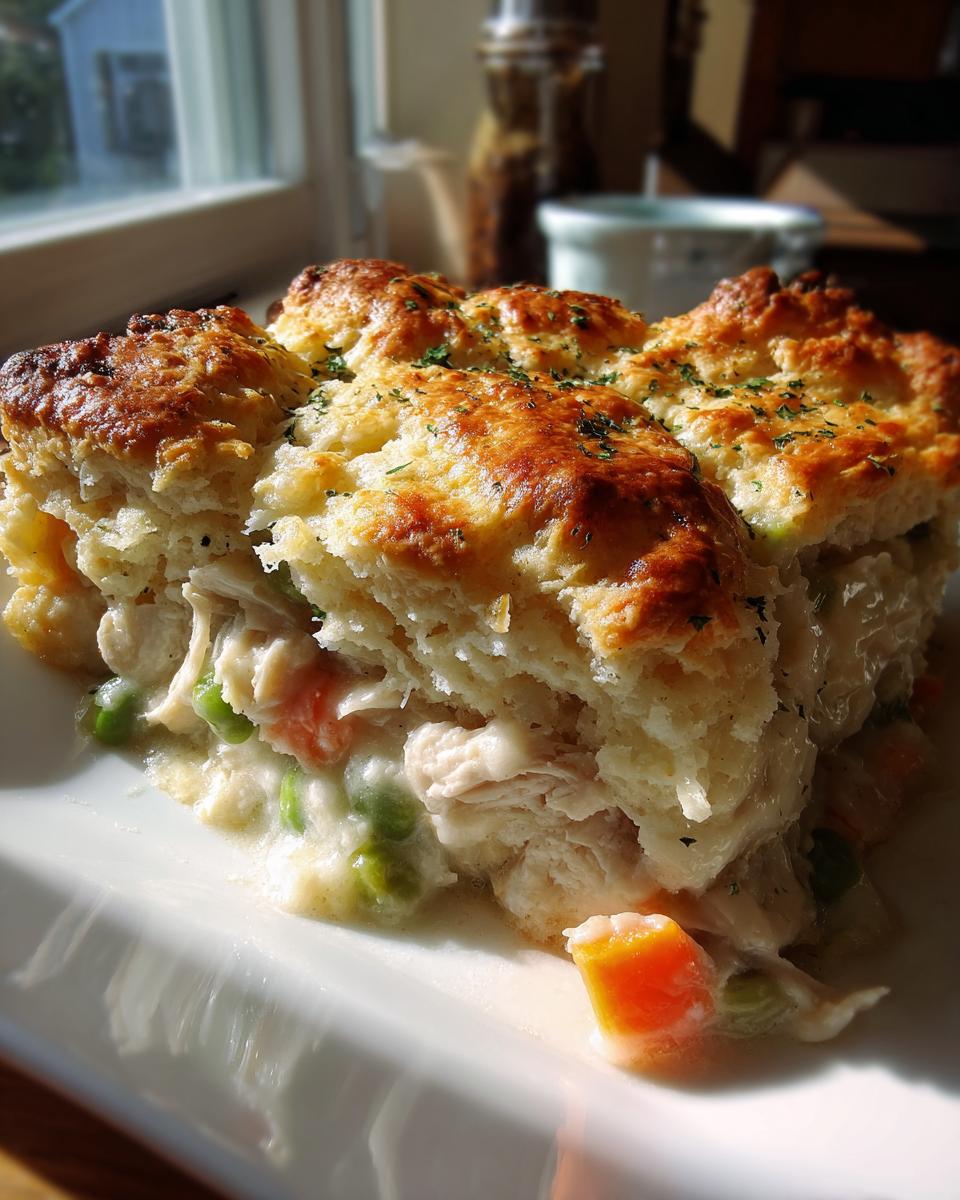
This is where you get that fantastic texture contrast. You’re pairing that rich, creamy filling with tender, fluffy, homemade biscuits. That golden topping soaks up all the savory sauce underneath. The biscuit topping recipe is simple enough for a weeknight, but it tastes like you spent hours making everything from scratch.
Gathering Ingredients for Your Perfect Pot Pie
When I plan out a project, the ingredient list has to be crystal clear. You need to know exactly what you’re working with before you start the assembly phase. For this Ultimate Easy Chicken Pot Pie, we are focusing on maximizing that savory payoff while keeping the list focused on things you can grab easily at any standard grocery store. Forget hunting down specialty items; we’re keeping this efficient, right from the shopping cart to the saucepan.
For the Creamy Chicken Filling Base
The foundation of this dish is that rich, savory sauce. For efficiency, I always suggest using about two cups of already cooked, shredded chicken. That usually means grabbing a rotisserie chicken—it’s the ultimate shortcut! You’ll need your classic mirepoix: chopped onion, celery, and those beautiful bright orange carrots, about a cup of each. Peas are thrown in near the end for color and sweetness. To build the sauce, you need half a cup of good unsalted butter, half a cup of flour to thicken it up, two cups of chicken broth, and one cup of heavy cream or whole milk for that beautiful richness. Don’t forget your seasonings: salt, pepper, and a pinch of dried thyme. Getting this right is key to that amazing creamy chicken filling.
For the Biscuit Topping
This is the step where we guarantee speed without compromising texture. We are skipping homemade crust because, frankly, that takes forever. Instead, we rely on one tube of refrigerated biscuit dough. This is what keeps the final preparation phase of your pot pie under an hour total. You just pop those dough pieces out and arrange them over the hot filling. They bake up beautifully golden and light right on top of that steaming savory base!
Step-by-Step Instructions to Make This Pot Pie
Okay, now we get into the project execution phase! This is where my background as a project manager really shines because we break this down into simple, sequential tasks to avoid any last-minute chaos. We need a hot oven and a prepared dish before we even think about melting butter. Organization is key since you’re building a whole meal structure in one dish. Knowing the right way to handle the crust alternatives ahead of time helps, like checking out the simple steps for a great Southern Chicken Pot Pie Using Simple Biscuit Topping.
First things first: get that oven preheated to 400 degrees Fahrenheit. Seriously, do that right now. Then, grease up your 9-inch pie dish or whatever casserole dish you’re using. If you skip this, removing the final product will be a nightmare, and we’re trying to keep things easy here!
Building the Flavorful Pot Pie Sauce
This is the actual cooking core of your pot pie filling. Start by melting the butter in a big saucepan over medium heat. Once it looks nice and melted, toss in your chopped onion, carrots, and celery. You need to cook these veggies down until they start getting soft—that usually takes about five to seven minutes of gentle stirring. Don’t rush this part; we need those root veggies to give up some flavor!
Next, the magic thickening step. Sprinkle in your half cup of flour and stir it constantly for just one minute. We’re cooking out that raw flour taste to create what we call a roux. Once that smells toasted, start whisking in your chicken broth slowly, making sure no lumps form. Follow that with the heavy cream or milk. Keep stirring until the whole thing starts to gently simmer and thicken up—you’ll know it’s right when it coats the back of your spoon. This simmering takes about five minutes. Once thickened, pull it right off the heat immediately!
Assembly and Baking the Easy Chicken Pie
With the base sauce off the burner, it’s time to combine everything for the final assembly. Stir in your two cups of shredded chicken, the frozen peas, salt, pepper, and dried thyme. Mix it all together until everything looks happy and combined. Pour that glorious, creamy mixture right into your prepped pie dish. It should look nice and full!
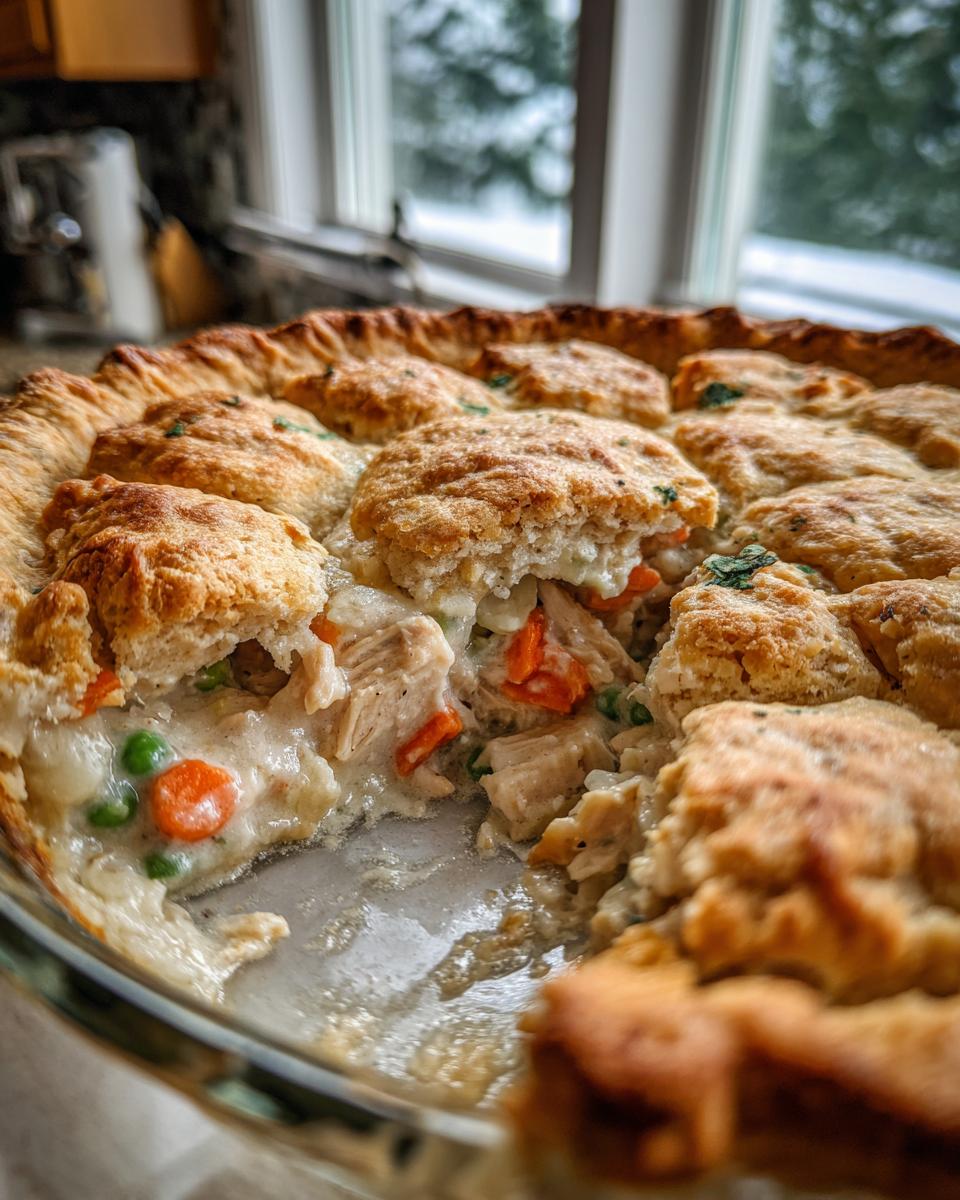
Now for the topping! Take your refrigerated biscuit dough pieces and lay them out evenly over the filling. You can snuggle them close together for a solid-looking lid, or leave a tiny bit of space between them—either way works. Pop the whole dish into that 400-degree oven for 18 to 22 minutes. You’re looking for biscuits that are gorgeously golden brown and bubbly filling underneath. Don’t forget this last crucial step: let the easy chicken pie rest for 10 minutes after it comes out. This lets the sauce settle down so it doesn’t run everywhere when you cut into it! You might want to check out this slow cooker chicken pot pie if you want to save even more active time later on.
Tips for a Flawless Pot Pie Every Time
Even though this is our “easy” version, there are a few small logistical points that separate a good pot pie from an absolutely unbeatable one. When you’re aiming for those hearty dinner classics, details matter, even if we streamline the process. I’ve found that paying attention to how the topping sits and knowing your alternatives can save you from minor kitchen disasters!
One thing I always check is the sauce consistency before I even think about topping it. If your sauce looks a little thin after simmering, don’t panic. You can always thicken it up afterward, though it’s better to avoid this if possible. You can whip up a quick cornstarch slurry—just mix a tablespoon of cornstarch with two tablespoons of cold water until it’s perfectly smooth, then whisk that into your simmering sauce. It only takes a minute for it to turn into the perfect thick base. If you ever struggle with thickening sauces without this step, check out my guide on homemade brown gravy recipe no drippings for general roux knowledge.
Also, when placing those biscuits on top, make sure they overlap just slightly if you want a truly solid top shield. If you leave big gaps, the sauce will bubble up too aggressively, and you might end up with wet spots on your otherwise perfect biscuit tops. Remember, the goal is that beautiful textural contrast for your pot pie!
Handling Topping Variations: Puff Pastry Pot Pie
While I absolutely love the fluffiness of the biscuits, I know some people prefer a traditional crust. If you want to swap those out, just grab one sheet of store-bought puff pastry. Unroll it and lay it right over the filling—no need to vent it if you’re using the casserole dish style! It’s a neat trick that gets you that flaky texture without all the work of rolling out dough. For those who prefer going fully traditional like the recipes I saw over at Homemade Chicken Pot Pie, just swap the biscuits for your favorite double pie crust recipe.
Making Your Pot Pie Recipe Freezer Friendly
One of the best things about having an efficient recipe like this is that you can easily double the filling and have an emergency meal ready to go whenever life gets hectic. I absolutely love making a batch of this pot pie filling specifically for freezing. It’s perfect for those inevitable nights when you look into the fridge at 5:30 PM and realize you have zero energy left to cook.
The key here is to only assemble the filling part before freezing. You don’t want to bake it with the biscuits on top—that dough will turn to mush in the freezer, trust me. So, after you finish Step 5, where you put together that lovely, thick, creamy chicken filling, just pour it into your freezer-safe container or pie dish. Cool the filling down completely in the fridge first; putting hot food in the freezer can mess with the temperature for everything else inside.
Once it’s chilled, cover that dish tightly with a layer of plastic wrap pressed directly against the surface of the filling, then wrap the whole thing securely in aluminum foil. You want to keep the air out! This gets the pot pie ready for your deep freezer. When you’re ready to bake it a month later, just transfer it to the fridge the night before to thaw slowly. Remove the restrictive plastic wrap, put your fresh, unbaked biscuits on top, and bake it according to the original instructions. Your kitchen will smell like you spent all afternoon cooking, even though you only spent 10 minutes prepping!
Variations: Exploring Vegetarian Pot Pie Options
Not everyone is on Team Chicken every night, and frankly, I get it! Sometimes you want something lighter but just as deeply comforting. The brilliant part about this creamy base—the one we built from butter, flour, and broth—is that it serves as a phenomenal foundation for a fantastic vegetarian pot pie. You don’t lose any of that cozy, savory satisfaction!
The swap is incredibly straightforward. You just need to ditch the shredded chicken and beef up the vegetables. Think about using hearty root vegetables like parsnips or sweet potatoes if you want more texture. Mushrooms are fantastic here because they add an almost meaty depth to the filling. Another trick I love when making a meatless version is tossing in a can of drained cannellini or navy beans right at the end; they provide that satisfying protein density that keeps you feeling full.
When you substitute the chicken for vegetables and beans, you might need to cook those harder veggies (like carrots or potatoes) a little longer in Step 2 so they are tender when the sauce is done. If you want to see some gorgeous inspiration for fully veggie-focused bakes, I always point people toward recipes like the one detailed at Vegetable Pot Pie Recipe. It proves you don’t need meat to deliver a home-run dinner!
Estimated Nutritional Data for This Pot Pie
Now, I’m not a nutritionist—I’m a home cook who believes in good flavor first! But because I approach every recipe like good project management, I know you want the numbers, too. So, based on the ingredients breakdown and assuming six generous servings, here’s the estimated snapshot for this Ultimate Easy Chicken Pot Pie. This is based on standard measurements for the chicken, biscuits, and creamy sauce blend.
Keep in mind that these figures are estimates. How much butter you use on your dish, or if your heavy cream is slightly richer, can shift these slightly. But this gives you a great general idea of what you are sitting down to enjoy when you make this classic comfort food!
- Calories: Approximately 550 per slice. A solid, hearty number for a main course!
- Total Fat: Around 32g, with about 18g saturated fat, mostly thanks to that buttery sauce and rich cream.
- Carbohydrates: We’re looking at about 38g, coming mainly from the flour and that fantastic biscuit topping.
- Protein: This packs a good punch at about 28g per serving, thanks to the chicken.
Every bite of this creamy, cheesy pot pie is worth it. It’s designed to be a satisfying, full meal, so those macros reflect a truly delicious, complete plate. Enjoy it stress-free, knowing you made a huge, flavorful dinner with minimal fuss!
Common Questions About Making a Savory Pot Pie
I figured since we’ve engineered this recipe for maximum efficiency, you might have a few lingering logistical questions. That’s totally normal! We want zero surprises when you pull this out of the oven, especially when we are aiming for those satisfying chicken casserole dinner results. Anticipating these small stumbling blocks is part of what makes a recipe truly reliable, which is my whole philosophy here at Dishicious.
Can I use store-bought pie crust instead of biscuits for this pot pie?
Absolutely, you can! The biscuits are my fast favorite because they create that airy, fluffy contrast to the creamy filling, but we certainly don’t discourage other options. If you prefer a solid crust on top—that classic, traditional look—you can definitely use a standard refrigerated pie crust or even a sheet of puff pastry instead. That’s the beauty of this easy pot pie; it adapts to your schedule. Just remember to poke a few vents in a full crust so your steam has somewhere to escape while baking!
What is the best way to use up leftover chicken in this comfort food recipe?
This recipe is actually designed around minimizing extra cooking time, so using pre-cooked chicken isn’t just an option, it’s highly encouraged. If you’ve got leftover roasted chicken from a previous meal, shred it up and use it. For the ultimate shortcut that keeps this a true weeknight meal, just grab a store-bought rotisserie chicken. It’s already seasoned, perfectly cooked, and shreds beautifully right into the filling. It’s all about efficiency without sacrificing that rich, savory flavor profile we love in these comfort food recipes.
My sauce seems too thin; how do I thicken my pot pie filling?
If you pull your sauce off the heat and it still looks more like soup than a thick gravy, don’t throw anything out! We can save it quickly right here in the kitchen. The fix is a simple cornstarch slurry, which is a lifesaver for any sauce that needs a little boost. Mix about one tablespoon of cornstarch with two tablespoons of cold water—it needs to be cold water so it dissolves nicely without clumping. Whisk that slurry slowly into your simmering pot pie filling. Give it another minute or two on the heat, and you’ll see it tighten right up into that perfect, hug-in-a-bowl consistency. It’s a quick adjustment that saves the whole batch!
Share Your Ultimate Easy Chicken Pot Pie Experience
And just like that, we’ve successfully executed the project! We’ve taken a classic, deeply satisfying dinner and streamlined the entire process so you get maximum comfort with minimal fuss. This is what Dishicious is all about—making those amazing homemade dinners achievable on a Tuesday night.
Now that you’ve tried this Ultimate Easy Chicken Pot Pie, I genuinely want to know what you think. Did the biscuits turn out golden and fluffy? Was the creamy filling everything you hoped for? Don’t keep those delicious results to yourself!
Please leave a star rating right below this section so other busy cooks can see how reliable this recipe is. If you have any tweaks that you loved, or if you tried one of the variations we discussed, drop a comment below. I read every single one, and I love seeing how you adapt these efficient cooking projects in your own kitchens. If you snap a picture of your bubbling, golden creation, I’d be thrilled if you tagged us on social media—I love seeing photos of successful, heartwarming pot pie dinners!
If you’re looking for another hearty, efficient dish that requires a similar focus on building a great sauce base, you have to check out my recipe for creamy white sauce chicken lasagna next. Happy cooking!
PrintUltimate Easy Chicken Pot Pie with Homemade Biscuit Topping

Make this comforting chicken pot pie using a simple, creamy filling topped with light, homemade biscuits. This recipe delivers a hearty family meal with straightforward steps.
- Prep Time: 20 min
- Cook Time: 25 min
- Total Time: 45 min
- Yield: 6 servings 1x
- Category: Dinner
- Method: Baking
- Cuisine: American
- Diet: Vegetarian
Ingredients
- 2 cups cooked, shredded chicken (use rotisserie chicken for ease)
- 1 cup chopped carrots
- 1 cup frozen peas
- 1 cup chopped celery
- 1/2 cup chopped onion
- 1/2 cup (1 stick) unsalted butter
- 1/2 cup all-purpose flour
- 2 cups chicken broth
- 1 cup heavy cream or whole milk
- 1 teaspoon salt
- 1/2 teaspoon black pepper
- 1/4 teaspoon dried thyme
- 2 cups refrigerated biscuit dough
Instructions
- Preheat your oven to 400 degrees Fahrenheit. Lightly grease a 9-inch pie dish or a similar-sized casserole dish.
- In a large saucepan, melt the butter over medium heat. Add the onion, carrots, and celery. Cook until the vegetables soften, about 5 to 7 minutes.
- Stir in the flour. Cook for 1 minute, stirring constantly. This creates the roux base for your creamy filling.
- Gradually whisk in the chicken broth until smooth. Then, whisk in the heavy cream or milk.
- Bring the mixture to a simmer, stirring until the sauce thickens enough to coat the back of a spoon. This should take about 5 minutes.
- Remove the pan from the heat. Stir in the shredded chicken, peas, salt, pepper, and thyme. Mix well to combine all ingredients.
- Pour the creamy chicken filling into your prepared pie dish.
- Arrange the refrigerated biscuit dough pieces evenly over the top of the filling. You can place them close together to form a solid topping or leave small gaps.
- Bake for 18 to 22 minutes, or until the biscuits are golden brown and cooked through, and the filling is bubbling hot.
- Let the pot pie cool for 10 minutes before you cut and serve it. This allows the filling to set slightly.
Notes
- For a shortcut, substitute the homemade sauce ingredients with one 10.5-ounce can of cream of chicken soup, reducing the added salt.
- If you prefer a flaky pie crust instead of biscuits, use one sheet of store-bought puff pastry to cover the filling.
- This recipe is freezer friendly; assemble the pie (do not bake the biscuits if using pastry), cover tightly, and freeze. Thaw overnight in the refrigerator before baking as directed.
Nutrition
- Serving Size: 1 slice
- Calories: 550
- Sugar: 6
- Sodium: 750
- Fat: 32
- Saturated Fat: 18
- Unsaturated Fat: 14
- Trans Fat: 1
- Carbohydrates: 38
- Fiber: 3
- Protein: 28
- Cholesterol: 110