
When I think of Mother’s Day, I immediately want a showstopper centerpiece dessert—something that looks like it took hours of professional artistry but didn’t actually consume my entire day. If you’re anything like me, sometimes you just need a visual breath of fresh air away from those heavy, dense cakes. That’s exactly why this **fresh fruit tart** is my go-to project. I’m Leo Grant, and I approach recipes like a project manager: efficiency first, elegance always. This tart delivers that gorgeous, sophisticated look every time using a super simple shortbread crust, a ridiculously smooth pastry cream filling, and vibrant, perfectly placed seasonal berries. It’s streamlined elegance on a plate. If you’re planning a special brunch, make sure to check out my favorite recipes over at easy breakfast and brunch ideas too!
- Why This Fresh Fruit Tart Is Your Go-To Mothers Day Dessert
- Ingredients for Your Stunning Fresh Fruit Tart
- Step-by-Step Guide to the Perfect Fresh Fruit Tart Crust
- Creating the Silky **Pastry Cream Filling**
- Assembling Your **Glazed Fruit Tart** Masterpiece
- Ingredient Notes and Substitutions for the Fresh Fruit Tart
- Storage and Serving Suggestions for Your Mothers Day Dessert
- Troubleshooting Common Fresh Fruit Tart Issues
- Estimated Nutritional Breakdown
Why This Fresh Fruit Tart Is Your Go-To Mothers Day Dessert
When it comes to a big celebration like Mother’s Day, you want a dessert that screams *effort* without requiring you to lose sleep over it. That’s the Dishicious philosophy in action! This recipe is engineered for high visual impact with low daily stress. Trust me, getting that stunning look is simpler than you think.
-
Achieving an Elegant Spring Sweet Look
The geometric arrangement of the fruit is where the magic happens. It looks like something from a bakery window, but it’s just focused placement. We’re aiming for precision over piling it high, which feels much more modern and crisp.
-
The Perfect Balance: Lightness Over Heaviness
We skip the heavy frosting and dense layers. This tart is refreshing! The combination of the crisp shell, light pastry cream filling, and bright seasonal produce makes it the ultimate elegant spring sweet. It’s the perfect ending to a brunch or afternoon tea.
Ingredients for Your Stunning Fresh Fruit Tart
Alright, let’s get organized. When I build any recipe, I need a clean component list. I’ve broken this down so you aren’t scrambling mid-process. Don’t skip the details here—like ensuring your butter is cold! That’s the difference between a flaky crust and a tough one. Having good components ready is half the battle won in project management, and the kitchen is no different!
Shortbread Crust Components
- 1 1/2 cups all-purpose flour
- 1/2 cup powdered sugar
- 1/4 teaspoon salt
- 1/2 cup (1 stick) cold unsalted butter, cubed
- 1 large egg yolk
- 2 tablespoons ice water
Smooth Pastry Cream Filling Components
- 1 cup whole milk
- 1/2 cup granulated sugar, divided (use 1/4 cup here, save the rest for the glaze mixture later if you want to simplify!)
- 3 large egg yolks
- 3 tablespoons cornstarch—this is key for that thick, beautiful structure!
- 1 teaspoon vanilla extract
Fruit and Glazed Fruit Tart Topping
- 2 cups mixed fresh berries (strawberries, blueberries, raspberries are my favorite combo)
- 2 tablespoons apricot jam, warmed (we’ll use this for the shine)
If you’re looking for some other great fruit ideas to try out in your next project, check out some fun dips over at fruit dip recipes!
Step-by-Step Guide to the Perfect Fresh Fruit Tart Crust
This is the engineering part of the project—getting the foundation right so it doesn’t collapse under the weight of that beautiful cream and fruit later. The shortbread crust needs to be delicate but strong. I learned the hard way when I was first testing recipes that if you let the food processor run too long, you get a tough, cracker-like base. We want tender, not tough! If you want to practice dough handling on something slightly more forgiving, try my recipe for easy sugar cookie bars, but for this tart, focus on restraint.
Mixing and Chilling the Dough
Get your flour, sugar, and salt in the processor first. Pulse it just a few times to combine. Now, drop in the cold, cubed butter. Pulse until you see a mix of coarse crumbs—think rough sand. Don’t let it turn into actual paste! Add the egg yolk and the ice water quickly, and pulse just until the dough starts looking shaggy and coming together. Wrap that shaggy dough into a perfect disk immediately and send it to chill for at least 30 minutes. That chill time is non-negotiable!
Blind Baking for a Crisp Shell
Get your oven up to 375°F (190°C). You need to roll this out and press it into that 9-inch tart pan. Remember to prick the bottom all over with a fork—those little holes let steam escape so your bottom doesn’t dome up on you. Line it with parchment paper and weigh it down heavily with pie weights or dried beans. Bake that shell for 15 minutes. Then, pull out the paper and weights, and bake it for another 8 to 10 minutes until it’s just lightly golden brown around the edges. Make sure it cools completely before the next step, or you’re asking for a soggy bottom! We need that shell bone dry before we add the wet cream.
Creating the Silky **Pastry Cream Filling**
If you’re ever nervous about making custard, this is the time to push past that anxiety. The key to perfectly smooth pastry cream filling—the stuff that holds your gorgeous fruit in place—is all about managing temperature. We need to temper the eggs, which means we slowly introduce heat so they don’t curdle into scrambled bits when they hit the pan. Do this slowly! Whisk your yolks, sugar, and cornstarch until pale yellow and completely smooth.
While that mix is waiting, get your milk simmering. Take just a small ladleful of that hot milk and slowly drizzle it into your egg bowl while whisking like you mean it. This raises the egg temperature gently. Once you’ve slowly incorporated about half the hot milk, you can pour that whole mixture back into the saucepan with the remaining milk.
Now, turn the heat to medium and whisk constantly. Don’t walk away! The cornstarch needs to get hot enough to do its thickening job, so you must bring the mixture to a full, rolling boil for at least one minute while you keep stirring. Once it’s thick—like pudding—take it off the heat, stir in that vanilla, and get it into a bowl. The trick to avoiding that gross rubbery skin? Press a piece of plastic wrap directly onto the surface of the cream. Seriously, right on top. Then chill for at least two hours. Waiting is the hardest part of this step!
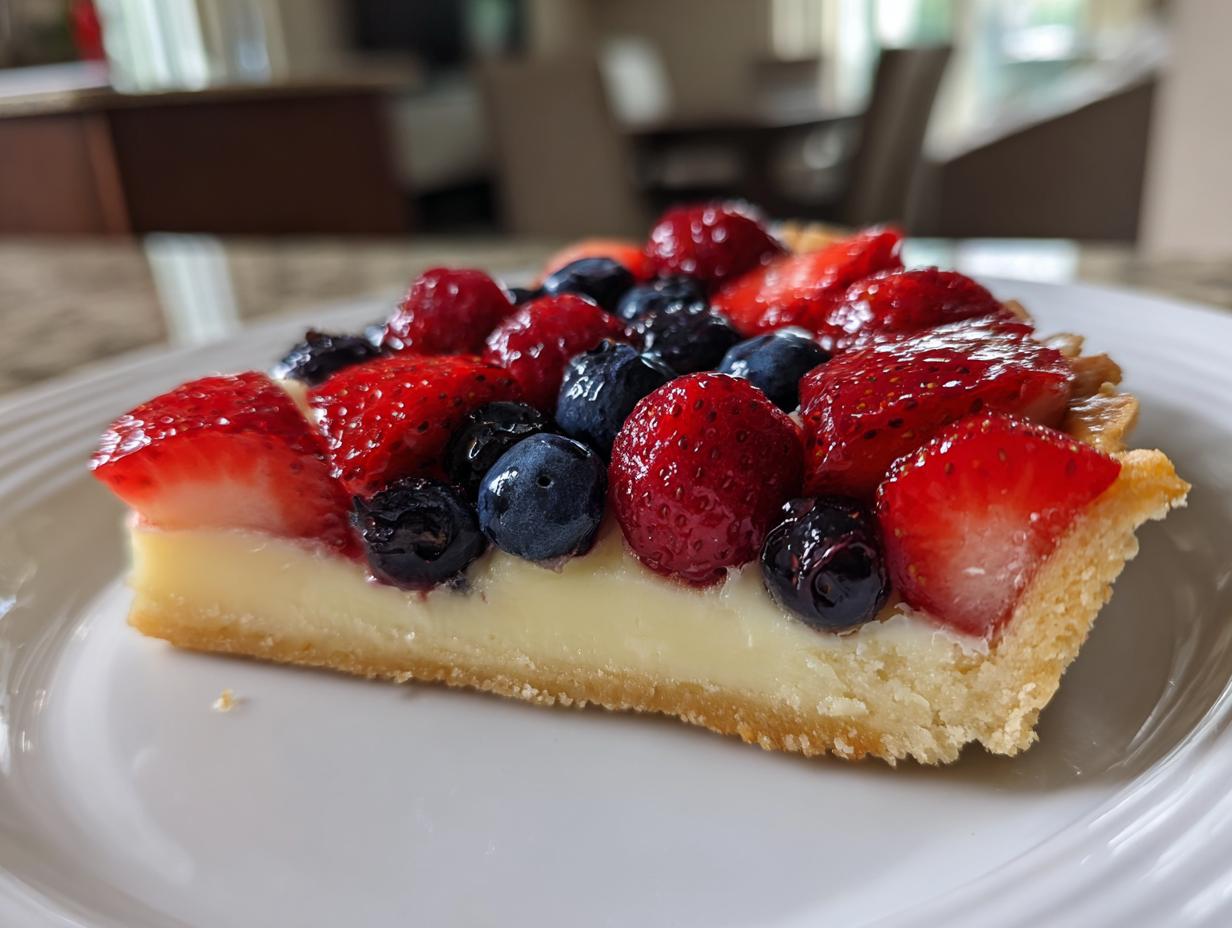
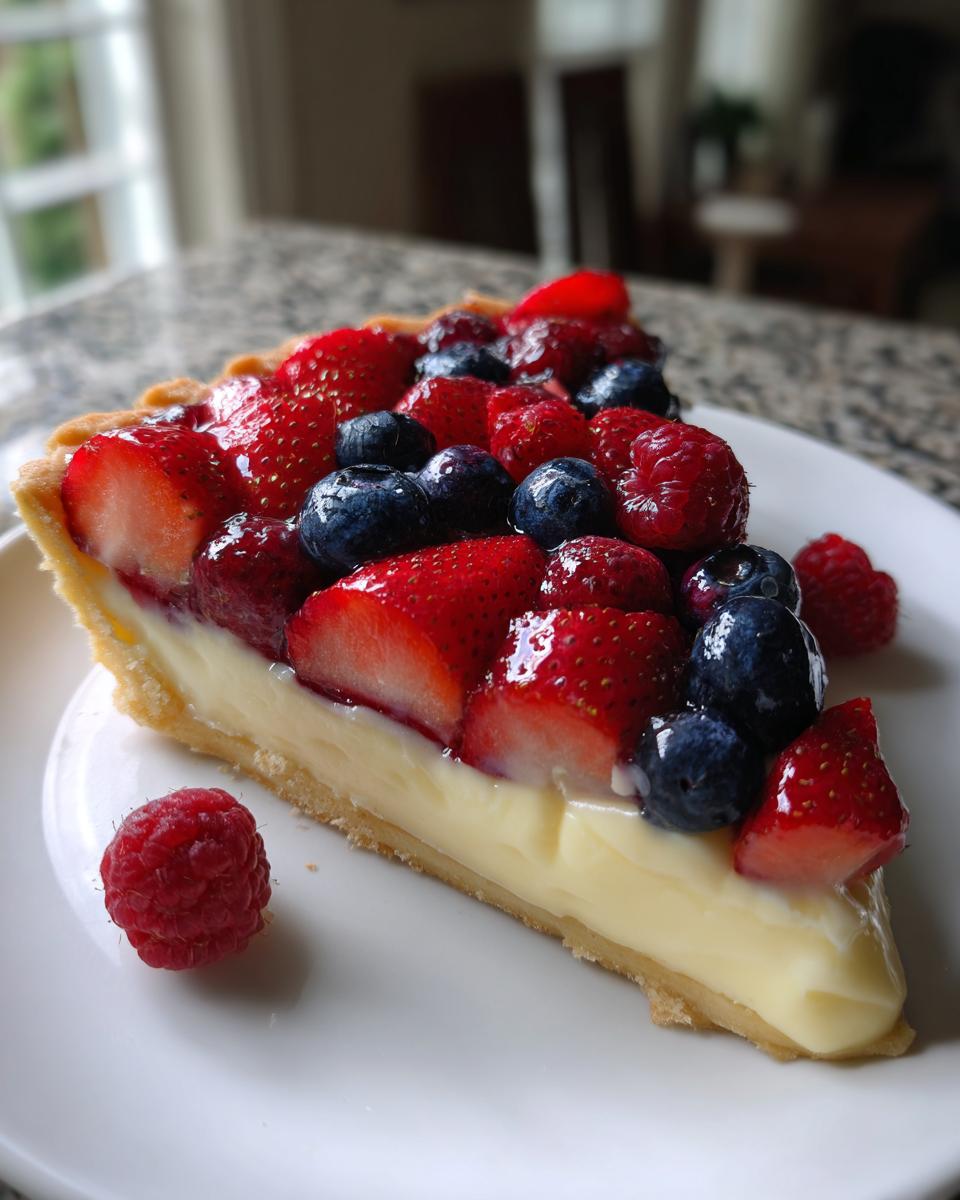
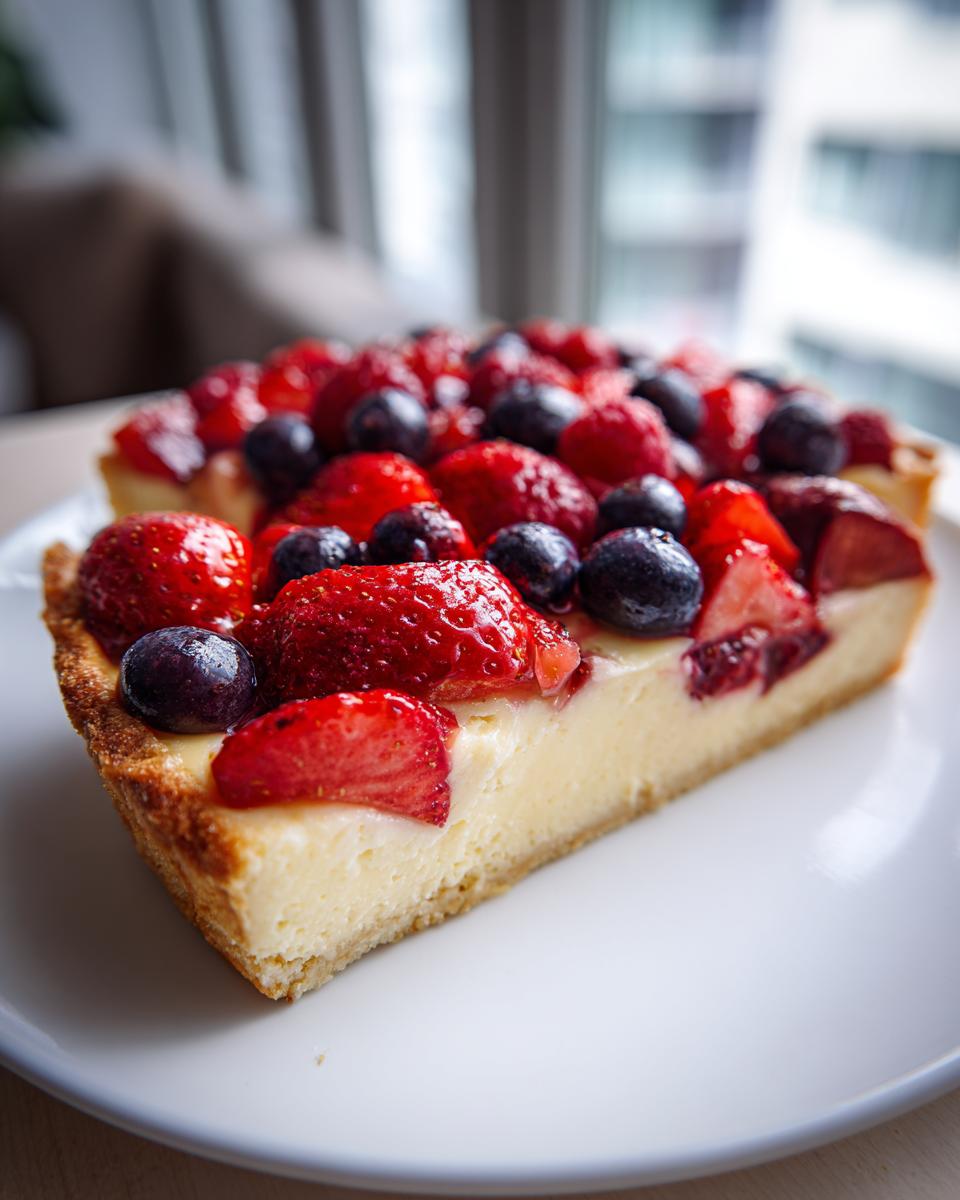
Assembling Your **Glazed Fruit Tart** Masterpiece
This is the final phase, where all the planning comes together into something truly beautiful. Once your crust is totally cool and that pastry cream filling is properly set and chilled, it’s time for the artistry. Take out your pastry cream and give it a quick whisk just to loosen it up a touch. Then, spread it evenly inside the cooled tart shell. Don’t pile it too high; we need structure for the fruit!
Tips for Perfect Fruit Arrangement
Now for the aesthetic part. This is where we aim for that geometric perfection. If you are using strawberries, go ahead and slice them thinly. Uniformity makes the final look so much cleaner, whether you choose tight circles or neat rows. Think about color placement—putting the reds next to the blues or yellows really makes those colors pop against the white cream base.
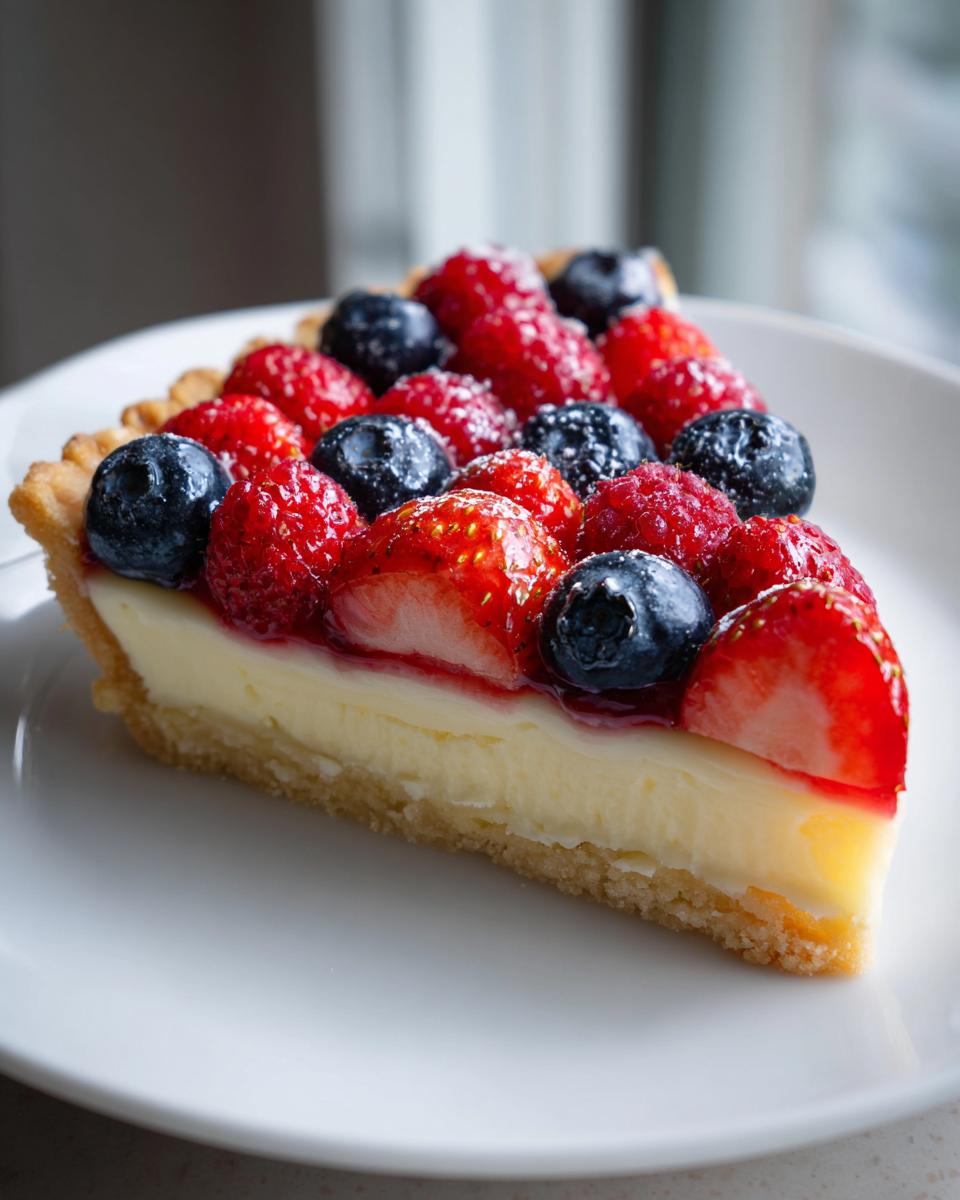
Applying the Final Shine to the **Fresh Fruit Tart**
To turn this into a true **glaced fruit tart**, we need that professional shine. Warm up your apricot jam—just a few seconds in the microwave should do it—and stir in a tiny splash of water to thin it slightly. Using a pastry brush, gently dab this glaze over every piece of fruit. Don’t scrub it, just caress it! This locks in the moisture, keeps the fruit looking vibrant, and gives you that amazing, glossy finish. Pop your finished masterpiece back in the fridge until serving time.
If you’ve got leftovers or want another fruit-forward dessert project, check out my fruit pizza sugar cookie recipe!
Ingredient Notes and Substitutions for the Fresh Fruit Tart
Since I focus on efficiency, I know people sometimes need to swap things out. If you don’t have apricot jam for that final shine on your **glaced fruit tart**, don’t panic! Clear apple jelly works just as well as a binder and gives great gloss. Also, if you’re ever unsure about the crust, remember that the notes suggested you can blind bake it completely and even brush the inside with a thin layer of egg white before adding the cream. That’s my trick for keeping the crust perfectly crisp. For other speedy fruit baking projects, you might enjoy my strawberry cake mix cookies!
Storage and Serving Suggestions for Your Mothers Day Dessert
This beautiful **fresh fruit tart** is best eaten the day it’s assembled, honestly. I mean, who can blame fresh berries for wanting to be eaten right away? But if you have leftovers—and I hope you do!—you need to store it smartly. Keep the entire tart, uncovered if possible, in the refrigerator. If you need to stack things in the fridge, cover it loosely with foil, but try to keep it away from anything that gives off moisture.

When serving, pull it out of the cold about 15 minutes early. Letting it sit on the counter just slightly brings out the flavor of the fruit and the buttery crust. For anyone looking for more brunch ideas to serve alongside this stunning dessert, check out my guide over at easy breakfast and brunch!
Troubleshooting Common Fresh Fruit Tart Issues
Even with the best project plan, things can sometimes veer off track in the kitchen. Don’t worry if you hit a snag; that’s what testing is for! I always have backup strategies ready for when things get tricky with this **fresh fruit tart**. The number one enemy we fight here is moisture, especially in that beautiful crust. If you’re worried about a soggy bottom, here’s the failsafe: once the shell is fully baked and cool, brush the inside base (just the baked dough part) with a very thin layer of whisked egg white before you put in the **pastry cream filling**. It seals it up completely!
If your **pastry cream filling** looks a bit too liquidy after you think it’s done, remember my biggest non-negotiable rule: make sure it really boils for a full minute while you whisk like mad. That one minute is when the cornstarch builds its strength. If you pull it too early, it stays runny. If you need any other basics for dealing with tricky kitchen components, you might find my guide on making mayonnaise helpful—it’s all about emulsion control there, too!
Estimated Nutritional Breakdown
I know some of you meticulously track everything, and even though I focus on streamlined cooking, having a general goal is always smart planning. Keep in mind that because we are using fresh, variable produce and the exact thickness of your **pastry cream filling** layer changes slightly every time, these numbers are a calculated estimate based on standard ingredient portions for one slice.
I’ve laid out the figures based on my testing for this wonderful **fresh fruit tart**. Remember, this is just an overview, not a medical standard, so take it as a general guide for planning your amazing Mother’s Day brunch!
- Serving Size: 1 slice
- Calories: 350
- Sugar: 25g
- Sodium: 120mg
- Fat: 18g
- Saturated Fat: 10g
- Unsaturated Fat: 8g
- Trans Fat: 0g
- Carbohydrates: 42g
- Fiber: 2g
- Protein: 6g
- Cholesterol: 110mg
Elegant Fresh Fruit Tart with Pastry Cream Filling

Create a visually stunning, professional-looking fresh fruit tart perfect for Mother’s Day. This recipe uses a simple shortbread crust and a smooth pastry cream filling, topped with geometrically arranged seasonal berries for an elegant spring sweet.
- Prep Time: 45 min
- Cook Time: 25 min
- Total Time: 70 min
- Yield: 8 servings 1x
- Category: Dessert
- Method: Baking
- Cuisine: American
- Diet: Vegetarian
Ingredients
- 1 1/2 cups all-purpose flour
- 1/2 cup powdered sugar
- 1/4 teaspoon salt
- 1/2 cup (1 stick) cold unsalted butter, cubed
- 1 large egg yolk
- 2 tablespoons ice water
- 1 cup whole milk
- 1/2 cup granulated sugar, divided
- 3 large egg yolks
- 3 tablespoons cornstarch
- 1 teaspoon vanilla extract
- 2 cups mixed fresh berries (strawberries, blueberries, raspberries)
- 2 tablespoons apricot jam, warmed
Instructions
- Prepare the crust: In a food processor, pulse the flour, powdered sugar, and salt. Add the cold butter and pulse until the mixture resembles coarse crumbs. Add the egg yolk and ice water; pulse until the dough just comes together. Do not overmix.
- Form the dough into a disk, wrap it, and chill for at least 30 minutes.
- Preheat your oven to 375°F (190°C). On a lightly floured surface, roll the dough out to fit a 9-inch tart pan with a removable bottom. Press the dough into the pan and trim the edges. Prick the bottom all over with a fork.
- Line the shell with parchment paper and fill with pie weights or dried beans. Bake for 15 minutes. Remove the weights and paper and bake for another 8-10 minutes until lightly golden. Cool completely.
- Make the pastry cream filling: Heat the milk in a saucepan until simmering. In a separate bowl, whisk the egg yolks, 1/4 cup of the granulated sugar, and cornstarch until smooth.
- Slowly temper the hot milk into the egg mixture while whisking constantly. Return the mixture to the saucepan. Cook over medium heat, whisking constantly, until the cream thickens significantly and boils for 1 minute.
- Remove from heat, stir in the vanilla extract, and transfer the pastry cream to a shallow dish. Press plastic wrap directly onto the surface to prevent a skin from forming. Chill for at least 2 hours.
- Assemble the tart: Once the crust and cream are fully chilled, spread the pastry cream evenly into the cooled tart shell.
- Arrange the mixed fresh berries decoratively over the pastry cream. Aim for a geometric pattern for a professional look.
- Make the glaze: In a small bowl, mix the warmed apricot jam with 1 teaspoon of water. Brush this glaze lightly over the fruit to give the glaced fruit tart a shine. Chill until ready to serve.
Notes
- For a sturdier crust, you can blind bake the shell until fully cooked, then let it cool before filling.
- If you do not have apricot jam, use a clear apple jelly for the glaze.
- When arranging the fruit, slice strawberries thinly to create uniform pieces for a cleaner design.
Nutrition
- Serving Size: 1 slice
- Calories: 350
- Sugar: 25g
- Sodium: 120mg
- Fat: 18g
- Saturated Fat: 10g
- Unsaturated Fat: 8g
- Trans Fat: 0g
- Carbohydrates: 42g
- Fiber: 2g
- Protein: 6g
- Cholesterol: 110mg