
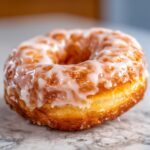
Forget dry, dense imposters! If you’ve ever dreamed of pulling a tray of impossibly light, airy, melt-in-your-mouth perfection straight from your own fryer, today is the day that dream becomes reality. Making professional-grade **Glazed yeast donuts** used to feel like a project too complex for a Tuesday night, but that’s where my background kicks in. I approached this classic recipe like I approach any chaotic system: I broke it down, streamlined the proofing times, and eliminated the guesswork. Trust me, this streamlined process guarantees that tender, pillowy interior and that signature crackle of crystalized sugar in the glaze. We’re making bakery-quality donuts at home, and we’re doing it efficiently!
- Why This Glazed Yeast Donut Recipe Works Every Time
- Essential Ingredients for Bakery-Quality Glazed Yeast Donuts
- Step-by-Step Instructions to Make Glazed Yeast Donuts
- Tips for Success When Making Glazed Yeast Donuts
- Ingredient Spotlight: Why Whole Milk Matters in This Glazed Yeast Donut
- Storage and Reheating Instructions for Your Yeast Donuts
- Variations on the Classic Glazed Yeast Donut Recipe
- Frequently Asked Questions About Making Yeast Donuts
- Share Your Melt-in-Your-Mouth Glazed Yeast Donut Triumph
Why This Glazed Yeast Donut Recipe Works Every Time
When developing this recipe, I wasn’t looking for ‘good enough’; I was looking for repeatable perfection. That means stripping away anything unnecessary and focusing only on the variables that deliver maximum results. This approach is why these donuts consistently rival the best local bakeries.
- Temperature Control is Key: We nail the oil temperature right away. If the oil isn’t reading a steady 360°F, you might as well stop—too cool means greasy; too hot means burned shells and uncooked centers.
- Streamlined Proofing: I cut down the rising times slightly without sacrificing the lift. The secret isn’t just waiting longer; it’s proving the dough in a controlled, warm environment.
- The Glaze Sets Fast: The glaze mixture is balanced perfectly so it sets with that thin, crisp shell the minute it cools slightly on the rack. No sticky messes here!
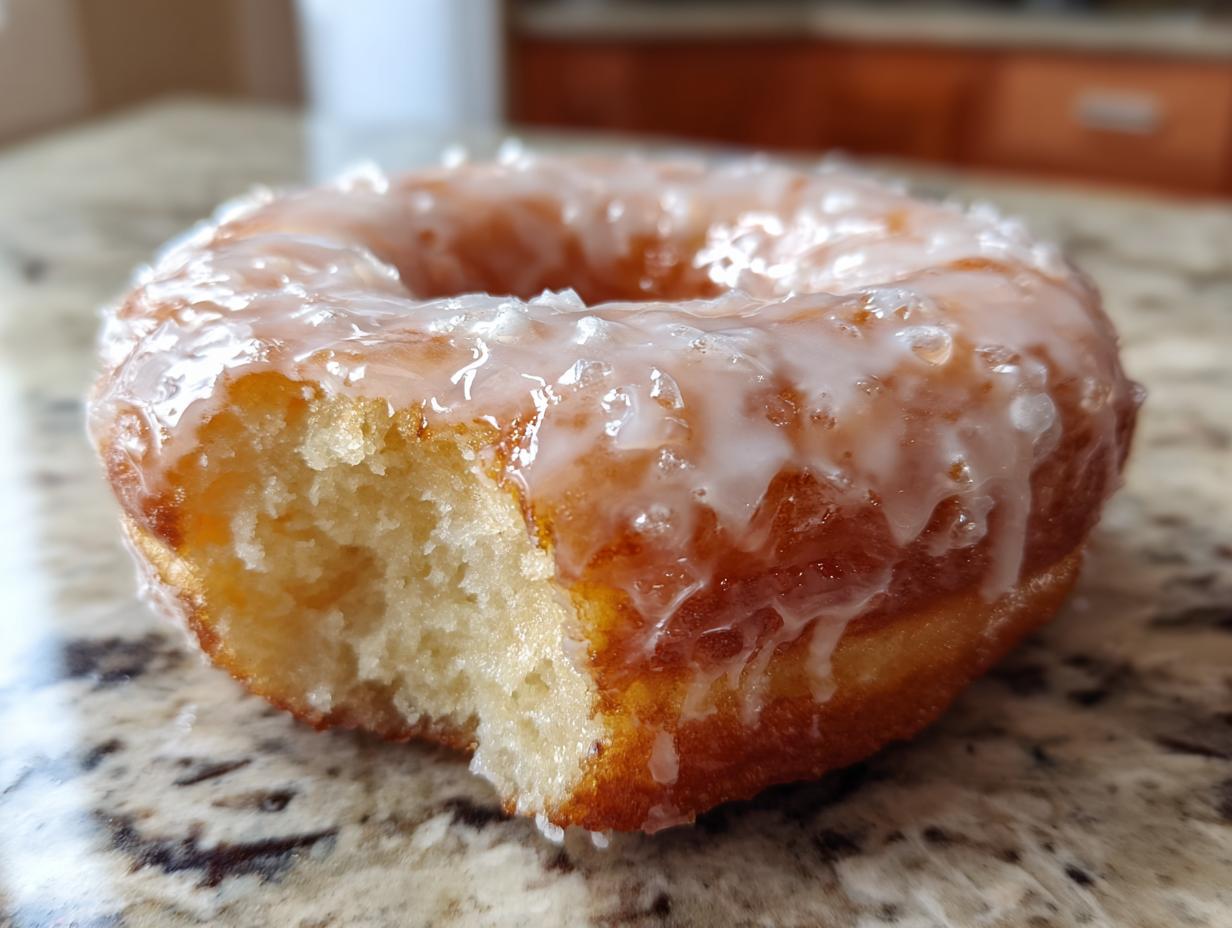
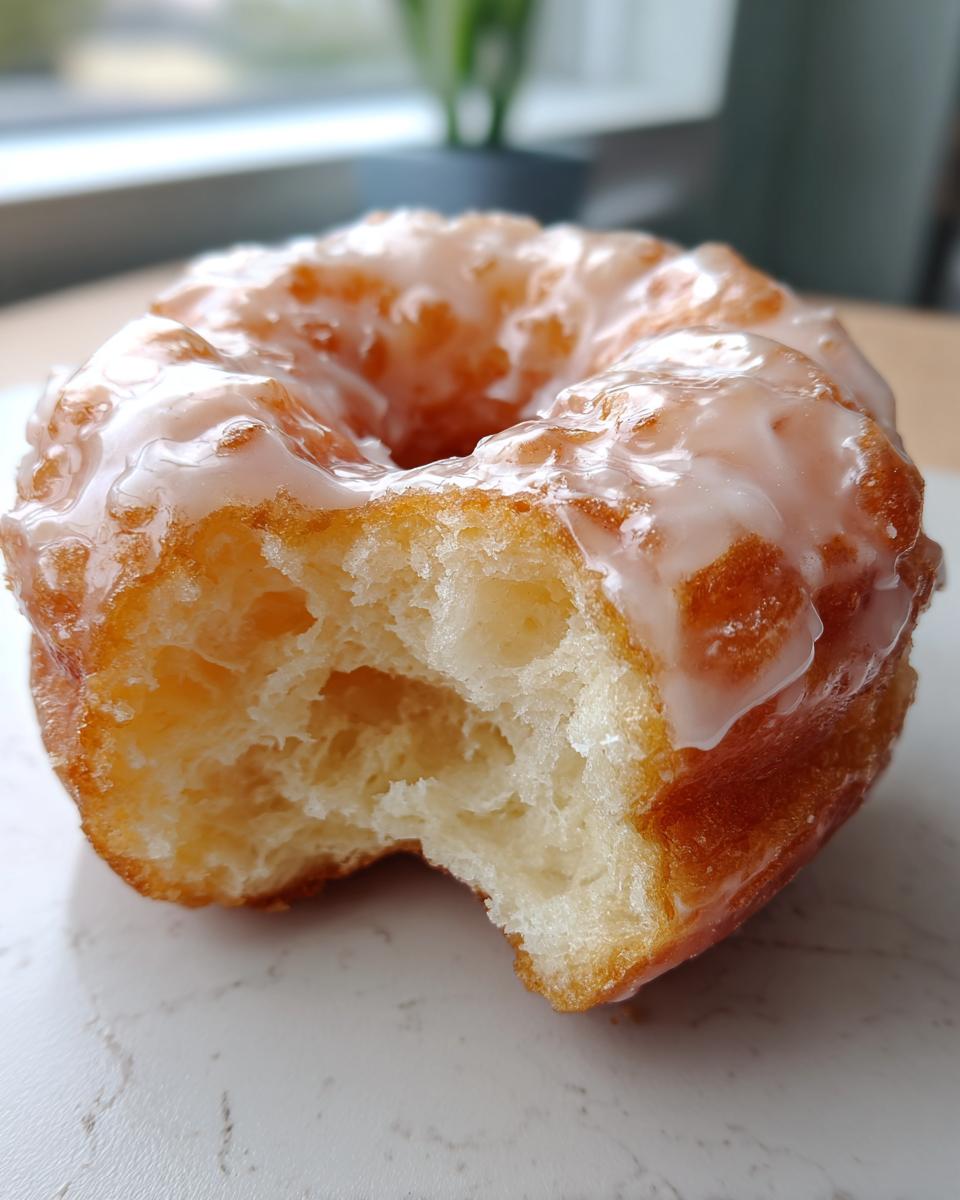
Achieving the Perfect ‘Melt-in-Your-Mouth’ Texture
The airiness starts with the yeast. You *must* see that foam after activating the yeast—that’s your green light, proving the yeast is alive and ready to work its magic. After kneading, we let the dough rest; this lets the gluten relax, which is crucial for producing those light, lofty pockets inside the finished yeast donuts. It’s this resting time, done properly, that locks in that unbeatable, melt-in-your-mouth quality.
Essential Ingredients for Bakery-Quality Glazed Yeast Donuts
When we talk about quality here, we mean ingredients that actually *do* what they are supposed to do. I list everything needed for perfect **homemade donuts** below. Notice how specific I am about temperatures—that’s not fussiness; that’s efficiency. Using the right components upfront means less troubleshooting later when you’re making your **donut recipe**.
- 1 cup whole milk, warmed to 105-115°F (Hot milk kills yeast; cold milk puts it to sleep. Need that sweet spot!)
- 2 1/4 teaspoons active dry yeast
- 1/4 cup granulated sugar, plus 1 tablespoon for yeast (Yes, we split the sugar up—it’s strategic!)
- 2 large eggs, room temperature (This is non-negotiable for smooth incorporation.)
- 1/4 cup unsalted butter, melted and cooled slightly (If it’s hot, it’ll scorch your yeast mixture.)
- 1 teaspoon salt (Don’t skip this; it manages the yeast activity.)
- 3 1/2 to 4 cups all-purpose flour, plus more for dusting (We start low and add until it feels right.)
- Vegetable oil, for frying (You need a neutral, high smoke-point oil, please!)
- For the Glaze: 2 cups powdered sugar, 1/2 cup whole milk, 1 teaspoon vanilla extract (Simple, but needs to be whisked well.)
Ingredient Notes and Substitutions for Your Donut Recipe
Let’s cover the details that separate a decent donut from a truly amazing one. First, the eggs. Make sure they are at room temperature—cold eggs shock the dough mixture and slow down the smooth incorporation of fat and moisture. Next, the milk temperature is critical for that initial yeast activation we talked about. Aim for that 105-115°F range using a quick thermometer check, or it should feel comfortably warm, not hot, on your wrist.
When it comes to oil, this is where we invest. You need a lot of it—at least 2 to 3 inches in your pot. Stick strictly to vegetable or canola oil for frying. Olive oil or coconut oil have off-flavors or smoke points that will ruin the delicate taste of these **glazed donuts**.
Step-by-Step Instructions to Make Glazed Yeast Donuts
This is where the project management mindset truly shines. We are moving through defined checkpoints to ensure zero wasted motion and maximum lift. Follow these timed steps closely, and you’ll have unbelievable **homemade donuts** before you know it. Stick to the timeline, and these **baking recipes** become ridiculously straightforward!
Mastering the Dough: Activation and First Rise
First thing: proof that yeast! Combine your warm milk (remember that 105-115°F sweet spot), the small bit of sugar, and the yeast. Walk away for five to ten minutes. If nothing foams up, that yeast is dead, and you need to start over. I learned this the hard way years ago—I rushed that step, baked a hockey puck, and had to start over. So, watch the foam! Once it’s bubbly, whisk in your eggs, the rest of the sugar, melted butter, and the salt. Slowly introduce the flour until it pulls away from the bowl sides. When I knead it, I look for this moment where it feels plush and elastic, almost like a baby’s cheek. It takes about 7 minutes by hand to get there, then just let it chill out in an oiled bowl for an hour, or until doubled.
Shaping and the Critical Second Rise for Fluffy Glazed Yeast Donuts
Gently punch the air out—don’t beat it up! Roll the dough out very carefully to exactly half an inch thick. Using your 3-inch cutter, punch out those shapes. Now, here is a pro-tip specific to this **donut recipe**: put each raw donut on its own little square of parchment paper. This paper is your absolute best friend for transferring them safely later! Cover them loosely and let them rest again for about 30 to 45 minutes. They need to look puffy, light, and airy, but seriously, *do not over-proof* them. If they get too big, they deflate when they hit the hot fat.
Frying Technique: Oil Temperature Control
Heat up your oil to a strict 360°F. This is the most technical part of making these amazing **yeast donuts**. If the oil is lower than 355°F, the dough absorbs the fat too fast and gets heavy. If it’s over 370°F, the outside burns before the inside cooks. Seriously, check that thermometer every single batch. Now, gently lower two or three donuts in at a time, using that parchment square to slide them right off the counter and into the oil. Fry for about 90 seconds a side until they are that perfect golden brown color. They should puff up beautifully right in the oil. Pull them out and let them rest on paper-towel-lined racks to drip! If you love deep-fried goodness, you should absolutely check out my apple fritter recipe for another weekend treat.
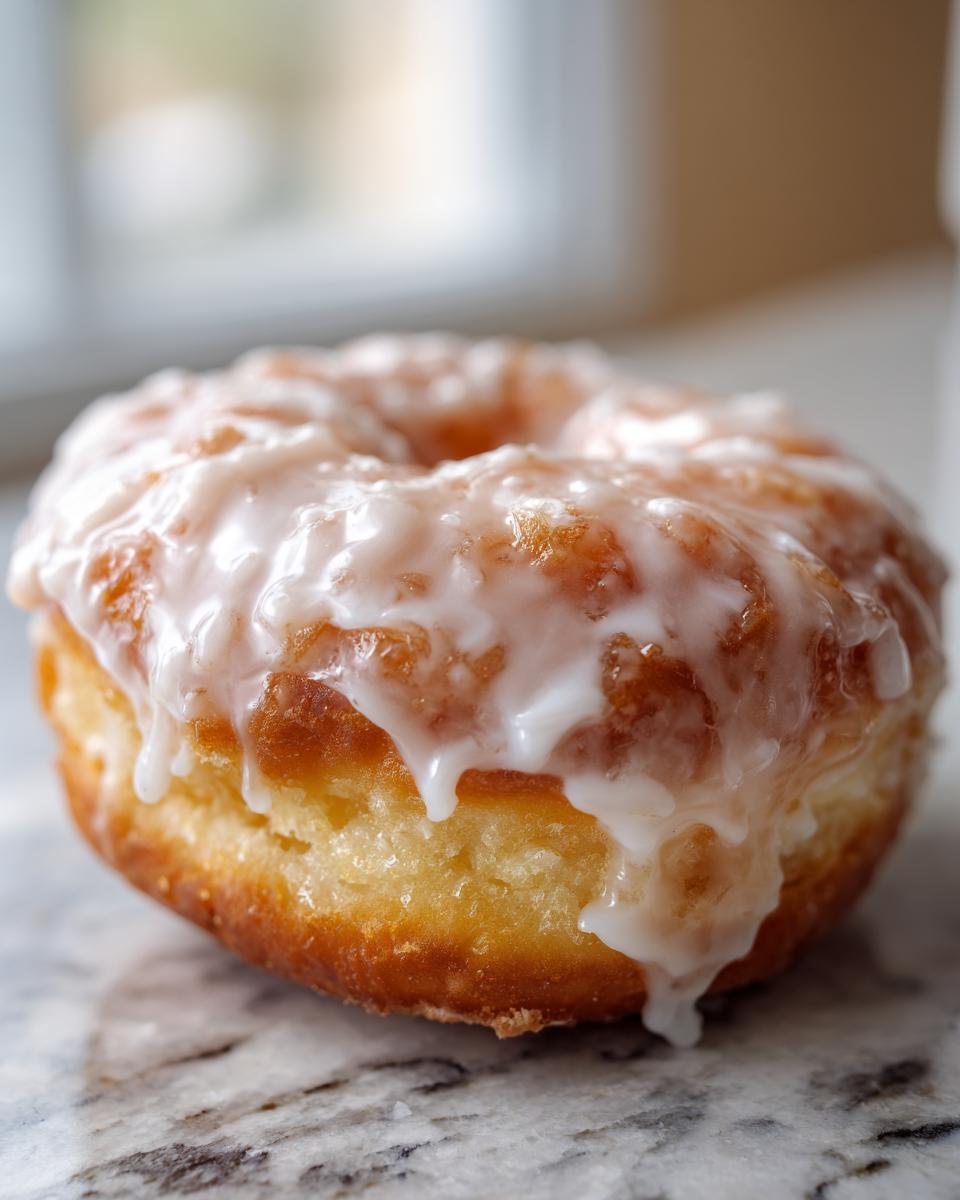
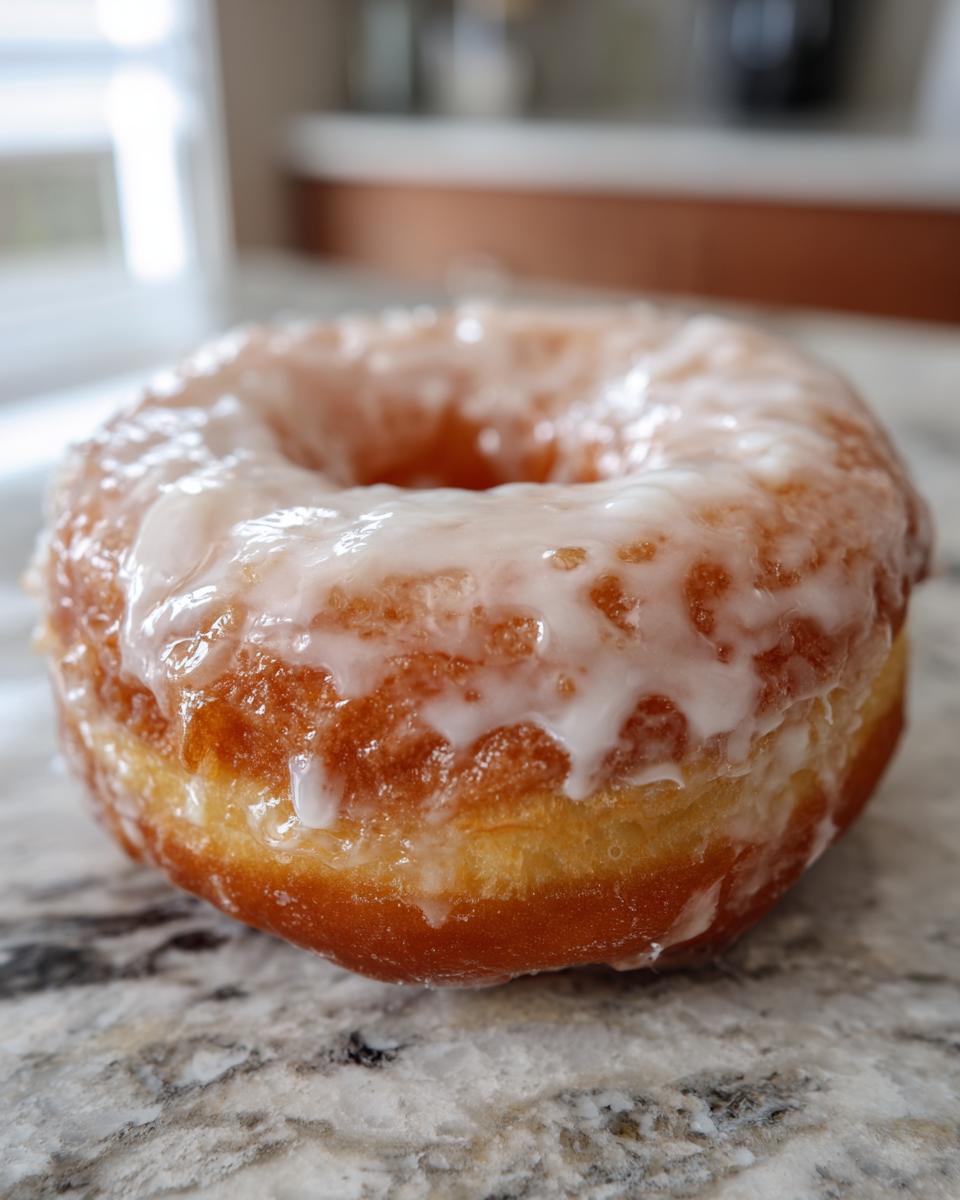
Creating the Perfect Glaze for Homemade Donuts
While the first batch is cooling just slightly—they need to be warm but not piping hot—we assemble the glaze. This is so simple it hurts! Whisk your powdered sugar, milk, and vanilla extract until it’s perfectly smooth. No lumps allowed! If you feel like it’s too stiff, add milk just a teaspoon at a time until it flows smoothly off the whisk. If it looks runny, add a spoonful more powdered sugar. When dipping your warm **glazed donuts**, just dip the top side, let the excess slide right off, and put it back on the cooling rack. The residual heat helps that clear, shiny glaze set up perfectly in minutes.

Tips for Success When Making Glazed Yeast Donuts
Okay, you’ve done the heavy lifting: the dough is risen, and the oil is sizzling away. But sometimes, even when you follow the instructions perfectly, little things can trip you up. I’ve learned a few battle-tested tricks over the years to ensure the final step lands perfectly, giving you those magazine-worthy **Glazed yeast donuts**.
First, humidity is a real enemy here. If it’s a miserable, sticky day outside, the dough might rise too fast and feel soupy. If this happens, don’t panic! Add flour just a tablespoon at a time during the kneading stage until it feels manageable again. It won’t ruin the final texture if you’re mindful.
Second, the glazing window is narrow. You can’t glaze them when they are completely cold, or the glaze won’t adhere properly and will crackle off. But if they are too hot, the glaze just melts right through them and disappears! I wait until I can handle them comfortably—maybe five minutes out of the fryer is the sweet spot. They should be warm to the touch, not burning your fingers.
If you’re making a huge batch, don’t crowd your cooling rack! You need air circulation all around the donut surface. If they sit touching each other while the glaze sets, you’ll end up with a sticky mess where they bump. Use multiple racks if you have them. For tips on managing dough structure for other projects, check out my guide on easy homemade bread bowls, as the protein structure principles are actually similar!
Ingredient Spotlight: Why Whole Milk Matters in This Glazed Yeast Donut
When I’m optimizing a recipe, I look for ingredients that pull double or triple duty, and whole milk is absolutely one of them in this **Glazed yeast donut** process. You can technically use low-fat milk or even water, but trust me, you’ll lose something important.
The fat content in whole milk is what enriches the dough structure during kneading. That fat coats the flour particles and helps create that incredibly tender crumb we’re aiming for. It keeps the dough softer, which translates directly into that light, airy chewiness once they fry up.
But it’s not just the dough! The milk we use in the glaze matters too. It helps create a smoother emulsion with the powdered sugar and vanilla than water ever could. That slight bit of fat prevents the glaze from drying out too quickly and turning chalky; it keeps it looking glossy and delicious on your finished **homemade donuts**. It’s a small detail, but details are how we nail the outcome every time.
Storage and Reheating Instructions for Your Yeast Donuts
So, you made a huge batch of these perfect **Glazed yeast donuts** and now you have leftovers (if you even *have* leftovers, which is my common problem!). Storing them correctly is important because yeast donuts are delicate—they can get stale faster than cake donuts, especially with that delicate glaze.
First rule: let the glaze set up completely before you even think about putting them away. If you stack them while the glaze is still tacky, you end up with a sticky, melted mess stuck together, and that’s just sad. Give them a solid hour on the wire rack until the glaze is firm and dry to the touch.
Once they’re set, the best way to store them is in a single layer in an airtight container at room temperature. Don’t put them in the fridge! Refrigeration dries out bread products like crazy—we want to keep that fluffy texture we worked so hard for.
They are truly best eaten the day you make them, but they last well for about two days stored this way. If you want to revive them, don’t use the microwave unless you want tough rubber! Instead, pop that single **yeast donut** in a toaster oven or regular oven at about 300°F for just 3 to 5 minutes. That little bit of dry heat warms the dough through and crisps up the glaze just slightly. It tastes almost freshly made again!
Variations on the Classic Glazed Yeast Donut Recipe
Listen, once you master the core blueprint for these **yeast donuts**, you’ve unlocked an entire world of possibilities. I love the classic light glaze, but sometimes you just need to pivot! That’s what I love about a good, solid **baking recipe**—it’s a foundation, not a prison sentence. These tweaks are simple, requiring maybe one extra ingredient, and they radically change the profile without messing up the beautiful rise we engineered.
For a warmer flavor profile, try adding a teaspoon of ground cinnamon right in with the flour when you mix the dry ingredients. It infuses the entire dough with a cozy spice that really complements the frying process. When the dough is ready for its final proof, you’ll notice it smells incredible!
If you want to experiment with the glaze, ditch the vanilla extract and use almond or even a touch of lemon extract. Almond brings out a beautiful, subtle nuttiness that pairs wonderfully with the fried dough. Or, for a brighter finish, swap out half of the milk in the glaze for fresh orange juice!
And if you *really* want to go overboard (I certainly do sometimes), skip the clear glaze entirely! Instead, reserve a tablespoon of butter from the dough mix, melt it, and brush it onto the donuts right after they come out of the oil. While they are still warm and slightly tacky, toss them immediately into my favorite {cinnamon sugar mixture} instead of glazing them. You get a completely different, wonderfully crisp coating. It’s a fantastic path to satisfying that sweet tooth!
Frequently Asked Questions About Making Yeast Donuts
I know making something as iconic as a classic **Glazed yeast donut** can bring up a few technical wrinkles. That’s totally normal! When you’re aiming for bakery-level perfection, you need concrete answers. I’ve compiled the questions I get asked most often about the dough, the frying, and how to ensure your **homemade donuts** turn out light every single time.
Can I use bread flour instead of all-purpose flour for this yeast donut recipe?
You certainly can, but you need to be careful. Bread flour has more protein, which means more gluten development. This results in a chewier donut. If you use bread flour, dial back the kneading time by about two minutes, and watch the consistency very closely. Remember, we are aiming for melt-in-your-mouth, not tough chew! All-purpose flour gives us that perfect balance of tenderness and structure for these **yeast donuts**.
What is the best way to cut out perfect homemade donuts?
This is a classic rookie mistake that can ruin the rise! When you cut out the rounds, you need to press the cutter straight down and lift straight up. Do *not* twist the cutter. Twisting seals the edges of the dough. If the edges are sealed, the donut can’t puff up evenly around the perimeter when it hits the oil, leading to heavy, oddly shaped rings. A clean punch ensures maximum lift. If you are looking for another easy, fried option, have a look at my guide for easy baked apple fritters—the cutting technique is similar for a nice shape!
Another thing: if you don’t have a dedicated donut cutter, use two differently sized biscuit cutters or a clean drinking glass and a bottle cap for the center hole. Just make sure your cuts are swift and decisive!
Share Your Melt-in-Your-Mouth Glazed Yeast Donut Triumph
You’ve navigated the tricky waters of yeast activation, you’ve monitored that oil temperature like a hawk, and now you have a rack full of shimmering, perfect **Glazed yeast donuts**! Honestly, that’s the payoff, and I want to hear all about your success. If you followed the streamlined steps here, your kitchen probably smells like the best bakery in Chicago right now.
Don’t keep this triumph to yourself! Drop a comment below letting me know how your first batch turned out. Did the rise feel perfect? Did that thin glaze set up exactly the way you wanted it to? Rating this recipe is seriously helpful because it lets other busy home cooks know that this method is reliable and repeatable. Knowing that this project management approach to baking works for you makes my whole day!
Seriously, snap a picture and tag me if you share it online—I love seeing proof that complicated baking can be simple and delicious. If you’re new to the site and wondering how we tackle other complex meals with efficiency, feel free to check out my philosophy on smart cooking over on the About page. Now go enjoy those **homemade donuts**!
PrintMastering the Melt-in-Your-Mouth Glazed Yeast Donut
Achieve bakery-quality, light, and airy homemade yeast donuts with a perfect, clear glaze using this streamlined recipe.
- Prep Time: 45 min
- Cook Time: 20 min
- Total Time: 165 min
- Yield: 12 donuts 1x
- Category: Dessert
- Method: Frying
- Cuisine: American
- Diet: Vegetarian
Ingredients
- 1 cup whole milk, warmed to 105-115°F
- 2 1/4 teaspoons active dry yeast
- 1/4 cup granulated sugar, plus 1 tablespoon for yeast
- 2 large eggs, room temperature
- 1/4 cup unsalted butter, melted and cooled slightly
- 1 teaspoon salt
- 3 1/2 to 4 cups all-purpose flour, plus more for dusting
- Vegetable oil, for frying
- For the Glaze: 2 cups powdered sugar, 1/2 cup whole milk, 1 teaspoon vanilla extract
Instructions
- Activate the yeast: In a large bowl, combine the warm milk, 1 tablespoon of sugar, and the yeast. Let stand for 5 to 10 minutes until foamy.
- Mix wet ingredients: Whisk the remaining 1/4 cup sugar, eggs, and melted butter into the yeast mixture. Stir in the salt.
- Form the dough: Gradually add the flour, one cup at a time, mixing until a shaggy dough forms. Turn the dough onto a lightly floured surface and knead for 5 to 7 minutes until smooth and elastic. The dough should be slightly tacky but not sticky.
- First rise: Place the dough in a lightly oiled bowl, turning to coat. Cover the bowl with plastic wrap and let it rise in a warm place for 1 to 1.5 hours, or until doubled in size.
- Shape the donuts: Gently punch down the risen dough. On a lightly floured surface, roll the dough out to a 1/2-inch thickness. Use a 3-inch round cutter to cut out donut shapes. Place the cut donuts on squares of parchment paper.
- Second rise: Cover the cut donuts loosely with plastic wrap and let them rest for 30 to 45 minutes until puffy. Do not over-proof.
- Heat the oil: Pour 2 to 3 inches of vegetable oil into a deep, heavy-bottomed pot or Dutch oven. Heat the oil to 360°F. Use a thermometer to maintain this temperature.
- Fry the donuts: Carefully drop 2 or 3 donuts into the hot oil, using the parchment paper to gently lower them in. Fry for 1 to 1.5 minutes per side until golden brown. Flip carefully with a slotted spoon or spider.
- Drain: Remove the donuts and place them on a wire rack lined with paper towels to drain excess oil.
- Make the glaze: While the donuts cool slightly, whisk together the powdered sugar, milk, and vanilla extract until completely smooth.
- Glaze: Dip the top side of each warm donut into the glaze, lift, let excess drip off, and place back on the wire rack to set. These are your perfect homemade donuts.
Notes
- Maintain the oil temperature strictly at 360°F for light, non-greasy yeast donuts. If the oil is too cool, the donuts absorb too much fat.
- For best results, use a stand mixer with a dough hook for kneading if you prefer less manual effort.
- If the glaze seems too thick, add milk a teaspoon at a time. If too thin, add more powdered sugar.
Nutrition
- Serving Size: 1 donut
- Calories: 280
- Sugar: 25g
- Sodium: 180mg
- Fat: 14g
- Saturated Fat: 4g
- Unsaturated Fat: 10g
- Trans Fat: 0g
- Carbohydrates: 35g
- Fiber: 1g
- Protein: 4g
- Cholesterol: 45mg