
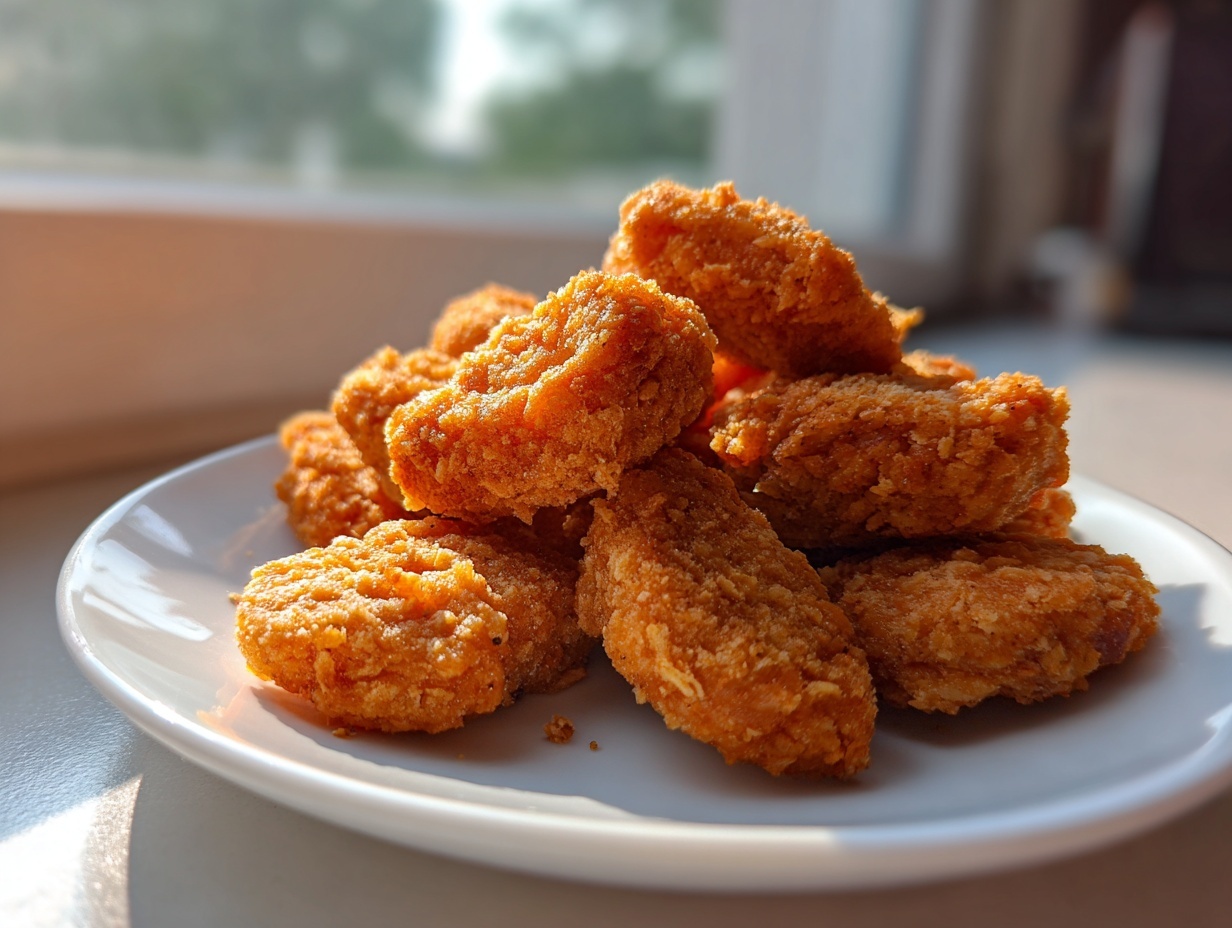
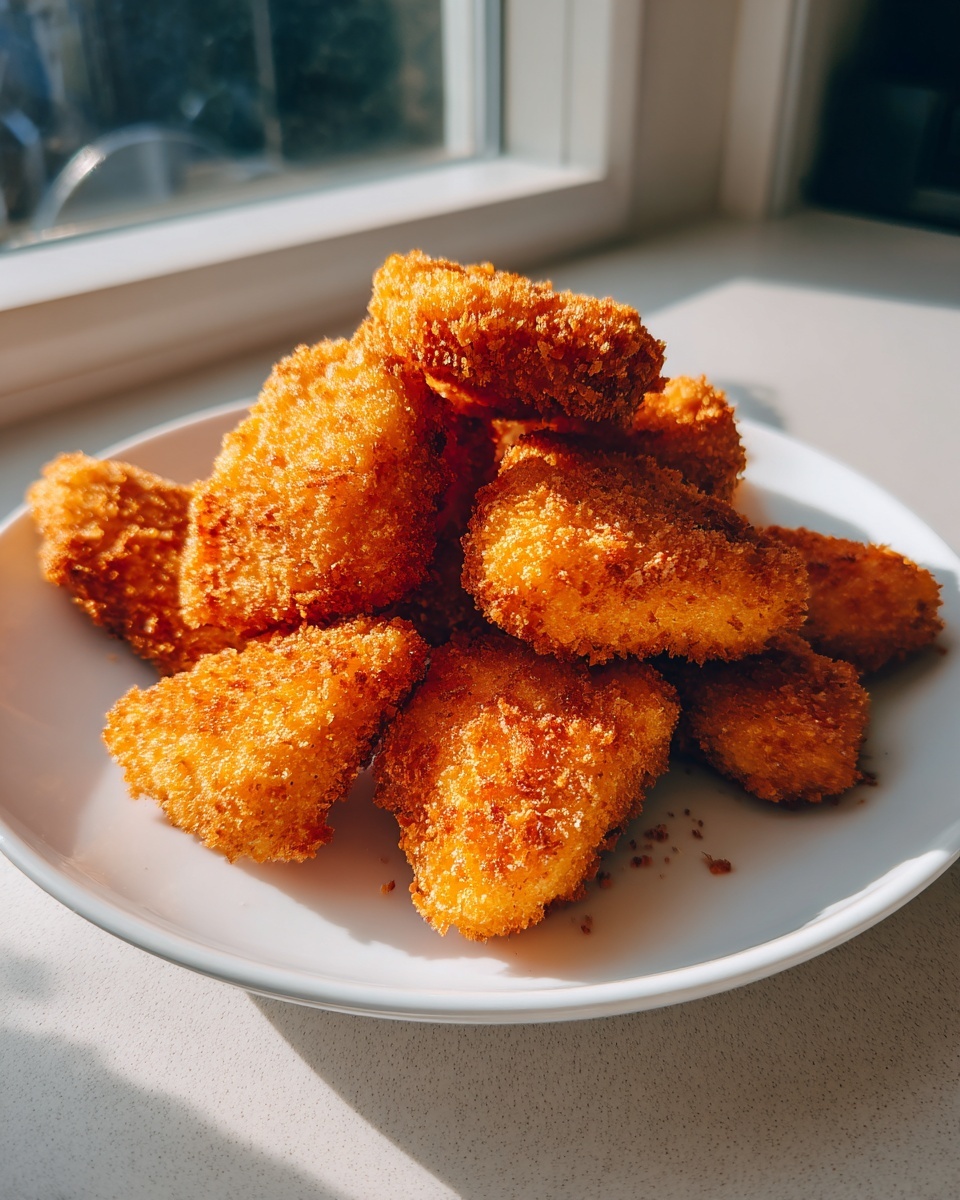
We’ve all been there: you get that deep, undeniable craving for those perfectly crispy, slightly salty chicken nuggets, but the thought of ordering takeout or digging into a box of processed freezer food just doesn’t sit right. You want that satisfying crunch, but you need transparency about what’s actually going into your food. That’s exactly why I developed this benchmark recipe for the ultimate homemade chicken nuggets.
As the founder of Dishicious, my whole philosophy is about efficiency and flavor, treating recipes like projects that need streamlining. This recipe strips away the complicated deep-frying steps, proving you can achieve spectacular crispiness using either your oven or an air fryer. Forget recipes that take forever; this method is engineered to be foolproof, savory, and ready fast enough to qualify as a reliable quick weeknight chicken dinner. Trust me, once you nail this technique, you won’t look back.
- Why This is the Best Recipe for Homemade Chicken Nuggets
- Essential Ingredients for Perfect Homemade Chicken Nuggets
- Step-by-Step Instructions for Crispy Homemade Chicken Nuggets
- Tips for Making the Easiest Chicken Nugget Recipe
- Serving Suggestions for Your Homemade Chicken Nuggets
- Storage and Reheating: Keeping Homemade Chicken Nuggets Fresh
- Variations: Copycat Fast Food Chicken Nuggets and More
- Frequently Asked Questions About Homemade Chicken Nuggets
- Nutritional Estimate for Homemade Chicken Nuggets
Why This is the Best Recipe for Homemade Chicken Nuggets
I engineered this recipe to solve the biggest hurdle people face when making nuggets at home: achieving that perfect crunch without drowning the chicken in oil. We use smart techniques built around accessible ingredients, making this method incredibly trustworthy for busy schedules. This isn’t just another recipe; it’s an optimized process for maximum flavor payoff.
- This recipe delivers a product that is genuinely kid friendly chicken recipes approved, using simple pantry staples.
- It allows you to ditch the deep fryer entirely while still nailing that satisfying texture.
- We’ve kept the process straightforward so it slots perfectly into your weeknight rotation.
Achieving Maximum Crunch Without Deep Frying
The magic here is Panko. Standard breadcrumbs steam; Panko absorbs less moisture and creates these fantastic, sharp shards of crunch when baked or air-fried. By coating the nugget and then giving the outside a good spray of oil or cooking spray, we mimic the frying environment. This is how we guarantee those crispy baked chicken nuggets that hold up wonderfully!
Perfect for Meal Prep and Freezing
This is a project manager’s dream because it scales so well. Once these are cooked, they are fantastic for chicken nugget meal prep. You can cool them completely, toss them into a freezer bag, and have ready-to-go lunches or snacks for weeks. They reheat beautifully in the air fryer, which is exactly what you need.
Essential Ingredients for Perfect Homemade Chicken Nuggets
When we talk about streamlining, we mean making sure every single ingredient pulls its weight. You won’t find any weird fillers here—just pure, simple components designed to get you the best flavor and texture possible. Precision matters, so pay close attention to how you prep the chicken; that’s where the juiciness comes from.
Here is what you need for a batch that yields about four servings:
- 1.5 lbs boneless, skinless chicken breast, cut into 1-inch pieces
- 1 cup all-purpose flour
- 2 large eggs, lightly beaten
- 1.5 cups panko breadcrumbs
- 1 teaspoon salt
- 0.5 teaspoon black pepper
- 0.5 teaspoon paprika
- 0.25 teaspoon garlic powder
- Cooking spray or 2 tablespoons vegetable oil (for baking/air frying)
Ingredient Notes and Smart Substitutions
Using ground chicken is my primary recommendation here because it’s fast, easy, and yields incredibly moist nuggets consistently. We pulse it in the food processor just enough to break it down, but stopping before it turns into mush is crucial for texture. If you hate using ground meat, you can absolutely pivot here and use whole chunks of chicken breast instead. For those whole chunk nuggets, you need to get them tender before breading. A quick 30-minute soak in buttermilk—that’s the secret flavor booster I mention in the notes—will ensure those pieces stay truly juicy. If you are trying to master the ground chicken nuggets recipe, remember that the texture you want comes from pulsing, not blending, hitting that sweet spot of coarse meat.
Step-by-Step Instructions for Crispy Homemade Chicken Nuggets
Okay, now for the payoff! This is where we turn those raw ingredients into something your whole family is going to devour. Since I approach cooking like a project, I’ve broken this down into defined phases. Stick to the plan, and you’ll have beautifully crisp nuggets coming out of the oven or the air fryer without any guesswork or panic. It’s incredibly straightforward once you see the setup.
Preparing the Ground Chicken Base
First thing’s first: prepping the protein. Take those 1-inch chicken pieces and dump them right into your food processor. You need to pulse this mixture. And I mean pulse, not blend. If you run the machine until it’s totally smooth, you’re going to end up with something closer to chicken paste. We want texture! Pulse it just until the meat is broken down and looks coarse, almost like ground meat you’d buy, but chunkier. Stop when you see that texture. Then, scoop it out onto a parchment-lined baking sheet. Gently shape these little guys into your classic nugget form. Don’t overwork them; keep them relaxed!
Setting Up the Three-Step Breading Station
A proper breading station is non-negotiable for maximum crispiness, trust me. Set up three shallow dishes in a row. Dish one gets the plain flour. Dish two gets your lightly beaten eggs—just a quick whisk is fine. Dish three is where the flavor locks in: that’s your Panko mixed with the salt, pepper, paprika, and garlic powder. Make sure that breadcrumb mix is thoroughly combined! Now, the technique: Flour first (shake off the excess), then egg dip (let the extra drip), and finally, press that nugget *firmly* into the seasoned Panko. Pressing is key so that crunchy layer actually sticks during cooking.
Cooking Method 1: Achieving Crispy Baked Chicken Nuggets
If you’re going with the oven route, you need high heat to create that crust fast. Preheat your oven right now to 400°F (200°C). Line a baking sheet with foil for easier cleanup—always plan ahead! Arrange your breaded nuggets on the sheet so they aren’t touching; air needs to circulate for true crispiness. Finish this step by giving the tops of the nuggets a good, even spray of cooking spray or a light drizzle of oil. Bake these beauties for about 15 to 18 minutes total. You must flip them halfway through! Use a meat thermometer to confirm they hit 165°F internally. That’s my check for safety and quality.
Cooking Method 2: Perfect Air Fryer Chicken Nuggets Homemade
If you want the absolute best crunch with minimal effort, the air fryer is your friend. Preheat it to 380°F (195°C). Spray that basket lightly so nothing sticks! Place your nuggets in the basket in a single layer—this is critical for any air fryer chicken nuggets homemade success. Remember to spray the tops again! Cook them for 10 to 12 minutes, but set a timer to flip them at the seven-minute mark. When they come out, they should be golden brown and intensely crunchy. Enjoy that perfect texture!
Tips for Making the Easiest Chicken Nugget Recipe
This recipe is designed to be simple, but a few insider tricks can take your easy chicken nugget recipe straight to the next level. If you want that authentic takeout experience without leaving the kitchen, I have one small addition that really sells it. We want maximum flavor impact with minimum effort, which is the whole point of Dishicious!
- Want that classic, slightly savory fast-food taste? Add just a tiny pinch of celery salt to your seasoned panko breading. It makes a huge difference for that easy chicken nugget recipe!
- If your nuggets seem too pale after baking or air frying, don’t worry about pulling them out early. Just hit them with an extra quick spray of oil and put them back in for two more minutes.
- When shaping, use slightly damp hands to handle the ground chicken mixture. It keeps the chicken from sticking to your fingers, making the whole process cleaner.
Serving Suggestions for Your Homemade Chicken Nuggets
You’ve nailed the ultimate crispy, juicy homemade chicken nuggets—now comes the fun part! A great nugget demands an equally great dipping companion. While fries are the classic partner for any quick weeknight chicken dinner sidekick, don’t let your meal end there. The flavor profile of these simple nuggets sings when paired with something creamy, tangy, or smoky.
The Best Homemade Dipping Sauces
Honestly, the store-bought stuff is fine in a pinch, but when you’ve put this much effort into making the chicken from scratch, taking two extra minutes to throw together a standout sauce is totally worth it. We’ve got incredibly simple recipes that elevate these nuggets to a whole new level. You absolutely need to try making your own versions of these classics:
- Tangy Honey Mustard: Mix equal parts Dijon mustard, mayonnaise, and a generous drizzle of honey. A tiny dash of apple cider vinegar sharpens it right up.
- Smoky BBQ: If you’re feeling lazy, just mix ketchup with a splash of Worcestershire sauce and a dash of liquid smoke if you have it. Instant depth!
- Creamy Ranch: Use a good quality store-bought base, but mix in some fresh dill and a squeeze of lemon juice to brighten it up instantly.
For the comprehensive guides on taking your dipping game seriously, check out my full list of best homemade dipping sauces. Seriously, skip the sugary stuff and see how easy homemade sauces are!
Storage and Reheating: Keeping Homemade Chicken Nuggets Fresh
One of the major reasons I love this recipe is that it’s built for leftovers, or rather, built for having food ready when you need it next week! This fully beats buying the sad, spongy ones from the freezer aisle. If you made a double batch—which I highly suggest you do—storage is simple, but reheating requires a strategy to keep that amazing crust we worked so hard for.
For the fridge, keep leftover cooked nuggets in an airtight container. They’ll be good for about three to four days, but honestly, they are best eaten within 48 hours. They’ll lose some snap overnight, which is normal.
For long-term results and great make ahead frozen nuggets, follow the process I detailed in the notes: cool them completely on a rack after they come out of the oven or air fryer. Once they are stone cold, spread them out on a baking sheet and freeze them flat for about an hour. Once they are hard little nuggets, transfer them to a heavy-duty freezer bag. This prevents them from sticking together, which is the key to successful make ahead frozen nuggets.
Here’s the critical part: reheating. Do not use the microwave! It’s the enemy of crispiness. You need dry heat. The best way to revive frozen or refrigerated nuggets is sending them straight back to the air fryer. Set the air fryer to 375°F (190°C) and cook for about 5 to 8 minutes, flipping them halfway. If you are using the oven, spread them on a tray at 400°F for about 10 minutes. This quick blast of dry heat re-crisps that Panko coating so they taste almost freshly made. It’s simple maintenance for a fantastic meal!
Variations: Copycat Fast Food Chicken Nuggets and More
The beauty of a streamlined foundational recipe like this is how easily it can be adapted. We started with a simple, healthier base using ground chicken, which is perfect for speed and consistency. But if you’re craving something specific, like that famous salty, slightly processed fast-food texture, we can tweak it!
For those moments when you absolutely need that specific flavor profile, forget the ground meat for a second. To get closer to that classic, tender-inside, processed-tasting nugget, swap the ground chicken for whole chunks of chicken breast, and here is the key modification: marinate those chunks in pickle juice for at least an hour before you start the breading process. Seriously, pickle juice! It tenderizes the meat beautifully and adds that subtle background tang you recognize from some major chains. This is the ultimate hack for a great copycat fast food chicken nuggets experience.
If you want to lean into the healthy aspect even more, you should look at the ground chicken nuggets recipe form we used here. Because the texture is already uniform, you can easily swap out the standard flour for a gluten-free blend, or trade the all-purpose flour for finely ground almond flour if you’re cutting carbs. Just remember that almond flour can brown faster, so you might need to drop your cooking temp by about 25 degrees. No matter which direction you go, this base structure is engineered to adapt without falling apart. That’s smart cooking for you!
Frequently Asked Questions About Homemade Chicken Nuggets
I know you might have a few questions when you’re looking to switch from the freezer bag to making things completely from scratch. It’s totally normal! When I organized this process, I tried to anticipate every hurdle. Here are the absolute most common questions I get about skipping the traditional deep-fryer and perfecting these homemade chicken nuggets.
Can I use chicken breast chunks instead of ground chicken for these homemade chicken nuggets?
Yes, you absolutely can! The recipe defaults to ground chicken because it makes for a super fast, incredibly consistent juicy chicken nuggets recipe, especially when time is short. If you prefer classic pieces, just swap out that step. You’ll want to cut your boneless, skinless chicken into traditional nugget shapes, but here’s the trick: you should marinate those chunks in buttermilk for about half an hour before you even start the flouring process. That soak prevents them from drying out while they cook, which is the main risk when you don’t use the uniform ground method. It adds richness and moisture, ensuring your chunks stay tender!
What is the best cooking method for the crispiest results?
If your main goal is texture—that crackle that just sings—the Air Fryer is your champion. It circulates heat so intensely around the Panko, drying it out just right without adding excess fat. It’s the MVP for delivering air fryer chicken nuggets homemade brilliance. However, don’t feel you have to own one! The oven method at 400°F with that extra spritz of oil on top is phenomenal for achieving no fry chicken nuggets that are still incredibly crisp. It simply takes about four minutes longer, that’s all. For my money, air fryer wins on crunch, but the oven is a very close second!
And since you’re making these for your family, if you want to ensure every bite is healthy and safe, remember that checking the internal temperature is non-negotiable to guarantee you are serving safe, delicious food. For more ideas on keeping these meals kid-approved while being nutritious, definitely check out my tips on healthy chicken nuggets for kids.
Nutritional Estimate for Homemade Chicken Nuggets
Look, when you make your own food from fresh ingredients, you’ve already won the health battle against the heavily processed versions out there. Because we are using simple chicken breast and baking/air frying instead of deep frying, these turn out far lighter than standard takeout. I always run the numbers to keep track, and I think you’ll be pleasantly surprised with the result for such a satisfying meal!
Here is the estimated nutritional breakdown for a serving size of 5 nuggets, based on the ingredients and methods detailed in this recipe (the oven/air fry method, Option A):
- Serving Size: 5 nuggets
- Calories: 280
- Protein: 30g
- Fat: 10g
- Saturated Fat: 2g
- Carbohydrates: 18g
- Fiber: 1g
- Sugar: 1g
- Sodium: 350mg
Please keep in mind that these are just estimations. The actual count can shift slightly depending on the exact cut of chicken breast you use or the amount of cooking spray you apply. But generally speaking, this formula provides a fantastic protein punch that works perfectly for a healthy lunch idea! It’s clean fuel for the rest of your busy day.
PrintThe Ultimate Crispy Homemade Chicken Nuggets (Oven or Air Fryer Method)
Make irresistible, crispy homemade chicken nuggets from scratch. This recipe uses simple ingredients and offers oven or air fryer methods for a healthier, quick weeknight dinner that kids love.
- Prep Time: 15 min
- Cook Time: 18 min
- Total Time: 33 min
- Yield: 4 servings 1x
- Category: Dinner
- Method: Baking or Air Frying
- Cuisine: American
- Diet: Low Fat
Ingredients
- 1.5 lbs boneless, skinless chicken breast, cut into 1-inch pieces
- 1 cup all-purpose flour
- 2 large eggs, lightly beaten
- 1.5 cups panko breadcrumbs
- 1 teaspoon salt
- 0.5 teaspoon black pepper
- 0.5 teaspoon paprika
- 0.25 teaspoon garlic powder
- Cooking spray or 2 tablespoons vegetable oil (for baking/air frying)
Instructions
- Prepare the chicken: Place the chicken pieces into a food processor and pulse until the chicken is coarsely ground. Do not over-process; you want a texture, not a paste.
- Shape the nuggets: Scoop the ground chicken onto a plate and gently form the mixture into small, classic nugget shapes. Place the formed nuggets on a parchment-lined baking sheet.
- Set up the breading stations: In the first shallow dish, place the flour. In the second dish, whisk the eggs. In the third dish, combine the panko breadcrumbs, salt, pepper, paprika, and garlic powder.
- Coat the nuggets: Dredge each chicken nugget first in the flour, shaking off excess. Next, dip it into the egg mixture, allowing excess to drip off. Finally, press the nugget firmly into the seasoned panko breadcrumbs to coat completely.
- Cook the nuggets (Oven Method): Preheat your oven to 400°F (200°C). Arrange the coated nuggets on a lightly oiled or sprayed baking sheet. Lightly spray the tops of the nuggets with cooking spray. Bake for 15-18 minutes, flipping halfway through, until golden brown and cooked through (internal temperature reaches 165°F).
- Cook the nuggets (Air Fryer Method): Preheat the air fryer to 380°F (195°C). Lightly spray the air fryer basket. Place the nuggets in a single layer, ensuring they do not touch. Spray the tops lightly with cooking spray. Air fry for 10-12 minutes, flipping halfway, until crispy and cooked through.
- Serve immediately with your favorite dipping sauce for a satisfying meal.
Notes
- For meal prep, cool the cooked nuggets completely, then freeze them in a single layer on a baking sheet before transferring them to a freezer bag. Reheat in the air fryer for best crispiness.
- To mimic fast food flavor, add a pinch of celery salt to the breading mixture.
- If you prefer using chicken breast chunks instead of ground chicken, marinate the chunks in buttermilk for 30 minutes before breading for extra juicy chicken nuggets.
Nutrition
- Serving Size: 5 nuggets
- Calories: 280
- Sugar: 1
- Sodium: 350
- Fat: 10
- Saturated Fat: 2
- Unsaturated Fat: 8
- Trans Fat: 0
- Carbohydrates: 18
- Fiber: 1
- Protein: 30
- Cholesterol: 85