
Oh, the holidays! That magical time of year when the air gets crisp, carols start playing, and the *best* part – the baking – begins! There’s just something about that sweet, cinnamon-spiced scent filling the kitchen, isn’t there? And if you’re anything like me, your cookie jar is about to be overflowing. My absolute favorite for cookie exchanges and festive gatherings? These incredible Italian Christmas cookies. They’re so wonderfully soft and tender, with just the right amount of sweet glaze and, of course, plenty of festive sprinkles. The best part? They look like you spent *hours* on them, but trust me, they’re surprisingly simple to whip up, even on a busy weeknight! I remember the first time I made these; they were an instant hit, and now they’re a non-negotiable part of my holiday baking tradition.
- Why You'll Love These Italian Christmas Cookies
- Gather Your Ingredients for Italian Christmas Cookies
- Step-by-Step Guide to Making Italian Christmas Cookies
- Tips for Perfect Italian Christmas Cookies Every Time
- Make-Ahead and Storage for Your Italian Christmas Cookies
- Frequently Asked Questions about Italian Christmas Cookies
- Estimated Nutritional Information
- Share Your Holiday Baking Creations!
Why You’ll Love These Italian Christmas Cookies
Seriously, these cookies are a holiday dream come true! Here’s why you’ll be making them year after year:
- Super Easy to Make: Even if you’re new to baking, you can totally nail these. They come together so quickly!
- Perfectly Soft and Tender: Forget those hard cookies that break your teeth! These are delightfully soft and melt-in-your-mouth.
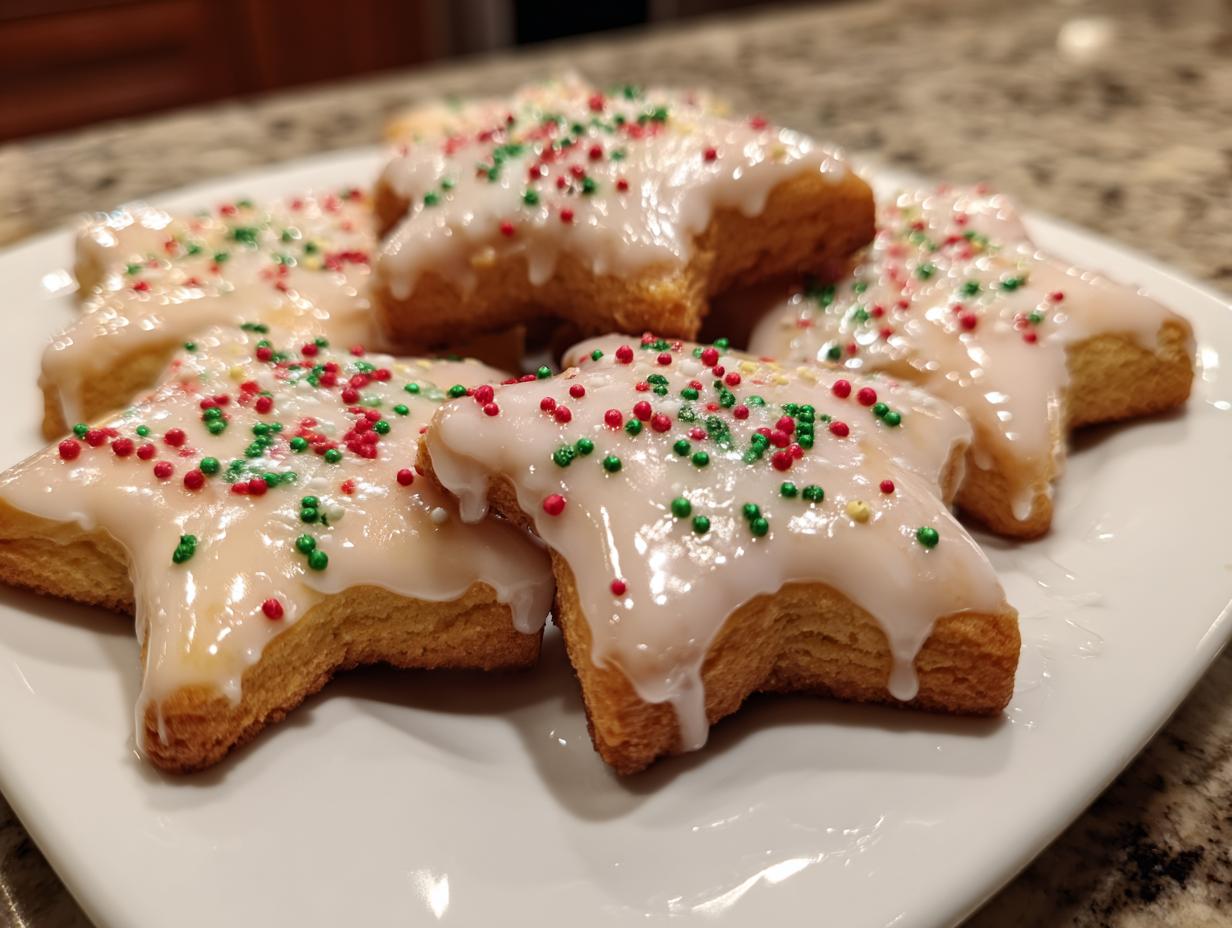
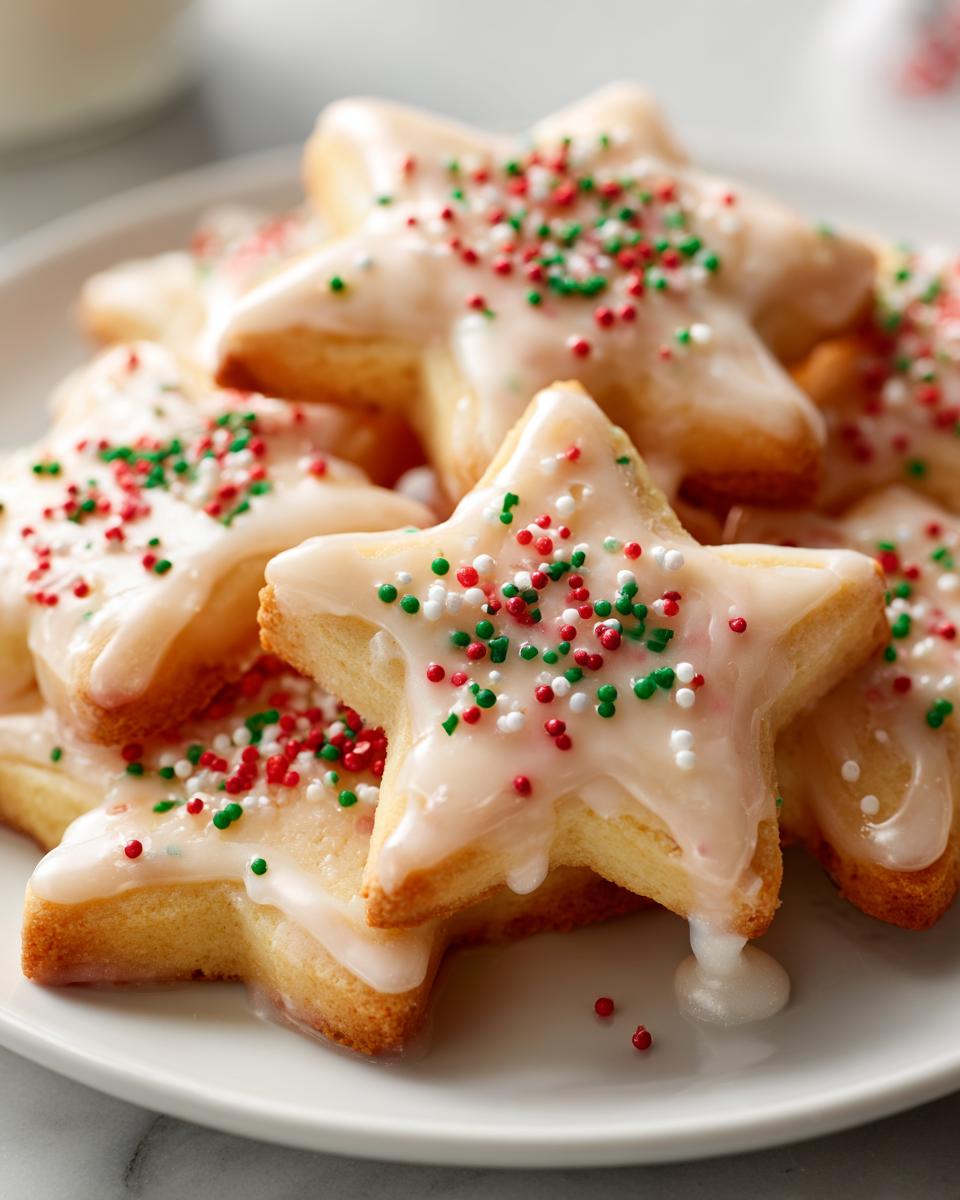
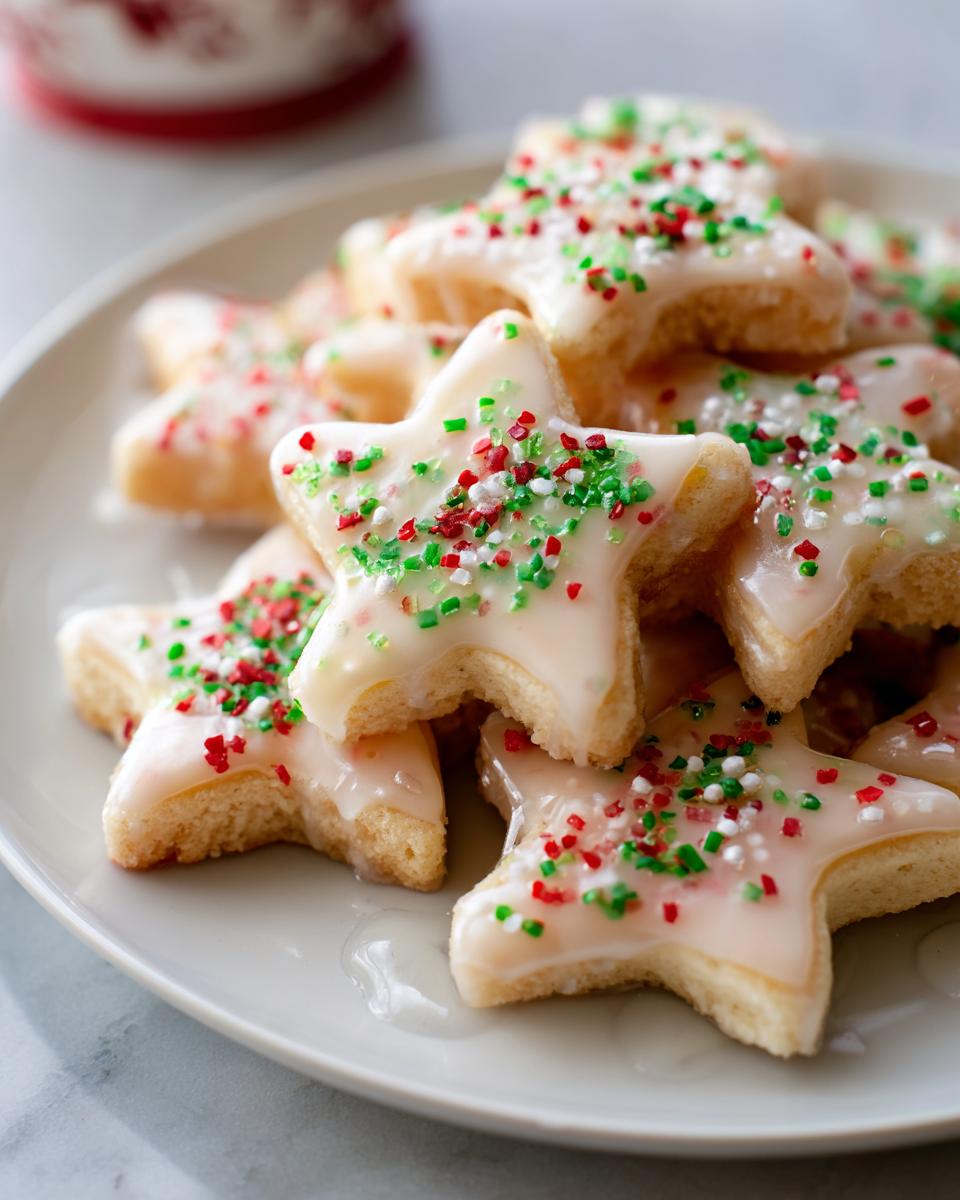
- So Festive and Pretty: With that sweet glaze and all those colorful sprinkles, they just scream holiday cheer. They look amazing on a cookie platter!
- Big Holiday Flavor: That hint of anise (if you use it!) and the sweet vanilla with the simple glaze is just classic holiday goodness.
- Crowd-Pleasers for Sure: Whether it’s a big cookie exchange or just family dropping by, everyone goes crazy for these Italian Christmas cookies.
Gather Your Ingredients for Italian Christmas Cookies
Alright, let’s get down to business and gather everything we need for these amazing Italian Christmas cookies! Trust me, using good quality stuff makes a world of difference, so grab the best butter and vanilla you can find. Remember, fresh ingredients are key for that perfect soft texture and delicious flavor!
For the Cookies:
- 3 cups all-purpose flour (plus a little extra for dusting your surface)
- 1 teaspoon baking powder
- 1/2 teaspoon salt
- 1 cup (that’s two sticks!) unsalted butter, make sure it’s nice and softened
- 1 1/2 cups granulated sugar
- 2 large eggs, preferably room temperature – they mix in better!
- 1 teaspoon vanilla extract (use the good stuff!)
- 1/4 cup milk
- 1 teaspoon anise extract (This? Totally optional! If you’re not a fan of anise, just skip it or try a splash of almond extract for a different twist.)
For the Simple Glaze:
- 2 cups powdered sugar
- 1/4 cup milk
- 1/2 teaspoon vanilla extract
- And of course, your favorite assorted sprinkles for that festive flair!
Step-by-Step Guide to Making Italian Christmas Cookies
Alright, let’s get these beautiful Italian Christmas cookies made! It sounds fancy, but honestly, it’s a pretty straightforward process. Just follow along, and you’ll have a batch of these sweet treats ready before you know it. Remember, patience is key, especially with the dough chilling!
Preparing the Cookie Dough
First things first, let’s get our dough ready. In a medium bowl, give your flour, baking powder, and salt a little whisk-around. This just makes sure everything’s evenly distributed. Now, in a bigger bowl – this is where the magic really starts – cream together that softened butter and sugar until it’s all light and fluffy. It should look almost like pale yellow whipped cream. Then, we’ll beat in the eggs, one at a time, followed by that lovely vanilla extract and the anise extract if you’re using it. Now, here’s the important part: we add the dry stuff and the milk *alternating*. Start and end with the dry ingredients. Just mix until it’s *just* combined – seriously, don’t overdo it, or your cookies might get tough! Pop that dough into the fridge for at least an hour. This part is crucial; it firms up the dough so it’s super easy to handle later.
Shaping and Baking Your Italian Christmas Cookies
Okay, dough chilled? Great! Preheat your oven to 350°F (175°C) and get your baking sheets ready with some parchment paper. This makes clean-up a breeze! On a lightly floured surface, roll out your dough to about a nice 1/4-inch thickness. It should be easy to work with now thanks to that chilling time. Grab your favorite holiday cookie cutters – stars, trees, whatever makes you happy! Cut out your shapes and carefully place them on your prepared baking sheets. Don’t crowd them too much; give them a little breathing room. Pop them into the oven for about 8 to 10 minutes. You’re looking for the edges to be just lightly golden. They’ll look a little soft when they come out, but that’s perfect! Let them cool on the baking sheet for a few minutes before gently moving them to a wire rack to cool completely. patience here prevents any sad broken cookie pieces!
Crafting the Simple Glaze and Decorating
While those beauties are cooling, let’s whip up the simple, sweet glaze that makes these Italian Christmas cookies really shine. In a small bowl, whisk together the powdered sugar, the milk, and that last bit of vanilla extract until it’s smooth and lovely. If it looks a *smidge* too thick, just add another tiny dribble of milk until it’s the consistency you like – sort of like thick paint. Once your cookies are totally, completely cool (this is important, or the glaze will melt right off!), dip the tops into the glaze. Don’t be shy! Immediately after dipping, shake on those festive sprinkles. You gotta do it right away before the glaze starts to set up. Let them sit on the wire rack until the glaze is firm, and voilà! You’ve got gorgeous, delicious homemade holiday cookies.

Tips for Perfect Italian Christmas Cookies Every Time
Look, even with the easiest recipes, sometimes things don’t turn out *exactly* right the first time, and that’s totally okay! I’ve learned a few little tricks over the years that make sure these Italian Christmas cookies are just perfect every single time. It’s all about paying attention to a few key details!
Achieving the Perfect Soft Texture
The biggest secret to these cookies being so delightfully soft is really about two things: not overmixing the dough and pulling them out of the oven at just the right moment. Overmixing develops the gluten, which makes them tough, not tender. And when you bake them, you want them *just* golden on the edges; they’ll continue to firm up a bit as they cool. If you bake them until they’re dark brown or hard, say goodbye to that melt-in-your-mouth texture!
Customizing Your Italian Christmas Cookies
Now, while the classic anise and vanilla are amazing, don’t be afraid to play around! If anise isn’t your jam, a splash of almond extract or even a little lemon or orange zest added to the dough can be *divine*. It gives them a totally different, but equally wonderful, flavor profile. And have you seen all the fun `sprinkles` out there these days? Get creative with your decorations! Different shapes, colors, and sprinkle combos make each batch your own special creation.

Make-Ahead and Storage for Your Italian Christmas Cookies
The beauty of these Italian Christmas cookies is that they’re totally make-ahead friendly! This is huge when you’re juggling a million things during the holidays. Once they’re completely cool, you can store the decorated cookies in an airtight container at room temperature for about 5 days. You could even tuck them away with your homemade Christmas jam! If you need them to last even longer, or maybe you’re prepping way ahead, you can totally freeze the *unfrosted* cookies! Just lay them in a single layer on a baking sheet, freeze ’til solid, then transfer them to a freezer-safe container. They’ll keep beautifully for up to 3 months. When you’re ready to use them, just let them thaw completely on a cooling rack before you dip them in glaze and add those pretty sprinkles. It’s like having a secret weapon for your holiday cookie platter!
Frequently Asked Questions about Italian Christmas Cookies
Got questions about whipping up these delightful Italian Christmas cookies? I’ve got you covered! Here are a few things folks often wonder about:
Can I use a different extract if I don’t like anise?
Absolutely! While anise is pretty classic for traditional Italian holiday cookies, it’s totally optional. If it’s not your favorite, just skip it, or try a teaspoon of almond extract for a lovely nutty flavor. You could even do a bit of lemon or orange zest in the dough instead! The vanilla is great on its own, too.
How do I prevent the glaze from cracking?
The trick to a smooth, non-cracking glaze is all about the consistency and making sure your cookies are completely cool. If the glaze is too thin, it can run off, and if it’s too thick, it might crack as it dries. Aim for a texture like thick-but-pourable paint. Also, dip your cookies when they’re totally, 100% cool – no warmth at all!
Can I make these Italian Christmas cookies dairy-free?
You can definitely make adaptations! For dairy-free, you’d need to swap the butter for a good quality dairy-free butter substitute and use a dairy-free milk (like almond or oat milk) in both the cookies and the glaze. The texture might be slightly different, but you’ll still get a delicious holiday cookie!
Are these considered Italian ricotta cookies?
This particular recipe is a classic soft butter cookie that’s often found during Italian Christmas celebrations, rather than a ricotta-based cookie. Ricotta cookies have a different, often even softer and slightly denser, texture because of the cheese. These are more of a traditional sugar cookie style with that lovely glaze!
Estimated Nutritional Information
Just a rough idea here, since everyone’s ingredients can be a little different! On average, you’re looking at about:
- Serving Size: 1 cookie
- Calories: Around 150
- Fat: About 7g (with 4g being saturated)
- Carbohydrates: Roughly 20g
- Protein: About 2g
These are estimates, of course, but give you a good idea of what you’re working with!
Share Your Holiday Baking Creations!
Okay, now it’s YOUR turn! Have you tried making these incredible Italian Christmas cookies? I’d absolutely love to hear how they turned out for you! Did you go classic with the anise, or try a fun new flavor? Drop a comment below, give the recipe a star rating, or tag me on social media with a picture of your beautiful creations. Showing off your holiday baking is half the fun, right? You can always reach out via our contact page if you have any questions!
PrintSoft Italian Christmas Cookies

Make soft, tender Italian Christmas cookies with a simple glaze and festive sprinkles. These easy-to-make cookies are perfect for holiday gatherings and cookie exchanges.
- Prep Time: 30 min
- Cook Time: 10 min
- Total Time: 1 hour 40 min
- Yield: 3 dozen 1x
- Category: Dessert
- Method: Baking
- Cuisine: Italian
- Diet: Vegetarian
Ingredients
- 3 cups all-purpose flour
- 1 teaspoon baking powder
- 1/2 teaspoon salt
- 1 cup (2 sticks) unsalted butter, softened
- 1 1/2 cups granulated sugar
- 2 large eggs
- 1 teaspoon vanilla extract
- 1/4 cup milk
- 1 teaspoon anise extract (optional)
- For the Glaze:
- 2 cups powdered sugar
- 1/4 cup milk
- 1/2 teaspoon vanilla extract
- Assorted sprinkles
Instructions
- In a medium bowl, whisk together the flour, baking powder, and salt.
- In a large bowl, cream together the softened butter and granulated sugar until light and fluffy.
- Beat in the eggs one at a time, then stir in the vanilla extract and anise extract (if using).
- Gradually add the dry ingredients to the wet ingredients, alternating with the milk, beginning and ending with the dry ingredients. Mix until just combined.
- Cover the dough and refrigerate for at least 1 hour.
- Preheat your oven to 350°F (175°C). Line baking sheets with parchment paper.
- On a lightly floured surface, roll out the dough to about 1/4-inch thickness. Cut out shapes using cookie cutters.
- Place the cookies on the prepared baking sheets.
- Bake for 8-10 minutes, or until the edges are lightly golden. Let cool on the baking sheets for a few minutes before transferring to a wire rack to cool completely.
- While the cookies cool, prepare the glaze. In a small bowl, whisk together the powdered sugar, milk, and vanilla extract until smooth. Add more milk if needed to reach desired consistency.
- Once the cookies are completely cool, dip the tops into the glaze and immediately cover with sprinkles. Let the glaze set before storing.
Notes
- For best results, use good quality butter.
- If you don’t have anise extract, you can omit it or use almond extract for a different flavor.
- These cookies can be stored in an airtight container at room temperature for up to 5 days.
- For longer storage, freeze the unfrosted cookies in a single layer in a freezer-safe container for up to 3 months. Glaze and decorate after thawing.
Nutrition
- Serving Size: 1 cookie
- Calories: 150
- Sugar: 15g
- Sodium: 50mg
- Fat: 7g
- Saturated Fat: 4g
- Unsaturated Fat: 3g
- Trans Fat: 0g
- Carbohydrates: 20g
- Fiber: 0g
- Protein: 2g
- Cholesterol: 25mg