
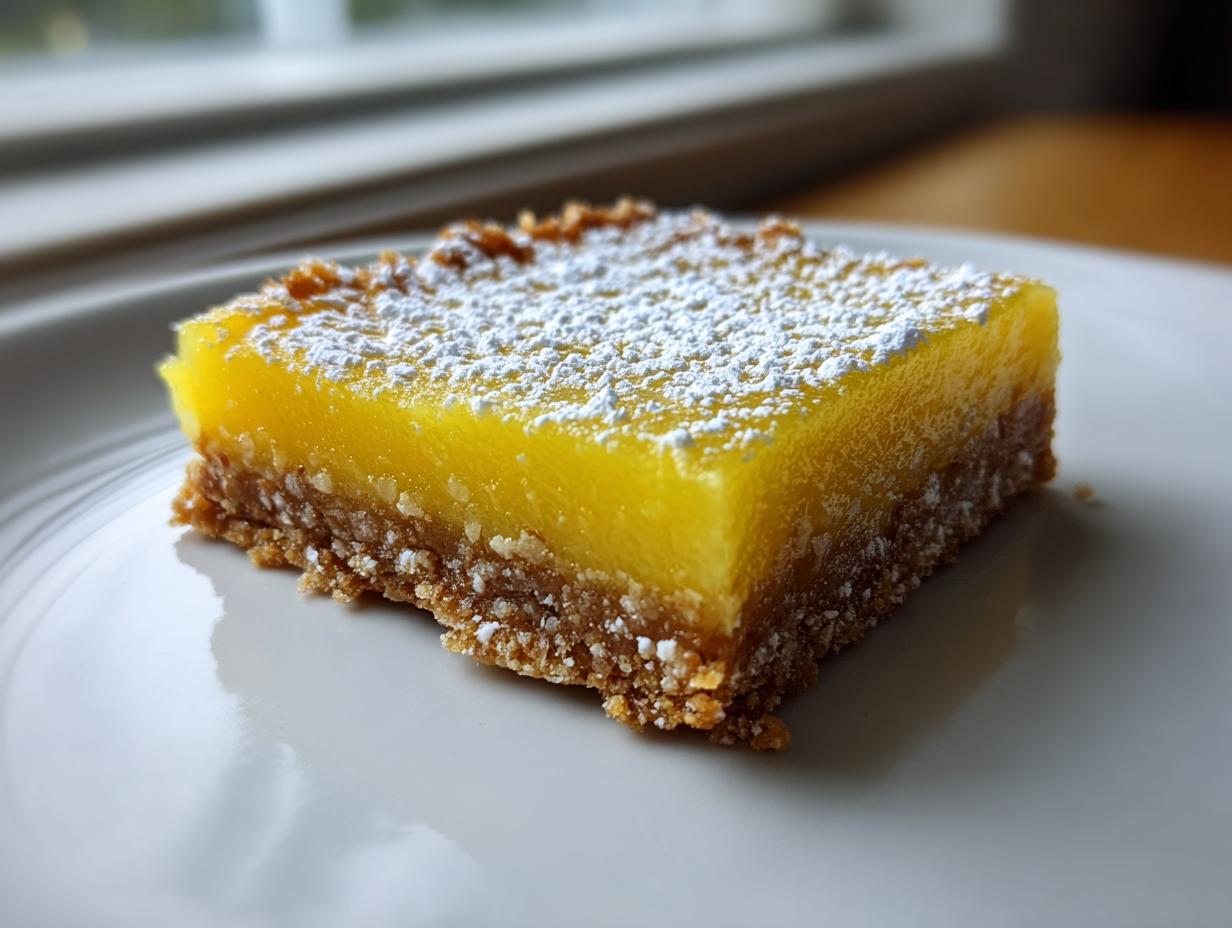
If the weather is trying to melt your windows, the last thing you need is to fire up the oven. Trust me, I’ve been there in my Chicago kitchen. That’s why I engineered the perfect solution: ultra-creamy no-bake lemon bars. These squares deliver that bright, zesty punch you crave, all without needing a single minute of baking time. As a former project manager, I aim for maximum flavor output with minimum effort. This recipe is straightforward, reliable, and provides that perfect citrusy lift, proving that simple cooking is simply better cooking.
- Why You Will Make These Ultra-Creamy No-Bake Lemon Bars
- Essential Ingredients for Perfect No-Bake Lemon Bars
- Step-by-Step Instructions for Your No-Bake Lemon Bars
- Tips for the Best No Bake Citrus Bars Recipe Success
- Storage and Reheating Instructions for Your Lemon Refrigerator Dessert
- Frequently Asked Questions About No-Bake Lemon Bars
- Estimated Nutritional Data for Creamy Lemon Dessert Bars
- Share Your Experience Making These No-Bake Lemon Bars
Why You Will Make These Ultra-Creamy No-Bake Lemon Bars
I always treat a recipe like a project. I look for the biggest return on investment, and these bars give you everything for almost no work. You get gourmet flavor without the heat. Here are the key reasons this recipe is going into heavy rotation in your house, trust me.
- No Oven Required Ever: The best part! When it’s sweltering outside, we minimize heat sources. Prep time is under 20 minutes, and that’s including measuring everything out.
- Incredibly Stable Filling: Unlike some recipes that turn into lemon soup, this one sets up beautifully firm. They slice cleanly and hold their shape perfectly.
- Bright, Authentic Flavor: We use real lemon juice and zest. You won’t get that dull, flat taste sometimes associated with instant desserts. It’s vibrant and wonderfully tangy.
Speed and Simplicity
Honestly, if you can mix two things in a bowl, you can make this. Active time is just about 20 minutes—I timed myself last week making a batch for a quick gathering. That’s less time than it takes most recipes to preheat! Because there is zero baking involved, this is the ultimate easy no bake lemon dessert for busy weeknights or when you need something last minute. Pull it out of the fridge, slice, and serve. Done.
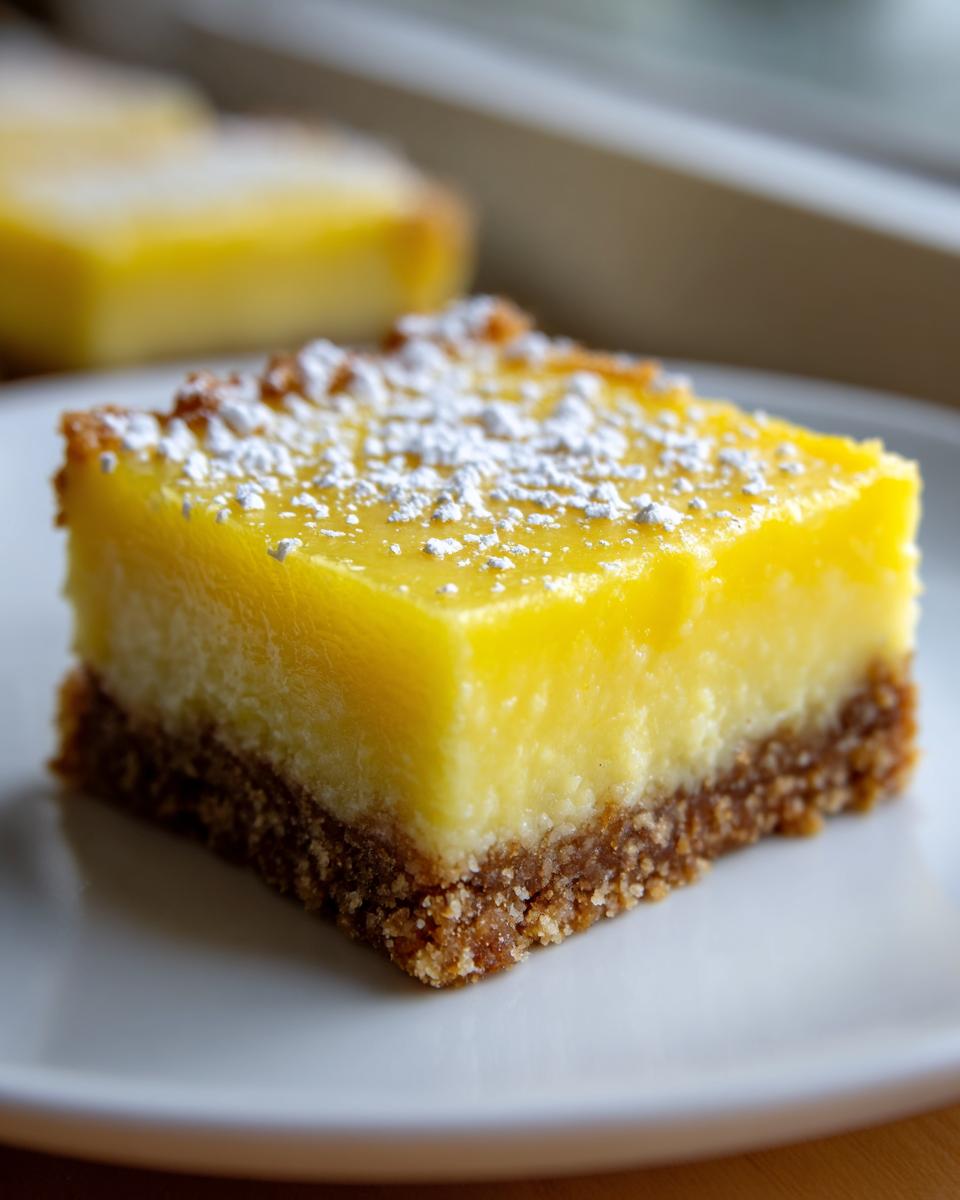
Texture: Creamy Lemon Dessert Bars
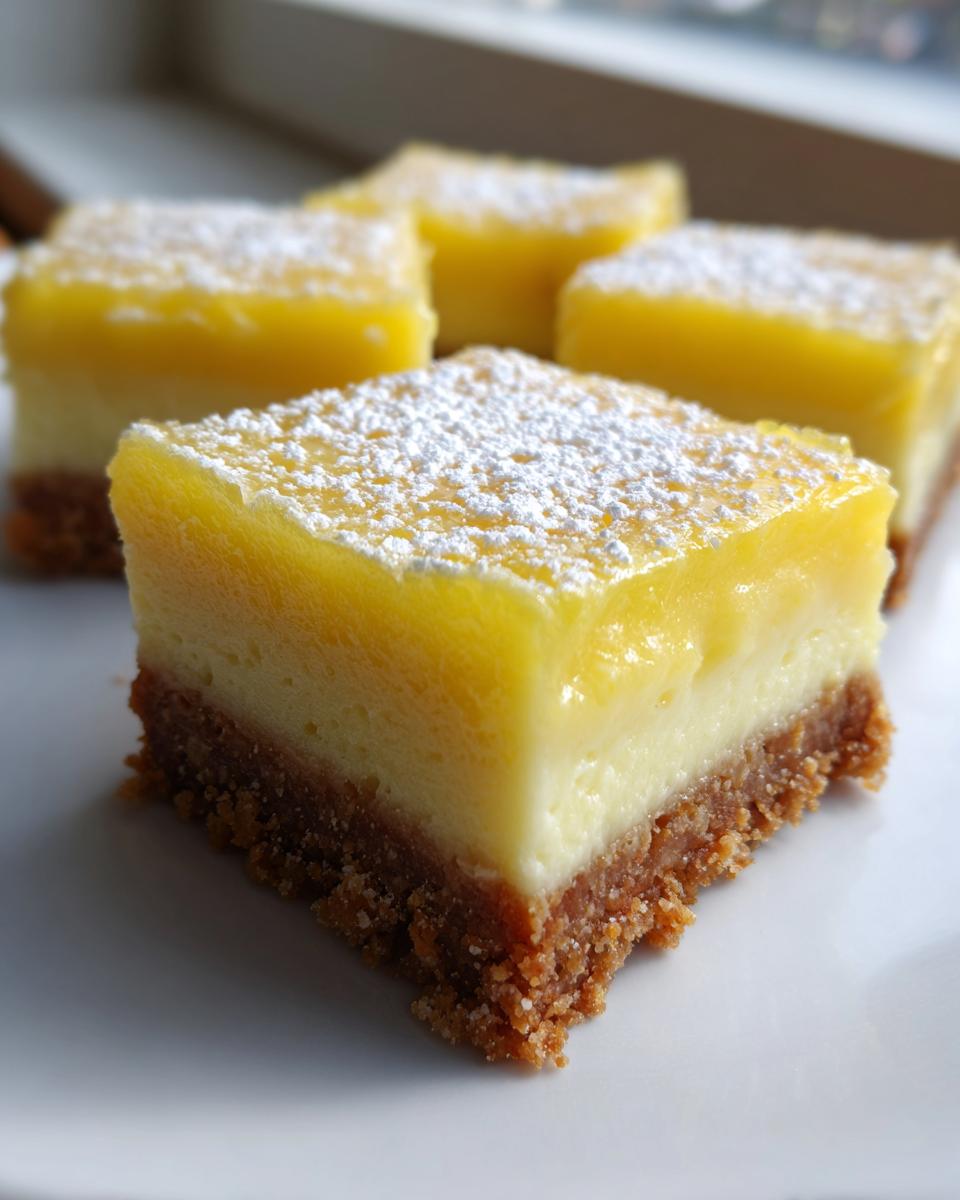
This is where most no bake lemon bars fall short. People either end up with a watery layer or a gritty texture. We fixed that by using softened cream cheese right alongside the sweetened condensed milk. This gives you a texture that is unbelievably luxurious—it melts in your mouth. It’s closer to a chilled lemon cheesecake bar than a traditional floppy filling. If you’re looking for truly creamy lemon dessert bars that satisfy that rich craving, this is the one.
Essential Ingredients for Perfect No-Bake Lemon Bars
When you’re ditching the oven, every single ingredient has to pull its weight because there’s no baking magic to smooth over any shortcomings. Based on my testing, these components are absolutely non-negotiable for achieving that perfect texture and zing. It’s about getting the right ratio of fat, acid, and sweetener. Here’s what you need to pull together your ingredients list.
For the Graham Cracker Crust Lemon Bars No Bake
The base has to be sturdy enough to hold that rich filling. This crust needs just three things, and it comes together faster than boiling water! Make sure your butter is melted completely so everything binds together nicely.
- 1 1/2 cups graham cracker crumbs
- 1/4 cup granulated sugar
- 6 tablespoons unsalted butter, melted
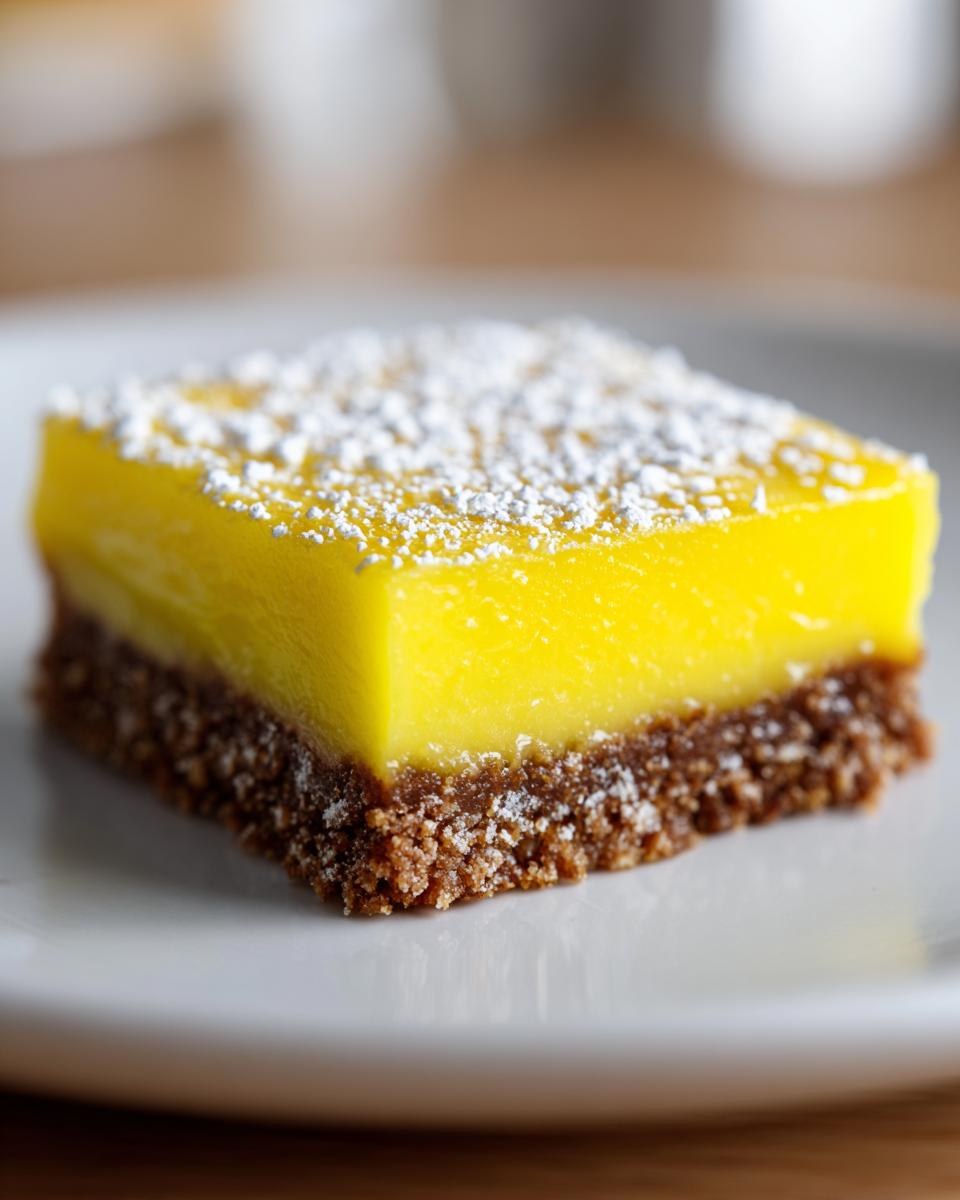
Quick Pro-Tip: If you happen to be trying to make gluten free no bake lemon bars base options, you can swap the graham crackers for an equal amount of crushed vanilla wafers or even finely ground almond flour mixed with the melted butter. It works like a charm!
For the Creamy Filling
This is the heart of the recipe, where that bright lemon flavor hits that perfectly delicate, creamy texture. Because this recipe relies on chemical setting rather than heat-setting, the dairy component stability is key. You’ll notice this fits neatly into the category of a classic condensed milk no bake lemon bars filling, but elevated by the cream cheese.
- 1 (14 ounce) can sweetened condensed milk
- 1/2 cup fresh lemon juice (this means truly fresh, squeezed right now!)
- 1 teaspoon lemon zest
- 8 ounces cream cheese, softened (make sure this is truly soft, not cold!)
Why fresh lemon juice? It carries the acid needed to react with the milk and soften the cream cheese just right. Bottled stuff just doesn’t give you that punch or structure you need for a great no bake lemon bars experience.
Step-by-Step Instructions for Your No-Bake Lemon Bars
Alright, let’s get this project moving. Since we aren’t dealing with baking times, we treat the chilling steps like cook times—they are just as important for stability! Follow these steps precisely, and you’ll have perfect squares every time. This process transforms simple pantry staples into an amazing, refreshing summer treat.
Preparing and Chilling the Crust
First up is that foundational graham cracker layer. In a medium bowl, you need to combine your 1 1/2 cups of crumbs and the 1/4 cup of granulated sugar. Now, pour in the 6 tablespoons of melted butter. Mix that up until every crumb looks evenly moistened—it should look like wet sand ready to hold a castle shape. Press this mixture down firmly into an 8×8 inch pan that you’ve already lined with parchment paper; leave those overhangs on two sides so you can lift it out later. Once pressed tight, you need to shove that pan into the freezer while you work on the filling. This hard chill prevents the crust from getting soggy when the filling goes on top.
Mixing the Light and Tangy Lemon Dessert Filling
This is crucial for texture management. Grab your mixer and make sure that 8 ounces of cream cheese is fully softened. Beat it until it is completely smooth—no lumps allowed! Next, slowly beat in that can of sweetened condensed milk until everything is homogenous. Now for the acid! Gently add your fresh lemon juice and the zest. Mix this on low speed just until it combines. I mean it: stop mixing right when the streaks disappear. Overmixing once the lemon juice is in can mess with the chemical reaction that gets you that perfect texture for this light and tangy lemon dessert.
Setting and Finishing Your Quick Lemon Squares No Oven Required
Carefully pour that beautiful lemon mixture over your chilled crust. Give the pan a gentle tap on the counter—this gets rid of any trapped air bubbles that might cause weird dips later. Now, cover it loosely with plastic wrap. We want at least six hours in the refrigerator, but honestly? Overnights are always best for the absolute firmest piece. Once they are set, use those parchment paper slings to lift the whole block out, slice it into 16 neat squares, and finish with a light dusting of powdered sugar. These are fantastic as a make ahead summer lemon bars option because they hold up so well!
If you need something similar but want to try a different approach, check out my recipe for easy no-bake peanut butter bars—same no-oven rule, totally different flavor bomb!
Tips for the Best No Bake Citrus Bars Recipe Success
We’ve assembled the components, we’ve mixed, we’ve poured—now we need to manage the final critical step: setting. Since we skipped the oven, we rely completely on refrigeration science to make this work. Think of this chilling process as the ‘bake time’ in reverse. Getting this right is what separates a sloppy snack from a perfect, sliceable piece worthy of being called the best no bake citrus bars recipe.
Achieving No Bake Cheesecake Lemon Bars Consistency
The magic here is simple chemistry. When you mix the lemon juice (our acid) with the dairy—the cream cheese and condensed milk—the acid starts to denature the proteins in the dairy. That’s what thickens the filling and firms it up, giving it that dense, almost fluffy stability we look for in a no bake cheesecake lemon bars experience. The key to success is temperature control and mixing speed, as I mentioned before.
How do you know they are ready? Don’t just guess! Gently press the center of one bar with a clean finger. It should feel firm underneath your touch, offering slight resistance but not feel squishy or wet. When you insert a knife to cut, the knife should come out mostly clean, maybe with a tiny bit of moist cling, but certainly not covered in runny liquid. If it’s still too soft, give it another hour. Patience here stops you from making a huge mess when you try to serve them.
Speeding Up the Setting Process
I know sometimes you just can’t wait the full six hours, especially if you’re rushing to get these out for a party. If you need to move things along and you don’t have time for the full overnight chill, we have a two-part fix that works surprisingly well. After chilling the bars in the refrigerator for the minimum two hours—which lets the outer edges firm up—pop the whole pan into the freezer for sixty more minutes.
This blasts the center into a firm, sliceable structure. It’s not quite as perfectly creamy as the overnight set, but it’s fantastic in a pinch. Remember, these are designed to be a fantastic make ahead summer lemon bars option, so planning ahead is always my first recommendation, but I know deadlines come up!
Storage and Reheating Instructions for Your Lemon Refrigerator Dessert
Since we skipped the oven, these treats rely entirely on the cold to stay perfect. That’s why we call them a true lemon refrigerator dessert! The good news is, these bars hold up very well, provided you keep them covered correctly. The science behind the creamy filling means it stays fresh longer than a baked custard would.
Keep them airtight. After you slice them, transfer any leftovers into an airtight container. I usually place a piece of parchment paper directly between layers if I have to stack them, just to make sure the powdered sugar doesn’t get messy or the creamy filling doesn’t stick to the layer above it. Don’t worry about these sitting out on the counter; they need to stay chilled to maintain that perfect, firm texture.
You can safely keep these bars in the fridge for about four days. If you happen to have too many—which is unlikely, but I’ve seen it happen—they actually freeze quite well too! Wrap individual squares tightly in plastic wrap, then place them in a freezer-safe bag. They thaw beautifully back in the fridge overnight, tasting almost as fresh as the day you made them.
Frequently Asked Questions About No-Bake Lemon Bars
I get tons of questions about these bars because people are just trying to avoid heat, which I totally respect! The reliability of a good no bake lemon bars recipe often rests on a few key details. Here are the common snags and questions people have when they try to make this instant lemon dessert recipe for the first time.
Can I use bottled lemon juice instead of fresh for these no bake lemon bars?
Please, please don’t if you can help it. I know bottled is convenient for a quick fix, but for these bars, fresh is essential. Bottled lemon juice usually lacks the bright, high natural acidity we need to truly interact with the cream cheese and condensed milk mixture. If you use bottled, the flavor will taste dull, and more importantly, the filling might not fully set up correctly. You need that fresh zing for the chemical reaction that creates that perfect, creamy structure—it’s what keeps these from being a flop!
What if I want a different base for my simple lemon slice recipe no cooking?
That’s a smart pivot! If you don’t have graham crackers on hand, or maybe you’re just looking to mix things up—because sometimes we all need a new approach to a simple lemon slice recipe no cooking—you have options. Vanilla wafers crush up beautifully and give a slightly sweeter, almost buttery base once chilled. Alternatively, if you want something richer, use crushed shortbread cookies mixed with the melted butter. Both options work just as well as graham crackers for holding up that filling. You can browse some of my other quick snack ideas over at my appetizers and snacks page for more inspiration.
How long do these bars need to chill to be firm?
This is the critical timeline, so pay attention! The absolute minimum chilling time we demand for these bars is six hours in the refrigerator. That gets them sliceable, but they are usually still a little soft around the middle. If you want that truly firm, perfect, clean-cut square—the kind you can stack up for your next party—you absolutely need to let them chill overnight. The longer they sit cold, the better the cream cheese and lemon set together. They are truly a set-it-and-forget-it recipe, so planning ahead is the secret weapon for this type of no oven dessert ideas for parties.
Estimated Nutritional Data for Creamy Lemon Dessert Bars
When we are simplifying recipes, sometimes people worry that we lose track of the details, but I always build in transparency. Since these are no-bake and rely heavily on condensed milk and cream cheese, the numbers look different than a traditional baked item, but they are still helpful to know.
Here is the estimated breakdown based on 16 standard servings of these creamy lemon dessert bars. Keep in mind, these are all project estimates, meaning they account for standard measurements and ingredients listed above. If you use different cookies for the base, your numbers will shift a bit!
- Serving Size: 1 bar
- Calories: 220
- Total Fat: 12g
- Carbohydrates: 27g
- Protein: 4g
- Sugar: 22g
- Saturated Fat: 7g
Just a quick note of caution: Because this recipe is heavy on the dairy and the sugar content required to keep it stable without baking, the sugar count is necessary for structure. But hey, it tastes like sunshine, and that’s worth the indulgence when you’re skipping the oven!
Share Your Experience Making These No-Bake Lemon Bars
Making these no-bake lemon bars should have been simple, but I always love hearing how they turned out for you! Did the crust stay perfectly crisp? Did your family notice how creamy the filling set without any baking required? I really want to know!
Head down to the comments section and leave a rating—one star to five stars—so I can gauge the success of this project. If you whipped up this refreshing lemon dessert guide recipe for a party or just a quiet afternoon treat, let me know how it fit into your schedule. I rely on your feedback to keep testing and streamlining these recipes for maximum efficiency!
Also, if you managed to get a perfect photo of that bright yellow filling against the crisp crust, share it on social media and tag me! It’s always so rewarding to see these simple, efficient recipes actually in action in your kitchen. Don’t forget to bookmark this page and try out some other super-fast options if you loved how easy these were. I have a whole collection of other instant lemon dessert recipes waiting for you when you decide to skip the oven again!
If you need to reach out directly with specific questions or detailed feedback—maybe you tried a substitution that worked brilliantly—feel free to connect with me directly through the contact page. Happy chilling, everyone!
PrintUltra-Creamy No-Bake Lemon Bars with Graham Cracker Crust

Make these creamy lemon bars without turning on your oven. This recipe uses a simple graham cracker base and a tangy, rich filling set in the refrigerator.
- Prep Time: 20 min
- Cook Time: 0 min
- Total Time: 6 hr 20 min
- Yield: 16 servings 1x
- Category: Dessert
- Method: No-Bake/Chilling
- Cuisine: American
- Diet: Vegetarian
Ingredients
- 1 1/2 cups graham cracker crumbs
- 1/4 cup granulated sugar (for crust)
- 6 tablespoons unsalted butter, melted
- 1 (14 ounce) can sweetened condensed milk
- 1/2 cup fresh lemon juice (about 3 large lemons)
- 1 teaspoon lemon zest
- 8 ounces cream cheese, softened
- 1/4 cup powdered sugar (for topping)
Instructions
- Prepare the crust: In a medium bowl, combine the graham cracker crumbs and 1/4 cup granulated sugar. Pour in the melted butter and mix until the crumbs are evenly moistened.
- Press the crumb mixture firmly and evenly into the bottom of an 8×8 inch baking pan lined with parchment paper, leaving an overhang on two sides for easy removal. Place the pan in the freezer while you prepare the filling.
- Make the filling: In a large bowl, beat the softened cream cheese with an electric mixer until smooth.
- Gradually beat in the sweetened condensed milk until fully combined and smooth.
- Add the fresh lemon juice and lemon zest. Mix on low speed until just combined. Do not overmix once the lemon juice is added, as this will help the filling set.
- Pour the lemon filling evenly over the chilled crust. Tap the pan gently on the counter to release any air bubbles.
- Cover the pan loosely with plastic wrap and refrigerate for at least 6 hours, or preferably overnight, until the bars are firm.
- Once set, use the parchment paper overhang to lift the bars from the pan. Cut into 16 squares.
- Before serving, dust the tops lightly with powdered sugar.
Notes
- For a gluten free no bake lemon bars base options, substitute the graham crackers with an equal amount of crushed shortbread cookies or almond flour mixed with melted butter.
- If you need to speed up the setting time, you can chill the bars for 2 hours, then place them in the freezer for 1 hour before cutting.
- Store leftovers in an airtight container in the refrigerator for up to 4 days. This is a great make ahead summer lemon bars option.
Nutrition
- Serving Size: 1 bar
- Calories: 220
- Sugar: 22
- Sodium: 110
- Fat: 12
- Saturated Fat: 7
- Unsaturated Fat: 5
- Trans Fat: 0
- Carbohydrates: 27
- Fiber: 1
- Protein: 4
- Cholesterol: 30