

Let’s be honest: the tragedy of a perfect strawberry shortcake isn’t mushy fruit; it’s a biscuit that turns into sweet, soggy cardboard the second the cream hits it. That’s completely unacceptable! My mission, following my own approach to workflow efficiency, is to engineer a dessert component that actually performs. This recipe delivers the strawberry shortcake biscuit you need: intensely flaky, beautifully risen, and sturdy enough to hold mountains of fresh berries and whipped cream without collapsing. We’re applying project management right here! We streamline the technique so you spend less time stressing and more time enjoying that perfect, slightly sweet bite.
- Why This Flaky Strawberry Shortcake Biscuit Recipe Works (EEAT)
- Ingredients Needed for the Perfect Strawberry Shortcake Biscuit
- Step-by-Step Instructions for Your Flaky Strawberry Shortcake Biscuit
- Baking Tips for Achieving Maximum Strawberry Shortcake Biscuit Rise
- Assembling Your Classic Strawberry Shortcake
- Storage and Reheating Instructions for Strawberry Shortcake Biscuit
- Frequently Asked Questions About This Biscuit Recipe
- Nutritional Estimate for This Biscuit Recipe
- Share Your Perfect Strawberry Shortcake Biscuit Results
Why This Flaky Strawberry Shortcake Biscuit Recipe Works (EEAT)
When you’re building a dessert like shortcake, structure isn’t optional—it’s essential! This might look like a simple biscuit recipe, but every step is calculated to ensure maximum lift and flakiness. We engineer reliability here, which is why this recipe is so trustworthy. The proof is in the structural integrity of the final product.
- The resulting strawberry shortcake biscuit is tough enough; those layers won’t surrender to juicy berries or heavy cream.
- You get incredible texture without sacrificing speed. It’s efficiency in action!
- We use tried-and-true methods (like keeping everything freezing cold) that bakers rely on for guaranteed success.
The Secret to a Sturdy Shortcake Biscuit
The real engineering genius here is the folding. We aren’t just mixing ingredients; we are creating architectural layers, which bakers call lamination. That letter-fold technique we use? It builds mini-walls inside the biscuit. When baked, those walls hold their shape, meaning that glorious stack of strawberries and cream actually sits *on* a biscuit, not *in* a soggy mess. This is how you create a proper strawberry shortcake biscuit.
Speed and Simplicity in Baking Basics
The best part? You get this amazing texture in about 30 minutes total. That’s what I love about optimizing home cooking! This isn’t some ancient, complicated process. It falls squarely into the necessary baking basics arsenal for any busy cook. You can absolutely nail that perfect texture without spending half your evening in the kitchen.
Ingredients Needed for the Perfect Strawberry Shortcake Biscuit
Okay, for this project, the quality and temperature of your supplies matter way more than the quantity. We need reliability, and that starts with knowing exactly what’s going into the mix. Using the right components ensures you get those perfect, flaky layers in our **biscuit recipe**. Don’t skimp here; these are the bedrock of a great dessert!
- 2 cups all-purpose flour
- 1 tablespoon granulated sugar
- 1 teaspoon baking powder
- 1/2 teaspoon baking soda
- 1/2 teaspoon salt
- 1/2 cup (1 stick) cold unsalted butter, cut into small cubes
- 3/4 cup cold buttermilk
- 1 large egg, beaten (for egg wash)
- 1 teaspoon milk (for egg wash)
Ingredient Notes and Substitutions for Your Sweet Biscuits
This is where we talk about temperature control, which is non-negotiable for that airy, flaky structure. The butter and the buttermilk need to be ice cold—seriously, keep that buttermilk straight from the back of the fridge, or better yet, pop it in the freezer for about five minutes before you start. Those hard, cold pieces of butter create steam pockets when they hit the hot oven, which forms the flakiness in the strawberry shortcake biscuit. Trust me on this one.
If you’re completely out of buttermilk, don’t panic and toss the whole batch. You can whip up your own! Just take regular milk (whole milk works best if you have it), and stir in one tablespoon of white vinegar or lemon juice. Let that sit on the counter for about five minutes until it looks slightly curdled. That creates the necessary acid reacting with the baking soda for a fantastic rise in your **sweet biscuits**.
Step-by-Step Instructions for Your Flaky Strawberry Shortcake Biscuit
Now for the execution phase. This is where we translate those cold ingredients into layers you can actually see. Since we want these sweet biscuits to be structurally sound for our shortcakes, the mixing has to be gentle but precise. I love diving into the process because watching the dough transform is genuinely satisfying. Remember, we’re aiming for flaky perfection, which means we need to work fast!
- First things first: get that oven hot! Preheat your oven to 425°F right now. Line a baking sheet with parchment paper so cleanup is a breeze. We want everything ready to go when the dough is mixed.
- Whisk everything dry together in a big bowl: flour, sugar, leaveners, and salt. Get that totally mixed up before you touch the fat.
- Next up: incorporating the cold butter cubes. Use a pastry blender or, honestly, just your fingertips if you work quickly. You have to cut that butter in until the mix looks like coarse crumbs, and I mean it—you need some visible, pea-sized chunks of butter floating around in there.
- Pour in all that cold buttermilk at once. Mix it just until the dry parts are moistened. It’s going to look shaggy, messy, and totally wrong. That’s perfect! Don’t you dare overmix it. If you’re trying to build flakes, overmixing is the enemy.
Mastering the Cold Butter Technique for Flaky Layers
Focusing on that butter stage is critical for your final shortcake biscuit texture. Those pea-sized pieces of butter are essentially tiny pockets waiting to turn into steam and push the dough up and apart. If you work the dough too long or use warm butter, those butter chunks melt right into the dough, giving you a dense cracker instead of a flaky biscuit. You want the mixture to stay crumbly at this stage. Keep your hands moving quickly so you don’t melt the butter with your body heat before it even gets near the oven.
The Essential Folding Process for the Best Strawberry Shortcake Biscuit
This folding step is the project management secret weapon! Once the dough is barely together, turn it onto a lightly floured surface and make a rough rectangle about ¾ inch thick. Then, you fold it like a letter—one side over the middle, then the other side over that. Turn it 90 degrees, and pat it back down to ¾ inch. I remember the first time I realized how much lift this added; I almost cried, it was so perfect! That folding builds the layers right into your strawberry shortcake biscuit structure.
When you cut the rounds, use a sharp 2.5-inch cutter and press straight down—no twisting! Twisting seals the edges and stops that beautiful upward rise we’ve worked so hard for. For great breakfast bases, this precision really pays off. Brush those tops with your quick egg wash, pop them in the hot oven, and bake for 12 to 15 minutes until they’re golden brown and magnificent. They are done when they’ve risen high!
Baking Tips for Achieving Maximum Strawberry Shortcake Biscuit Rise
We’ve done all the hard work creating those internal pockets of cold fat, so now we absolutely cannot sabotage the lift in the final stretch! Getting a tall, proud biscuit is all about small details right before it goes into the oven. This is where we enforce the rules for the best possible result for your shortcake layer. Honestly, if you skip the folding but nail these final temperature and pressure points, you’re still going to get a decent rise.
Remember that cutter? Press straight down—firmly, but gently. Twisting the cutter is like crimping the dough’s potential. You’re sealing the sides shut, and the steam that is desperate to push that dough skyward gets trapped at the bottom, resulting in squat, dense sweet biscuits. You want those sides smooth and straight so the dough has nowhere to go but up. It’s crucial for that classic, tall look.
Also, think about placement on your baking sheet. If you want super soft, fluffy sides that pull apart easily, place your cut rounds close together, just barely touching. The heat on the sides will be less intense, and they’ll bake up taller as they push against their neighbor. If you prefer those gorgeous, crackly, crisp edges—perfect for someone who likes a bit more texture—space them about an inch apart. Either way, once they’re in that 425°F oven, you let them sit! Opening the door before they’re set will instantly deflate all that glorious, engineered lift we achieved with the cold ingredients and folding. For more on getting things to rise high, check out my thoughts on guaranteed rise techniques.
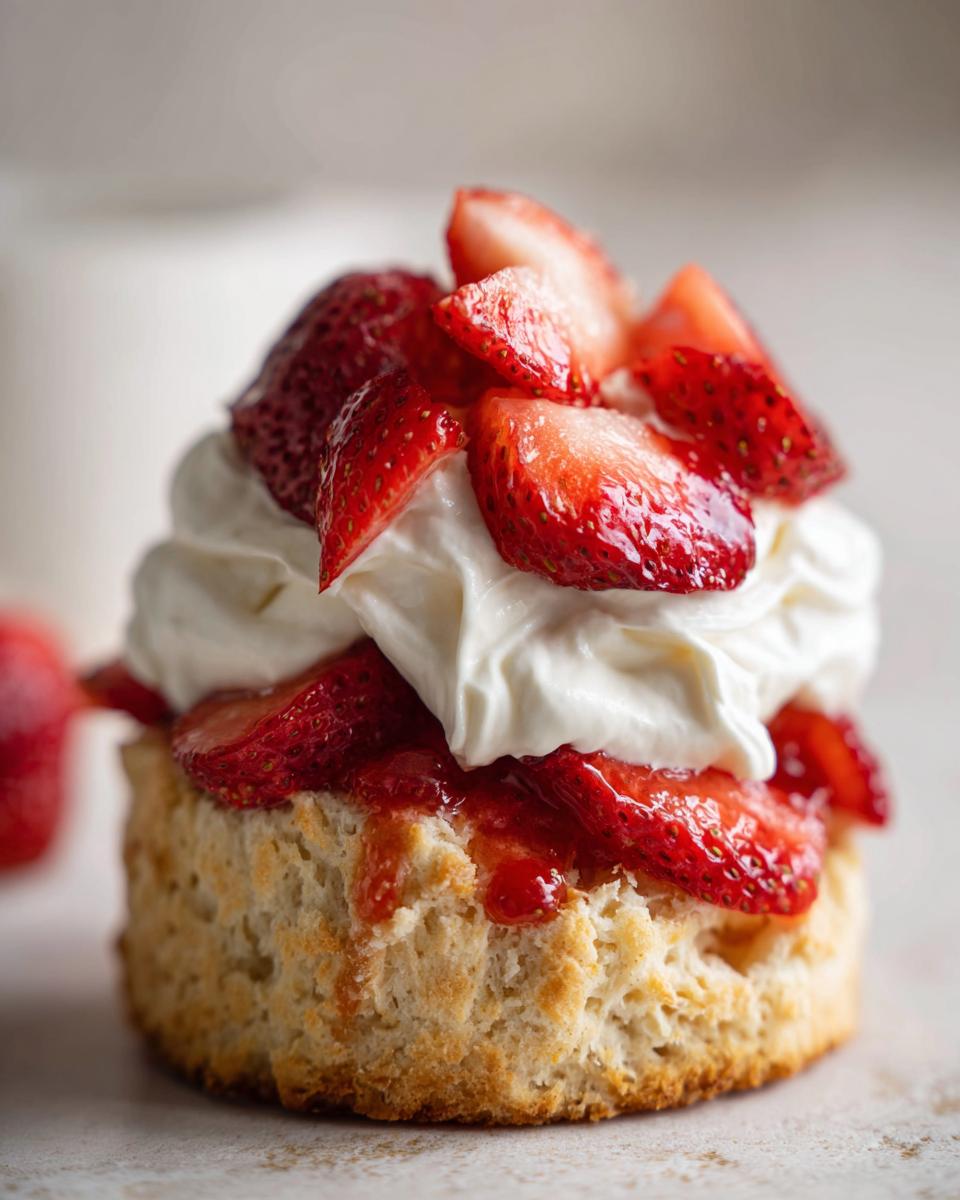
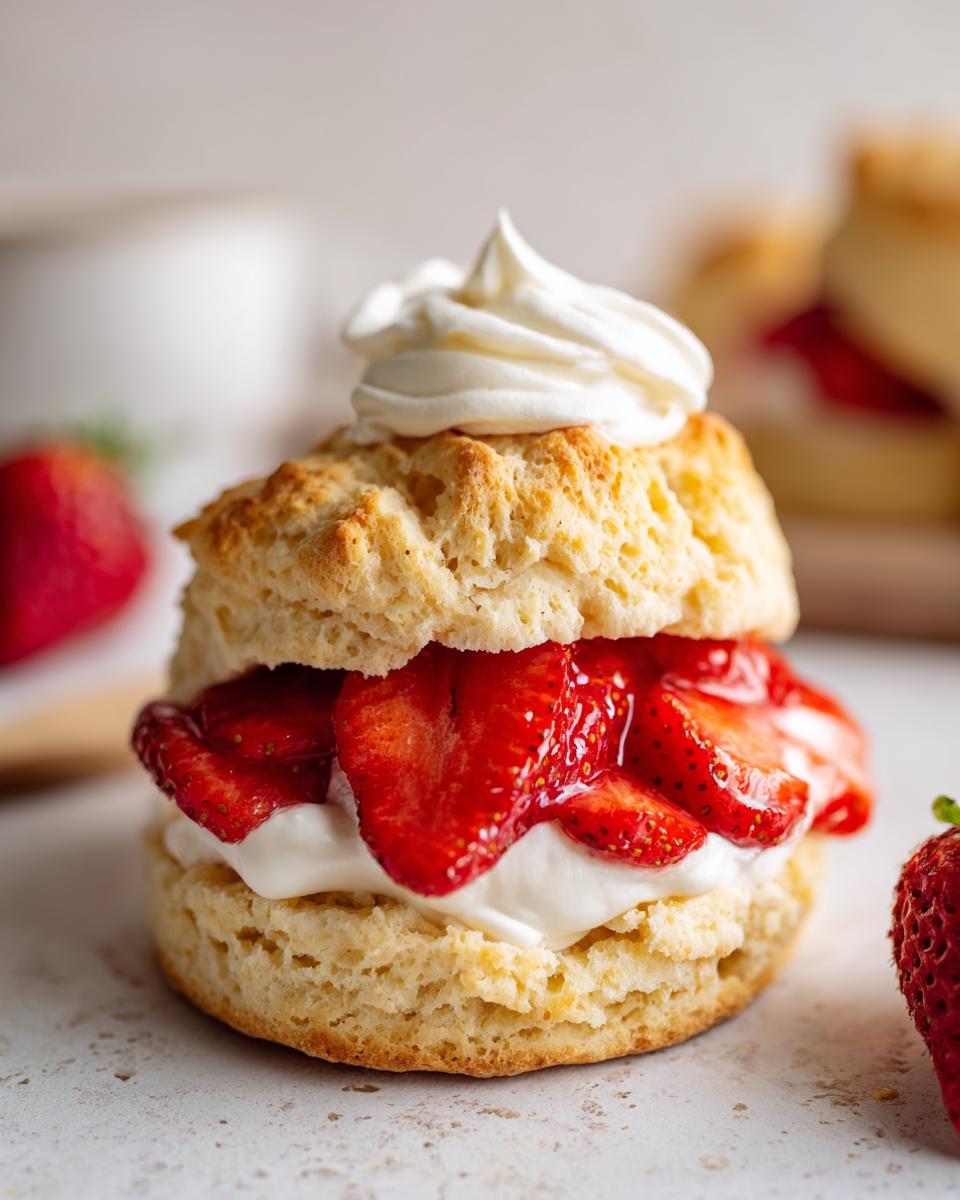
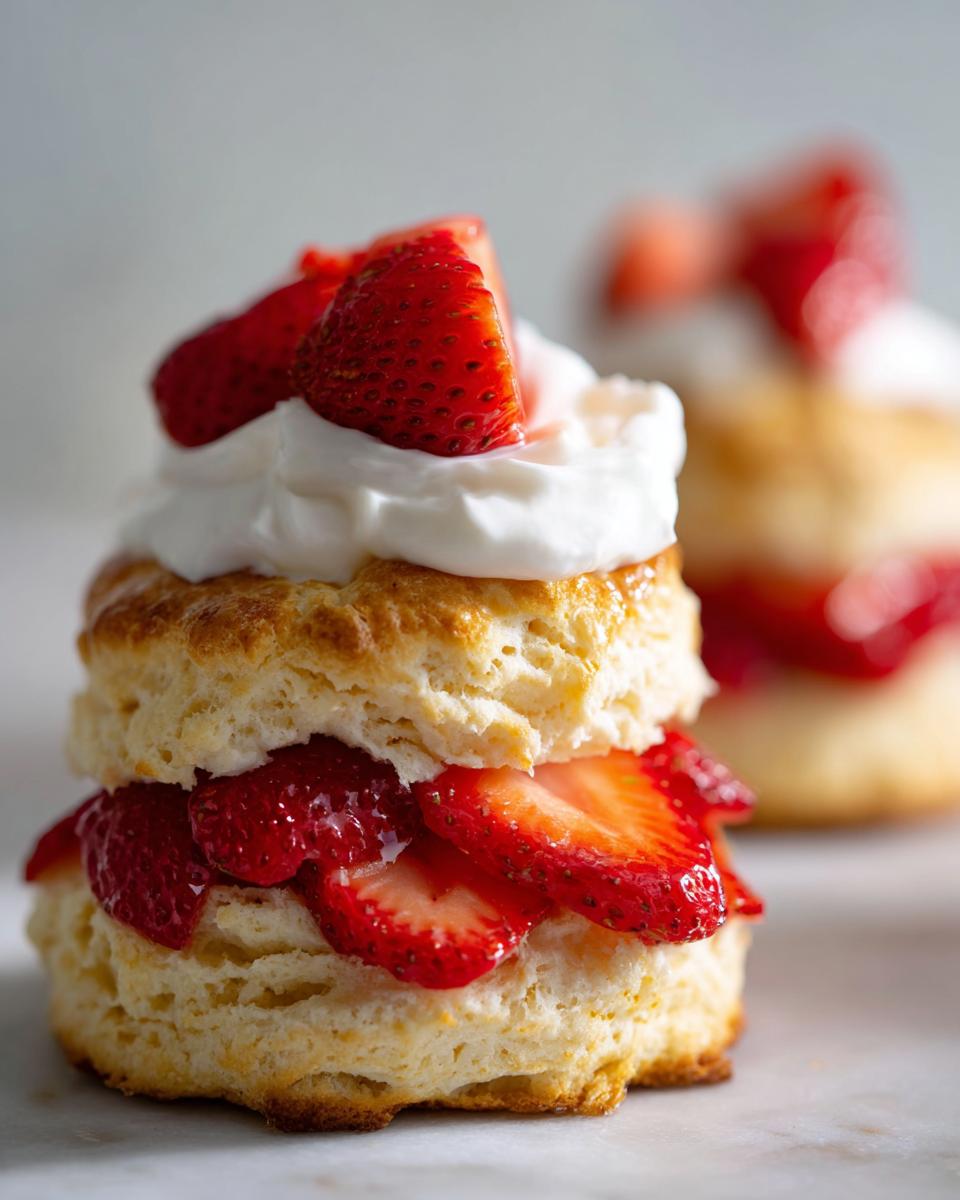
Assembling Your Classic Strawberry Shortcake
You’ve done the heavy lifting creating this perfect, sturdy **shortcake biscuit**; now it’s time for the reward! The structural integrity we engineered means you can finally move on to the fun stuff: berries and cream. But timing matters even here, friends. You don’t want to split these fresh-from-the-oven treasures the second they come out. Give them just five or ten minutes on the wire rack to cool slightly. Slicing them when they are actively steaming hot can make the crumb crumble a bit more than necessary. They should be warm, not scalding hot, when you split them open.
While the biscuits temper, get your fruit ready. I always slice my fresh strawberries fairly thickly and toss them with just a tablespoon or two of sugar—letting them sit for about 20 minutes until they release a little juice. That juice, mixed with the sugar, is pure shortcake gold! That liquid soaks beautifully into the interior of our sturdy base layer. Seriously, that’s why we worked so hard on that flaky structure; it soaks up flavor without dissolving.
When you’re ready, take a serrated knife and carefully split that biscuit horizontally. Look at those defined layers! Pile on your sweetened strawberries, add a generous cloud of fresh whipped cream—I like to use heavy cream whipped with just a touch of vanilla—and go! If you want to see my deep dive on making the best fruit toppings, you should definitely check out my full guide for authentic strawberry shortcake here. Enjoy the structural success!
Storage and Reheating Instructions for Strawberry Shortcake Biscuit
Look, sometimes you can’t eat all eight perfect biscuits in one sitting, and that’s okay! Even though these are designed to be amazing the moment they come out of the oven, we need a plan for leftovers. The goal here is preserving that beautiful flakiness we spent so much time engineering in our biscuit recipe.
If you have leftovers, let them cool completely first. Once cool, store them in an airtight container at room temperature. Do not—I repeat, do not—put them in the fridge! Refrigeration is the enemy of soft, flaky baked goods; it dries them out faster than anything. They’ll stay perfectly good for about two days just sitting on the counter in an airtight jar.
If you want to serve them the next day for a second round of shortcake, you absolutely must reheat them. Microwaving these **sweet biscuits** is a recipe for mush, so we’re skipping that. The best approach to restore that almost-fresh-from-the-oven texture is to use a hot oven. Pop them directly onto a baking sheet and give them about 5 to 7 minutes at 350°F. This brief blast of dry heat will evaporate any residual moisture from sitting around and crisp up the exterior perfectly. You want them warm enough that the butter inside softens just a touch, but not so hot that they steam themselves.
Frequently Asked Questions About This Biscuit Recipe
I get tons of emails asking about tweaking this process, which is great! It means you’re already thinking like a smart home cook. Most of the questions focus on texture, which is exactly what this optimized biscuit recipe is designed to solve. But let’s address the common issues so you can approach this with total confidence.
Can I use regular milk instead of buttermilk for these sweet biscuits?
You can, but you’re giving up a little bit of that ‘oomph’ factor. Buttermilk is acidic, and that acid reacts with the baking soda we added (see, system thinking!). This reaction creates a burst of lift right when the biscuit hits the heat. If you use regular milk, you miss out on that power, and your rise might be slightly less dramatic. If you have to substitute, use the little trick I mentioned earlier: add a teaspoon of vinegar or lemon juice to regular milk and let it sit for five minutes. It mimics the acidity needed for maximum lift in these sweet biscuits.
How do I prevent my strawberry shortcake biscuit from getting soggy quickly?
This is the main reason we engineered this recipe! The flakiness and the tight crumb structure we built in during the folding ensure this **shortcake biscuit** is naturally much sturdier than a standard fluffy drop biscuit. However, the *final* defense against sogginess is serving temperature. Do not slice a piping-hot biscuit to put fruit on it, as the trapped steam weakens the structure. Let it cool just enough so it’s warm—not hot—when you split it open. That small window of time makes a huge difference in maintaining that structural integrity against the juices.
Can I make these strawberry shortcake biscuit dough ahead of time?
Because the magic relies on those ice-cold butter chunks, chilling the dough is actually a great idea if you’re prepping for brunch! You can mix the dough right up until the point where you fold it for the first time. Wrap that shaggy mass tightly in plastic wrap and pop it in the fridge for up to 24 hours. Remember, you must keep it cold. When you’re ready to bake, take it out, gently pat it back into shape, and proceed with the folding and cutting right away. It’s a perfect way to streamline your morning prep!
Nutritional Estimate for This Biscuit Recipe
So, we’ve got the formula for perfect texture and lift. Now, for transparency—because I think we should always know what we’re putting into our bodies, even when we’re enjoying a perfect dessert! This is the estimated profile for one single, delicious **strawberry shortcake biscuit** made using this recipe. We’re aiming for deliciousness that fits seamlessly into real life.
Keep in mind, this is a calculated estimate based on standard pantry ingredients. If you use ultra-premium butter or different types of flour, the numbers will shift slightly. It’s a great roadmap, but remember that the joy of eating this **biscuit recipe** is worth far more than a precise calorie count!
- Serving Size: 1 biscuit
- Calories: 250
- Sugar: 3g
- Fat: 14g (9g Saturated Fat)
- Carbohydrates: 28g
- Protein: 5g
- Sodium: 350mg
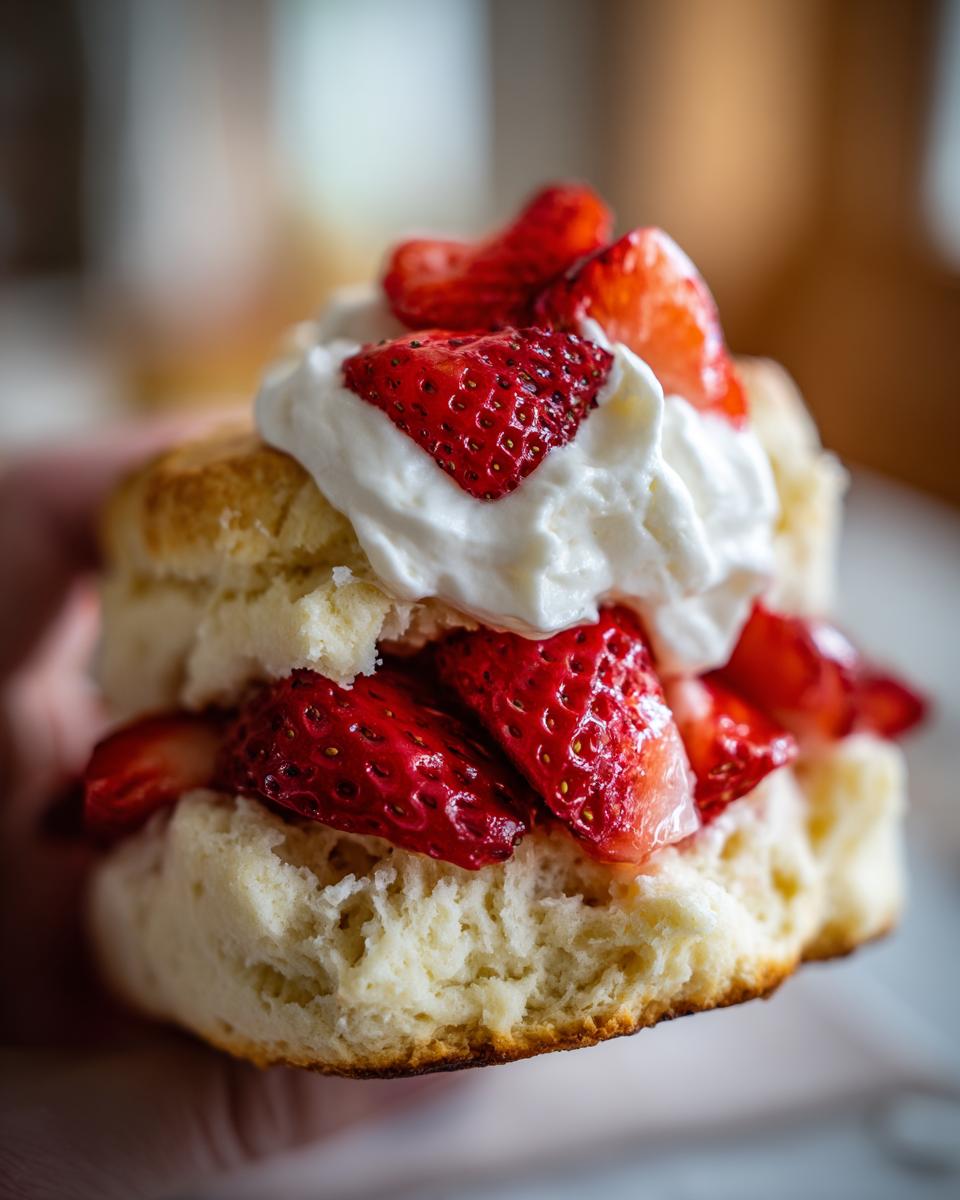
Share Your Perfect Strawberry Shortcake Biscuit Results
We’ve optimized the process, we’ve mastered the cold butter, and you’ve got a stack of perfectly flaky layers ready to hold summer fruit. Now it’s your turn to execute the final stage! I want to hear all about it. Did this engineered approach to the strawberry shortcake biscuit hold up against your heaviest cream topping? Did you notice the difference that the folding technique made compared to a standard biscuit recipe?
Take a picture of your masterpiece and tag me! If you followed the instructions, you should have the sturdiest, most glorious shortcakes imaginable. Honestly, seeing your successful bakes is the best part of running this site. Knowing that my systems approach to simple American recipes works for you is the ultimate confirmation that smarter cooking is better cooking.
If you loved this recipe and are already planning your next baking victory, you can find hundreds of other streamlined, efficient recipes right here in my complete collection of dessert projects. Please drop a rating below and let me know: what’s the absolute best part: the intense flakiness or the sturdy base for your berries?
PrintFlaky Strawberry Shortcake Biscuit Recipe

Make a sturdy, flaky, and slightly sweet biscuit perfect for holding fresh strawberries and whipped cream without becoming soggy. This recipe focuses on texture.
- Prep Time: 15 min
- Cook Time: 15 min
- Total Time: 30 min
- Yield: 8 servings 1x
- Category: Dessert
- Method: Baking
- Cuisine: American
- Diet: Vegetarian
Ingredients
- 2 cups all-purpose flour
- 1 tablespoon granulated sugar
- 1 teaspoon baking powder
- 1/2 teaspoon baking soda
- 1/2 teaspoon salt
- 1/2 cup (1 stick) cold unsalted butter, cut into small cubes
- 3/4 cup cold buttermilk
- 1 large egg, beaten (for egg wash)
- 1 teaspoon milk (for egg wash)
Instructions
- Preheat your oven to 425°F. Line a baking sheet with parchment paper.
- In a large bowl, whisk together the flour, sugar, baking powder, baking soda, and salt. This is your dry mix.
- Cut the cold butter into the dry ingredients using a pastry blender or your fingertips until the mixture resembles coarse crumbs with some pea-sized pieces of butter remaining.
- Pour in the cold buttermilk all at once. Mix gently with a fork until just combined. Do not overmix; the dough will look shaggy.
- Turn the dough out onto a lightly floured surface. Gently pat the dough into a rough rectangle about 3/4 inch thick.
- Fold the dough into thirds, like a letter. Turn the dough 90 degrees and pat it down again to about 3/4 inch thickness. This folding creates layers for flakiness.
- Use a 2.5-inch biscuit cutter to cut out rounds. Press the cutter straight down without twisting to keep the sides straight for maximum rise.
- Place the biscuits close together on the prepared baking sheet for softer sides, or slightly apart for crispier sides.
- Mix the beaten egg and milk for the egg wash. Brush the tops of the biscuits lightly with the wash.
- Bake for 12 to 15 minutes, or until the tops are golden brown and the biscuits have risen well.
- Cool slightly on a wire rack before splitting and serving with strawberries and cream.
Notes
- Keep your butter and buttermilk as cold as possible; this is key for flaky biscuits.
- Do not twist the biscuit cutter; press straight down to prevent sealing the edges, which stops the rise.
- For the best structure to hold fruit, serve these sweet biscuits warm, not hot.
Nutrition
- Serving Size: 1 biscuit
- Calories: 250
- Sugar: 3
- Sodium: 350
- Fat: 14
- Saturated Fat: 9
- Unsaturated Fat: 5
- Trans Fat: 0
- Carbohydrates: 28
- Fiber: 1
- Protein: 5
- Cholesterol: 55