
When hunger strikes but your schedule is packed solid, you need strategies, not stress. That’s where Dishicious comes in. I’m Leo Grant, and when I started this site, it was because I was done choosing between a quick, mediocre meal and spending two hours cooking after a long day. We treat recipes like projects—we streamline, we simplify, and we focus only on what delivers maximum flavor. This tuna kimbap recipe is the perfect example of that approach: it’s fast, requires zero cooking time once you have rice ready, and brings exciting Korean flavor into your rotation instantly. If you’re looking for better healthy lunch ideas that actually fit your life, you’ve found your new go-to.
- Why This Spicy Tuna Kimbap Recipe Works for Your Busy Schedule
- Ingredients for Flavorful Tuna Kimbap (Chamchi Kimbap)
- Step-by-Step Instructions to Make Perfect Tuna Kimbap
- Tips for Perfect Tuna Kimbap Rolling
- Making Tuna Kimbap Variations
- Storage and Make Ahead Lunch Options for Tuna Kimbap
- Serving Suggestions for Your Homemade Korean Food
- Frequently Asked Questions About Tuna Kimbap
- Estimated Nutrition for Spicy Tuna Kimbap
Why This Spicy Tuna Kimbap Recipe Works for Your Busy Schedule
Look, I optimized this recipe specifically so you aren’t stressed out. This spicy tuna kimbap isn’t about complicated prep; it’s about efficiency. It’s the ultimate strategy for those moments when you need satisfying quick and easy dinners but want the results of something truly special.
- It’s an incredibly easy kimbap recipe—seriously, no cooking required except for the initial rice.
- Total assembly time is under 15 minutes.
- It makes excellent quick lunch ideas that look fantastic even when you pack them for a picnic.
Ingredients for Flavorful Tuna Kimbap (Chamchi Kimbap)
For this particular recipe, we are streamlining everything, which means we skip loads of vegetable prep! That’s what makes it the ultimate canned tuna recipes korean style solution. When shopping, focus on good quality tuna packed in oil for the best savory base. Remember, since rice is the bulk of this roll, seasoning it correctly is half the battle won!
For the Seasoned Rice
- 2 cups cooked short grain rice (This texture is key!)
- 1 teaspoon sesame oil
- 1 teaspoon sesame seeds
- 1 teaspoon salt
For the Spicy Tuna Filling
This is where the kick comes from. Don’t skip the mayo—Kewpie, if you can find it, adds that perfect slight tang we are after in the best tuna kimbap.
- 1 can (5.3 oz) canned tuna in oil, drained well
- 2 tablespoons Japanese mayonnaise (or regular)
- 1 tablespoon Sriracha sauce (Feel free to adjust this down if you’re sensitive!)
- 2 tablespoons green onion, very finely chopped
For Assembly and Finishing
- 4 sheets roasted seaweed (nori or gim)
- 4 perilla leaves, washed and dried (This adds a wonderful earthy note, but leave them out if you don’t like the flavor!)
- 1 teaspoon sesame oil (for brushing the outside)
- 1 teaspoon sesame seeds (for sprinkling)
Step-by-Step Instructions to Make Perfect Tuna Kimbap
This is the fun part, and honestly, it flies by! Because we aren’t cooking a ton of fillings, you can get these incredible Korean seaweed rice rolls on the table in about 15 minutes total once your rice is ready. My biggest strategy here is to have everything prepped and measured—it’s all about workflow management.
Preparing the Rice Base
Seriously, don’t rush Step 1. In a large bowl, take your cooked short-grain rice and gently fold in the sesame oil, sesame seeds, and salt. I mean gently. If you mash it around like mashed potatoes, you’ll break all those starch granules and end up with mush instead of sticky, perfectly seasoned rice. We need that rice to hold its shape!
Creating the Spicy Tuna Filling
While the rice cools just slightly, tackle the filling. This is where we build the flavor profile for our tuna kimbap. In a separate bowl, just combine the drained tuna, mayonnaise, Sriracha, and those finely chopped green onions. Mix it until it’s just combined and holds together nicely. Taste it! If you want more heat, this is the time to drop in a few more shakes of Sriracha.
How to Roll Kimbap Like a Pro
Now we put it all together. Lay your nori sheet down on your bamboo mat, shiny side facing the mat. Layer the rice thinly across the sheet, but here is the critical part of how to roll kimbap successfully: make sure you leave about a 1-inch strip of bare nori at the top edge. Place your line of spicy tuna filling right in the center. Lift that bottom edge of the mat and fold it up and over the filling so the edge of the rice meets the rice on the other side. Give it a firm, gentle press. Roll forward until you get to that bare strip, then use a dab of water on your finger to wet that strip and quickly finish sealing the roll tight!
Tips for Perfect Tuna Kimbap Rolling
Rolling can definitely intimidate folks new to homemade Korean food, but honestly, it’s just a matter of firm pressure. My biggest tip for beginners is to remember that mat usage isn’t optional; it’s your primary tool for shaping. When you start the roll, press down firmly, right over the filling, to compact the ingredients so they don’t shift.
If you have any leftover rice that seems too dry to stick, you can try mixing in half a teaspoon of water or just lightly dampen your fingers when spreading it. Once you have your perfect cylinder, don’t skip the final step of brushing the exterior with sesame oil and seeds; that adds flavor and prevents the roll from getting sticky when you slice it.
And speaking of slicing—use your sharpest knife, and keep a little bowl of water nearby. Run the knife blade under the water right before each cut. This simple trick stops the nori from tearing and ensures you get beautiful, clean rounds, which is crucial for presentation!
Making Tuna Kimbap Variations
The beauty of this chamchi kimbap base is how easily you can start customizing it once you master the roll. If you’re batch prepping for the week and want variety, playing with fillings is fun! For instance, you can easily upgrade this recipe into fantastic kimbap variations.
Try adding thin strips of crunchy cucumber or even some shredded carrot directly alongside the spicy tuna mix. If you need to dial back the heat for kids or a milder palate, simply skip the Sriracha and use plain mayo. That gives you the classic, savory tuna roll every time. Remember, once you know how to roll, the filling is completely flexible!
Storage and Make Ahead Lunch Options for Tuna Kimbap
Since this recipe is so perfect for meal prep rolls, let’s talk storage. The main thing to watch out for is the rice texture; refrigeration isn’t our friend here because it dries out the short-grain rice quickly! If you make these for picnic food rolls, they are best enjoyed within a few hours.
If you absolutely must make them the night before, wrap each roll tightly in plastic wrap before slicing. Store them at cool room temperature if you plan to eat them the very next morning. Otherwise, if they must go into the fridge, pull them out about 30 minutes before you plan to eat them to let that rice soften up again. Trust me, fresh is always better with kimbap!
Serving Suggestions for Your Homemade Korean Food
So, you’ve mastered the roll—fantastic! Now, how do we turn this beautiful stack of tuna kimbap into a full meal? When serving your homemade Korean food, simplicity is often the best strategy. These rolls have bold flavor already, so they don’t need much help.
The absolute must-have side is tangy kimchi; it cuts right through the richness of the mayo filling. A side of store-bought pickled radish (danmuji) is also excellent for adding that crucial sour crunch. If you want a quick dipping sauce, just mix a little extra mayo with a drop of soy sauce. Honestly, though, these are perfect as-is for a quick lunch!

Frequently Asked Questions About Tuna Kimbap
If you’ve got your ingredients prepped and you’re staring down that bamboo mat for the first time, you probably have a few lingering questions. That’s totally normal! Getting the texture and rolling down for the first time can feel tricky, but don’t worry, these answers are all about making your quick lunch ideas super successful.
Can I use regular mayonnaise instead of Kewpie for the tuna kimbap filling?
You absolutely can! Kewpie mayo is great because it has a little more tang and sweetness built in, which pairs beautifully with the spice. If you only have regular American mayo on hand, go for it! Just realize the filling might taste slightly less complex, so maybe add a tiny extra squeeze of lemon juice or vinegar to your mix if you have it handy. It still makes fantastic chamchi kimbap!
What is the best rice to use for authentic kimbap?
Don’t even think about using basmati or long-grain rice here—it just won’t work for rolling! You need short-grain rice. The higher starch content is what makes the rice sticky enough to hold everything together when you roll it tight. Cook it, season it with salt and sesame oil while it’s hot, and let it cool slightly before spreading it thin on the nori. That stickiness is the backbone of any great Korean seaweed rice roll.
How do I keep my kimbap rolls from falling apart when slicing?
This is the simplest trick that makes the biggest difference. You need a very sharp knife, but that’s only half the battle. Before every single slice, dip the tip of your knife into a small cup of water. The film of water acts like a lubricant, stopping the sticky rice and the nori sheet from grabbing the blade and tearing the roll apart. Slice straight down quickly after wiping the blade clean—no sawing, just one smooth motion!
Estimated Nutrition for Spicy Tuna Kimbap
When you’re optimizing your meals for efficiency, you also want to know what you’re putting in your body, right? Since we’re using pantry staples like canned tuna and rice in this recipe, it’s naturally quite balanced for a quick bite. Keep in mind, these numbers are always going to be estimates because factors like how much oil you actually drain from the tuna or the specific brand of mayo you use can change things slightly. But this gives you a great baseline for your meal prep rolls!
This estimate is based on 1 serving, which is equal to one roll sliced into quarters (yields 4 servings total across the whole batch).
- Calories: Approximately 350 per serving
- Fat: Around 15g (Mostly the healthy fats from the tuna oil and sesame oil)
- Carbohydrates: Roughly 40g (This comes mostly from the rice base)
- Protein: About 15g (Great for keeping you full until your next meal!)
It’s easy to see why this is such a satisfying choice for a light dinner or a robust packed lunch. It’s flavorful without being overly heavy!
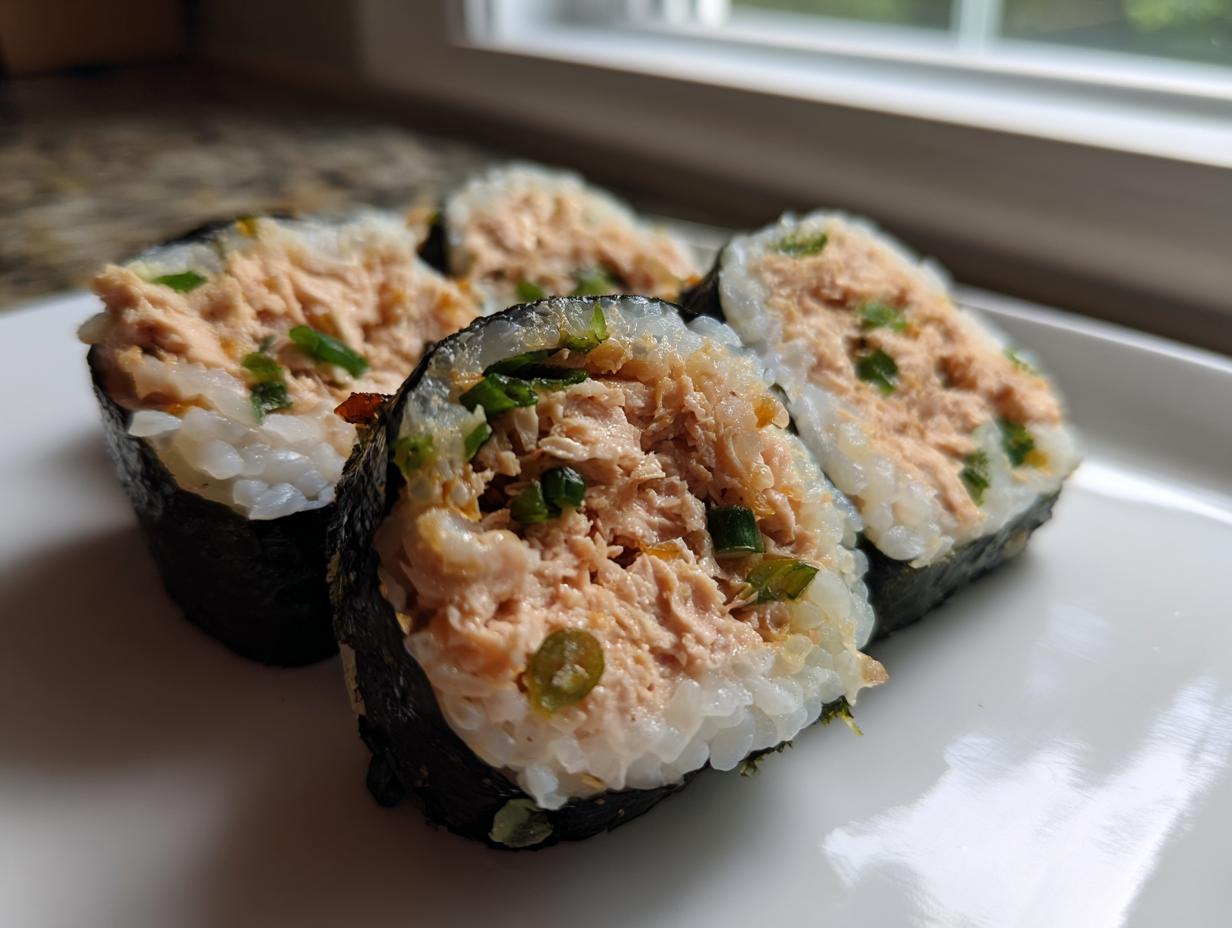
PrintEasy Spicy Tuna Kimbap (Chamchi Gimbap)

Make satisfying homemade Tuna Kimbap, also known as Chamchi Gimbap, using a quick spicy tuna filling. This recipe is perfect for quick lunches, picnics, or bento boxes.
- Prep Time: 15 min
- Cook Time: 0 min
- Total Time: 15 min
- Yield: 4 servings 1x
- Category: Lunch
- Method: Rolling
- Cuisine: Korean
- Diet: Vegetarian
Ingredients
- 2 cups cooked short grain rice
- 1 teaspoon sesame oil (for rice)
- 1 teaspoon sesame seeds (for rice)
- 1 teaspoon salt (for rice)
- 1 can (5.3 oz) canned tuna in oil, drained
- 2 tablespoons Japanese mayonnaise (Kewpie or regular)
- 1 tablespoon Sriracha sauce (adjust for spice level)
- 2 tablespoons green onion, very finely chopped
- 4 sheets roasted seaweed (nori or gim)
- 4 perilla leaves, washed and dried (optional)
- 1 teaspoon sesame oil (for coating rolls)
- 1 teaspoon sesame seeds (for sprinkling)
Instructions
- Prepare the seasoned rice: In a bowl, combine the cooked short grain rice, 1 teaspoon sesame oil, 1 teaspoon sesame seeds, and 1 teaspoon salt. Mix gently until combined.
- Make the spicy tuna filling: In a separate bowl, combine the drained canned tuna, mayonnaise, Sriracha sauce, and finely chopped green onion. Mix well until you have a cohesive spicy tuna mixture.
- Prepare the rolling station: Lay one sheet of nori, shiny side down, on a bamboo rolling mat. If using, place one perilla leaf on top of the nori.
- Layer the rice: Spread about one-quarter of the seasoned rice evenly over the nori, leaving about a 1-inch border clear at the top edge.
- Add the filling: Place a line of the spicy tuna mixture horizontally across the center of the rice.
- Roll the kimbap: Lift the edge of the mat closest to you, folding the nori over the filling. Press down gently to secure the roll. Continue rolling tightly, using the mat to shape the roll into a cylinder. Moisten the top edge of the nori with a little water to seal the roll completely.
- Finish the roll: Brush the outside of the finished roll lightly with the remaining 1 teaspoon of sesame oil and sprinkle with sesame seeds.
- Slice and serve: Using a sharp, slightly damp knife, slice the roll into bite-sized pieces. Serve immediately or pack for a quick lunch.
Notes
- For an easier roll, use slightly less rice.
- If you prefer a less spicy tuna filling, reduce the Sriracha or omit it entirely for classic Chamchi Kimbap.
- You can add other simple fillings like shredded carrot or cucumber strips for texture.
Nutrition
- Serving Size: 1 roll (approx. 1/4 of recipe)
- Calories: 350
- Sugar: 3
- Sodium: 450
- Fat: 15
- Saturated Fat: 3
- Unsaturated Fat: 12
- Trans Fat: 0
- Carbohydrates: 40
- Fiber: 2
- Protein: 15
- Cholesterol: 30