
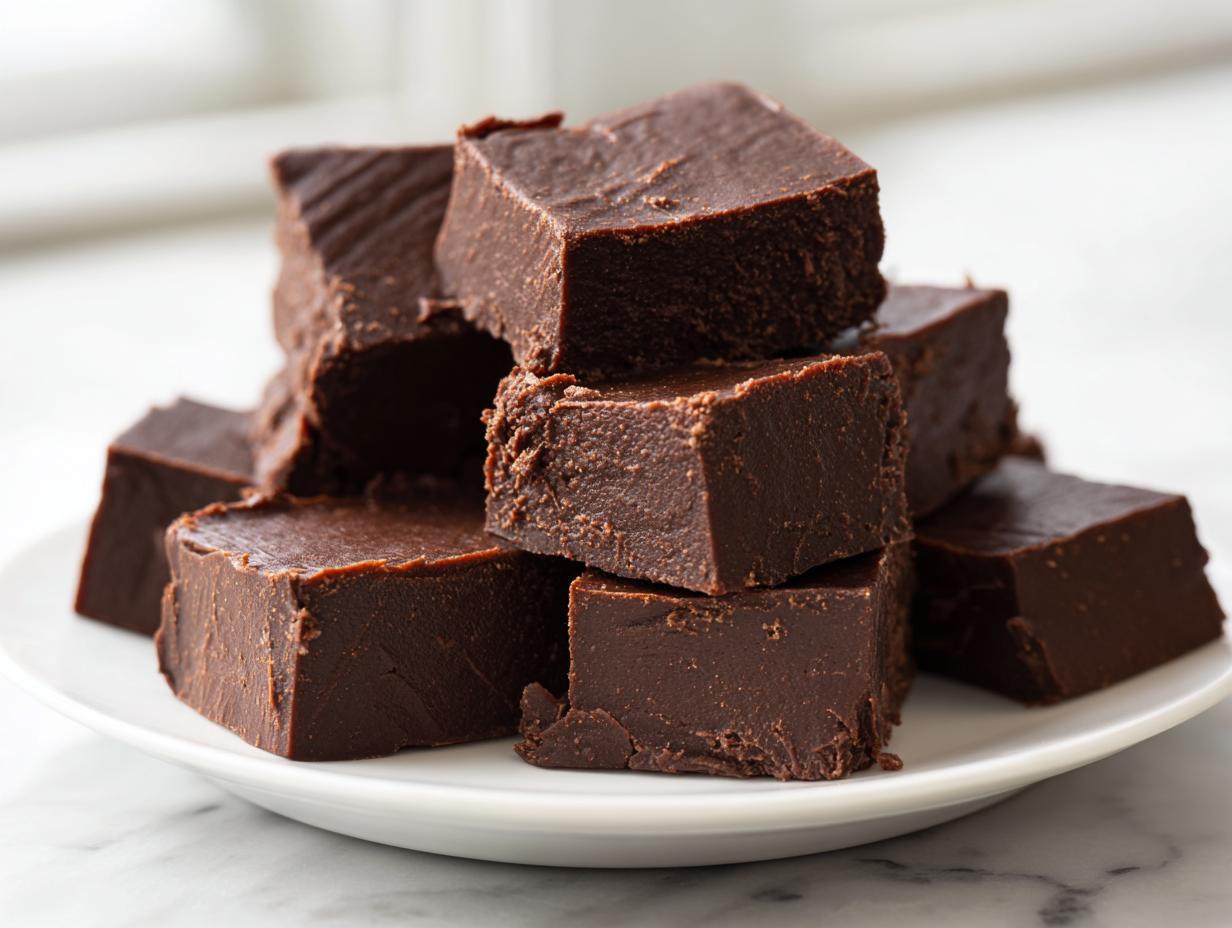
If you ask me what tastes like genuine, cozy comfort, it’s not some fancy plated dessert—it’s a slab of perfectly rich, creamy fudge. Life, especially when you’re juggling projects like I do here at Dishicious, is too short for fussy candy-making, right? That’s exactly why I engineered this recipe for Old fashioned chocolate fudge. Forget those complicated, grainy batches that end up stiff as a brick. This is the project manager’s dream: dead simple, uses ingredients you probably have right now, and yields the smoothest, most decadent *homemade candy* imaginable.
When I first started streamlining sweets, fudge was a major challenge until I realized the goal wasn’t precision crystallization; it was pure, velvety richness. This foolproof fudge recipe delivers that promise without any stress. It’s ready to cut and share faster than you can decide what movie to put on tonight.
- Why This Old Fashioned Chocolate Fudge Recipe Works Every Time
- Gathering Ingredients for the Best Old Fashioned Chocolate Fudge
- Step-by-Step Instructions for Perfect Old Fashioned Chocolate Fudge
- Tips for Success When Making Old Fashioned Chocolate Fudge
- Creative Ways to Gift This Sweet Treat
- Storage and Reheating Instructions for Old Fashioned Chocolate Fudge
- Common Questions About This Fudge Recipe
- Estimated Nutrition for Old Fashioned Chocolate Fudge
- Share Your Old Fashioned Chocolate Fudge Success
Why This Old Fashioned Chocolate Fudge Recipe Works Every Time
When I approach the kitchen, I treat it like a project—efficiency is everything. This Old fashioned chocolate fudge is the result of streamlining the candy-making process down to the essentials. It’s designed to hit the goal (creamy, delicious fudge) without any wasted steps. Trust me, this method takes the guesswork out of making sweet treats.
- It’s genuinely foolproof; the sweetened condensed milk handles all the texture work for you.
- Active time is minimal—seriously, you’re only stirring for about ten minutes!
- It uses common pantry staples, so you don’t need a special grocery run.
Foolproof Ingredients for Creamy Chocolate Fudge
We aren’t messing around with candy thermometers or messing up sugar crystals here. This simple fudge recipe relies on the perfect ratio of chocolate chips to condensed milk. That combination guarantees that absolutely creamy texture we want, eliminating any chance of graininess. It’s pure, straightforward deliciousness.
Quick Prep Time for Your Old Fashioned Chocolate Fudge
This is where the Dishicious philosophy shines. In less than 20 minutes of actual effort, you’ve mixed everything. You just melt, stir, pour, and let physics do the rest while it cools. It proves that amazing homemade candy doesn’t need to eat up your entire evening.
If you’re looking for more easy desserts to fit into your busy schedule, check out my full collection of reliable dessert recipes.
Gathering Ingredients for the Best Old Fashioned Chocolate Fudge
When you’re making something this classic, you need to trust your components. The beauty of this Old fashioned chocolate fudge is that you don’t need 15 different things; you just need the *right* things, measured correctly. I’ve got the whole list down to five core items. Trust me, sticking to these exact measurements stops any issues before they even start.
Ingredient Specifics and Clarity
Here’s what you need to pull together for this incredibly easy fudge recipe. It’s all about getting those quantities spot-on:
- One (14 ounce) can of sweetened condensed milk—this is the backbone of the creaminess!
- One (12 ounce) package of semi-sweet chocolate chips. You can use milk chocolate if you prefer things sweeter, but semi-sweet gives it that perfect robust flavor.
- One tablespoon of unsalted butter. It can be cold when you put it in; it’ll melt right along with the chips.
- One teaspoon of pure vanilla extract. Make sure it’s real vanilla; substitutes just don’t hit the same way here.
- One-quarter teaspoon of salt. This small addition is critical; it really sharpens up the chocolate flavor.
Step-by-Step Instructions for Perfect Old Fashioned Chocolate Fudge
Okay, this is where we turn ingredients into pure gold, and I promise, it’s easier than assembling IKEA furniture. My goal here is foolproof execution on this Old fashioned chocolate fudge, ensuring zero graininess. I failed spectacularly with fudge once early on—I got distracted and accidentally boiled the mixture, resulting in hard, sugary rocks. Never again! That’s why we manage the heat carefully in this project.
Preparing the Pan for Easy Removal
First things first: prep your 8×8 inch baking pan. Line it completely with aluminum foil, but here’s the pro-tip: leave a good overhang hanging over the sides. You’ll want those flaps later! Then, lightly grease that foil—just a tiny dab of butter or cooking spray on the foil surface. This overhang is your built-in handle; it makes lifting the entire block of fudge out in one piece absolutely seamless later on. Believe me, trying to dig fudge out of the pan edges is a nightmare.
Melting and Mixing Your Homemade Candy Base
Grab a medium, heavy-bottomed saucepan—we need even heat distribution. Combine the sweetened condensed milk, chocolate chips, butter, and salt inside. Place it over medium-low heat. You must stir constantly, don’t walk away! Keep stirring until everything is completely melted and smooth. The most critical rule for creamy homemade candy stability: Do not let it boil! If it bubbles aggressively, pull the pan off the heat immediately. Boiling is what causes crystallization and ruins the texture.
Setting and Cutting the Old Fashioned Chocolate Fudge
Once it’s silky smooth, take the pan off the burner completely and stir in your vanilla extract quickly. Pour that gorgeous mixture into your foil-lined pan and spread it out evenly; don’t worry about perfection on top, it will settle itself. Now, wait. You need to let the fudge cool completely at room temperature for at least two hours, honestly, sometimes three, until it’s firm to the touch. If you want an extra sharp, beautiful cut, you can pop it in the fridge for 30 minutes before lifting it out by the foil edges and cutting it into 1-inch squares. Enjoy that perfect Old fashioned chocolate fudge!
Need a quick alternative when you’re swamped? Try my easy no-bake peanut butter bars for another fast win.
Tips for Success When Making Old Fashioned Chocolate Fudge
Even with a streamlined process, sometimes little things can throw off your results, especially when dealing with chocolate. I remember one batch where I got distracted by an urgent work email right at the melting stage. I returned to find the edges scorching slightly. That batch was salvageable, but it had a noticeable slight chewiness instead of that totally melt-in-your-mouth texture. The key takeaway? Stay present for those ten minutes on the stove.
This Old fashioned chocolate fudge is incredibly simple, but keeping the temperature low is the secret weapon. If you see steam rising heavily off the mixture, you’re pushing it too hard. Medium-low heat ensures the chocolate incorporates fully without overheating the condensed milk. Overheating equals sugar seizing up, and nobody wants that.

Another game-changer for presentation, especially if you plan on gifting this, is the final set time. If you try cutting it while it’s still slightly warm, you’ll drag streaks across the top. You absolutely must let it set up completely at room temperature first. If you’re impatient—and I get it, I really do—the quick 30-minute chill I mentioned in the notes is the perfect compromise before you slice your perfect squares. You can find my method for another favorite treat, rocky road fudge, if you want a textural adventure next time!
Creative Ways to Gift This Sweet Treat
When I make a batch of this fantastic fudge, I rarely keep it all for myself. It’s too perfect not to share! Because the prep time is so fast, you can whip this up for almost any last-minute event. Honestly, this is wonderful for small, thoughtful gestures. If you’re looking for easy ideas that look impressive, thinking about presentation is key.
One of the best uses I’ve found for this recipe is creating simple, elegant graduation gifts. Everyone loves getting something homemade, but they don’t want something that looks hastily assembled. These squares, cut neatly, pack a huge punch!
Packaging Ideas for Homemade Candy
To make these sweet treats look professional, skip the plastic wrap and go for something cute. I always keep rolls of clear cellophane bags in my cupboard. You can tie the top with a simple piece of twine or a nice ribbon. If you want to upgrade instantly, grab some small, inexpensive decorative boxes—the kind you find near the craft aisle.
Layer a little parchment paper in the bottom of the box first, then arrange the fudge squares closely together. It looks instantly curated! For the graduates in your life, tying a little tag with their school colors on the ribbon makes it personal. It’s amazing how a little packaging effort elevates basic homemade candy into something that feels really special and thoughtful.
If you need another recipe for a gift basket, try my easy easy chocolate chip cookies recipe; they hold up well for gifting, too.
Storage and Reheating Instructions for Old Fashioned Chocolate Fudge
Alright, so you’ve made the perfect batch of Old fashioned chocolate fudge, and now you need to keep it tasting like it just came out of the pan. The good news is that this recipe is very stable! Since we managed the heat so carefully, we don’t have crystallization issues, which means storage is super simple.
For short-term keeping—say, if you plan on snacking on these squares over the next few days—just leave them airtight at cool room temperature. A dedicated cookie tin works great. I keep mine in a cool, dark pantry, and they stay perfectly soft and delicious for about a week. Because this chocolate fudge is packed with fat and sugar, it holds up beautifully without refrigeration.
Now, what if you need it to last longer? You can definitely freeze these! Cut them into squares first, wrap each square tightly in plastic wrap—this prevents that freezer burn film—and place them together in a sturdy freezer bag. They should last a solid two to three months this way. When you want to eat one, just let it thaw on the counter for about 15 minutes before enjoying that rich, Old fashioned chocolate fudge texture.
Do you ever need to reheat fudge? Honestly, no, because this version is already perfectly creamy at room temperature! Reheating it risks melting it into a messy puddle. However, if you’re curious about other chocolate fixes, check out my guide to the ultimate moist chocolate fudge cake if you want a baked good instead!
Common Questions About This Fudge Recipe
When I roll out a new project, I always anticipate where things might go wrong, and the same is true here. People always have questions when moving from standard baking to homemade candy making, but remember, we kept this recipe lean and mean! Here are the things I get asked most often about achieving that perfect creamy texture.
Can I substitute the chocolate chips in this chocolate fudge?
Yes, you absolutely can! I designed this recipe for reliability using standard semi-sweet chips, but feel free to swap them out. If you use dark chocolate (say, 60% cacao or higher), you should probably add an extra tablespoon of butter or a tiny bit more sweetener because darker chocolate has less sugar overall. Milk chocolate chips work too, but they result in a much sweeter, softer batch of sweet treats, so keep an eye on setting time.
Why did my homemade candy turn out grainy?
This is the one heartbreak we need to avoid! Graininess almost always comes down to one thing: heat. If you let the mixture boil or even simmer aggressively, those sugar crystals in the milk start forming, and you end up with fudge that crumbles instead of melting in your mouth. Remember that crucial step in the fudge recipe? Keep the heat at medium-low and stir constantly until it’s just smooth. Don’t rush the melting process—if you push the temperature, you ruin the smooth texture we worked hard to achieve.
How long does this fudge last?
Because this is a simple, condensed milk-based fudge, it stays fresh surprisingly well. If you keep it airtight at a cool room temperature, you can count on it being top-notch for about seven to ten days. It really shines in the first three days! If you need it to last longer, pop it in the freezer, as I explained before. These are excellent for making ahead of time for parties or events, which really helps streamline the whole process, especially if you’re also planning on quick, easy dinners that week!
Estimated Nutrition for Old Fashioned Chocolate Fudge
Now, I know some of you are focused on the macros, even when enjoying real comfort food like this Old fashioned chocolate fudge. I always say, enjoy the treat, but it’s good to know where you stand. Remember, this nutrition information is a calculated estimate based on the exact ingredients I listed. Since we are dealing with rich chocolate and condensed milk here, the numbers are what you’d expect for decadent *homemade candy*!
I ran the numbers for a standard 1-inch serving size. If you cut your squares larger or smaller than my suggested 64 pieces, these values will change, so keep that in mind!
- Serving Size: 1 square
- Calories: 105
- Fat: 5g (Saturated Fat: 3g)
- Carbohydrates: 15g
- Sugar: 14g
- Protein: 2g
It’s a little powerhouse of flavor! This is a dense treat, which is why just one piece of this chocolate fudge is usually enough to satisfy that sweet craving, leaving you ready to get back to the rest of your planning for the day. It’s a perfectly manageable indulgence.
Share Your Old Fashioned Chocolate Fudge Success
Okay, that’s everything you need to nail this recipe. I’ve given you the project plan, the streamlined process, and all the tips to ensure you get that perfectly creamy texture every single time you make this Old fashioned chocolate fudge. Now it’s your turn to execute the final step!
I truly want to know how this worked for you. Seriously, jump down to the comments section below and let me know! Did you add a little flaky sea salt on top before it set? Did you use it as one of your amazing graduation gifts? Give this recipe a rating so other busy cooks know they can trust this dependable method for chocolate fudge.
If you made a whole batch and you’re feeling proud, I’d love to see it! Snap a photo and tag us online. If you have questions that I didn’t cover, or if you tried a specific variation, please reach out through my contact page. Smarter cooking means sharing what works, and I can’t wait to hear about your fudge mastery!
PrintOld Fashioned Chocolate Fudge
Make creamy, rich homemade candy with this straightforward chocolate fudge recipe. It is a reliable sweet treat perfect for gifting.
- Prep Time: 10 min
- Cook Time: 10 min
- Total Time: 2 hours 20 min
- Yield: About 64 small squares 1x
- Category: Dessert
- Method: Stovetop
- Cuisine: American
- Diet: Vegetarian
Ingredients
- 1 (14 ounce) can sweetened condensed milk
- 1 (12 ounce) package semi-sweet chocolate chips
- 1 tablespoon unsalted butter
- 1 teaspoon vanilla extract
- 1/4 teaspoon salt
Instructions
- Line an 8×8 inch baking pan with aluminum foil, leaving an overhang on the sides for easy removal. Lightly grease the foil.
- Combine the sweetened condensed milk, chocolate chips, butter, and salt in a medium, heavy-bottomed saucepan.
- Heat the mixture over medium-low heat, stirring constantly until the chocolate and butter are completely melted and the mixture is smooth. Do not let it boil.
- Remove the saucepan from the heat. Stir in the vanilla extract.
- Pour the fudge mixture into the prepared baking pan. Spread evenly.
- Let the fudge cool completely at room temperature for at least 2 hours, or until firm.
- Use the foil overhang to lift the fudge from the pan. Place on a cutting board.
- Cut the fudge into 1-inch squares for serving or gifting.
Notes
- For a smoother finish, you can chill the fudge for 30 minutes before cutting.
- If you want a graduation gift idea, wrap individual squares in small cellophane bags.
- This recipe works well for making homemade candy for any occasion.
Nutrition
- Serving Size: 1 square
- Calories: 105
- Sugar: 14
- Sodium: 25
- Fat: 5
- Saturated Fat: 3
- Unsaturated Fat: 2
- Trans Fat: 0
- Carbohydrates: 15
- Fiber: 0.5
- Protein: 2
- Cholesterol: 5