

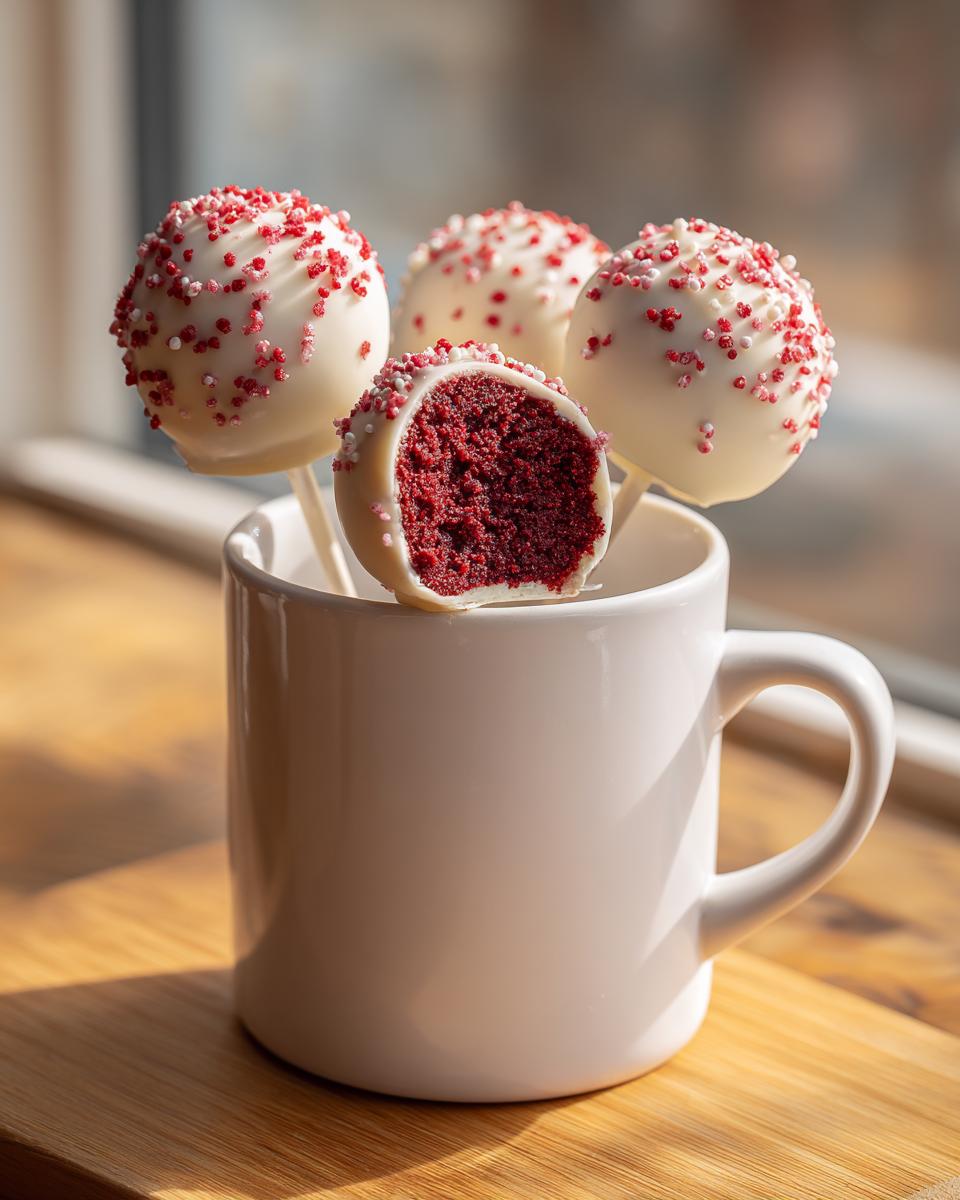
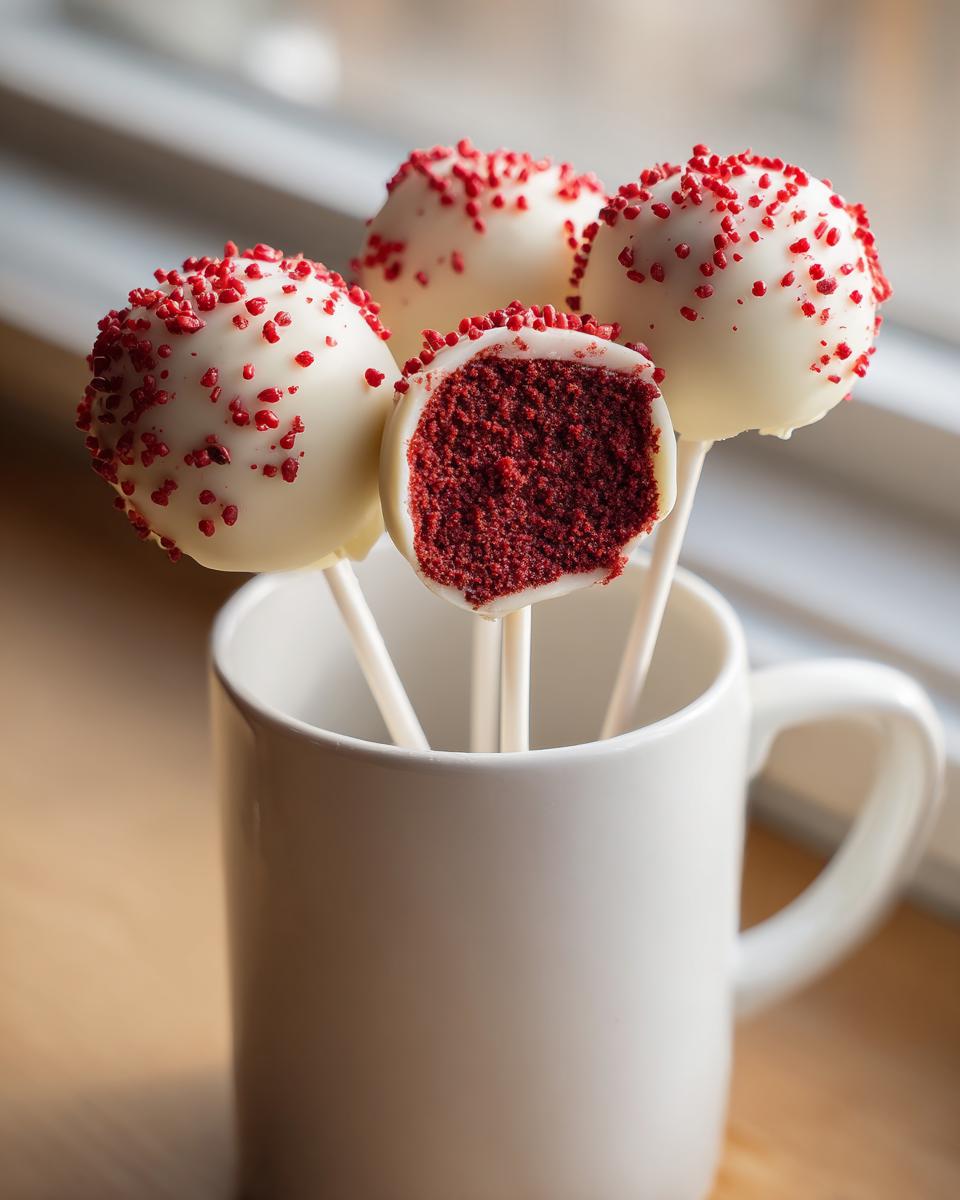
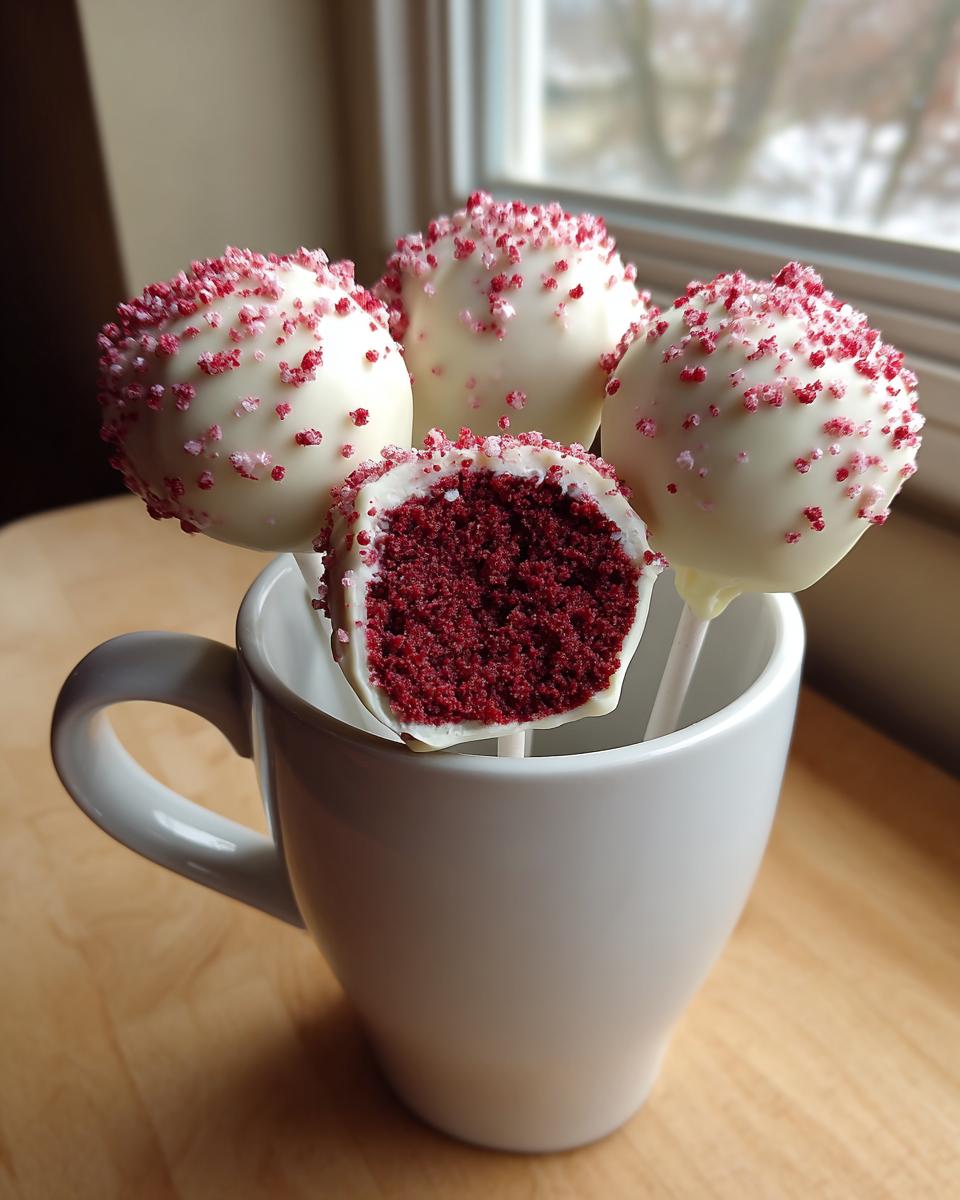
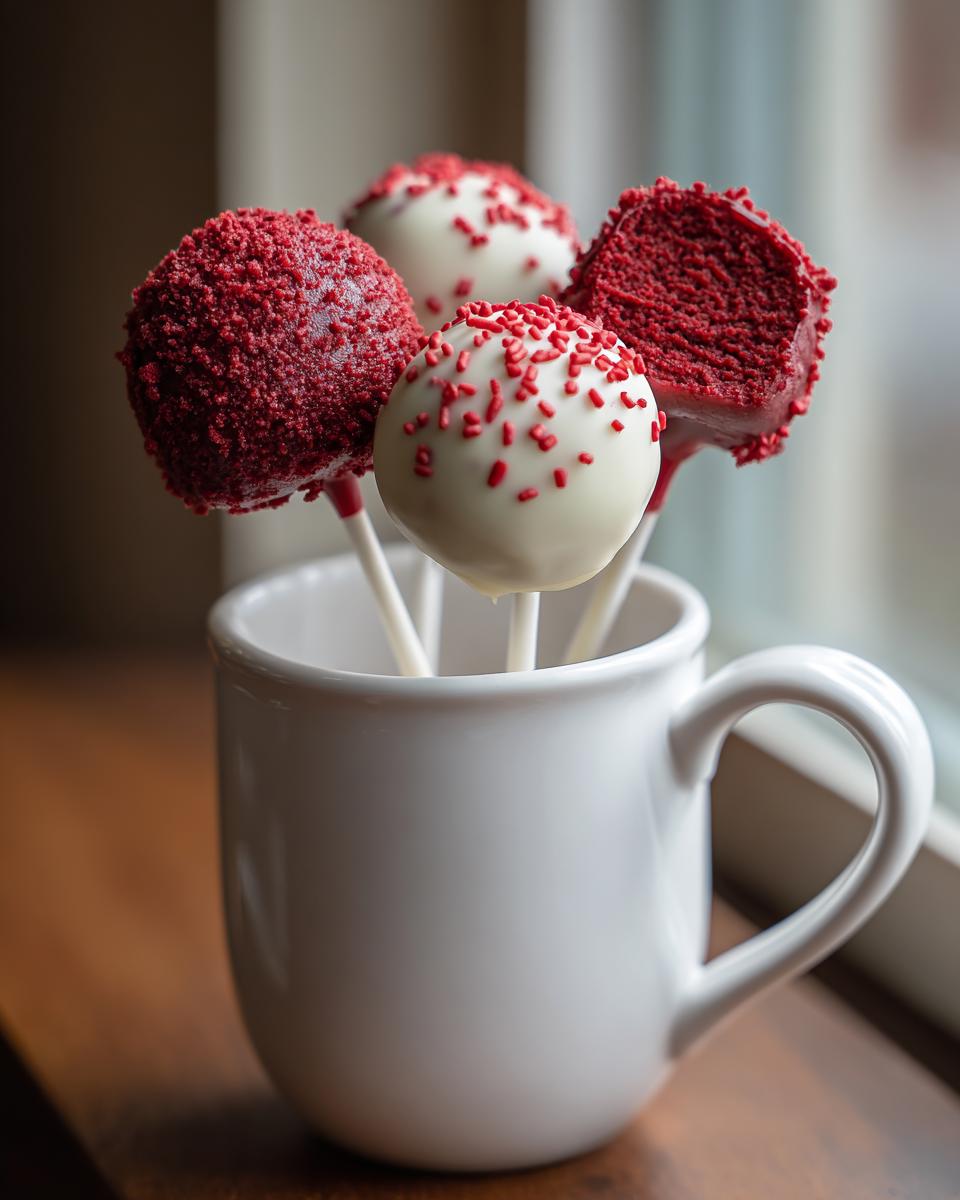
Oh, you know how much I adore anything small, cute, and requires zero plates and forks, right? They are just the perfect bite-sized desserts for any gathering! But here’s the thing about cake pops: they can be tricky. So many recipes end up dry or crumbly, and that just ruins the whole experience. Well, I’ve engineered the ultimate solution for you today: the **ULTRA Moist Red Velvet Cake Pops**! This recipe is honestly a game-changer because we lean into simplicity, starting with a standard box mix, which keeps things efficient. Our founder, Leo, always insists that cooking should be about smart systems, not stress, and this recipe proves it. We’ve nailed the exact texture so you get that rich, vibrant red velvet flavor that melts in your mouth, not in your hands. If you love easy sweets, check out all our dessert recipes!
- Why This is the Best Recipe for Red Velvet Cake Pops
- Ingredients Needed for Ultra Moist Red Velvet Cake Pops
- Homemade Cake Pops Tutorial: Step-by-Step Instructions for Red Velvet Cake Pops
- Tips for Success with Red Velvet Cake Pops
- Serving Suggestions for Cake Pops for Parties
- Variations for Red Velvet Dessert Bites
- Storage and Reheating Instructions for Red Velvet Cake Pops
- Frequently Asked Questions About Red Velvet Cake Pops
- Approximate Nutritional Data for Red Velvet Cake Pops
Why This is the Best Recipe for Red Velvet Cake Pops
I promise you, these aren’t just any red velvet cake pops—they are legitimately the best you will ever make. Why? Because they survive the dreaded dryness test! I’ve tested mixes and methods for ages to figure out how to keep that cake spongy and rich. The secret weapon here is actually the cream cheese frosting we’re blending in; it acts like a built-in moisturizer. If you’re looking for easy box mix cake pops without sacrificing quality, you’ve found them. Forget those sad, crumbly balls of compressed cake dust; these are decadent little nuggets!
Achieving Moist Cake Pops Every Time
The biggest magic trick we pull here happens before the cake even goes into the oven. We intentionally reduce the liquid called for on the red velvet box mix instructions. Seriously, cutting back by about a quarter cup makes all the difference! This simple act of methodical testing forces the cake to bake up denser and traps way more moisture inside. Trust me, that small adjustment guarantees you get those irresistibly moist cake pops every single time you try this recipe.
Simple Steps for Easy Red Velvet Cake Pops
We built this recipe on efficiency, which is what the whole Dishicious process is about! Because we start with a mix, the majority of the work is just mixing and chilling. Once that cake is baked and crumbled, we roll, chill, and dip. That whole assembly process? It’s completely no-bake! You get the impressive result of beautiful red velvet cake pops with almost none of the complicated timing issues you get from scratch recipes.
Ingredients Needed for Ultra Moist Red Velvet Cake Pops
Okay, let’s gather our supplies for these vibrant, bite-sized treats. Because we are aiming for the best flavor without the fuss, we’re keeping the main ingredients really straightforward, which is just smart cooking, if you ask me. The absolute non-negotiable item here is the cream cheese frosting. That’s what creates that incredible cream cheese cake pop filling that keeps the inside so unbelievably soft and tangy—it really balances the sweetness of the cake.
Coating and Decoration Components for Red Velvet Cake Pops
Now for the shiny part! We need about 12 ounces of white chocolate melting wafers—remember, using wafers or candy coating is much easier than dealing with temperamental real chocolate for these red velvet cake pops. If the melted chocolate seems a little stiff when we dip, just keep half a teaspoon of coconut oil or shortening handy; it really helps thin it down so you get a perfect, smooth shell over your finished pops. And of course, grab those festive sprinkles! You gotta dress them up for the party!
Homemade Cake Pops Tutorial: Step-by-Step Instructions for Red Velvet Cake Pops
Alright, this is where we transform that baked cake into the amazing dessert on a stick experience! Remember, the key to success here is patience during the chilling phases. We baked our cake already (using the box instructions but cutting back on liquid like we talked about!), so now we move into the purely assembly phase. It’s totally intuitive to follow these steps, and I promise, it’s way less messy than you think!
Mixing the Cream Cheese Cake Pop Filling
Once that cake is totally cool—and I mean stone cold or else it melts the frosting—crumble it finely into a big bowl. Now, bring in that cream cheese frosting. You need to mix this vigorously until it looks and feels like a thick cookie dough. Why dough-like? If it’s too crumbly, your gorgeous red velvet cake pops will just crack apart when you try to dip them in the chocolate later. We need it cohesive! You should be able to squeeze a handful and have it hold a solid shape.
Chilling and Sticking the Balls for Dipping
After you’ve rolled uniform little balls (about one inch is perfect!), they *must* go into the fridge for a solid 30 minutes. This chilling is absolutely crucial to avoid that dry, crumbly mess that plagues amateur pop makers! Once chilled, melt your white chocolate. Here’s the trick: dip the tip of your pop stick into the chocolate first, then gently push it into the cake ball. Chill it again for five minutes. This sets the glue so the final dunking doesn’t dislodge your pops, ensuring you get perfect red velvet cake pops for your party!
Tips for Success with Red Velvet Cake Pops
Look, nobody wants to put in all this work just to have their beautiful red velvet cake pops crumble when you dip them. Our focus here is efficiency meeting flawless execution, like Leo always preaches about project management! So, I pulled the top three warnings from our tested recipe notes because these little things save you a huge headache later.
First, don’t you dare overbake that cake! Even with the liquid adjustment, checking it a few minutes early is the real measure of quality. If you see wet batter, wait; if you see bone dry, you went too far. Second, if your cake-and-frosting mix seems stiff or dry when you’re rolling the balls, don’t panic! Just add frosting, one tablespoon at a time. That extra little bit of fat is better than having them fall apart.
Finally, for the white chocolate coating—this is a big one for red velvet cake pops—make absolutely certain your bowl and spoon are bone dry before you melt those wafers. Any speck of water and that beautiful chocolate will seize up on you, turning into a thick, unusable mess. It’s all about having the right tools ready!
Serving Suggestions for Cake Pops for Parties
These beautiful, chocolate-dipped spheres are just begging to be the star of the show! Making red velvet cake pops means you’ve already created something that automatically feels celebratory. They are amazing for virtually any event because they are so easy to manage—no cutting required, which is why they are perfect for big batches of cake pops for parties.
For presentation, honestly, skip the plates! You can stick them upright in a block of decorative styrofoam—you can cover that in foil or festive paper—or look for those cute little tiered stands that coffee shops use. They instantly elevate your display. Since they look so vibrant, you don’t need much else on the table, making these fantastic festive red velvet treats for everything from Valentine’s parties to game day spreads. You can find great ideas for easy party food on our appetizer and snack page, but trust me, the red velvet ones always disappear first. Don’t forget to check out why others love them too, like this suggestion from Yum Tastic Meals!
Variations for Red Velvet Dessert Bites
Listen, while I live for how easy this box mix hack is, you’ve got room to play around with these red velvet cake pops if you’re feeling extra creative! If white chocolate just isn’t your jam, go for dark chocolate! The slight bitterness of a high-quality dark coating pairs unbelievably well with that tangy cream cheese center—it really makes for a more grown-up flavor profile. If you’re looking for a simpler melted coating recipe, check out my guide to ultimate creamy white hot chocolate for dip inspiration.
You can also totally swap the sprinkles! Try using crushed peppermint during the holidays or little gold sanding sugar for something really elegant. And for my seasoned bakers out there who hate mixes? Feel free to use your favorite scratch recipe for a cake made from scratch, just make sure you bake it slightly dense so you can still form those perfect red velvet dessert bites, just like the ones shared over at Pretty Pastelitos!
Storage and Reheating Instructions for Red Velvet Cake Pops
So you made an absolute mountain of these gorgeous red velvet cake pops—good job! Now, how do we keep them perfect? The key is careful storage, especially since the coating is chocolate. You must store them in an airtight container, but try not to stack them if you can help it; they look too pretty to get smooshed!
They are happiest sitting in the refrigerator for up to about a week. What happens when you pull them out for the party? That’s important too! Don’t serve them fridge-cold. Pull them out about 20 minutes before you plan to serve them. Letting them come up to room temperature slightly softens that chocolate shell and brings back the ultimate creamy texture of that soft cake interior. Don’t even think about microwaving them; that’ll melt your hard work right off the stick!
Frequently Asked Questions About Red Velvet Cake Pops
I know when I first started making these, I had a million questions buzzing around my head! It’s always better to ask upfront so you don’t get those sad, cracked coating messes later. Here are the things folks ask me most often about getting perfect red velvet cake pops every time. If you’ve made it this far, you are seriously dedicated to having the best red velvet cake pops!
Can I make these Red Velvet Cake Pops without baking the cake first?
That’s a great question, especially since you see people talking about “no bake cake pops” floating around! For this specific recipe, no, you really do need to start by baking the cake according to the box. That baking process creates the necessary fluffy crumb structure that we then cool down and crumble up. Once the cake is baked and cooled, then the assembly process becomes “no bake.” You need those crumbs to mix into our doughy base!
How do I get the best white chocolate coating for my Chocolate Dipped Red Velvet pops?
This is all about the coating sitting nice and smooth! Honestly, skip regular baking chocolate unless you want to deal with complicated tempering—it’s just too stressful for a simple treat like this. I highly recommend using good quality white chocolate *melting wafers* or candy melts instead. They are formulated to remelt perfectly smooth and harden quickly into that beautiful, snappy shell you want on your red velvet cake pops. Just melt them slowly with no excess water around, and you’ll be golden!
Approximate Nutritional Data for Red Velvet Cake Pops
So, look, I’m not a nutritionist, and these are definitely a treat—a spectacular, bite-sized treat—but they aren’t exactly diet food! I wanted to give you a ballpark idea for what you’re getting into with one of those beautiful crimson spheres. We ran these numbers through our standard system based on the exact box mix and frosting we used here at Dishicious.
Keep in mind these are estimates, alright? If you swap fancy artisanal white chocolate for the standard wafers, the numbers change! But generally, you are looking at about 220 calories per pop, with around 14 grams of fat and 23 grams of carbs. Enjoy them responsibly!
PrintULTRA Moist Red Velvet Cake Pops Using Box Mix

Make perfectly moist red velvet cake pops using a simple box mix and cream cheese frosting center. These bite-sized desserts are coated in smooth white chocolate and are perfect for parties or festive gatherings.
- Prep Time: 45 min
- Cook Time: 30 min
- Total Time: 75 min
- Yield: 24 pops 1x
- Category: Dessert
- Method: No Bake (after cake is baked)
- Cuisine: American
- Diet: Vegetarian
Ingredients
- 1 box (15.25 oz) red velvet cake mix
- Ingredients listed on cake mix box (usually eggs, oil, water)
- 1 cup cream cheese frosting (store-bought or homemade)
- 12 oz white chocolate melting wafers or candy coating
- 1 teaspoon coconut oil or vegetable shortening (optional, for thinning chocolate)
- Red sprinkles or decorative toppings (optional)
- Cake pop sticks
Instructions
- Prepare the red velvet cake according to the box directions, but reduce the liquid slightly (use 1/4 cup less water or milk) to promote a denser, moister cake structure.
- Bake the cake in a 9×13 inch pan. Let the cake cool completely on a wire rack.
- Crumble the cooled cake into a large bowl, ensuring no large lumps remain.
- Add the cream cheese frosting to the cake crumbs. Mix thoroughly with your hands or a sturdy spoon until a uniform, dough-like consistency forms. This mixture should hold its shape when squeezed.
- Roll the mixture into small, uniform balls, about 1 inch in diameter. Place the balls on a parchment-lined baking sheet.
- Chill the cake balls in the refrigerator for at least 30 minutes. This step prevents cracking and crumbling during dipping.
- Melt the white chocolate wafers in a microwave-safe bowl in 30-second intervals, stirring well after each interval until smooth. Stir in the coconut oil if the chocolate is too thick.
- Dip the tip of a cake pop stick into the melted chocolate and insert it about halfway into a chilled cake ball. Return the sheet to the refrigerator for 5 minutes to set the stick.
- Dip the entire cake ball into the melted white chocolate, rotating gently to coat completely. Tap the stick lightly against the side of the bowl to remove excess chocolate.
- Immediately apply sprinkles or decorations before the chocolate sets.
- Place the finished cake pops upright in a styrofoam block or cake pop stand to dry completely.
Notes
- For the moistest cake pops, do not overbake the cake. Check it a few minutes before the box suggests.
- If your cake ball mixture seems too dry, add one tablespoon of extra frosting at a time until the desired texture is reached.
- To prevent the chocolate coating from seizing, ensure your bowl and utensils are completely dry before melting the wafers.
Nutrition
- Serving Size: 1 pop
- Calories: 220
- Sugar: 22
- Sodium: 150
- Fat: 14
- Saturated Fat: 8
- Unsaturated Fat: 6
- Trans Fat: 0.5
- Carbohydrates: 23
- Fiber: 0.5
- Protein: 2
- Cholesterol: 25