
If you’ve ever spent time rolling, cutting, and baking beautiful sugar cookies only to have your icing turn out sticky, cracked, or just plain runny, you know the frustration! Trust me, that’s why I’m obsessed with making sure **cookie icing** is perfect before it ever touches the cookie. Here at Dishicious, Leo always talks about efficiency, and that means we don’t want to waste time on decorations that fail. This guide isn’t about some fussy glaze; this is my foolproof method for making **cookie icing** that hardens up smooth, glossy, and ready for stacking or shipping. I promise, once you see how reliable this royal icing is, you’ll never go back to anything else. It just works, every single time.
We’ve polished this down to the simplest process, ensuring you get professional-looking results without needing a pastry degree. Check out the recipe below—it’s everything you need for beautiful, durable decorations!
If you are looking for a different kind of bake inspiration while this icing sets up, don’t forget to check out my recipe for the famous Levain Bakery Chocolate Chip Cookies. They make the perfect base for icing, too!
- Why This Is the Best Cookie Icing Recipe for Cookies That Harden
- Ingredients for Your Perfect Hardening Cookie Icing
- Step-by-Step Guide to Making Smooth Sugar Cookie Icing
- Tips for Success with Your Durable Cookie Icing Recipe
- Coloring Your Cookie Icing for Detailed Decoration
- Drying and Storing Your Finished Cookie Icing Decorations
- Troubleshooting Common Cookie Icing Issues
- Frequently Asked Questions About Cookie Icing
- Estimated Nutritional Data for This Cookie Icing Recipe
Why This Is the Best Cookie Icing Recipe for Cookies That Harden
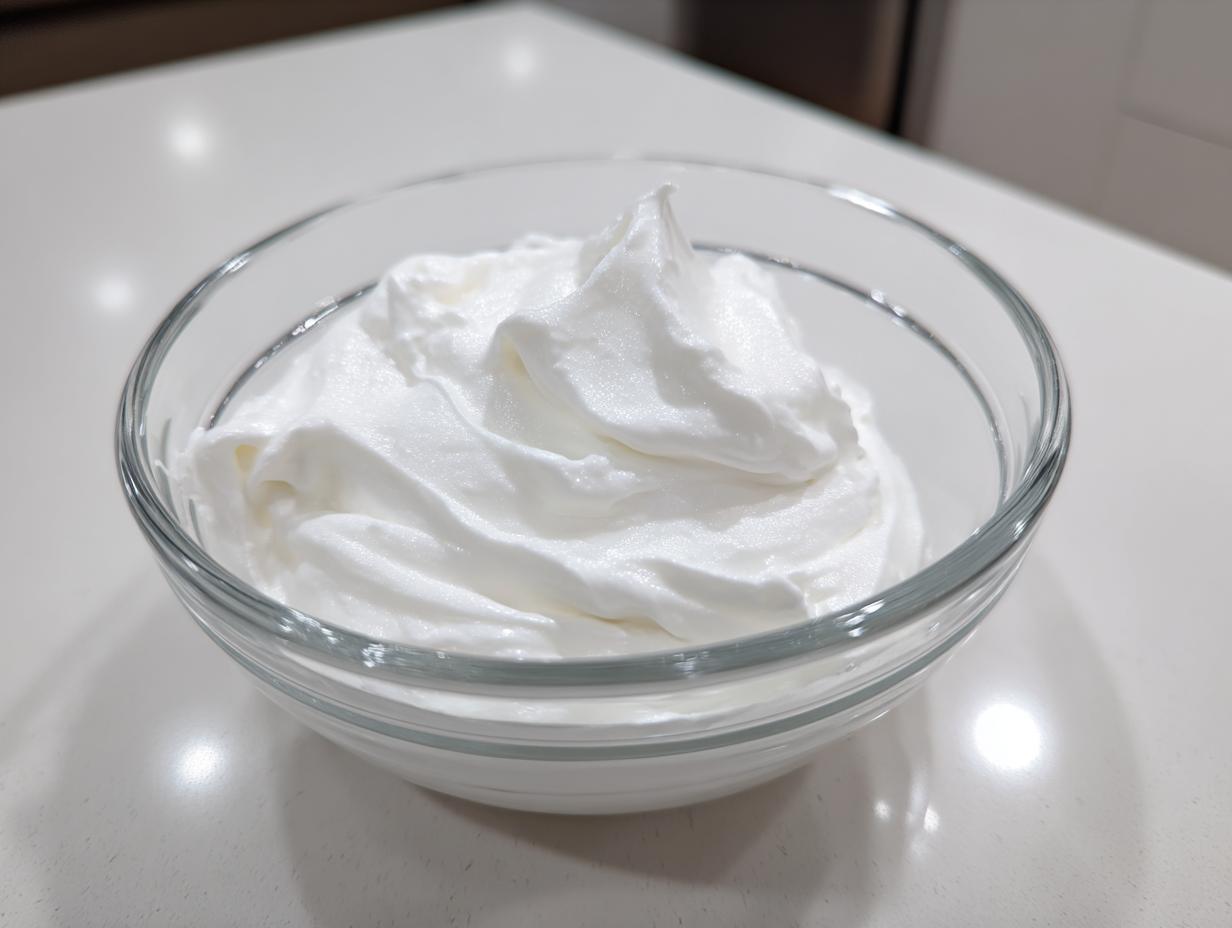
Let’s be real: the biggest headache in cookie decorating is waiting forever for everything to dry, or worse, putting them in a box only to find everything stuck into one big, colorful mess! That’s exactly why this recipe for **royal icing for cookies that hardens** is my absolute go-to. Simple glazes made with just powdered sugar and milk look nice for about ten minutes, but they never build that structure you need. You want something that holds up, especially if you’re baking batches for gifting like I often do!
We use meringue powder here, and it’s a total game-changer. It whips up so stable that you get that perfect, **smooth sugar cookie icing** consistency that lets you outline and flood like a pro. Because it dries hard—like, seriously hard and glossy—you never have to worry about your beautiful sugar cookies sticking together when you stack them up. Trust me, there is nothing more satisfying than peeling two decorated cookies apart after they’ve cured, and they come apart perfectly clean. This recipe is reliable, which means less stress for you and a better-looking final product. If you want your cookies to look professional and last, this is the base you need. You can see how others achieve this rock-solid finish over at Emma’s Cake Studio, but mine cuts down on the fuss!
And hey, while you’re waiting for that amazing, durable icing to set up, maybe whip up a batch of my famous chocolate chip cookies? They make the perfect non-decorated companion treat!
Ingredients for Your Perfect Hardening Cookie Icing
Okay, getting the ingredients right is half the battle when you’re trying to master this **cookie icing**. If you get the ratios wrong, you end up with a runny mess, and nobody has time for that! I’ve listed exactly what you need below, and trust me, sifting that powdered sugar makes a huge difference in getting that smooth texture ASAP. You’ll notice I mention gel food coloring—liquid coloring is almost guaranteed to thin out your icing consistency, so stick to the gels if you want to keep things stiff and perfect for decorating!
- 4 cups powdered sugar, sifted
- 3 tablespoons meringue powder
- 6 tablespoons warm water
- 1 teaspoon vanilla extract
- Gel food coloring (optional)
Ingredient Notes and Substitutions for Cookie Icing Consistency Tips
I know some people get nervous about using meringue powder, but it’s my secret weapon for reliability! It replaces raw egg whites, which saves you time and definitely keeps your **cookie icing** safer, which is huge when you’re baking for large groups or gifting your treats. It’s what gives us that beautiful, durable finish.
Now, about corn syrup. This recipe is optimized using it because that wonderful sugar stuff really helps achieve that glossy, non-cracking surface. If you absolutely need an icing without corn syrup option, you can often substitute it with an equal amount of light corn syrup substitute, but honestly, for the best hardening, stick to the original list. It’s worth seeking out if you want truly professional results that don’t chip!
Step-by-Step Guide to Making Smooth Sugar Cookie Icing
Alright, now that we have all our ingredients ready, let’s mix this magic! This is where precision matters, but don’t stress—it’s easy once you see how it comes together. First things first, get your sifted sugar and meringue powder into that bowl and whisk them together really well. We need those dry things totally combined before we introduce any liquid.
Next, pour in your measured water and that splash of vanilla. Start the mixer on low speed—seriously, low, or you’ll wear powdered sugar! Just mix until everything starts to look like a shaggy mess, making sure to scrape down the sides so no dry pockets are hiding out. This step is key to that smooth frosting later on!
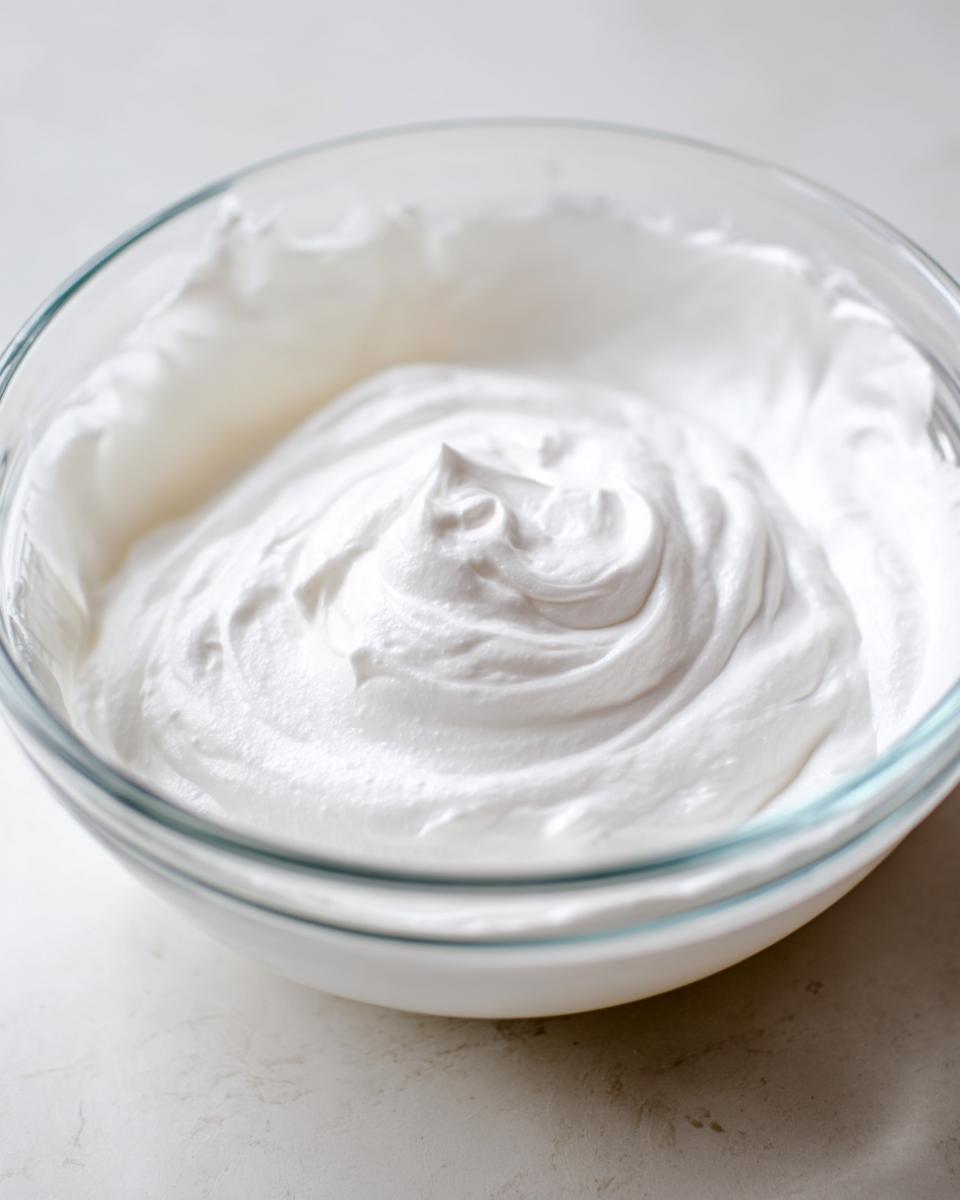
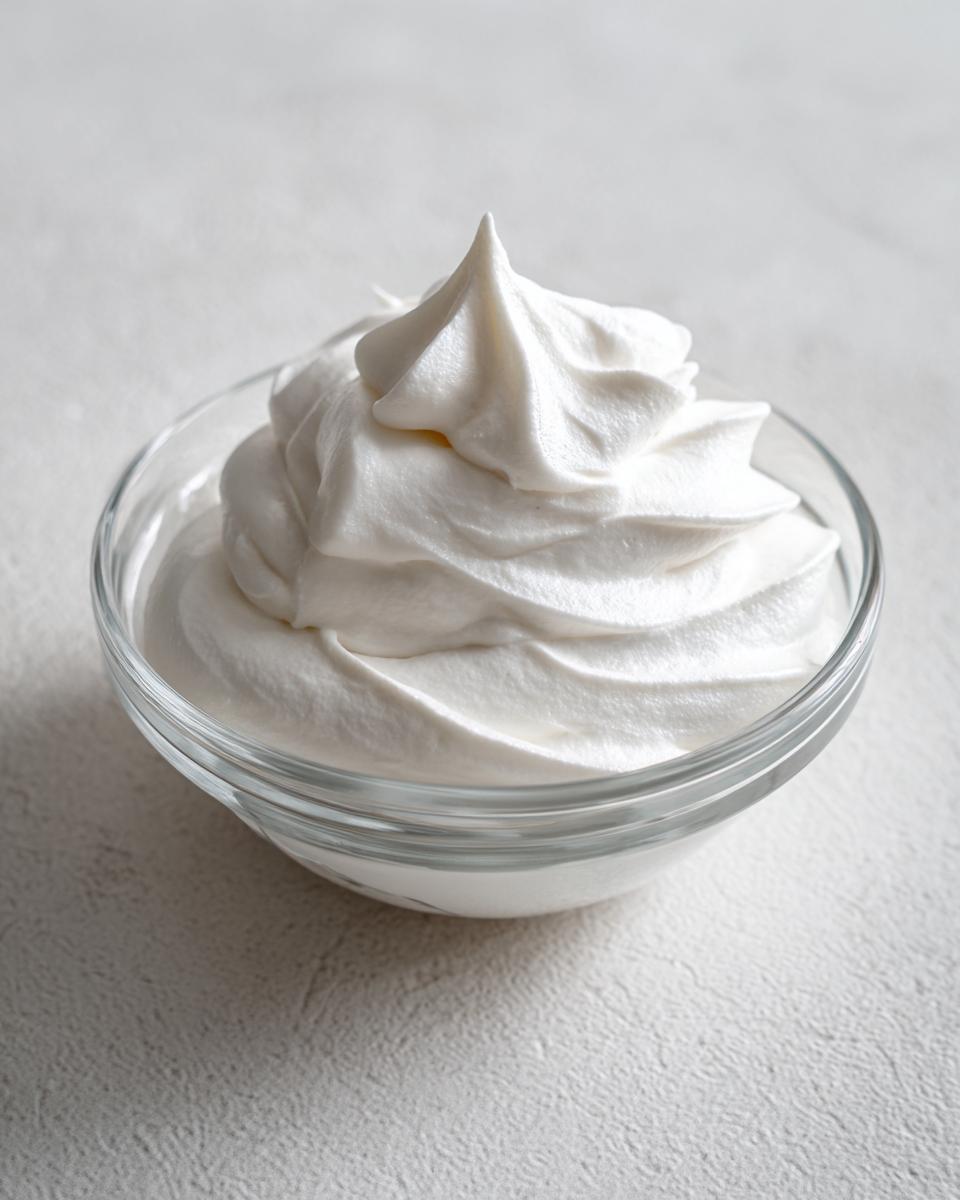
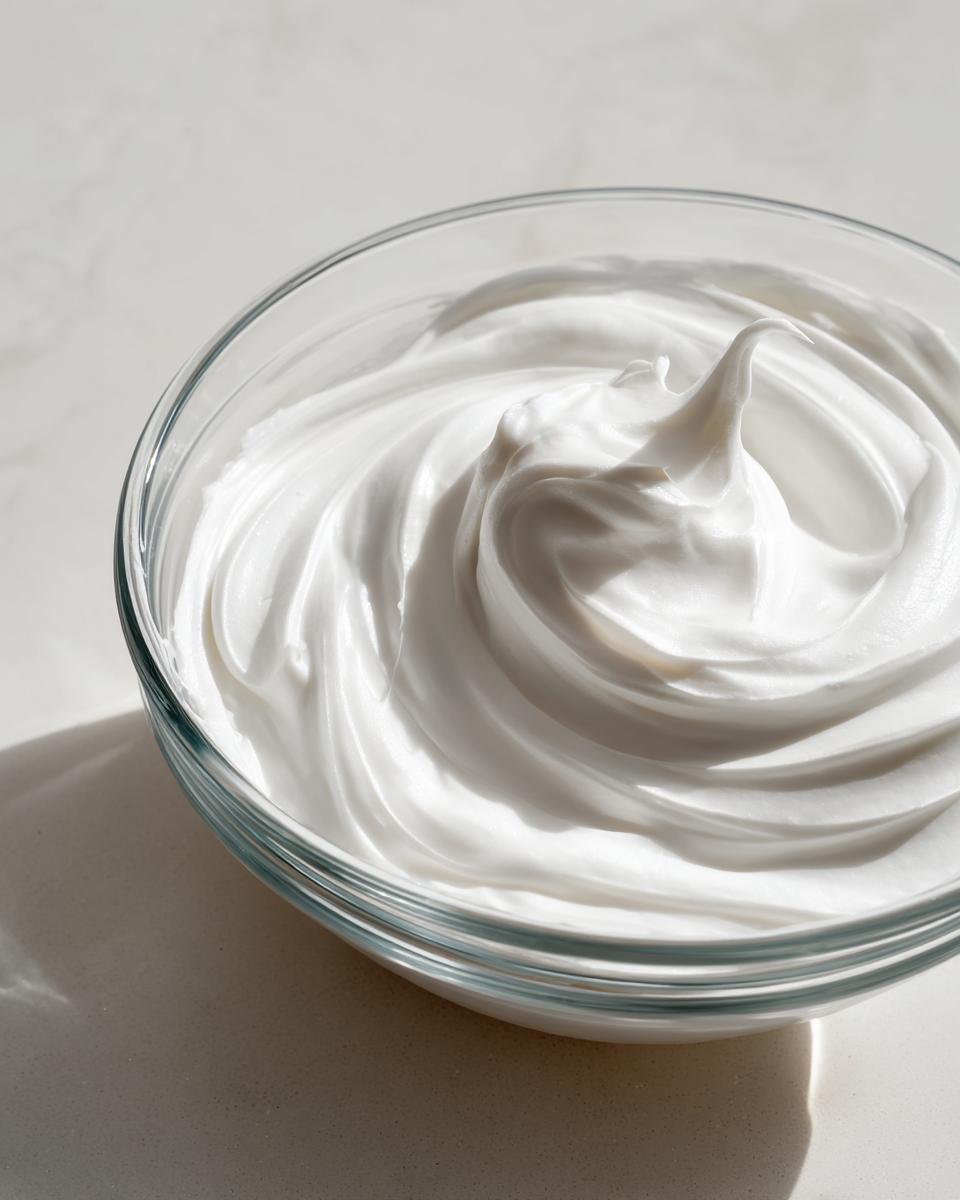
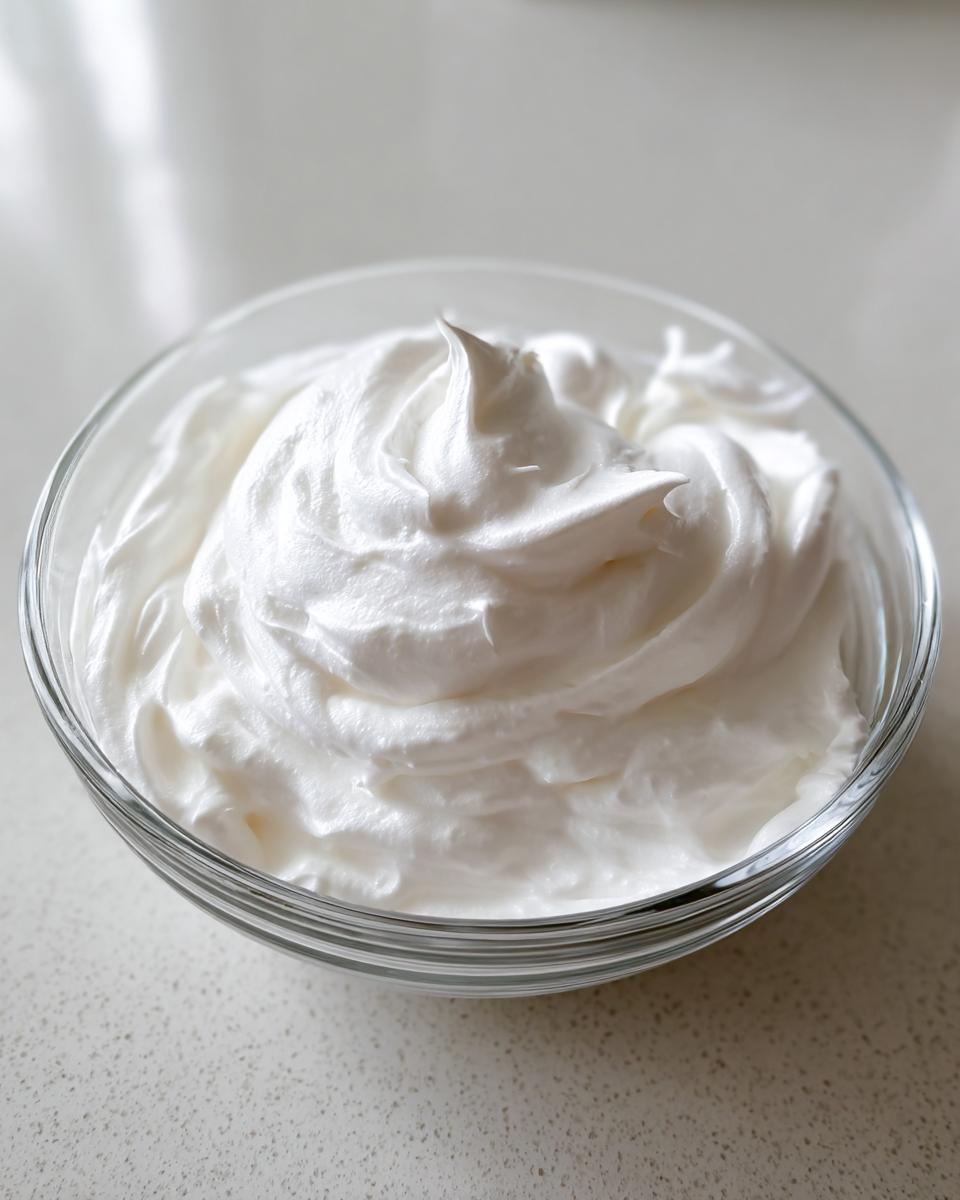
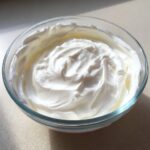
The real work starts when you crank it up to medium-high. You need to beat this for a solid five to seven minutes. Don’t peek early! You are looking for a texture that is super thick and holds stiff peaks when you lift the whisk. That’s your perfect stiff icing, ready for outlining. If you’re following along and want to see professional tips for getting that rock-solid dry finish, check out the experts at Cook Orchard!
Achieving the Right Cookie Icing Consistency Tips for Outlining and Flooding
This is the secret sauce for decorating, so listen up! We need two main textures: stiff for outlining and thinner for flooding. The mixture you just whipped up is your stiff consistency—use that to draw the borders on your cookies. Let those outlines dry for about half an hour until they feel firm when you touch them gently.
For the flooding, we need it thinner, but not soupy! To get that perfect flow, you add warm water, just a tiny teaspoon at a time, beating it in until you hit what we call the 15-second consistency. What’s that? When you lift your whisk, the icing you drizzle back into the bowl should create a ribbon that sinks back down and disappears completely in about 15 seconds. If it sinks in under 10, you’ve gone too far! If in doubt, always start thick and thin it out slowly. It’s so much harder to rescue icing that’s too thin!
Tips for Success with Your Durable Cookie Icing Recipe
Okay, you’ve got your stiff outline icing and your thinner flood icing ready—now let’s make sure it all behaves! I learned this the hard way years ago when I made hundreds of little gingerbread men only to find them all cracked and sad the next morning. Why? Because I rushed the drying process and used liquid food dye!
The biggest tip for getting that sturdy, non-cracking finish is definitely sticking to gel food coloring. It keeps the moisture content perfect. Also, no matter how excited you are, resist the urge to blast the cookies with a hairdryer or put them near a vent. This **durable cookie icing recipe** thrives on slow, steady drying at room temperature. If you need more inspiration on getting that glossy look, I love seeing what the folks over at Ziptaste Recipes are doing!
If you mess up the consistency for whatever reason, don’t panic! Remember, if it’s too thin for flooding, just whisk in a tablespoon of sifted powdered sugar. If it’s too stiff, start adding water, just a drop at a time. Patience here makes all the difference for making sure your cookies look amazing and hold up until they hit the dessert table. When you’re done decorating, they sit perfectly fine on the counter until you’re ready to serve, much like a good, firm cream cheese frosting would on a cake!
Coloring Your Cookie Icing for Detailed Decoration
Once you have that beautiful, stiff base of **cookie icing**, it’s time to go wild with color! This is where you turn your plain white canvas into something stunning, especially if you’re navigating a complex Christmas theme or need a vibrant palette. Keep in mind, this is your **colorful cookie icing guide**—we want rich color, not soupy icing.
The easiest way to manage this is to scoop your required amounts into separate bowls *before* you add any liquid or coloring. Remember, we stick to gel food coloring, always! Use a toothpick to add the tiniest bit of gel color, stir it in thoroughly, and check the consistency again. A little bit of gel goes a long way to create deep shades without watering down that perfect, ready-to-use icing.
Drying and Storing Your Finished Cookie Icing Decorations
Okay, the decorating—the fun part—is done! But don’t think you can stack these beauties right away; that’s the rookie mistake that ruins them. Because this is a hardening royal icing, you have to respect the curing time, which manages that expectation of **fast-drying cookie icing**. If you used the flood consistency, you need to let those cookies sit out at room temperature completely undisturbed.
I always wait at least thirty minutes after I’ve flooded an area before I even think about touching the cookie again, just to check that the outline is fully set. For a fully dry, stackable finish, you are usually looking at several hours, or honestly, I just leave them overnight if I can wait that long! This ensures the gloss holds and they won’t stick.
Once they are rock hard, storage is easy peasy. Pop those decorated cookies into an airtight container, and keep them at room temperature. Don’t chill them! If you’re prepping for a bake sale or just finishing up a big batch of treats, this simple storage trick keeps them looking fresh for days. For quick breakfast ideas while you wait for the icing to set, check out my recipe for easy make-ahead egg muffins!
Troubleshooting Common Cookie Icing Issues
Even with the best recipe in the world, sometimes things go a little sideways, right? That’s totally normal, which is why I put together this little cheat sheet for you! We are going for that **no-fail cookie icing**, and these little fixes ensure you can save almost any batch. Don’t throw it out if it looks wrong—just grab an extra tool or ingredient!
If your icing feels too thin when you are trying to outline, it means it’s too runny to hold a nice bead. This happens sometimes when the air is humid! The fix is super simple: slowly mix in just a little more sifted powdered sugar, maybe a tablespoon at a time, until it starts holding its shape better. We already covered this in the consistency section, but it’s worth repeating: fixing thick icing is easy; fixing thin icing is a headache!
Now, if your icing seems too thick for flooding—like it’s clumping when you pour it—you need to thin it out slightly. Add warm water, about half a teaspoon at a time, and mix it in well before checking the consistency again. This slow approach prevents you from accidentally turning it into soup! If you are curious about another easy-to-handle sugar icing, check out the version from Farmhouse Harvest.
If you see cracks starting to form after it has dried, that usually means one of two things: either you didn’t use enough liquid (it dried out too fast!), or you didn’t whip it long enough to incorporate enough air while mixing. If you catch it early, you can sometimes gently press the crack together before it fully sets, but honestly, if it’s truly cracked, you might just need to make a small fresh batch of flood icing to cover the rough spot!
Frequently Asked Questions About Cookie Icing
I get so many questions about this recipe after I post photos of my finished holiday cookies! It’s natural to wonder about making swaps or adjusting the timing, especially since this is a slightly more involved **cookie icing recipe** than just your basic powdered sugar glaze. Here are the top things people always ask me about getting that perfect, glossy finish!
Can I make this royal cookie icing recipe ahead of time?
Yes, you absolutely can, and I often do! You can make the stiff base icing for outlining one day ahead of time. Just store it in an airtight container at room temperature—no fridge needed! If you refrigerate it, the sugar can seize up and get hard lumps, which is a nightmare to fix. If you do make it ahead, you might need to add a teaspoon of water and beat it for 30 seconds to revive that smooth texture before you use it.
Can I use liquid food coloring instead of gel?
Oh gosh, please try not to use liquid food coloring if you can help it! That’s one of my major **cookie icing consistency tips**—liquid coloring adds unnecessary moisture, and that extra water quickly pushes your icing from a perfect stiff consistency into that dreaded thin flood consistency. If you only have liquid coloring, use the tiniest drop you possibly can, but for the best results and the brightest colors, gel pastes are the way to go for your **holiday cookie decorating icing**.
Does this specific royal icing harden well on gingerbread cookies?
It hardens beautifully on gingerbread! In fact, because gingerbread often has a slightly more porous or rough surface than sugar cookies, this **durable cookie icing recipe** is actually perfect for it. The meringue powder creates a strong bond, so your gingerbread cookies are totally fine for packaging and shipping without the icing cracking or chipping off.
How long does it take for this icing to dry completely?
This is the area where patience pays off! Quick-drying is relative with royal icing. If you are using the thinner flood consistency, it might look dry within an hour or two if the air is dry. But for that completely rock-hard, glossy finish where you can stack them up safely, you really need to give it six to eight hours, or just let it cure overnight. When Leo is tackling a big project, we always plan to decorate the day before we need to package anything!
If you’re looking for other easy items to make while you wait for the cookies to dry, you should check out my recipe for simple homemade lemonade—it requires a similar sugar base, but it’s totally different!
Estimated Nutritional Data for This Cookie Icing Recipe
Alright, I always have to mention this because we are all busy folks trying to keep track of what we’re making. The numbers below are estimates based on the recipe as written, using standard ingredients. If you swap out the sugar or use a different type of vanilla, these values will change slightly, so just keep that in mind! This gives you a good baseline for understanding the nutritional side of your beautiful **cookie icing**!
- Serving Size: 1/4 cup
- Calories: 450
- Sugar: 110g
- Protein: 2g
- Fat: 0g
- Sodium: 10mg
It’s definitely a sweet treat, but wow, is it worth it for those gorgeous decorated cookies! If you want something savory that’s just as easy to make while the icing dries, you must try my easy Mexican potatoes!
PrintPerfect Hardening Royal Icing for Sugar Cookies
Follow this straightforward recipe to make smooth, glossy royal icing that hardens perfectly every time, ideal for detailed cookie decorating.
- Prep Time: 15 min
- Cook Time: 0 min
- Total Time: 15 min
- Yield: Enough to cover approximately 2 dozen medium cookies
- Category: Baking Component
- Method: Mixing
- Cuisine: American
- Diet: Vegetarian
Ingredients
- 4 cups powdered sugar, sifted
- 3 tablespoons meringue powder
- 6 tablespoons warm water
- 1 teaspoon vanilla extract
- Gel food coloring (optional)
Instructions
- In a large bowl, whisk together the sifted powdered sugar and meringue powder until fully combined.
- Add the warm water and vanilla extract to the dry ingredients.
- Beat with an electric mixer on low speed until the ingredients are just incorporated. Scrape down the sides of the bowl.
- Increase the mixer speed to medium-high and beat for 5 to 7 minutes until the icing is very thick, smooth, and holds stiff peaks. This is your stiff consistency icing for outlining.
- To achieve a thinner consistency for flooding, add water one teaspoon at a time, beating well after each addition, until the icing flows smoothly off the whisk in a ribbon that disappears back into the bowl after about 10 seconds (this is 15-second consistency).
- Divide the icing into separate bowls if you plan to color it. Add gel food coloring sparingly and mix until the color is uniform.
- Use the stiff icing to outline your cookies. Let the outline dry for at least 30 minutes until firm to the touch.
- Flood the outlined areas with the thinner icing. Gently tap the cookie on the counter to release air bubbles.
- Allow the icing to dry completely at room temperature for several hours or overnight until hard and glossy before stacking or handling.
Notes
- For a no-corn-syrup option, substitute the corn syrup with an equal amount of light corn syrup substitute or use the recipe as written for the best hardening results.
- If your icing is too thin for flooding, add more sifted powdered sugar, one tablespoon at a time.
- If your icing is too thick for outlining, add water, one half-teaspoon at a time.
- Use gel food coloring instead of liquid coloring to avoid thinning the icing consistency.
Nutrition
- Serving Size: 1/4 cup
- Calories: 450
- Sugar: 110g
- Sodium: 10mg
- Fat: 0g
- Saturated Fat: 0g
- Unsaturated Fat: 0g
- Trans Fat: 0g
- Carbohydrates: 112g
- Fiber: 0g
- Protein: 2g
- Cholesterol: 0mg