
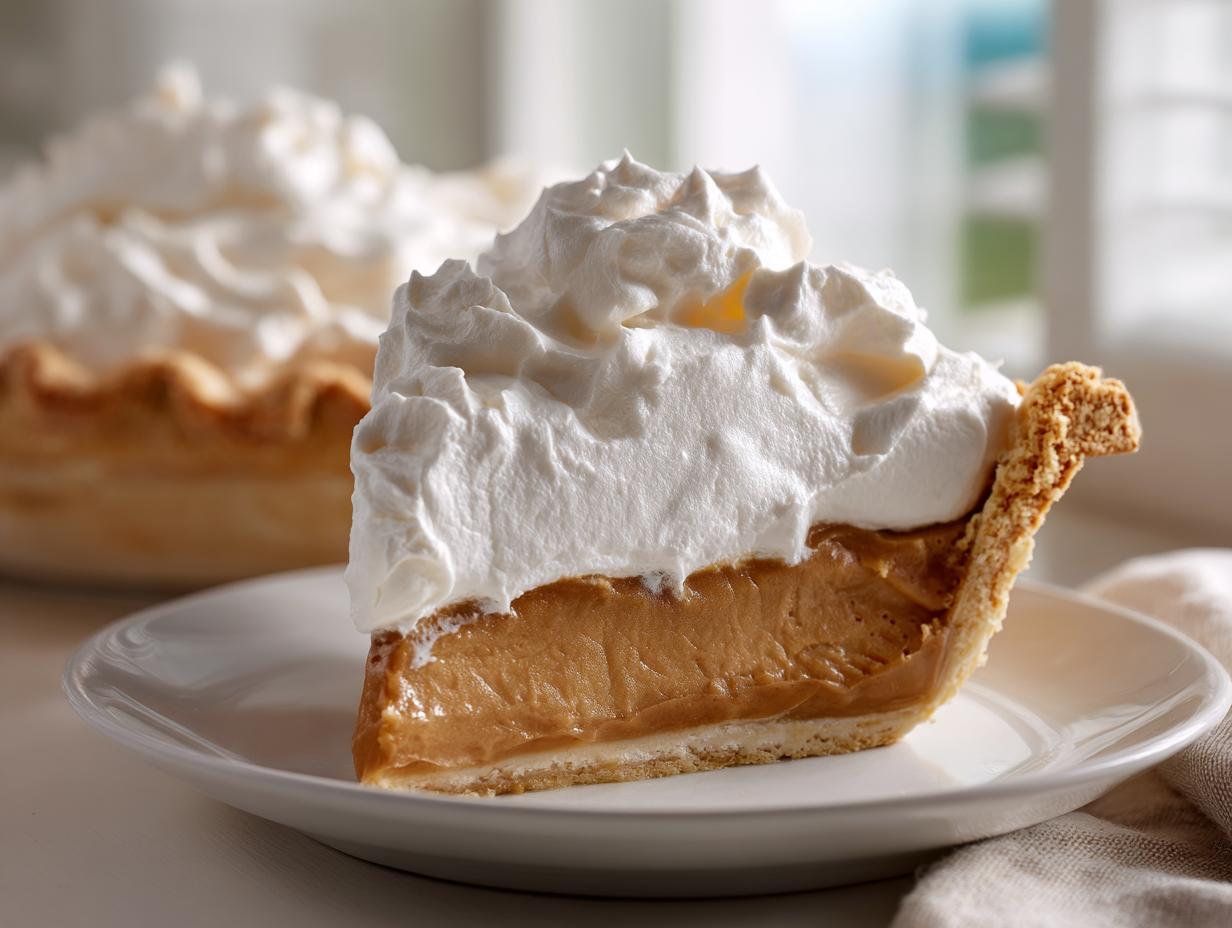
If you’re anything like me, you’ve got a soft spot for those truly classic, comforting American desserts. The ones that taste like a hug? This caramelized onion dip might be savory, but my heart lives for this rich, velvety butterscotch pie.
Forget those overly sweet, dull fillings you sometimes find. We’re making an Old-Fashioned Creamy Butterscotch Pie, and we’re doing it from scratch to get that show-stopping, silky-smooth texture. Leo and I treat recipes like projects here at Dishicious, so I’ve methodically broken down every step needed to ensure this caramel custard dessert is foolproof.
You get that incredible, deep brown sugar flavor without any fuss or guesswork. Trust me, once you master tempering those yolks, this becomes your go-to rich dessert recipe for every gathering, holiday, or just because it’s Tuesday!
- Why This Old-Fashioned Butterscotch Pie Recipe Works
- Ingredients for Your Creamy Butterscotch Pie Recipe
- How to Make This Old-Fashioned Butterscotch Pie
- Tips for the Best Creamy Butterscotch Pie
- Storage and Serving Suggestions for Your Butterscotch Pie
- Frequently Asked Questions About This Butterscotch Pie
- Estimated Nutrition for This Rich Dessert Recipes Slice
- Share Your Classic Dessert to Bake Experience
Why This Old-Fashioned Butterscotch Pie Recipe Works
I know what you’re thinking: making a custard pie from scratch sounds like a total time commitment. But honestly, this butterscotch pie is surprisingly fast to cook, and the payoff is huge! It’s all about the fundamentals that yield that perfect, indulgent result.
- It gives you that deep, authentic brown sugar dessert pie flavor you just can’t get from a mix.
- It delivers the incredible, silky smooth pie filling everyone craves.
- It’s seriously impressive! This is easily the best holiday pie recipe you can pull out when you have guests coming over.
Achieving a Velvety Butterscotch Pie Filling
The secret to that unbelievably creamy texture? It’s 100% in that tempering step we’ll cover next. We are gently introducing the hot milk to the cold egg yolks, nice and slow. If you rush this part—and I mean really slowly—you prevent the eggs from scrambling.
When you get that temperature just right, the yolks turn into the richest, thickest base for our filling. It’s the difference between a pudding-like pie and a truly velvety custard. It’s worth the extra minute of whisking, promise!
Simple Secrets for a Perfect Butterscotch Pie
Even though we are baking this from scratch, we are keeping it super simple. First thing: the crust must be baked and completely cool before you even think about adding the hot filling. A warm crust equals a mushy bottom, and no one wants that heartbreak!
The second big thing for this specific butterscotch pie? Patience during the chill time. You need a minimum of four hours in the fridge, maybe even longer, so that custard sets up perfectly firm. Don’t skip the chill; it solidifies all our hard work!
Ingredients for Your Creamy Butterscotch Pie Recipe
Okay, let’s gather our supplies! Because we are making this old fashioned butterscotch pie properly—from scratch—we need everything measured out perfectly. I’ve divided the list up so you aren’t overwhelmed when the custard starts cooking; this is where being systematic pays off!
If you’re using a homemade crust, make sure it’s cooled completely. It’s the foundation for our whole dessert, and we don’t want any soggy bottoms here!
For the Silky Smooth Butterscotch Pie Filling
This is where the magic happens. Notice those egg yolks? That’s what gives us that incredible, rich, velvety butterscotch pudding pie mouthfeel instead of a watery custard base. Don’t skip whipping those yolks lightly before we temper them!
- 1 pre-made or homemade 9-inch pie crust, baked
- 1 cup packed light brown sugar
- 1/4 cup all-purpose flour
- 1/4 teaspoon salt
- 1 1/2 cups whole milk
- 3 large egg yolks, lightly beaten
- 1/2 cup (1 stick) unsalted butter, cut into pieces
- 1 teaspoon vanilla extract
For the Whipped Cream Topping
We need a light, airy topping to balance that deep, brown-sugar richness. This comes together in about two minutes once the pie is chilled and ready to serve.
- 1 cup heavy whipping cream
- 2 tablespoons powdered sugar
Gathering these items, like my favorite butter cookies, just before you start stove work makes the process so much smoother!
How to Make This Old-Fashioned Butterscotch Pie
Alright, get your whisk ready! This is the main event. We’re turning simple pantry staples into that glorious, decadent filling for our butterscotch pie. Remember my project-manager brain? We’re tackling this methodically so we avoid any custard catastrophes. No rushing this part! You can find extra tips over at how to make this pie if you need a visual reference, but my system is totally foolproof.
Preparing the Base and Cooking the Butterscotch Pie Filling
First things first, step one: make sure that crust you baked earlier is fully cool. I mean bone-chillingly cool! In a medium saucepan, we whisk together your brown sugar, flour, and salt. It’s going to look dry, that’s fine.
Then, slowly whisk in the whole milk until everything disappears into a smooth liquid. Pop that over medium heat. Now this is important: cook it, stirring constantly, until it thickens enough to coat the back of a spoon. We want it thick like pudding, but please, do not let it boil rapidly! Rapid boiling messes up the sugar structure, and we are aiming for that perfectly rich dessert recipes texture, not hard candy.
Tempering Eggs and Finishing the Custard for Your Butterscotch Pie
Once it coats the spoon, pull that pan off the heat right away. This next part is where we create that amazing silky smooth pie filling, and you need to pay attention! In a separate little bowl, whisk your three egg yolks, just until they’re pale yellow and combined.
Now, the tempering trick: take about half a cup of that hot milk mixture and drizzle it slowly—I mean, drop by drop at first—into those yolks while you whisk non-stop. If you dump the liquid in too fast, you end up with sweet scrambled eggs! Once the yolks are warmed up, pour that tempered mix back into the saucepan with the rest of the milk base. Return it to low heat for just a minute or two, stirring constantly, until it looks noticeably thicker. Seriously, do not boil it!
Off the heat again! Stir in the butter pieces until they melt right into the custard, making it all glossy. Then, the vanilla goes in. Pour that hot, beautiful filling straight into your cooled crust. For a good velvety texture, I like to strain this custard through a fine sieve right before pouring it in—it catches any tiny speck that might have cooked too fast. Make sure you press plastic wrap directly against the filling’s surface before chilling. This is key for that perfect creamy result!
Chilling and Topping the Final Butterscotch Pie
Your creamy old-fashioned butterscotch pie needs a serious rest now. Pop it into the fridge for a minimum of four hours. I usually let mine go overnight because that setting time is non-negotiable for a clean slice! Once it’s firm, whip up your heavy cream with the powdered sugar until you get firm peaks. Spread that gorgeous cloud over your perfectly set, chilled pie. That’s it! We just made a showstopper from scratch.
Tips for the Best Creamy Butterscotch Pie
Even though we nailed the technique in that last section, sometimes small adjustments make the difference between a great pie and *your* signature butterscotch pie. I always keep these little tricks handy because the difference between good and spectacular is often in the details!
Remember that straining tip I mentioned earlier? Seriously, do it! If you poured your custard out nice and smooth, strain it again before it goes into the crust. It guarantees that beautiful, silky smooth pie filling that melts in your mouth. It’s an extra 30 seconds, but it removes any chance of tiny cooked yolk bits clinging in there.
Ingredient Tweaks for Your Butterscotch Pie
If you want to lean into that deep, classic flavor profile people associate with southern style pies, you absolutely need to play with the sugar. I always stick to light brown sugar because it whips up nicely, but my go-to upgrade for an even richer dessert is swapping out a quarter cup for dark brown sugar.
That dark brown sugar brings molasses notes that just deepen the whole caramel experience. It takes this from a regular dessert to one of those truly indulgent sweet treats. Try it next time you need that extra complex flavor in your brown sugar dessert pie. It’s fantastic!
Storage and Serving Suggestions for Your Butterscotch Pie
So you’ve made this incredible, rich butterscotch pie—now how do we keep it perfect until it’s time to serve? Since this is a custard pie, just like making my yummy chicken alfredo, it needs to stay cold. You absolutely must keep the finished pie covered tightly in the refrigerator.
It stays wonderfully fresh for about three to four days. Any longer than that, and the texture starts to change a little bit, which we don’t want for our beautiful, silky filling.
For serving, you want it chilled, of course. But if it’s been chilling for ages, pull it out about fifteen minutes before slicing. That little rest lets the filling soften just enough so you get those clean slices, and it really lets the butterscotch flavor shine through!
Frequently Asked Questions About This Butterscotch Pie
I always get so many questions once folks see just how gorgeous this butterscotch pie comes out! It’s understandable; it looks fancy, but it’s easier than you think. Here are a few things people often ask me right after they’ve decided to bake a truly classic dessert to bake.
Can I make a no bake butterscotch pie using this recipe?
That’s a great question, especially if you’re looking for the fastest possible route! But for this specific recipe—the rich, old fashioned butterscotch pie—the answer is no, you can’t skip the stovetop part. We have to cook that custard base with the flour and egg yolks to make sure it sets up properly once chilled.
If you’re craving something truly no-bake, you usually have to rely on instant pudding mixes or melted chips, which gives you a totally different texture. Stick to these steps for the definitive creamy, cooked custard flavor in your butterscotch pie!
What is the secret to a silky smooth butterscotch pie filling?
You bet I can tell you! The secret, my friend, is all about managing the heat and those egg yolks. Two things must happen to get that truly silky smooth pie filling:
- Temper, Temper, Temper: You have to pour that hot milk into the yolks slowly while whisking like crazy so the eggs warm up without scrambling.
- No Boiling! Once the yolks go back in, you cook it until it coats the spoon, but you must keep the heat low enough so it never hits a hard, rolling boil. Little gentle bubbles are fine, but no frantic boiling allowed!
Do those two things, and you’ll have the creamiest filling imaginable!
Can I use a store-bought crust for this butterscotch pie?
Absolutely, yes, you can! I cheer for efficiency! If you’re looking for an easy homemade butterscotch dessert experience, grab a sturdy, pre-made 9-inch crust, bake it according to the package directions, and let it cool totally. That’s what I listed in the ingredients!
While making a from scratch pie crust is rewarding, don’t let that stop you from enjoying this amazing filling. The focus here is that velvety brown sugar center, not wrestling with pastry the day before your guests arrive. Enjoy the shortcut!

If you’re looking for more cozy recipes perfect for the colder months, check out my favorites in this best winter desserts guide!
Estimated Nutrition for This Rich Dessert Recipes Slice
Now, I’m not a nutritionist, and let’s be real—when you’re making a truly decadent, old fashioned butterscotch pie like this, you aren’t exactly focused on counting every single calorie, are you?
Because we’re using real butter, packed brown sugar, and egg yolks for that incredible texture, this is definitely an indulgent sweet treat! So, here’s my standard disclaimer for all my indulgent recipes:
The nutritional data provided on dessert recipes, especially one as wonderfully rich as this butterscotch pie, is just an estimate. It really depends on the exact brand of butter you use, the size of your eggs, and even how thick your cream topping ends up being!
Think of this as a wonderful finale for your feast—pure joy in a slice. If you decide to skip the whipped cream, that’s an easy way to adjust things slightly, but honestly, just enjoy the deliciousness of this classic dessert knowing it was made with lots of love!
Share Your Classic Dessert to Bake Experience
Now that you’ve got this incredible butterscotch pie cooling in the fridge, or maybe you’ve already dug into a slice, I want to hear all about it! That’s the best part about sharing these recipes—knowing they’re bringing joy to your table, just like they do ours.
Did this recipe live up to your expectations for a truly classic dessert to bake? I’d be over the moon if you could leave a quick rating below—five stars means you think this is a top-tier pie recipe for guests!
And please, drop a comment! I’m genuinely curious about your results. I always struggle deciding on the topping next time. So tell me, what topping did you use on your pie? Did you stick to the fluffy whipped cream, or did you try something unexpected?
PrintOld-Fashioned Creamy Butterscotch Pie

Make a rich, velvety butterscotch pie from scratch. This recipe delivers a classic, indulgent dessert with a silky-smooth filling that is perfect for holidays and gatherings.
- Prep Time: 20 min
- Cook Time: 15 min
- Total Time: 4 hr 35 min
- Yield: 8 servings 1x
- Category: Dessert
- Method: Stovetop Cooking and Chilling
- Cuisine: American
- Diet: Vegetarian
Ingredients
- 1 pre-made or homemade 9-inch pie crust, baked
- 1 cup packed light brown sugar
- 1/4 cup all-purpose flour
- 1/4 teaspoon salt
- 1 1/2 cups whole milk
- 3 large egg yolks, lightly beaten
- 1/2 cup (1 stick) unsalted butter, cut into pieces
- 1 teaspoon vanilla extract
- 1 cup heavy whipping cream
- 2 tablespoons powdered sugar
Instructions
- Prepare your 9-inch pie crust and let it cool completely.
- In a medium saucepan, whisk together the brown sugar, flour, and salt.
- Gradually whisk in the whole milk until smooth.
- Place the saucepan over medium heat. Cook, stirring constantly, until the mixture thickens enough to coat the back of a spoon, about 8 to 10 minutes. Do not let it boil rapidly.
- Remove the saucepan from the heat. In a small bowl, whisk the egg yolks lightly. Slowly drizzle about 1/2 cup of the hot milk mixture into the egg yolks while whisking constantly to temper them.
- Pour the tempered egg mixture back into the saucepan with the remaining hot mixture. Return to medium-low heat. Cook, stirring constantly, for 1 to 2 minutes until the custard thickens further. Do not boil.
- Remove from heat. Stir in the butter pieces until fully melted and smooth. Stir in the vanilla extract.
- Pour the hot butterscotch filling immediately into the cooled, pre-baked pie crust.
- Press plastic wrap directly onto the surface of the filling to prevent a skin from forming. Chill the pie in the refrigerator for at least 4 hours, or until the filling is completely set.
- Before serving, prepare the topping: In a chilled bowl, whip the heavy whipping cream and powdered sugar until stiff peaks form.
- Spread or pipe the whipped cream over the chilled pie. Slice and serve immediately.
Notes
- For a truly silky smooth filling, strain the custard through a fine-mesh sieve before pouring it into the crust.
- If you want a richer flavor, substitute 1/4 cup of the brown sugar with dark brown sugar.
- Chill the pie for a minimum of 4 hours to ensure the filling sets firmly.
Nutrition
- Serving Size: 1 slice
- Calories: 380
- Sugar: 35g
- Sodium: 180mg
- Fat: 22g
- Saturated Fat: 13g
- Unsaturated Fat: 9g
- Trans Fat: 0.5g
- Carbohydrates: 45g
- Fiber: 1g
- Protein: 5g
- Cholesterol: 110mg