
When I think about true comfort food, my mind immediately goes to something warm, sweet, and impossibly creamy. Forget those dry, rice-heavy versions you might have suffered through; we’re going straight for nostalgia here. This is my recipe for the Ultra Creamy Old-Fashioned Stovetop Rice Pudding, and trust me, it hits every single mark. We make this entirely on the stove, which means no fussy oven times, just pure, rich texture unfolding in a single pot.
That smooth, luxurious feel isn’t an accident, either! It comes from seeing recipes like a project that needs optimizing, just like our founder Leo Grant is always talking about when simplifying classics. We focus only on the steps that matter to deliver that rich, homemade taste without turning dinner into a multi-hour ordeal. If you follow this method, you’ll have that perfect pudding everyone remembers. You can check out more about how we simplify cooking over on our About Page, but for now, let’s just get stirring!
- Why This Ultra Creamy Old-Fashioned Rice Pudding Is a Family Favorite Dessert
- Ingredients for the Best Rice Pudding Recipe
- How To Make Creamy Rice Pudding Using the Stovetop Method
- Serving Suggestions for Your Classic Vanilla Cinnamon Dessert Rice Pudding
- Storage and Make Ahead Dessert Ideas for This Rice Pudding
- Troubleshooting Common Issues with Stovetop Rice Pudding
- Frequently Asked Questions About Traditional Rice Pudding
- Nutritional Estimates for This Rich and Smooth Pudding
- Share Your Nostalgic Rice Dessert Experience
Why This Ultra Creamy Old-Fashioned Rice Pudding Is a Family Favorite Dessert
When you need that hug-in-a-bowl feeling, nothing beats this dessert. It checks all the boxes: it tastes totally old-fashioned, it fills the kitchen with the best smell, and it’s shockingly simple to pull off on a weeknight because we keep it right on the stovetop.
Why do people go wild for this version? It comes down to texture and trustworthiness. Here’s the rundown on why this is the one you’ll keep coming back to:
- It delivers that deep, slow-cooked creaminess you think you can only get from an all-day bake.
- It relies on basic ingredients because comfort food shouldn’t require a specialty store trip.
- The stovetop method is fast; we’re looking at about an hour total for that cozy payoff!
Achieving the Richest and Smoothest Pudding Texture
The secret to getting that incredible, rich, smooth texture without baking is all about the rice we use. We start with short-grain rice. As it simmers slowly in the milk, the starches break down right in the pot. That starch is what naturally thickens the whole thing up and gives it that luxurious mouthfeel that long-grain rice just can’t match. Trust me, that slow release is key, so don’t rush Step 2!
Simple 5 Ingredient Rice Pudding Base
Even though our full ingredient list has about seven things, the real heart of this dish—the part that screams comfort—is built on just a few core items. We are talking rice, milk, a tiny bit of water to start, sugar, and vanilla. That’s why this recipe is often called a Simple 5 Ingredient Rice Pudding! It’s proof that extraordinary flavor doesn’t need extraordinary effort. We add the salt and cinnamon in later, but that base? It’s pure, easy magic.
Ingredients for the Best Rice Pudding Recipe
Alright, gathering your supplies shouldn’t feel like a chore because this easy stovetop pudding comes together with things you likely already have! We’re talking about the core components necessary to get that thick, rich base going. For the absolute best results and that deep creaminess everyone raves about, pay close attention to the type of rice and milk you grab.
Here is exactly what you’ll need:
- 1 cup short-grain white rice (Arborio or medium-grain works best)
- 4 cups whole milk
- 1 cup water
- 1/2 cup granulated sugar
- 1 teaspoon vanilla extract
- 1/4 teaspoon ground cinnamon (plus extra for topping)
- Pinch of salt
Ingredient Notes and Substitutions for Perfect Rice Pudding
When it comes to the rice, please skip the long-grain white rice if you can—it just doesn’t release the necessary starch for that velvety texture. Short-grain is where it’s at. If you happen to have Arborio rice (like for risotto), that is actually a fantastic substitute because it’s super starchy and guarantees a creamy finish!
Same rule applies to the milk: use whole milk for richness. If you want to go absolutely over the top? Use half heavy cream instead of half the whole milk specified. It makes this dessert incredibly decadent. If your family loves those chewy little bursts of flavor, stir in about a half cup of golden raisins during the last ten minutes of cooking. They plump right up and are such a nice surprise!
How To Make Creamy Rice Pudding Using the Stovetop Method
This is where the magic really happens, friends! Making this on the stovetop truly is the fastest route to that rich, comforting texture we’re chasing. You’ll need about 5 minutes to get everything set up, but then the cooking process takes roughly 55 dedicated minutes. The key here, and please listen closely because this is how we avoid a scorched disaster, is babying the mixture. We need gentle heat and lots of stirring engagement—think of this prep time as your hour to relax by the stove!
This method guarantees less fuss than baking, and it lets us control that starch release perfectly. If you’re looking for other simple stovetop wins, you should check out my instructions for homemade applesauce—it uses similar low-and-slow principles!
Step 1: Initial Absorption of Water for the Rice Pudding
First things first, combine your rice and the single cup of water in a medium saucepan. Don’t use too big of a pot, or the mixture won’t cook evenly! Set that over medium-high heat and bring it up to a boil. As soon as it starts bubbling hard, drop the heat down immediately. We’re just simmering this part until all that water disappears—it usually takes about five minutes. The goal here is just to give the rice a head start before we introduce all that glorious milk.
Step 2: Slow Simmer for Maximum Creamy Rice Pudding Texture
Now, pour in all four cups of whole milk. Bring this mix back up to a gentle simmer—we don’t want a rolling boil, just those slow, lazy bubbles around the edge. This is the longest part. You’ll need to keep cooking this for a good 40 to 50 minutes. You absolutely have to stir frequently—every few minutes—especially scraping the very bottom of the pan. This constant movement is what forces the rice to release its starches into the milk, which creates that wonderfully Creamy Homemade Rice Pudding consistency. If you let it sit too long, it burns, and that’s no good! Keep stirring patiently until the entire thing looks thick and it just coats the back of a spoon. You’ll know it when you see it; it looks rich and velvety.
Serving Suggestions for Your Classic Vanilla Cinnamon Dessert Rice Pudding
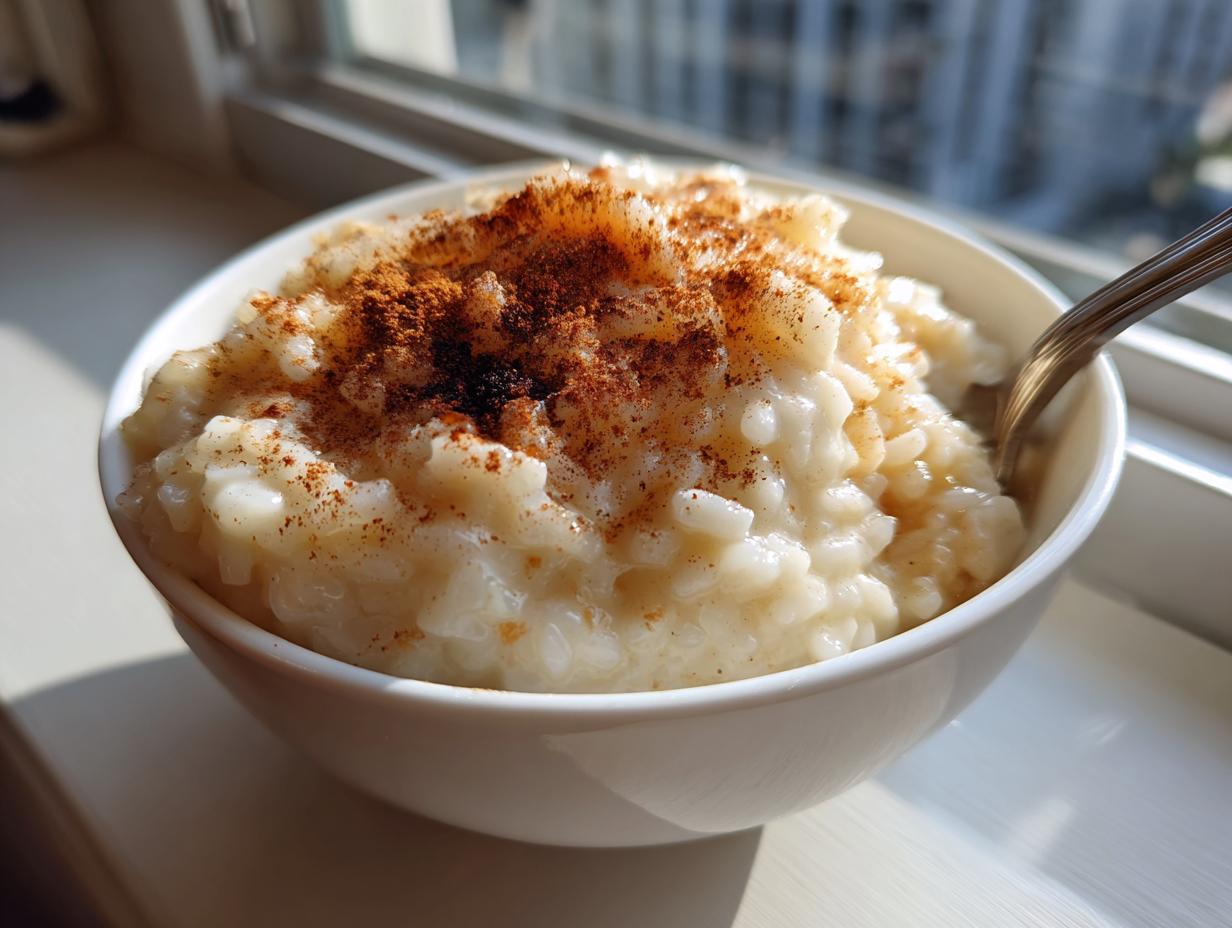
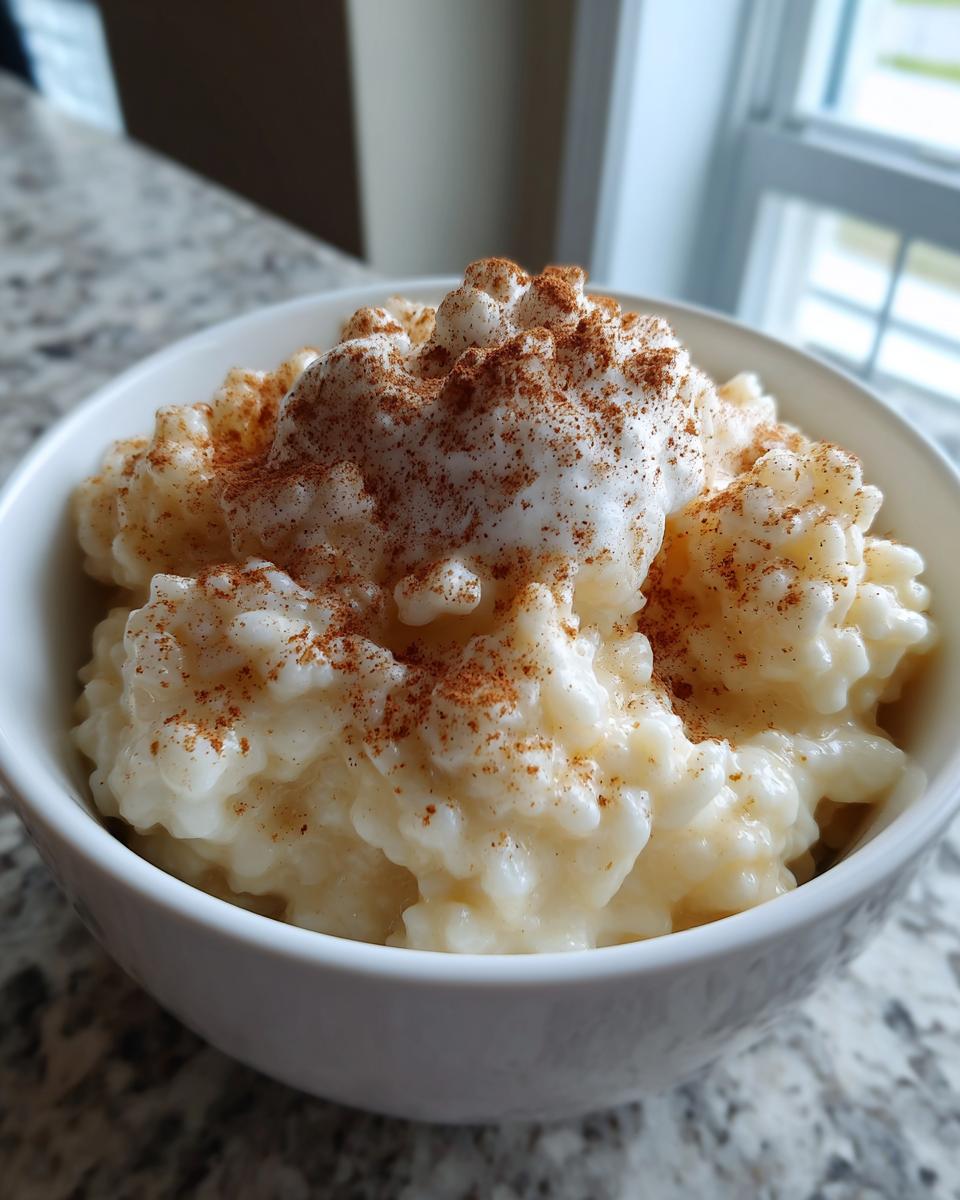
That 50-minute wait is over, and you’ve successfully made the ultimate Classic Vanilla Cinnamon Dessert! Now, the big question: do you eat it right now while it’s piping hot, or do you chill it down? Honestly, I don’t discriminate! This pudding is delightful either way. It’s the perfect cozy, warming treat on a chilly evening, or it’s a cool, smooth indulgence straight from the fridge.
We’ve already whisked in the vanilla and cinnamon, so the flavor is built right in, but you can absolutely top it with a fresh dusting of cinnamon right before serving. That aroma alone is worth the effort!
Tips for Serving Rice Pudding Warm or Cold
If you want to serve it right away while it’s warm and liquidy, go for it! Just stir in that sugar, vanilla, and salt right off the heat, and dig in. But if you’re planning on chilling it—which I highly recommend for that super thick texture—you need a specific little trick.
To stop that unfortunate, rubbery skin from forming on top while it cools in the fridge, grab a piece of plastic wrap and press it directly onto the surface of the pudding *before* you cover the whole bowl. It basically traps steam right where it needs to be. When you pull it out later and want to enjoy it cold, it’s perfect! If you decide to reheat leftovers the next day, the pudding will definitely have firmed up a ton. Don’t panic! Just stir in a splash or two of fresh whole milk while heating it gently on the stove until it loosens back up to that lovely, dreamy consistency.
Storage and Make Ahead Dessert Ideas for This Rice Pudding
I always try to plan for leftovers because, frankly, this dessert tastes even better the next day once all those cozy flavors have really settled in. Since this is a stovetop version, it is absolutely fantastic as a Make Ahead Dessert Idea. You don’t have to worry about it drying out like some baked goods do!
Once you’ve added your sugar and flavorings, you need to cool it down properly for storage. Remember that trick I mentioned about pressing the plastic wrap right onto the surface? That’s essential for storage, too! It keeps the moisture locked in and prevents that weird skin.
Transfer your pudding into an airtight container once it’s cooled a little bit on the counter. Properly stored in the refrigerator, this rich and smooth pudding stays deliciously creamy for about four to five days. I find that by day five, the rice grains have gotten a little swollen, but honestly, it’s still great!
If you’re looking for other smart recipes where you can prep everything now and enjoy later, you might want to check out my foolproof guide for make-ahead egg muffins. Meal prepping saves the day, and that totally applies to dessert, too!
Troubleshooting Common Issues with Stovetop Rice Pudding
When you’re relying on slow simmering, sometimes things don’t go exactly to plan. That’s okay! That’s just part of cooking, and honestly, it’s part of what makes a recipe trustworthy—knowing how to fix it when it acts up. Since we aren’t baking this, most of our problems crop up from heat mismanagement or not stirring enough. If you run into a snag, here are the few little hiccups I run into sometimes and how I fix them right there on the stove.
If your dessert is too thick or too thin, that’s usually just a matter of timing, but scorching? That requires a quick rescue mission. Don’t stress, though; we can usually save it!
My Rice Pudding Stuck to the Bottom: How to Fix It
This is the number one fear with any stovetop pudding, right? Milk scorches so fast! If you notice a little brown sticking to the bottom of the pan, pause everything. Take the whole pot off the heat source immediately. If the sticking is minor—just a light tan layer—don’t panic. That slight caramelization can actually add a deeper, nuttier flavor to your Old Fashioned Comfort Dessert, so you might just leave it!
If it looks seriously burnt, though, you have to move fast. Gently scoop all the good, unstuck pudding from the top layer into a clean, separate saucepan. Be super careful not to disturb the bottom layer! If the flavor of the *burnt* part has already seeped into the rest, you might need to thin it out with a tiny splash of extra whole milk, sweeten it up a hair if the flavor is too bitter, and just gently reheat that salvaged portion. Never try to scrape the burnt bits back into the good stuff—that just ruins the whole batch!
Frequently Asked Questions About Traditional Rice Pudding
Okay, I know you might have a few lingering questions! Rice pudding seems simple, but getting that perfect, velvety texture takes a little insider knowledge. I’ve pulled together some of the most common things people ask about making this Traditional Rice Pudding at home. We want your dessert day to be stress-free!
Before we jump in, if you ever want to compare notes on other simple starch-based dishes—like how to get restaurant-perfect texture on grains—you can see my tips on making restaurant-style Mexican rice. But back to pudding!
Can I use leftover cooked rice to make this rice pudding?
That’s a great question since this is often a go-to for using up leftovers! While my main recipe calls for raw short-grain rice to maximize starch release, you absolutely can use leftover cooked rice. If you do, you skip Step 1 entirely. Just add your cooked rice directly to the simmering milk in Step 2. Be warned, though: because the rice is already soft, your total cook time will drop significantly—maybe only 20 to 25 minutes of simmering instead of 50. Watch carefully so it doesn’t turn into mush instead of becoming that Rich and Smooth Pudding!
What is the best rice for creamy rice pudding?
Hands down, you need short-grain white rice, like Calrose or traditional pudding rice. If Arborio rice is easier for you to find, grab that! These types of rice have higher starch content and break down perfectly while simmering, releasing that glorious thickener into the milk naturally. If you use Uncle Ben’s or another long-grain rice, it tends to keep its shape too much and you’ll end up with a thinner, less comforting bowl that tastes more like plain cooked rice than a true Family Favorite Dessert.
Nutritional Estimates for This Rich and Smooth Pudding
I know some of you need to watch the details, and while I focus on flavor over everything else, I always keep a rough estimate handy! Remember, this is just a snapshot based on the whole milk, sugar, and regular white rice measurements. If you swap in heavy cream or add a ton of golden raisins, these numbers will change, of course.
These estimates are based on serving one cup of this Rich and Smooth Pudding:
- Serving Size: 1 cup
- Calories: Roughly 350
- Total Fat: About 8 grams (don’t forget—that’s flavor!)
- Carbohydrates: Around 60 grams
- Protein: A helpful 10 grams, thanks to all that milk!
- Sugar: Approximately 25 grams
We keep this nice and simple—no mysterious ingredients, just wholesome goodness that satisfies that deep craving for a classic dessert. Think of this as a comforting treat for a cozy night in; it’s totally doable for your daily rhythm!
Share Your Nostalgic Rice Dessert Experience
Whew! We made it through the slow simmering and stirring, and now you have the creamiest, most satisfying bowl of old-fashioned goodness possible. Now it’s your turn to jump in and tell me all about it! I absolutely love hearing how this Nostalgic Rice Dessert turned out for you and your family.
This recipe is a classic for a reason, but I know everyone has their own little touches. Did you stick strictly to the vanilla and cinnamon? Or maybe you drizzled on a little maple syrup instead of plain sugar?
I really want to know—how did you eat it? Were you team ‘scoop-it-out-hot-right-now’ or did you have the patience to wait for that chilled, firm texture? Please drop a rating (five stars would make my week!) down in the comments below. Sharing your success stories helps other people feel confident enough to try this recipe, and I love seeing your kitchen triumphs. If you made any tweaks or just followed my instructions to the letter, let me know! If you ever need to reach out directly with a question or feedback, you can always send a message through the contact page. Happy eating!
PrintUltra Creamy Old-Fashioned Stovetop Rice Pudding

Make the creamiest, old-fashioned rice pudding right on your stovetop. This simple recipe delivers rich, comforting flavor perfect for serving warm or chilled.
- Prep Time: 5 min
- Cook Time: 55 min
- Total Time: 60 min
- Yield: 4 servings 1x
- Category: Dessert
- Method: Stovetop
- Cuisine: American
- Diet: Vegetarian
Ingredients
- 1 cup short-grain white rice (Arborio or medium-grain works best)
- 4 cups whole milk
- 1 cup water
- 1/2 cup granulated sugar
- 1 teaspoon vanilla extract
- 1/4 teaspoon ground cinnamon (plus extra for topping)
- Pinch of salt
Instructions
- Combine the rice and water in a medium saucepan. Bring to a boil over medium-high heat, then reduce heat and simmer until the water is mostly absorbed, about 5 minutes.
- Add the whole milk to the saucepan. Bring the mixture to a gentle simmer, stirring frequently to prevent scorching on the bottom.
- Reduce the heat to low. Continue to cook, stirring every few minutes, for 40 to 50 minutes. The pudding thickens as the rice absorbs the milk and releases starch, creating a creamy texture.
- When the pudding reaches your desired thickness (it should coat the back of a spoon), remove it from the heat.
- Stir in the sugar, vanilla extract, cinnamon, and salt until fully combined.
- Serve the rice pudding warm immediately, or transfer it to a bowl, cover the surface directly with plastic wrap to prevent a skin from forming, and chill for at least 3 hours before serving cold.
Notes
- For an even richer texture, substitute 1/2 cup of the whole milk with 1/2 cup of heavy cream.
- If you prefer raisins, stir in 1/2 cup of golden raisins during the last 10 minutes of cooking.
- This is a great make ahead dessert; it thickens considerably upon chilling. Add a splash of milk when reheating if necessary.
Nutrition
- Serving Size: 1 cup
- Calories: 350
- Sugar: 25
- Sodium: 120
- Fat: 8
- Saturated Fat: 4
- Unsaturated Fat: 4
- Trans Fat: 0
- Carbohydrates: 60
- Fiber: 1
- Protein: 10
- Cholesterol: 25