
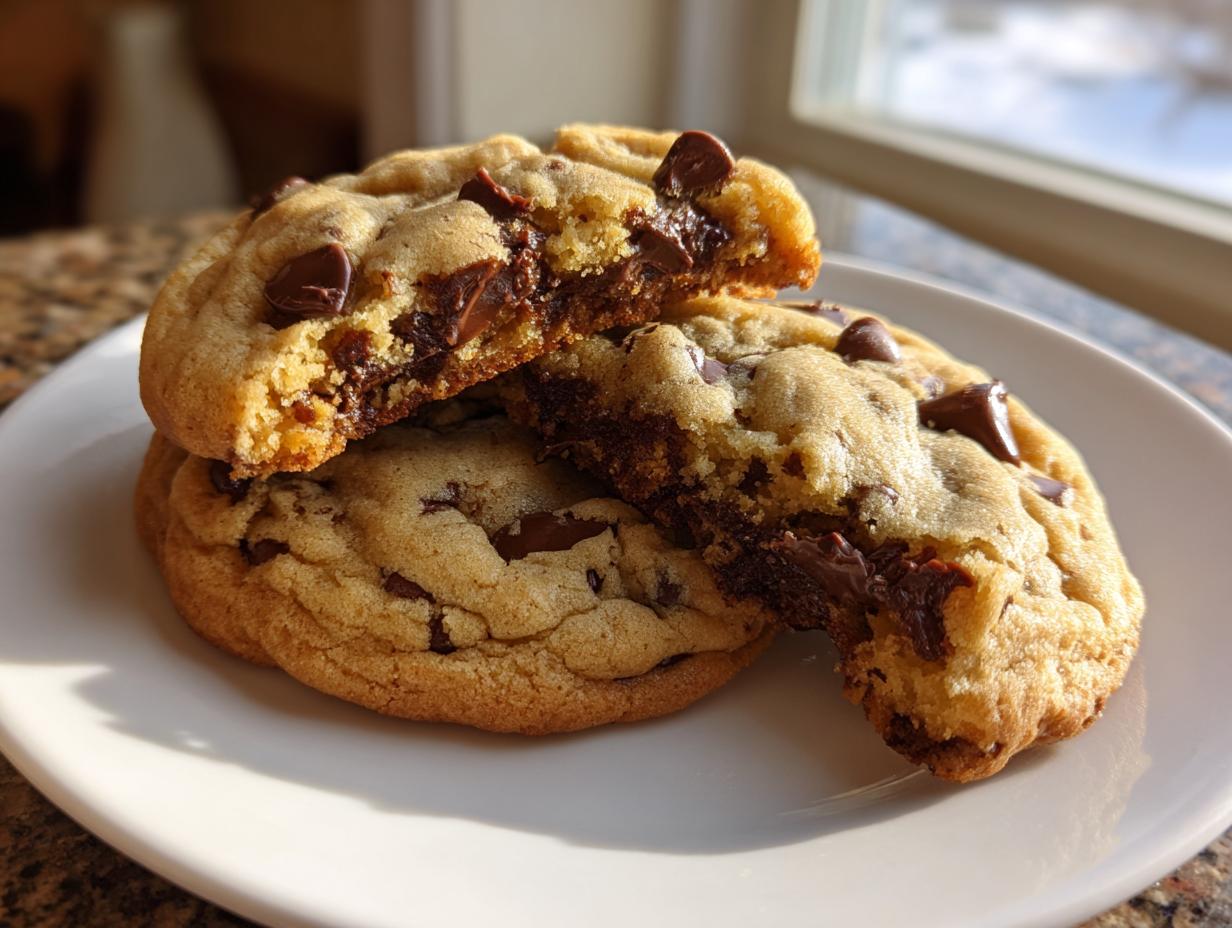
Let’s be honest: the quest for the perfect chocolate chip cookie is a universal mission. Everyone wants that thick, bakery-style magic, right? Well, after weeks of tinkering in my Chicago kitchen—treating it like a little project I needed to optimize—I cracked the code. This recipe delivers the ultimate thick, chewy homemade chocolate chip cookies you’ve been dreaming about. Forget flat, sad cookies; this method gives you reliable, soft centers and buttery, golden edges every single time. It’s foolproof, I promise! If you’re looking for other simple wins, check out my approach to making the best homemade onion dip recipe, proving that streamlined cooking works every time.
- Why This is the Best Homemade Cookie Recipe for Bakery Style Results
- Essential Ingredients for Perfect homemade chocolate chip cookies
- Step-by-Step Instructions for Thick Cookies Recipe
- Tips for Success: Achieving Bakery Style Cookies at Home
- Storage & Reheating Instructions for homemade chocolate chip cookies
- Variations on Classic Chocolate Chip Cookies
- Frequently Asked Questions about homemade chocolate chip cookies
- Estimated Nutritional Data for homemade chocolate chip cookies
- Share Your Best Homemade Cookie Recipe Experience
Why This is the Best Homemade Cookie Recipe for Bakery Style Results
So, why spend your time on this specific recipe when there are a million others out there? It comes down to engineering the perfect texture using simple physics, which is my favorite way to batch cook! This isn’t just a recipe; it’s a system designed for results. We focus heavily on three things that stop your cookies from spreading into pancakes: the butter temperature, using cold eggs, and mandatory chill time. Trust me, these elements are what separate a good cookie from the Best Homemade Cookie Recipe you’ll ever make.
This method guarantees those attributes everyone chases: seriously chewy centers, a slight crispness around the golden edges, and that impressive bakery-style thickness. We aren’t hunting for obscure ingredients here; we are just controlling the variables. If you want to know more about my whole approach to getting results, I lay out some extra pointers in my guide to chocolate chip cookie secrets. Also, if you ever need a soft cookie fix that uses pudding for moisture, these chocolate chip pudding cookies are a fun alternate test!
Essential Ingredients for Perfect homemade chocolate chip cookies
This is where our philosophy kicks in: great food doesn’t need a scavenger hunt for specialty items. We are using staples, but the clarity on how those staples behave is what matters most. When you see an ingredient listed, I’ve specified exactly how it should be prepared, which makes the process reliable—no guesswork needed! For the ultimate homemade chocolate chip cookies, here’s exactly what you need:
You’ll need 1 cup (2 sticks) of unsalted butter, which must be softened to a cool room temperature. Grab 1 cup packed of light brown sugar and 1/2 cup granulated sugar. Then come the two large eggs, and these must be cold—that’s important! Don’t forget 1 tablespoon of pure vanilla extract. For the dry side, measure out 2 1/4 cups of all-purpose flour, 1 teaspoon of baking soda, and 1 teaspoon of salt. Finally, the star: 2 cups of semi-sweet chocolate chips (I prefer the standard bag size, about 12 ounces).
If you want to see how butter plays a leading role in other simple bakes, check out my guide to classic butter cookies.
Ingredient Notes and Substitutions for homemade chocolate chip cookies
The contrast between the cool eggs and the softened butter is crucial if you want those thick cookies. If your eggs are warm, the batter spreads way too much! Stick with semi-sweet chocolate chips for that classic bakery flavor, but feel free to mix in some milk chocolate if that’s your jam. Quality matters here, so use real vanilla extract, not imitation stuff. The baking soda and salt are not negotiable; they control the spread and enhance the flavors of *everything* else in the bowl.
Step-by-Step Instructions for Thick Cookies Recipe
Alright, time to put the plan into action. If you follow these steps exactly, you are guaranteed a batch of Thick Cookies Recipe perfection. Remember, my project manager brain loves efficiency, so we keep the steps logical, which results in the Easy Chocolate Chip Cookie Recipe you’ve been waiting for.
Mixing the Dough for Gooey Center Cookies
First, get that mixer going on your softened butter and both sugars. You need to beat them until it looks light and creamy—that takes about two minutes. Don’t stop early! Next, add those cold eggs one at a time, making sure each one is incorporated fully before dropping in the next one, followed by your vanilla. Now, for the dry stuff: in a separate bowl, whisk the flour, baking soda, and salt together. Add this dry mix to your wet ingredients, but listen to me—mix on low speed only until the flour streaks *just* disappear. If you overmix now, you ruin the structure we’re building for those Gooey Center Cookies.
The Crucial Chill Time for homemade chocolate chip cookies
This step is non-negotiable if you want thickness. Unless you like pancakes, the dough *has* to chill. Cover the bowl and pop it in the fridge for at least 30 minutes. If you can manage it—and I highly recommend this for the deepest flavor—let it chill for up to 24 hours. Chilling slows down the butter melting process in the oven, which is the secret weapon for preventing spread and locking in texture. I learned this trick early on when testing for the best homemade cookie recipe.
Baking for Crispy Edge Cookies
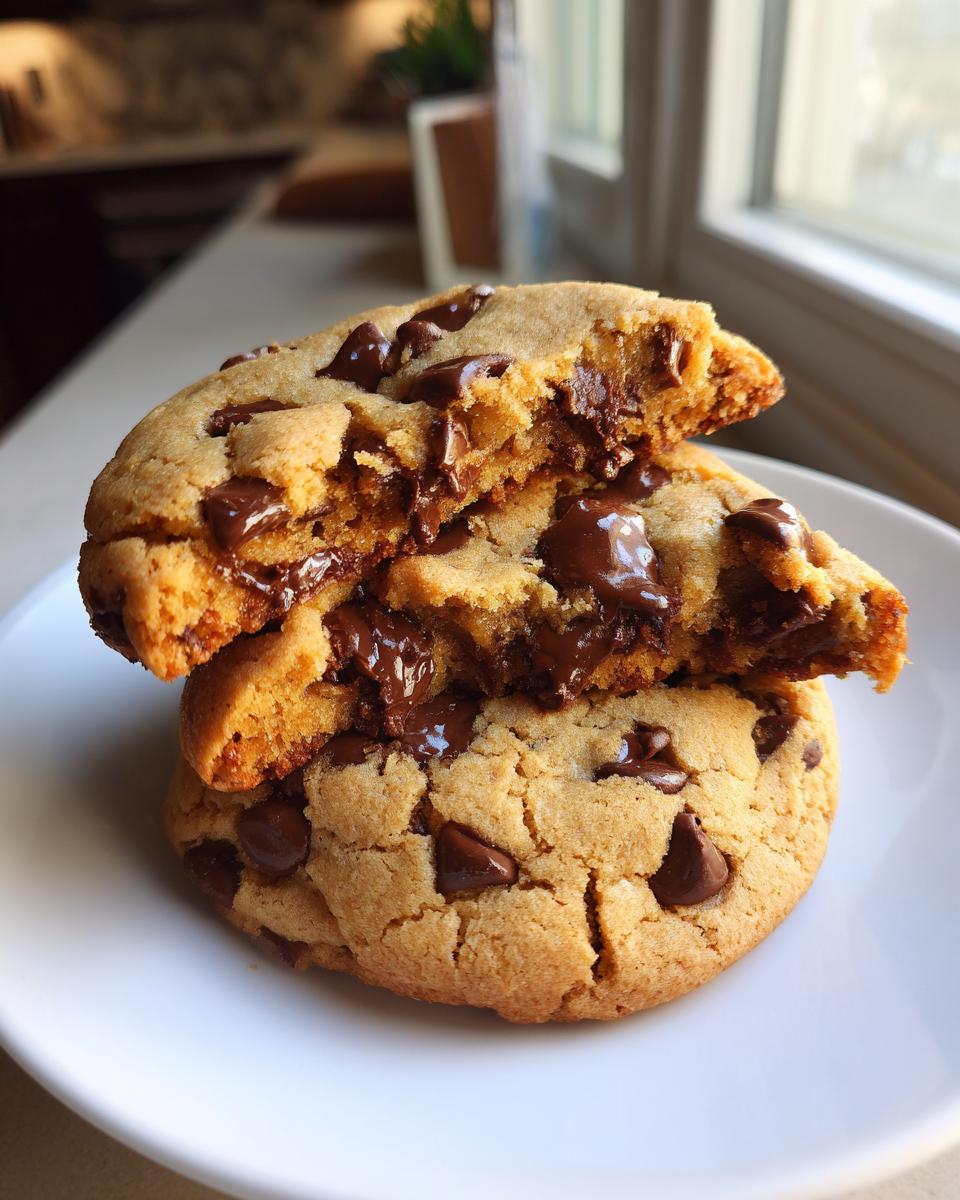
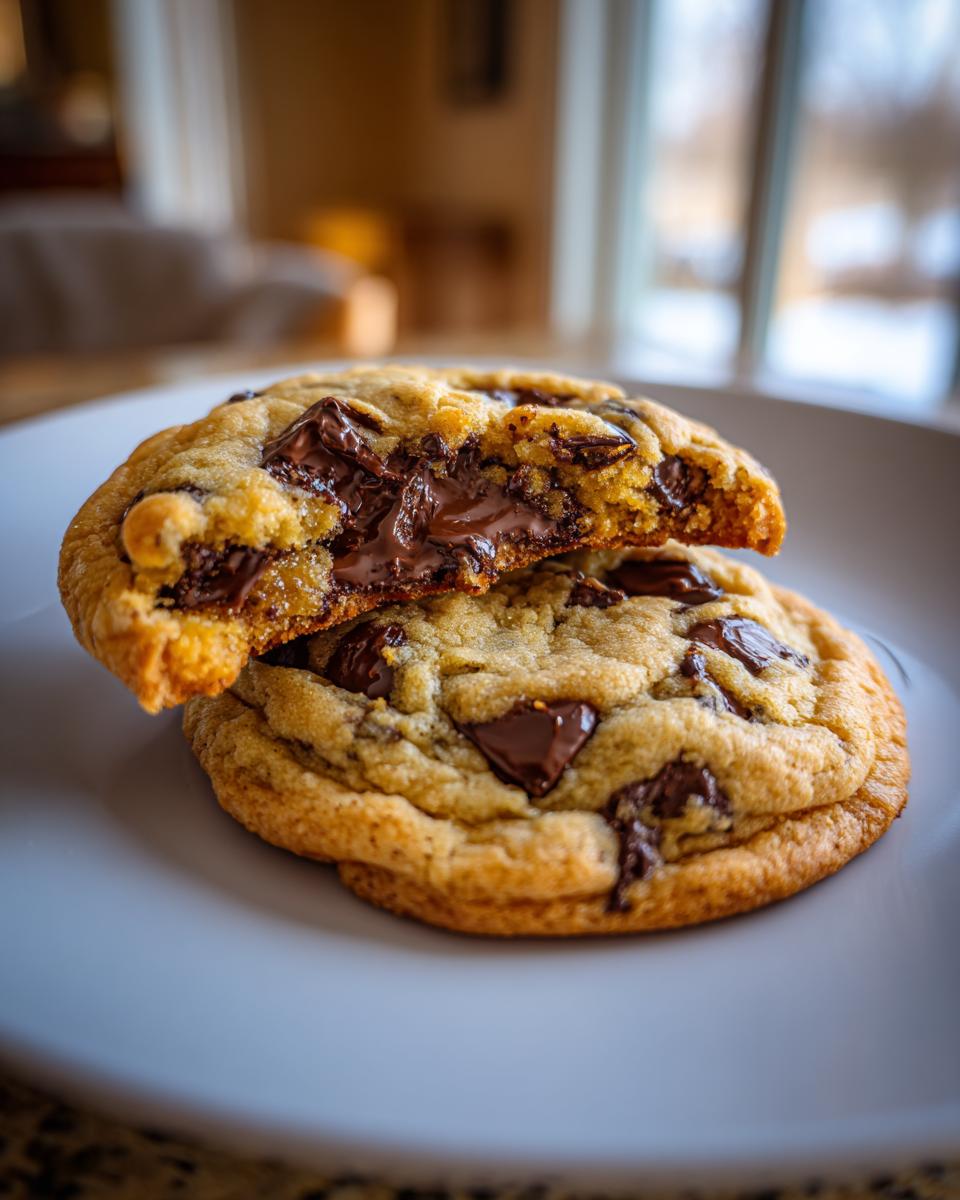
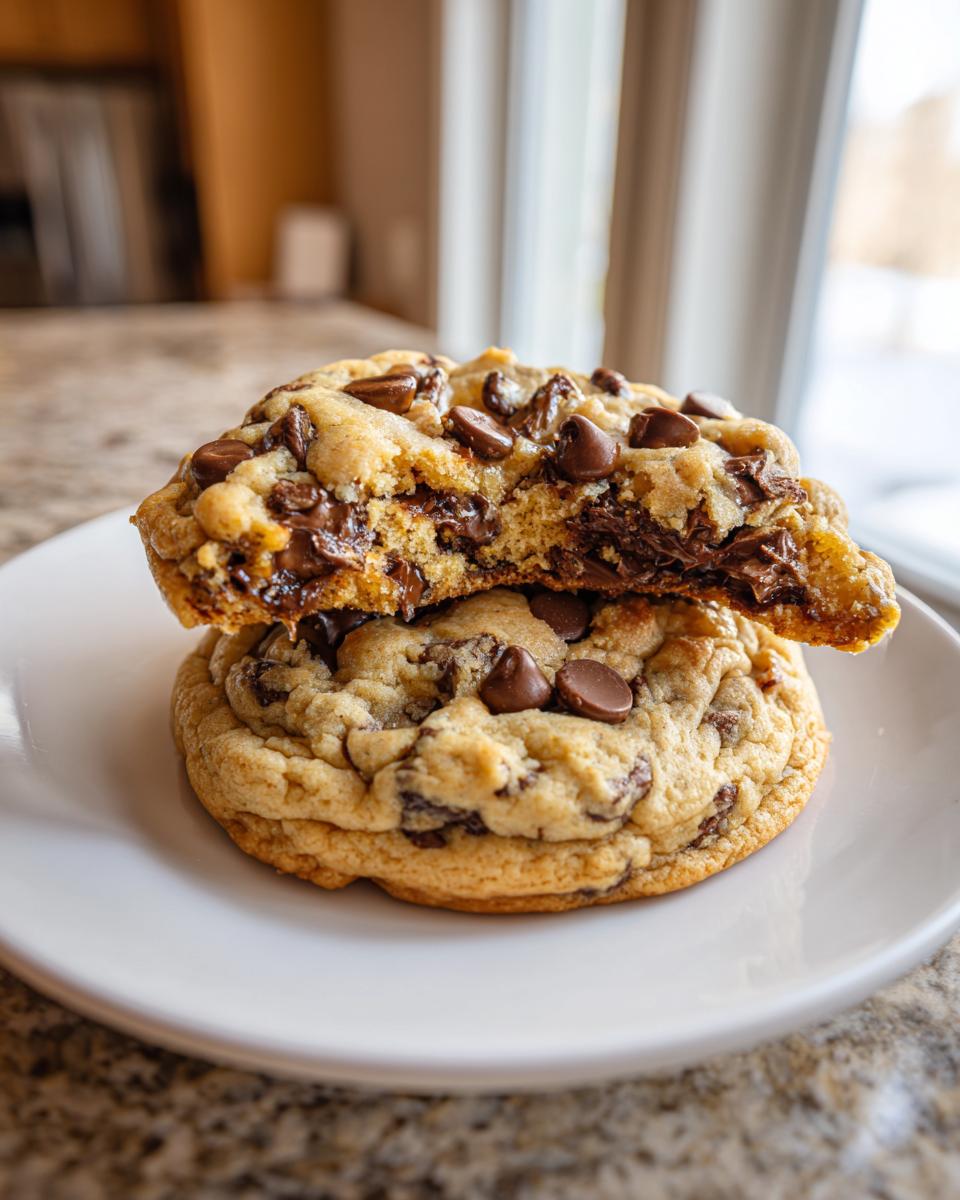
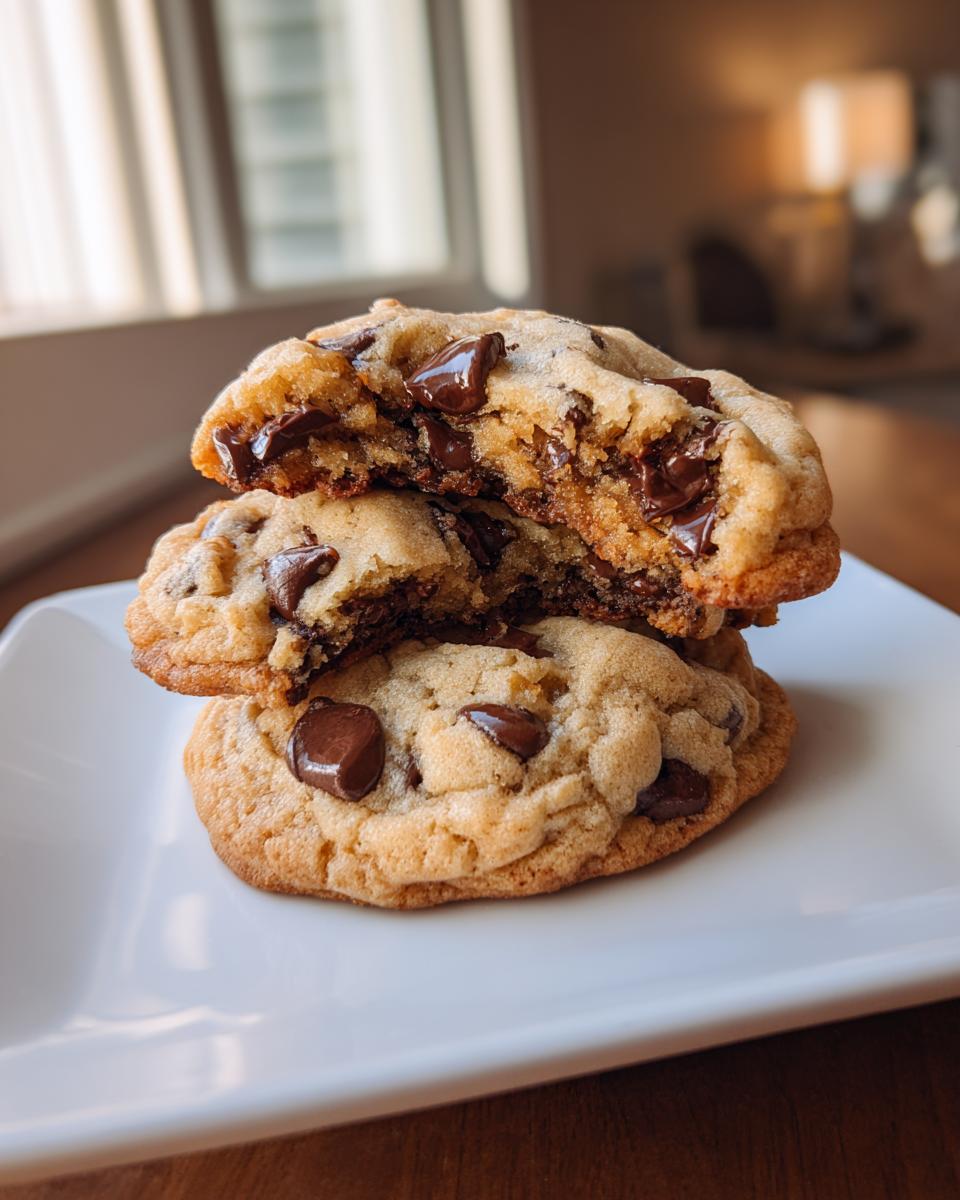
When you’re ready, preheat that oven to 375 degrees Fahrenheit. Line your sheets with parchment paper, always—it’s the simplest insurance policy you can buy. Scoop the dough (about two tablespoons each) and place them two inches apart, or stack two balls for extra height if you want them huge. Bake for 10 to 12 minutes. Here’s the biggest trick for Crispy Edge Cookies: pull them out when the edges look golden brown, but the center still looks slightly soft and underdone. Seriously! If you wait until the center looks baked, they’ll be hard once they cool.
When they come out, leave them sitting right there on the hot baking sheet for a solid five minutes. That final rest lets the residual heat finish setting the middle into that perfect chewy consistency. Then, move them gentle onto a rack. If you want to see another incredible cookie technique, my recipe for soft and chewy cake batter cookies relies on similar temperature controls!
For more insight on achieving that perfect texture without messing up the spread, you can look at how others tackle the challenge in methods like those listed here: bakery style chocolate chip cookies.
Tips for Success: Achieving Bakery Style Cookies at Home
I know recipes are great, but sometimes the little details make all the difference between a good bake and a legendary one. Since we are engineering these to be Bakery Style Cookies at Home, you need the insider knowledge. The absolute biggest difference-maker here is temperature control. Don’t skip the cold eggs! Putting cold eggs into that softened butter and sugar mixture shocks the dough slightly, which keeps it from flattening out in the oven. It’s simple science, really.
Beyond temperature, you must trust the timing of the bake itself. I mention it in the steps, but I need to repeat it: pull the cookies when they look slightly naked in the middle. If you wait until they look fully done, you’ve waited too long, and you’ll end up with a crispy edge but a hard center instead of chewy goodness. I have a separate post breaking down some other great methods for achieving that soft center, which you can read about best chewy chocolate chip cookies.
And remember what I always say—recipes are projects that must be respected! For those of you trying to recreate that giant, thick, almost under-baked look of certain famous bakeries, always stack your dough balls when scooping. It forces the cookie to bake up, not out. If you’re fascinated by other famous thick cookie concepts, check out my analysis of the famous Levain Bakery chocolate chip cookies.
Storage & Reheating Instructions for homemade chocolate chip cookies
One batch of these perfect homemade chocolate chip cookies is never enough, but when you actually manage to have leftovers, you need to treat them right so they maintain that chewy texture. The absolute easiest method is keeping them at room temperature. Pop them into a good airtight container—like a sturdy Tupperware or even a zip-top bag with most of the air squeezed out—and leave them on the counter. They usually stay fantastic for three or four days this way.
Now, here is the absolute game-changer for eating day-old cookies: the reheat! If you let them sit out, the edges get a little too firm, and the center loses that fresh-from-the-oven gooey factor. Just take one or two cookies onto a microwave-safe plate and zap them for about 10 to 15 seconds. Don’t overdo it! That quick blast softens the butter back up, melts the chocolate chips just slightly, and brings you right back to tasting the very first cookie you pulled off the sheet. It’s the hack that lets you enjoy these gooey center cookies all week long.
If you are ever looking for something completely different but still cookie-related, I have a very simple recipe for easy cookie icing that hardens, though these chocolate chip monsters really don’t need any extra coating!
Variations on Classic Chocolate Chip Cookies
One of the best things about having a foolproof base recipe, like this one for homemade chocolate chip cookies, is how easily we can customize it. Since the structure is so stable thanks to our butter control and chilling time, you can start swapping things out and still count on that perfect texture. We call these the Classic Chocolate Chip Cookies, but let’s make them yours!
The easiest change is the chocolate itself. If you’re feeling a little bolder than standard semi-sweet, try substituting half the chips with dark chocolate chunks or even some creamy milk chocolate morsels. They melt differently and give you a lovely visual and flavor contrast. For the nut lovers out there, now is the time to add about a cup of roughly chopped pecans or walnuts. Toasting them lightly first really brings out their flavor, but honestly, throwing them in raw works just fine too since they bake up perfectly alongside the dough.
If you are looking for a completely different, but equally delicious, cookie experience, you should check out my recipe for white chocolate macadamia nut cookies. It uses a similar structural approach but swaps the cocoa with bright white chocolate!
Frequently Asked Questions about homemade chocolate chip cookies
I get so many questions about these cookies after people bake them—which is a good sign! It means you’re invested in getting that perfect cookie texture. Since we engineered this recipe for reliability, most issues are usually just a timing thing. Here are the most common bits that come up when baking these from scratch cookies.
Why did my homemade chocolate chip cookies spread too much?
Okay, this always happens if you mess with the core structure we built. The number one reason cookies spread is warm butter OR warm eggs. If your butter was too soft or you forgot to chill the dough, the fat melts too fast in the oven before the structure has a chance to set. Also, using too much brown sugar compared to white sugar can cause spread, but we kept that ratio tight here. Did you remember to use cold eggs? That little temperature shock is key!
Can I skip the chilling time for these cookies?
You *can* skip it, but then you won’t have the thick, bakery-style cookies we promised. If you skip the chill time, the dough will be softer, and the cookies will bake flatter and taste less caramelized. The chilling time isn’t just for texture; it allows the flour to hydrate fully, which deepens the flavor. For the best results, even 30 minutes really makes a difference, but overnight is simply the gold standard for flavor development.
What is the best flour ratio to ensure thick cookies?
We are using 2 1/4 cups of all-purpose flour for about 24 cookies, which is a very solid standard ratio. The real secret isn’t the *amount* of flour, it’s how you handle it. Make sure you are measuring your flour correctly—spoon the flour lightly into your measuring cup and then level it off. If you scoop directly from the bag, you’re packing in way too much flour, which results in dry, crumbly cookies, not chewy ones. We need that specific proportion to balance the sugar and fat!
How do I get those crispy edges but gooey centers?
This is all about watching the clock and trusting your eyes! You are looking for visual cues, not just time. As soon as the edges look set and golden brown—that deep color—you pull them out, even if the middle still looks a little damp. That residual heat sitting on the hot baking sheet for those crucial 5 minutes is what firms up the edge while allowing the center to cool into a perfect gooey state. Don’t be afraid to pull them early; they will bake more outside the oven than you think!
If you’re curious about how other simple recipes work when you follow a measured plan, take a look at my guide to making easy yeast bread for beginners. Cooking with precision always pays off!
Estimated Nutritional Data for homemade chocolate chip cookies
As a systematic cook, I believe in accountability for every ingredient that goes into our food. Knowing what you are eating is part of being confident in your baking, even when you are whipping up a batch of these decadent homemade chocolate chip cookies.
Based on the exact measurements listed in the recipe above—making a full yield of 24 cookies—here is the estimated nutritional breakdown per cookie. We’re getting good energy from the fats and sugars, balanced by some decent protein!
- Serving Size: 1 cookie
- Calories: 180
- Sugar: 15g
- Sodium: 120mg
- Fat: 10g
- Saturated Fat: 6g
- Unsaturated Fat: 4g
- Trans Fat: 0g
- Carbohydrates: 23g
- Fiber: 1g
- Protein: 2g
- Cholesterol: 30mg
Now, here’s the required disclaimer from my project management side: These are solid estimates derived directly from the ingredients listed. If you use a different brand of butter, switch to dark chocolate chunks, or use organic sugar, the numbers will shift slightly. If you’re keen on seeing how to boost the macros in your sweet treats, take a look at my recipe detailing high-protein cookie dough sometime!
Share Your Best Homemade Cookie Recipe Experience
I’ve given you the blueprint now—the streamlined, tested method for getting those incredible, thick, bakery-style homemade chocolate chip cookies every single time. My job as the kitchen strategist is done; now it’s your turn to execute the project!
I truly want to know how this worked for your kitchen. Did you nail that perfect chewy center? Were the edges just as golden and crisp as you hoped? Don’t leave me hanging!
Please take a moment to leave a rating below. If you’re comfortable sharing, tell me in the comments about the chilling time you used—did you go for the quick 30 minutes or the overnight flavor bomb effect? Your feedback is huge because it helps me confirm that this system works reliably for everyone, not just for me here in Chicago.
If you run into any burning questions post-bake or want to suggest a new recipe optimization challenge, feel free to reach out directly through my contact page. Happy baking, and I hope these cookies bring you a little slice of simple, achievable joy!
PrintThe Ultimate Thick, Chewy, Bakery-Style Chocolate Chip Cookies
Follow this foolproof method to bake thick, bakery-style chocolate chip cookies with soft, gooey centers and perfectly golden, slightly crispy edges. This easy homemade recipe uses simple ingredients for reliable results.
- Prep Time: 15 min
- Cook Time: 12 min
- Total Time: 57 min
- Yield: 24 cookies 1x
- Category: Dessert
- Method: Baking
- Cuisine: American
- Diet: Vegetarian
Ingredients
- 1 cup (2 sticks) unsalted butter, softened to cool room temperature
- 1 cup packed light brown sugar
- 1/2 cup granulated sugar
- 2 large eggs, cold
- 1 tablespoon vanilla extract
- 2 1/4 cups all-purpose flour
- 1 teaspoon baking soda
- 1 teaspoon salt
- 2 cups (12-ounce bag) semi-sweet chocolate chips
Instructions
- Combine the softened butter, brown sugar, and granulated sugar in a large bowl. Beat with an electric mixer until the mixture is creamy and light in color, about 2 minutes.
- Add the cold eggs one at a time, beating well after each addition. Mix in the vanilla extract.
- In a separate medium bowl, whisk together the flour, baking soda, and salt.
- Gradually add the dry ingredients to the wet ingredients, mixing on low speed until just combined. Do not overmix the dough.
- Stir in the chocolate chips by hand using a spatula.
- Cover the bowl and chill the dough for a minimum of 30 minutes, or up to 24 hours, for thicker cookies.
- Preheat your oven to 375 degrees Fahrenheit. Line baking sheets with parchment paper.
- Scoop the dough into balls, about 2 tablespoons each, and place them 2 inches apart on the prepared sheets. For extra thickness, stack two dough balls together.
- Bake for 10 to 12 minutes. The edges should be golden brown, but the centers should still look slightly underbaked and soft.
- Remove the sheets from the oven. Let the cookies cool on the baking sheet for 5 minutes before transferring them to a wire rack to cool completely. This allows the centers to set into a chewy texture.
Notes
- Use cold eggs; the temperature difference between the softened butter and cold eggs helps create a thicker cookie structure.
- For the best texture, chill the dough. Longer chilling times (up to 24 hours) result in deeper flavor and less spread.
- Do not bake these cookies until they look fully done; pull them out when the edges are set and the center looks soft for a gooey center.
Nutrition
- Serving Size: 1 cookie
- Calories: 180
- Sugar: 15
- Sodium: 120
- Fat: 10
- Saturated Fat: 6
- Unsaturated Fat: 4
- Trans Fat: 0
- Carbohydrates: 23
- Fiber: 1
- Protein: 2
- Cholesterol: 30