
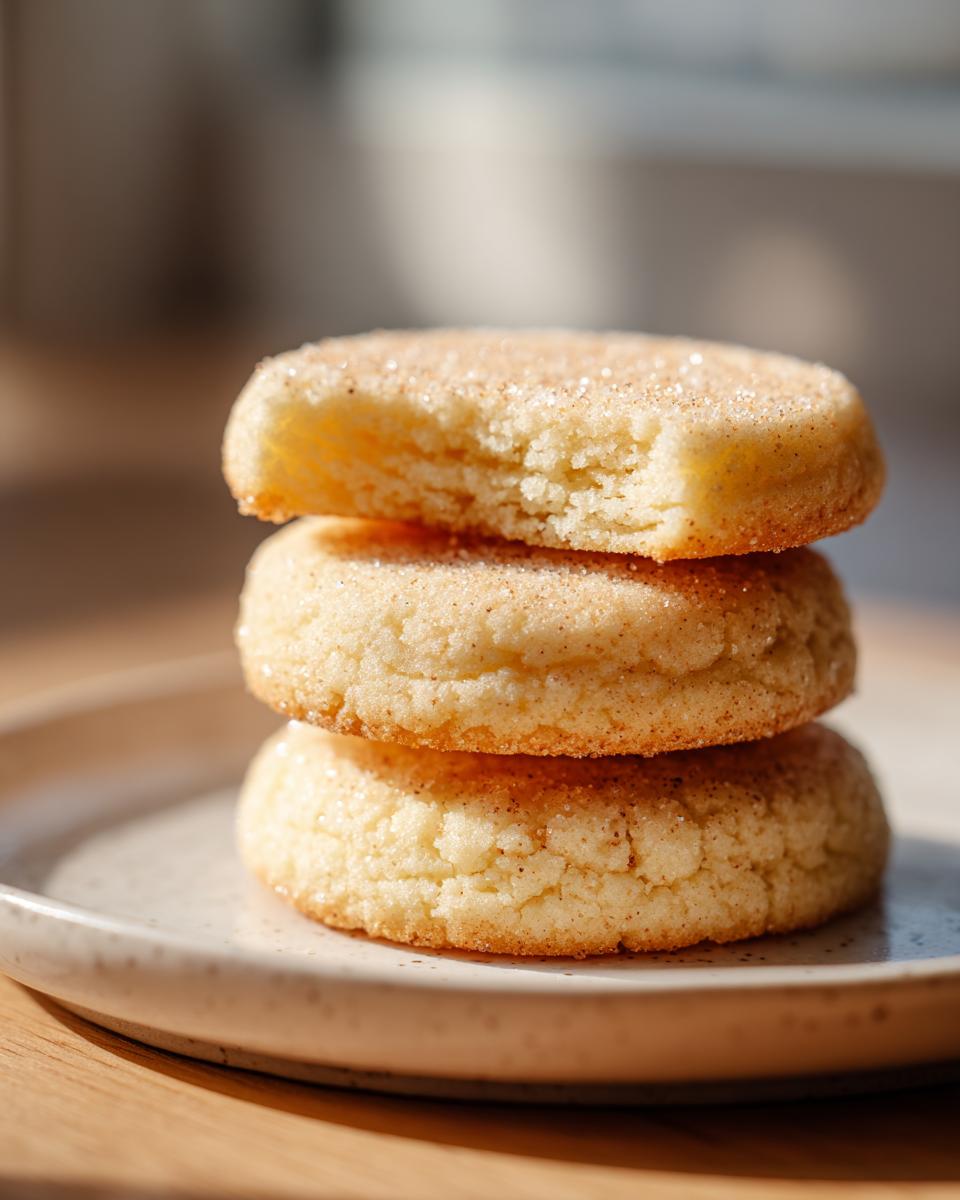
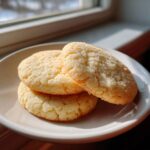
We all search for that one recipe, right? The one that ends the endless cycle of trial and error. For me, that mission was perfecting the ultimate sugar cookies. I needed something that delivered that perfect melt-in-your-mouth flavor but could still handle the rigors of cute cookie cutter shapes. That’s why I approached this as a project. As a home cook who values efficiency, I engineered what I call The Best Soft and Chewy Cutout Sugar Cookie Recipe. This recipe doesn’t rely on luck; it’s built on tested parameters to guarantee reliability every single time you step into the kitchen. Once these buttery sugar cookies cool, you’re ready for the fun part, like whipping up a batch of hard-setting cookie icing.
- Why These Are The Best Sugar Cookies Ever (The Dishicious Method)
- Ingredients for Perfect Buttery Sugar Cookies
- How to Prepare These Easy Sugar Cookie Recipe Instructions
- Ingredient Notes and Substitutions for Your Sugar Cookies
- Tips for Success with Roll Out Sugar Cookies
- Holiday Sugar Cookies: Decorating Ideas
- Storage and Make-Ahead Tips for Your Sugar Cookies
- Frequently Asked Questions About Soft Sugar Cookies
- Nutritional Estimates for These Sugar Cookies
- Nutritional Estimates for These Sugar Cookies
Why These Are The Best Sugar Cookies Ever (The Dishicious Method)
When people ask me why this specific batch of sugar cookies beat out every other recipe I tested, it boils down to control. My method here systematically solves the three biggest cookie problems: lack of flavor, spreading blobs, and dry texture. I engineered this recipe to perform exactly as expected, which is the cornerstone of the Dishicious approach.
- Guaranteed buttery flavor that screams homemade.
- Thick cookies that remain incredibly soft after cooling.
- Dough that cuts cleanly and holds sharp edges perfectly.
If you want reliable results, check out my tips for my favorite soft dipping cookies, too, but for cutouts, this formula is unbeatable.
Achieving Soft Sugar Cookies Texture
The softness comes down to a precise ratio of fat to flour, combined with how we handle the eggs. We use slightly more flour than a typical drop cookie recipe, but we rely on the high-quality butter and the necessary chilling step to prevent the dough from spreading too thin in the oven. Also, the slight underbaking—just a minute shy of being fully browned—locks in that essential moisture.
Tips for Perfect Cut Out Sugar Cookies Shape Retention
This is where most home bakers lose control of their sugar cookies. The secret weapon, as detailed in the instructions, is aggressive chilling. You must chill the dough for at least an hour. Why? When the dough hits the hot oven, the butter starts to melt immediately. If the dough is warm, the butter rushes out, and your perfect star becomes a sad, puffy puddle. Cold dough means the fat takes longer to melt, allowing the structure to set up properly before spreading can happen. Chill it, roll it thick, and you’ll get crisp, perfect outlines every time.
Ingredients for Perfect Buttery Sugar Cookies
When I engineered this recipe, I kept one core project management principle in mind: use the best available components for guaranteed results. I wasn’t messing around when it came to sourcing my ingredients for these sugar cookies. You don’t need any secret pantry items here—just high-quality staples treated correctly. Using real butter and quality vanilla extract makes all the difference in achieving that superior, buttery foundation that makes these cookies irresistible even before you add frosting. These straightforward ingredients are why this remains one of my most reliable recipes.
If you want to nail the texture in my melting butter cookies, using these exact measurements is key.
- 1 cup unsalted butter, softened
- 1 1/2 cups granulated sugar
- 2 large eggs
- 1 teaspoon vanilla extract
- 1/2 teaspoon almond extract
- 3 3/4 cups all-purpose flour
- 1 teaspoon baking powder
- 1/2 teaspoon salt
- Optional: Extra sugar for rolling
How to Prepare These Easy Sugar Cookie Recipe Instructions
Following a recipe is like executing a project plan—sticking to the established timeline and checkpoints ensures the final product is flawless. These instructions for our sugar cookies are designed to take you from raw ingredients to bake-ready dough efficiently. Pay close attention to the mixing order; this is critical for texture optimization. While you are waiting for your dough to chill, you could tackle prepping your frosting, maybe whipping up that quick side dish for dinner, or just breathing! We need that dough cold, so plan for at least an hour of downtime before moving on to rolling them out.
Mixing the Perfect Sugar Cookie Dough
Step one requires proper creaming. Get that butter and granulated sugar together in your mixing bowl and let your mixer run on medium speed for a solid three minutes until it’s visibly lightened up and fluffy. This builds the air pockets we need. Next, beat in those two large eggs, one at a time—make sure you mix thoroughly after each addition! Finally, pour in your vanilla and almond extracts. In a separate bowl, whisk together your flour, baking powder, and salt. Then, and this is important, add the dry mixture to the wet mixture slowly, running your mixer on the absolute lowest speed. Stop mixing the second you see the last trace of flour disappear. We absolutely cannot overmix the dough; that’s how you activate gluten and end up with tough cookies instead of soft ones.
Chilling and Rolling Out Your Sugar Cookies
Now for the non-negotiable project checkpoint: chilling. Divide your perfect dough into two flat disks and wrap them up tight. They must chill for a minimum of one hour in the fridge. If you try to cut shapes from warm sugar cookies dough, I promise you they will spread out into unrecognizable shapes when they bake! Once chilled, preheat your oven to 375°F (190°C) and line those baking sheets with parchment paper—this prevents sticking, a crucial efficiency upgrade. On a lightly floured surface, roll out one disk to about a quarter of an inch thick. Use your cookie cutters and get creative!
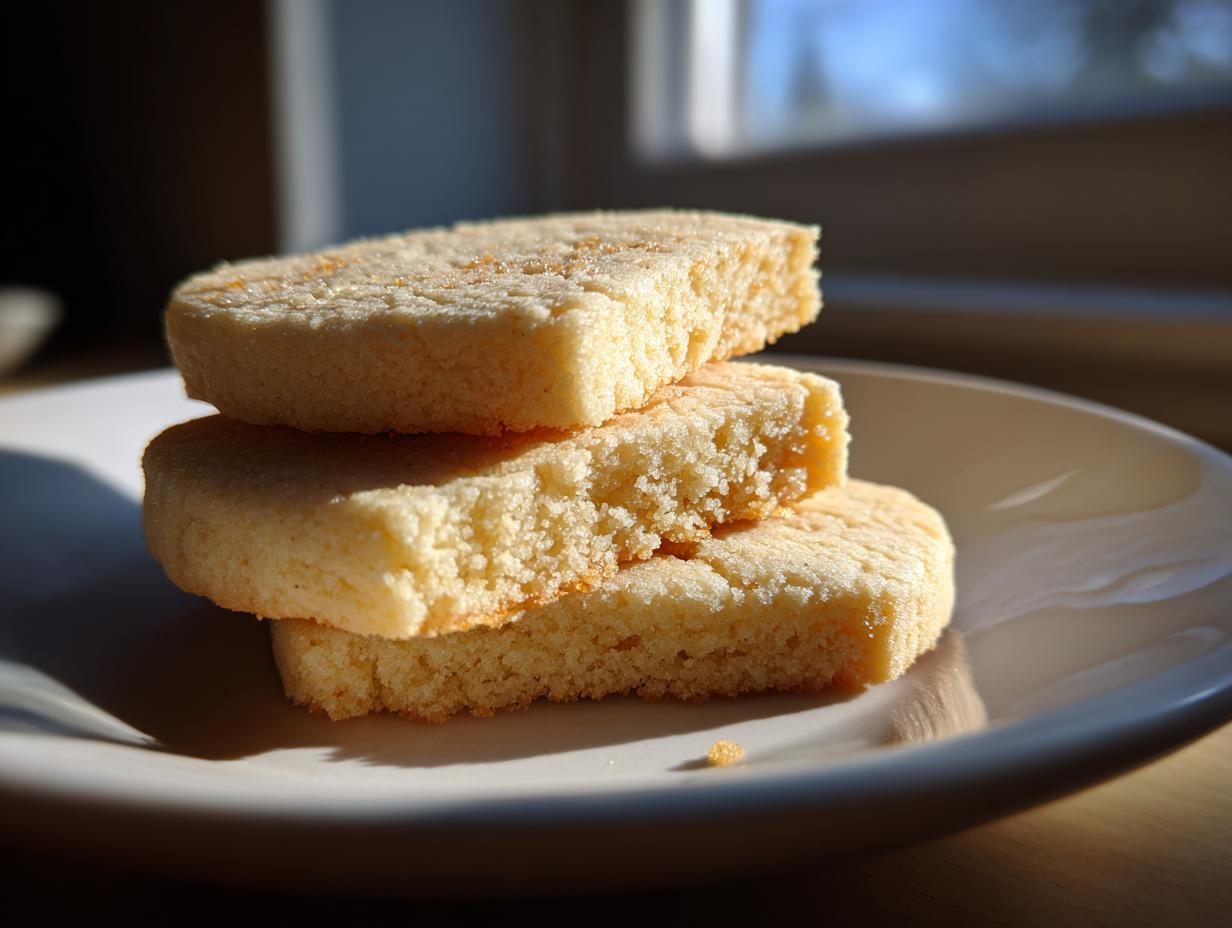
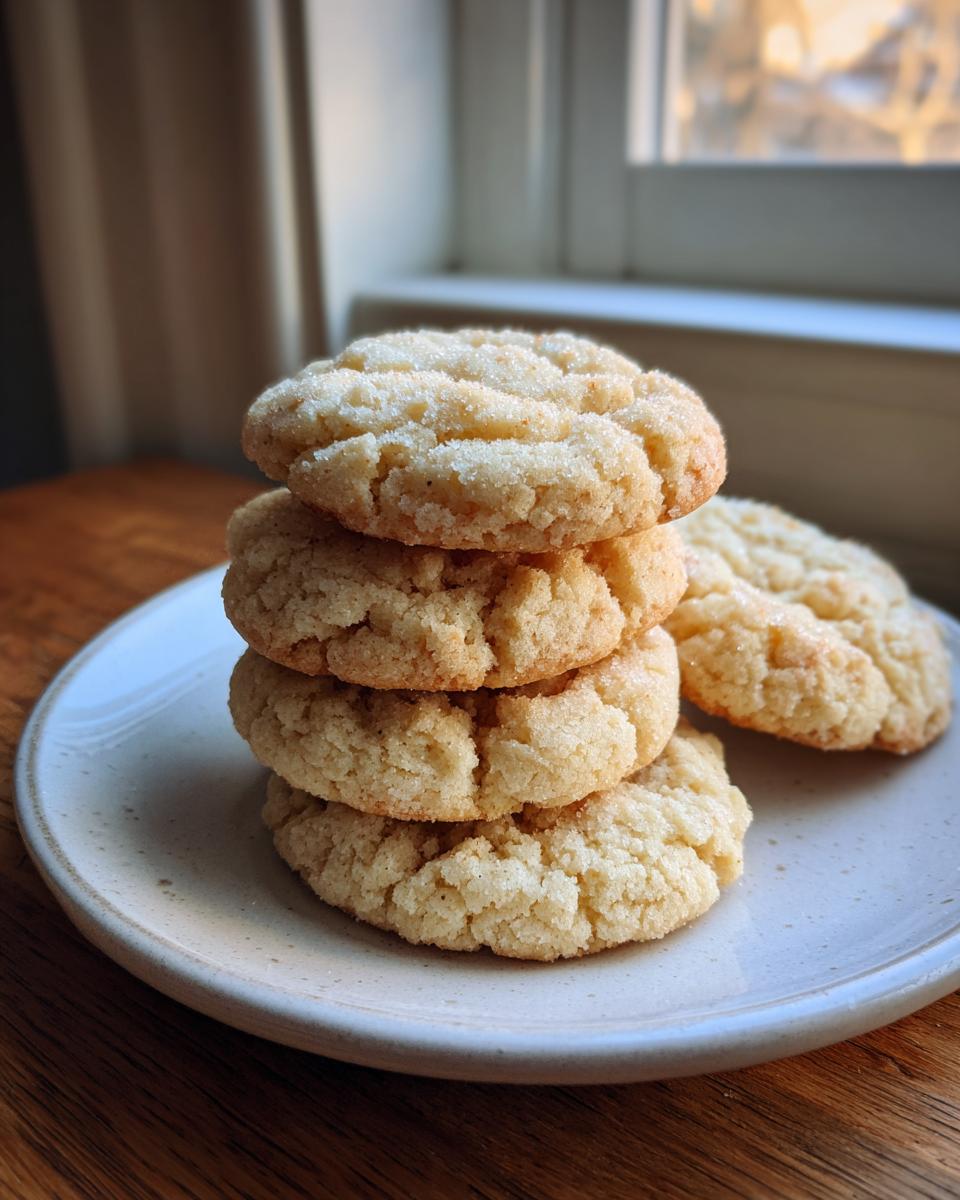
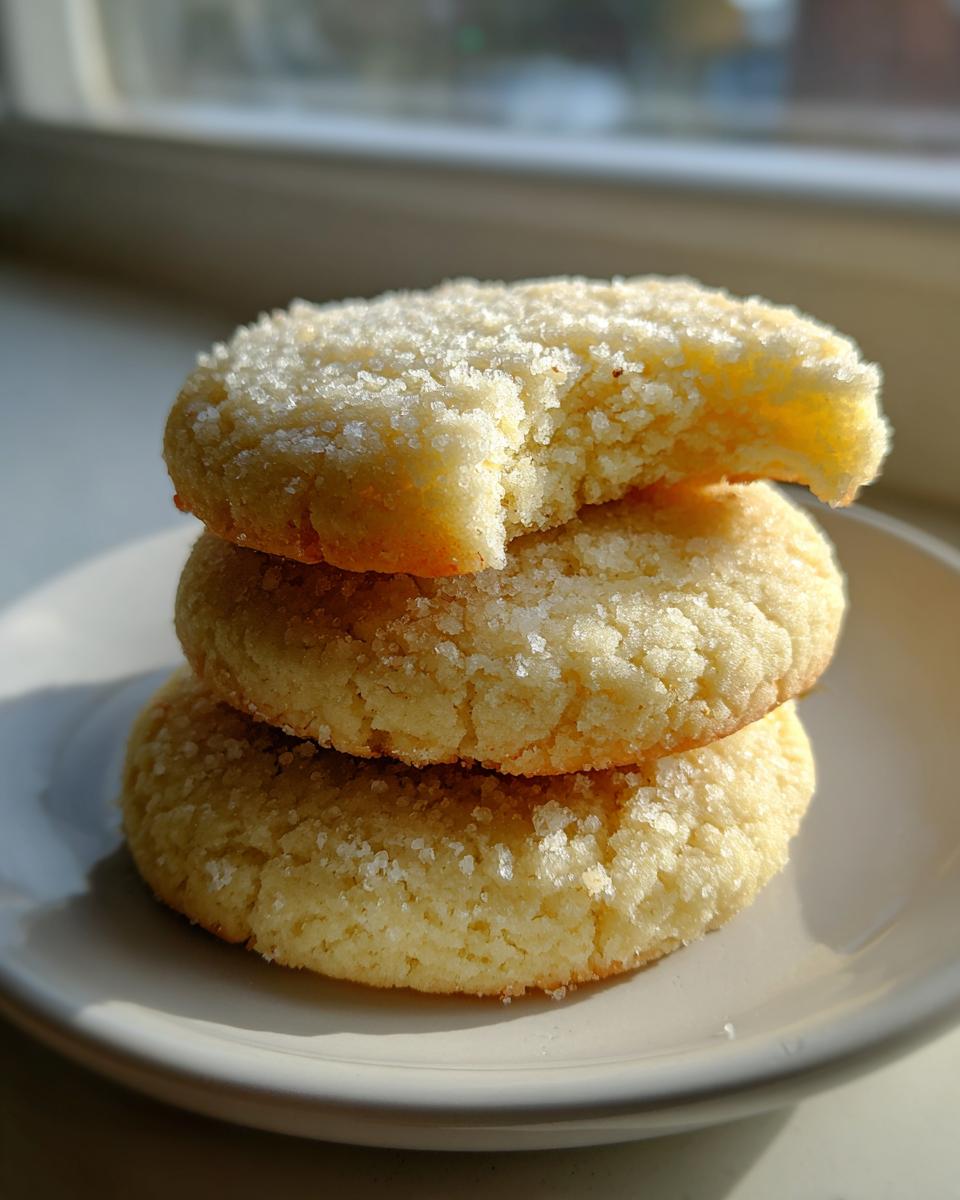
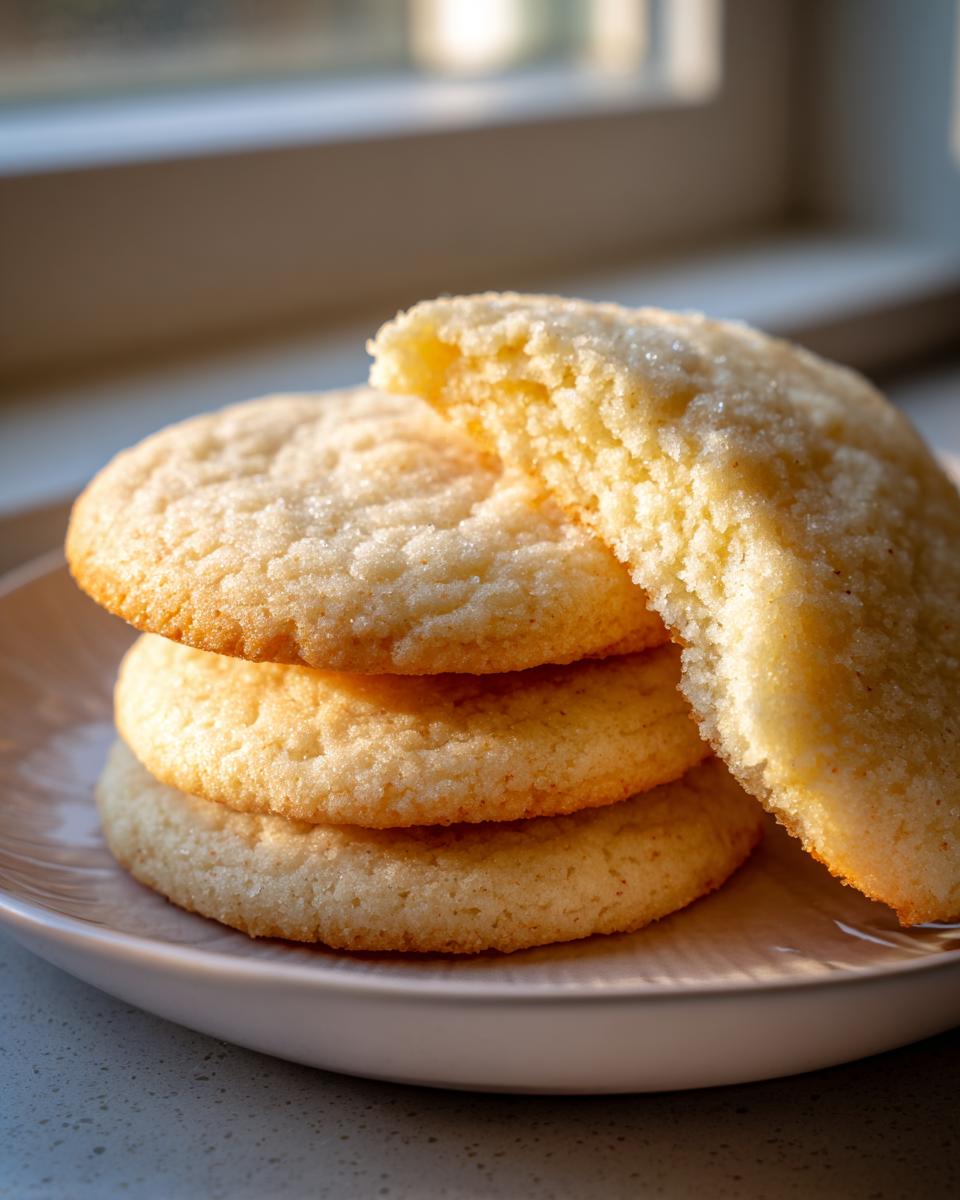
Baking for Soft Sugar Cookies Results
Before they hit the oven, if you want an extra texture boost, lightly roll the cutouts in a little extra granulated sugar. That coating sometimes gives the edges a nice slight crispness that contrasts beautifully with the soft centers. Now, bake your cookies for 8 to 10 minutes. My key takeaway after testing dozens of batches is this: err on the side of underbaking slightly for maximum softness. You are looking for edges that are just faintly golden; they should still look slightly pale in the center. Let them sit right there on the hot baking sheet for five minutes to firm up—this is crucial! Then, gently move them to a wire rack to cool completely before you even think about frosting them.
Ingredient Notes and Substitutions for Your Sugar Cookies
Let’s talk specifics, because even with the best roadmap, cheap components can derail the whole project. When I first started optimizing recipes, I noticed that even shifting one ingredient radically changed the structural integrity of these sugar cookies. Since we are going for that classic bite combined with adaptability, here are the notes I keep taped right above my mixing station.
First, why the almond extract? That tiny 1/2 teaspoon is non-negotiable. It doesn’t make the cookie taste like marzipan, I promise! It simply enhances the vanilla complexity and gives the cookie that slightly elevated, bakery-style finish that separates a good cookie from the best sugar cookies. Don’t skip it for plain vanilla unless you absolutely have to.
Second, what about skipping the chill? I detailed in the instructions that chilling is necessary, but if you are truly in a rush for holiday sugar cookies—maybe you have kids waiting impatiently—I’ve tested a 30-minute minimum chill. If you skip it entirely, the dough will be gummy, sticky, and your cookies will spread a lot. You’ll get soft cookies, sure, but they won’t hold those sharp cutout shapes we are aiming for. This is one area where shortcutting the process impacts the final deliverable too greatly.
And finally, butter temperature is key. It must be softened, not melted! Melted butter means greasy, flat cookies. Softened means the mixer can whip air into it when creaming, setting up the structure for those wonderfully buttery sugar cookies. If you’re unsure about your butter, check out my favorite simple three-ingredient butter cookie standard—if you can nail that texture, you nail this one, too.
Tips for Success with Roll Out Sugar Cookies
When I first started testing for reliability, my biggest failure point involved the sugar cookies slumping in the oven. They looked perfect coming out of the cutter, but after five minutes of baking, they were just smooth, butter puddles. I realized I was too aggressive with the rolling, making the dough too thin, or I was using room-temperature butter that was already slightly greasy. That’s solved by sticking strictly to the 1/4 inch thickness specified and ensuring that chilling time is honored.
If you are having trouble with cracking during rolling, a quick trick is to let the dough sit out for just five minutes before you roll—it adds a tiny bit of pliability. This recipe gives you the infrastructure for the best sugar cookies, you just have to respect the dough’s needs. For more dependable texture hacks, check out my guide on making soft and chewy cake batter cookies—similar principles apply!
Holiday Sugar Cookies: Decorating Ideas
Once these sugar cookies are completely cool—and I mean totally cool, or your icing will just slide right off—it’s time to bring in the fun! This is where these reliably shaped cookies shine, especially when you’re aiming for Christmas cookie recipes that look professional. Because they hold their shape so well, they are the perfect blank canvas for serious decorating.
If you’re using royal icing, you absolutely must check out my guide on making foolproof royal icing with meringue powder. It sets up hard, which is exactly what you need for layering colors or creating those gorgeous, smooth holiday designs.
For simple, fast decorating that still looks festive, try these quick ideas:
- Use cookie cutters with small inserts (like little windows or stars) and cut a contrasting color dough (like a green dough base with a pink circle cutout) just before baking.
- After baking, use a fine-mesh sieve to dust the cooled cookies with powdered sugar for a snowy effect—perfect for any festive cookie baking project.
- Simple floods of white or pale green icing, topped immediately with colored sanding sugars, gives maximum sparkle with minimal effort.
This recipe, detailed over at Wholesome Cove, is fantastic too, but for pure shape retention and that specific soft/chewy factor, stick with my formula for your primary batch of sugar cookies.
Storage and Make-Ahead Tips for Your Sugar Cookies
Since I approach baking like any other project in my life, planning ahead is essential, especially around busy times like the holidays. The beauty of these sugar cookies is that the dough is incredibly stable, and the finished product lasts quite a while! You want to manage the storage based on whether you’ve decorated them yet, because frosting changes everything about how long they stay fresh.
For make-ahead prep, I highly recommend focusing on the dough first. You can easily divide the dough into disks, just like the recipe calls for, wrap them tightly in plastic—I usually double-wrap mine just to be safe—and stash them in the refrigerator for up to five days. If you need to plan further out, freezing the dough is even better. Place the wrapped disks in a zip-top freezer bag, pressing out all the air. They hold up perfectly in the freezer for up to three months. When you are ready to bake, just pull them out the night before and let them thaw gently in the fridge.
Once baked, handling unfrosted cookies is simple. Store them in a completely airtight container at room temperature. They will stay deliciously soft and chewy for a full week! If you’ve already frosted them—especially if you used my full royal icing recipe—it’s generally best to store them in a single layer or with parchment paper separating the layers. Humidity is the enemy of a good hard-set glaze, so keep them cool and dry. For long-term storage of decorated cookies, freezing is also viable, but again, make sure they are fully set and well-protected from freezer burn. You can see how I manage pre-baking for my morning routine with my make-ahead egg muffins; the same organizational principles apply here for stress-free holiday baking!
Frequently Asked Questions About Soft Sugar Cookies
I know you might still have a few logistical questions left over—that’s totally normal when you’re implementing a new project plan! Getting every detail right ensures you end up with the best sugar cookies, not just ‘okay’ ones. Here are the key issues I solved during my testing phase regarding these soft sugar cookies.
Can I skip the required chilling time for the dough?
I strongly advise against it if you need true cut out sugar cookies that hold their shape. Skipping the chill time means the butter softens too much before the flour sets up, leading to cookies that spread into vague shapes. You can try chilling for a minimum of 30 minutes if you are desperate, but that crucial rest time transforms the dough structure.
How do I make these the chewiest sugar cookies possible?
For maximum chew, slightly increase the amount of dark brown sugar if you were making a different recipe, but for this established formula, you must slightly underbake them; pull them out of the oven when the edges are barely turning golden. They will firm up as they cool on the sheet. This locks in the moisture that creates that satisfying chewiness we love in chewy sugar cookies.
Can I use this dough to make sugar cookie bars instead?
Yes, you absolutely can! This dough is stable enough. Instead of rolling it out, just press the dough firmly and evenly into a greased 9×13-inch pan. You might need to increase the baking time slightly—check around the 20-minute mark. Because we are skipping the cutting step, you don’t need to worry as much about the chilling time for shape retention, making it an easy sugar cookie recipe adaptation for bars.
Do I really need the almond extract?
If you want an “ultimate” or “bakery style” experience, yes. That little bit of almond extract, along with the specific vanilla amount, elevates these from a basic recipe to one of the best cookie recipes ever. It adds depth that pure vanilla just can’t reach when paired with the butteriness.
If you’re planning your week, remember you can easily prep side dishes alongside these, like a batch of my easy weeknight chicken alfredo, knowing your cookies just need a couple of hours to chill unattended.
Nutritional Estimates for These Sugar Cookies
As a home cook focused on delicious results over calorie counting, I always treat nutritional estimates as just that—estimates! Your final numbers will truly depend on the exact brand of flour, butter fat content, and how much sugar you roll the outside in. The following chart gives you a baseline for one cookie, based on standard measurements from this classic sugar cookies formula.
- Serving Size: 1 cookie
- Calories: 150
- Sugar: 14g
- Sodium: 85mg
- Fat: 7g
- Saturated Fat: 4g
- Carbohydrates: 20g
- Protein: 2g
Please remember that these figures are just a guide. If you are using these for large events, it’s always best to calculate your own based on the specific products you decide to use in your kitchen.
PrintThe Best Soft and Chewy Cutout Sugar Cookies
This is the best sugar cookie recipe for soft, chewy cookies that hold their shape perfectly for decorating. These buttery sugar cookies use simple ingredients and deliver melt-in-your-mouth flavor.
- Prep Time: 25 min
- Cook Time: 10 min
- Total Time: 1 hour 35 min
- Yield: 3 dozen cookies 1x
- Category: Dessert
- Method: Baking
- Cuisine: American
- Diet: Vegetarian
Ingredients
- 1 cup unsalted butter, softened
- 1 1/2 cups granulated sugar
- 2 large eggs
- 1 teaspoon vanilla extract
- 1/2 teaspoon almond extract
- 3 3/4 cups all-purpose flour
- 1 teaspoon baking powder
- 1/2 teaspoon salt
- Optional: Extra sugar for rolling
Instructions
- In a large bowl, cream together the softened butter and granulated sugar until light and fluffy. This takes about 3 minutes with an electric mixer.
- Beat in the eggs one at a time, mixing well after each addition. Stir in the vanilla and almond extracts.
- In a separate bowl, whisk together the flour, baking powder, and salt. Gradually add the dry ingredients to the wet ingredients, mixing on low speed until just combined. Do not overmix the dough.
- Divide the dough in half. Flatten each half into a disk, wrap tightly in plastic wrap, and chill in the refrigerator for at least 1 hour. This step is necessary for cutout sugar cookies to hold their shape.
- Preheat your oven to 375°F (190°C). Line baking sheets with parchment paper.
- On a lightly floured surface, roll out one disk of dough to about 1/4 inch thickness. Use cookie cutters to cut out your desired shapes.
- If desired, lightly roll the cutouts in extra granulated sugar before placing them on the prepared baking sheets.
- Bake for 8 to 10 minutes, or until the edges are lightly golden. For soft sugar cookies, err on the side of underbaking slightly.
- Let the cookies cool on the baking sheet for 5 minutes before transferring them to a wire rack to cool completely.
Notes
- For the softest cookies, chill the dough for 1 hour. If you need a faster option, chilling for 30 minutes is the minimum time required for clean cuts.
- These cookies are perfect for holiday sugar cookie decorating once fully cooled.
- If you prefer a chewier texture, slightly decrease the baking time.
Nutrition
- Serving Size: 1 cookie
- Calories: 150
- Sugar: 14
- Sodium: 85
- Fat: 7
- Saturated Fat: 4
- Unsaturated Fat: 3
- Trans Fat: 0
- Carbohydrates: 20
- Fiber: 0
- Protein: 2
- Cholesterol: 30