
Let’s be honest: getting sourdough bread to behave like regular, supermarket-style sandwich bread can feel like trying to manage chaos. You want the flavor, sure, but you absolutely need that soft, fluffy crumb that actually slices neatly without squishing. That’s exactly where my background as a project manager comes in handy. I’ve streamlined this process for making the best soft sourdough sandwich bread into a foolproof plan. Forget complicated steps; this recipe focuses only on what delivers maximum softness and that perfect, mild tang. If you’re new to this, trust me, we’re making your first loaf incredibly easy.
- Why This is the Best Soft Sourdough Sandwich Bread for Beginners
- Gathering Your Ingredients for Perfect Sandwich Bread Sourdough
- Step-by-Step Instructions for Your Sliceable Sourdough Loaf
- Tips for Success with Your Homemade Sourdough Sandwich Recipe
- Storage and Reheating Instructions for Everyday Sourdough Bread
- Frequently Asked Questions About Sourdough Sandwich Bread
- Estimating Nutritional Data for this Healthy Sourdough Sandwich Loaf
- Share Your Perfect Sourdough Sandwich Bread Results
Why This is the Best Soft Sourdough Sandwich Bread for Beginners
When you’re making sourdough sandwich bread at home, you aren’t trying to win artisan baking competitions. You want something dependable! The goal here is simple: delicious flavor wrapped in a texture that rivals the fluffiest stuff you find in the grocery aisle. Here are the key reasons this particular blueprint works so well, especially if you’re just dipping your toes into sourdough baking.
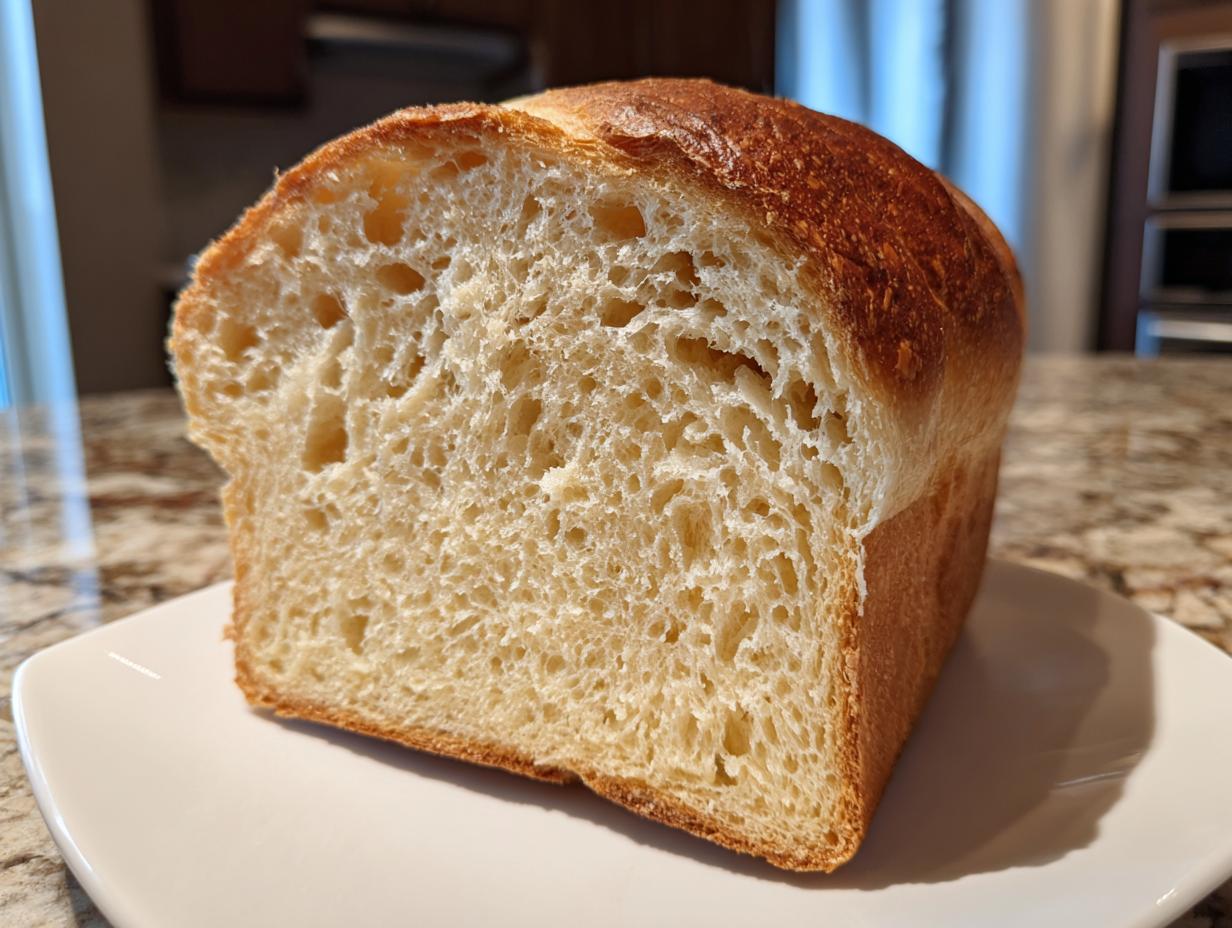
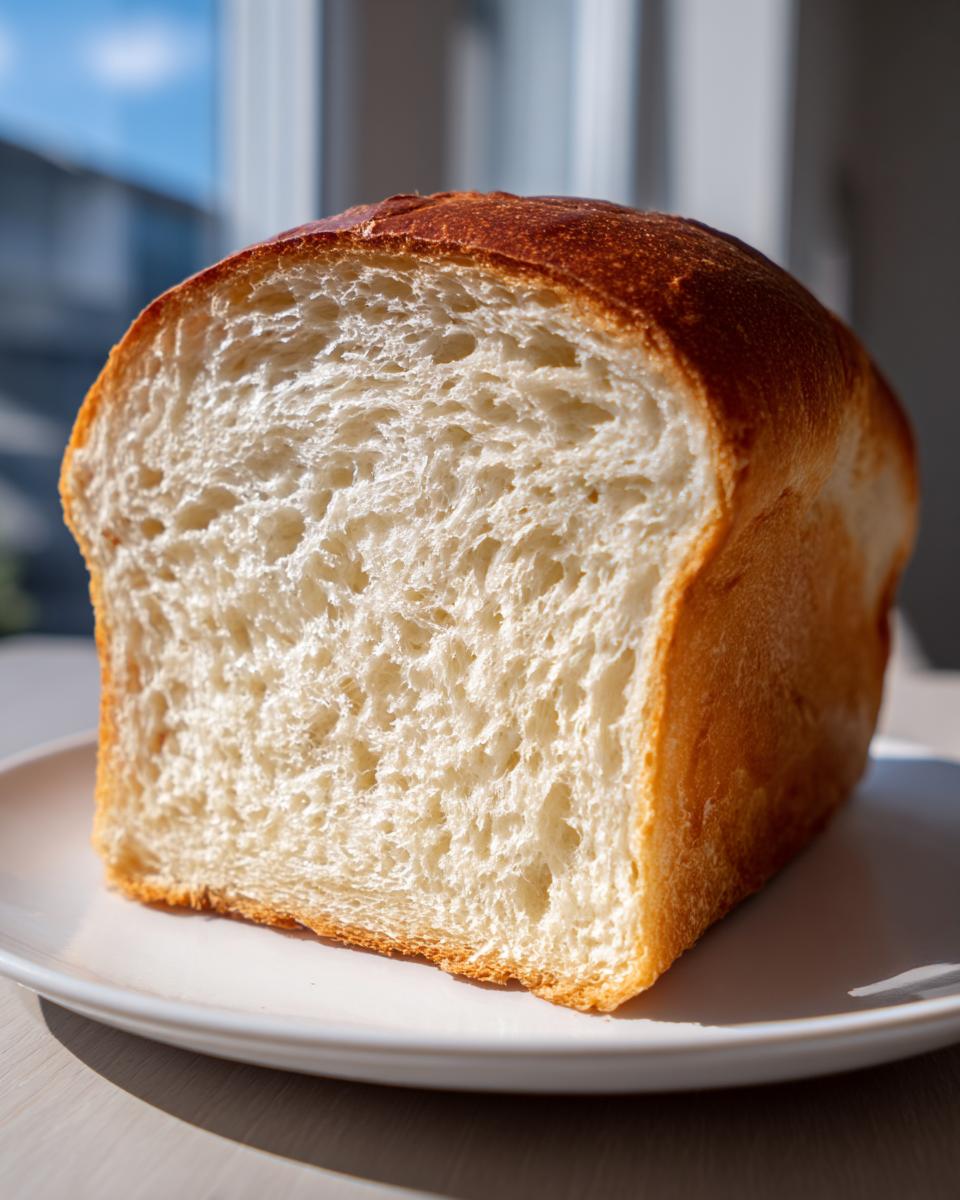
- Perfect Sliceability: This loaf holds its shape so you get clean slices for sandwiches or toast, no tearing required.
- Mild, Approachable Tang: We’re focusing on flavor that complements fillings, not overpowers them. It’s perfect for school lunches.
- Consistency: I’ve engineered this process to require very little guesswork, making it reliable for your first few attempts.
Achieving a Pillowy Sourdough Bread Texture
That incredible softness—the hallmark of a great sandwich loaf—comes down to a couple of controlled additions. We use a bit of avocado oil, which coats the starches and prevents the crumb from getting too chewy or dense. This small injection of fat immediately elevates the dough into that sought-after pillowy sourdough bread territory. Plus, controlling the bulk rise means we avoid the large, uneven holes you see in rustic loaves.
A Simple Sourdough Loaf Tutorial for New Bakers
I know the steps can look intimidating, but this recipe boils everything down. We skip lengthy kneading and rely on short bursts of stretching during the initial hour. This is what sets up the structure cleanly without requiring serious technique. If you can mix ingredients in a bowl and wait patiently, you have everything you need for this easy sourdough bread for beginners. I promise, it’s simpler than it looks on paper!
Gathering Your Ingredients for Perfect Sandwich Bread Sourdough
Okay, now for the part I enjoy most about my optimized approach: the ingredient list is short and effective. I hate hunting down specialty flours or weird conditioners for an everyday sourdough bread. This list is what you need for a top-tier result. Remember, clarity here equals success later, so pay attention to the state of your ingredients—that’s crucial for a reliable outcome.
- 150g active sourdough starter (fed and bubbly!)
- 325g warm filtered water
- 20g avocado oil
- 25g honey
- 500g unbleached bread flour
- 10g salt
If you don’t have an active starter ready to go, don’t panic! I’ve got a whole system on how to get one going reliably right here: starting your own sourdough starter. It’s all about setting the project up correctly from Day One!
Ingredient Notes and Substitutions for Sourdough Sandwich Bread
A few quick notes on making sure these exact ingredients give you that perfect texture. First up, the flour: you absolutely need to stick with unbleached bread flour here. The higher protein is essential for trapping those gases during the proofing stages, which is what gives us our sliceable sourdough loaf structure.
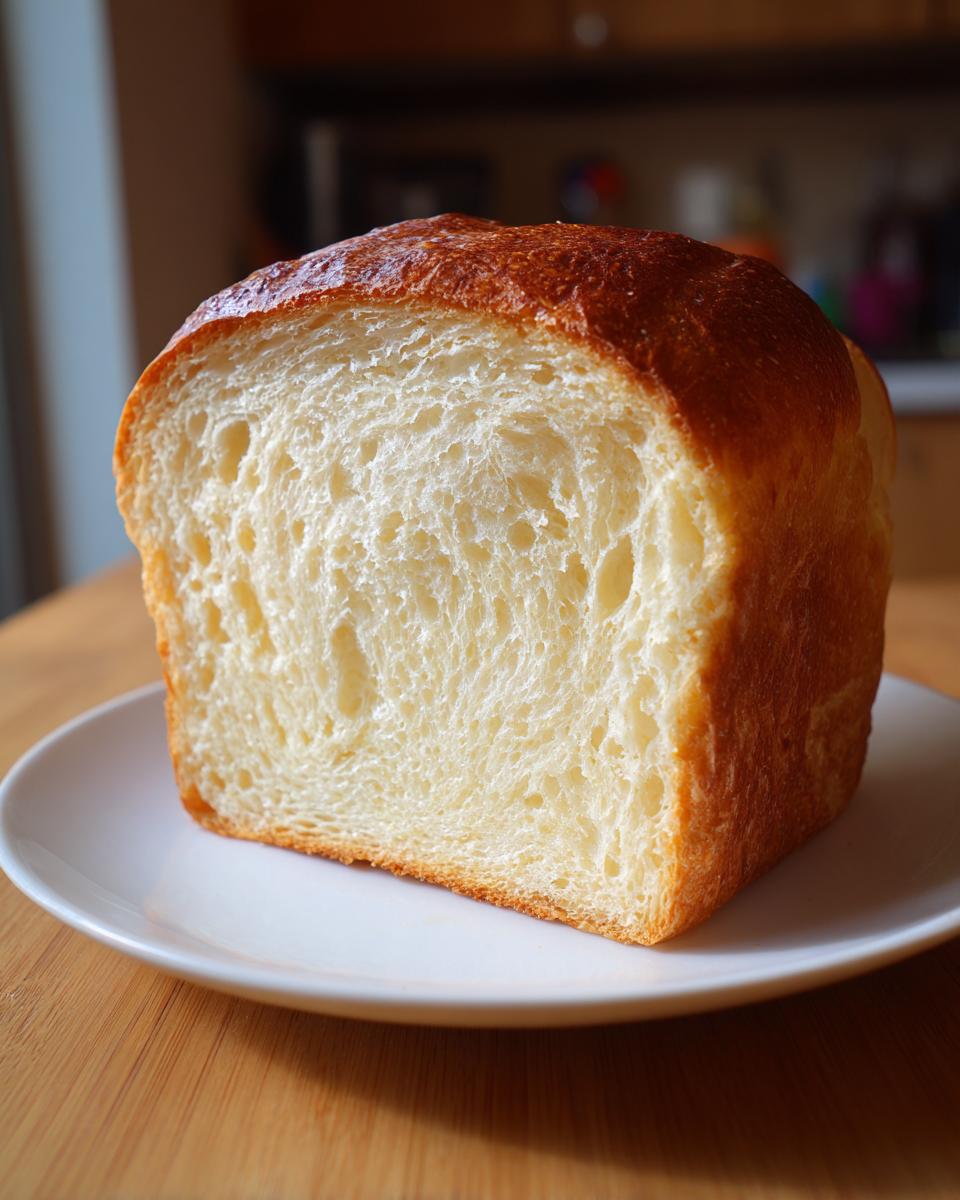
Next, the fat. I call for avocado oil because it’s neutral, light, and lets the inherent sourdough flavor shine through. If you want to lean into that decadent, buttery crumb sourdough bread texture, go ahead and swap the oil for melted, unsalted butter. Both work wonderfully for this basic sourdough sandwich bread, but butter gives a richer mouthfeel.
Finally, that starter. It *must* be active. That means you recently fed it, and it has at least doubled in size and is full of bubbles before you measure it out. Since we aren’t relying on commercial yeast, your starter is doing all the heavy lifting for our sourdough sandwich bread lift.
Step-by-Step Instructions for Your Sliceable Sourdough Loaf
This is the blueprint for success, the exact sequence that gets you that perfect, sliceable sourdough loaf every time. We aren’t rushing anything, but we are being efficient. Remember, patience in the waiting stages pays off huge when you go to slice this beautiful sourdough sandwich bread!
Mixing and The Initial Rest Period
First up, let’s get those liquids happy. Grab your large bowl. You’re going to combine your active starter, the warm filtered water, that nice avocado oil, and the honey. Just mix this around lightly until the water looks a little milky. That signals everything is pretty much dissolved.
Now, add the bread flour and the salt right on top. Mix this all together by hand, just until you absolutely cannot see any more pockets of dry flour. Don’t go crazy mixing it! It’s supposed to look messy and shaggy right now. That’s exactly what we want. Cover that bowl right up and let it hang out for one full hour. This rest period, sometimes called autolyse, is letting the flour fully hydrate, which is key for that soft texture later on.
Building Strength with Stretch and Folds
The next stage builds the muscle in the dough, which is crucial for any fluffy sourdough bread recipe. After that initial hour, we’re going to perform four rounds of stretch and folds, and these need to be spaced about 30 minutes apart.
Here’s the move: gently get your hand under one side of the dough, stretch that section up high, and then neatly fold it right over the very center of the dough mass. Give the bowl a quarter turn—nice and easy—and repeat that stretch-and-fold motion on the next side. Do this four times total, covering the dough between each set. After that fourth set? Cover it again and let it just relax for the rest of the bulk fermentation phase.
Bulk Fermentation and Shaping the Sourdough Sandwich Bread
This bulk fermentation step is where the magic happens, but timing is tricky because kitchens vary so much. You are looking for the dough to increase in volume anywhere from 30% to 50%. It should look gassier and feel lighter. Depending on your room temperature, this could take anywhere from four to eight hours. Don’t stress the clock; watch the dough!
Once it looks ready, turn the dough out onto a surface that is *very* lightly floured. We need to shape this into a tight package for the loaf pan. Think about tucking everything in nice and neat until you have a tight log or an oval shape that fits comfortably in your greased 9×5 inch loaf pan. Place it seam-side down. This tightness secures all those wonderful gases for the final rise.
Final Proofing and Baking the Loaf
Cover that loaf pan loosely so the dough doesn’t dry out on top. Now we wait for the final proof. You know it’s ready when the dough has risen about one full inch *above* the rim of the pan. This usually takes between one and three hours. If you poke it gently, it should leave a slight indentation that slowly springs back.
About 30 minutes before you think the dough is ready, get that oven preheated to 375°F (190°C). High heat starts the oven spring well! Bake this loaf for 35 to 45 minutes until the crust is a beautiful golden brown. You really want that internal temperature to hit 200-205°F on a thermometer, but if you don’t have one, just trust the color.
When it comes out, get it *out* of the pan immediately onto a wire rack. Seriously, don’t leave it sitting there—it will steam and ruin the bottom crust. And here’s the hardest part: you have to let it cool completely. I struggle with this every time, but slicing hot sourdough guarantees a gummy texture. Give it at least two hours before you even think about slicing for your sourdough sandwich bread!
For more tried-and-true methods for getting amazing crusts without a Dutch oven, check out my guide on making perfect breadsticks—the techniques for managing moisture overlap!
Tips for Success with Your Homemade Sourdough Sandwich Recipe
Even with a streamlined project plan, sourdough likes its specific environmental cues. Getting this sourdough sandwich bread right consistently comes down to managing a few variables that scare off new bakers. Since this recipe is designed to be incredibly straightforward, let’s talk about the little things that elevate it from ‘good’ to ‘the best,’ ensuring you get that incredibly light crumb without fail.
First rule: Temperature is your best friend, but it’s also the biggest unknown. If your kitchen runs cold, your bulk fermentation time is going to trend toward the 8-hour side. If it’s blazing hot, you might be done in four. Learn to read the dough, not the clock. If it hasn’t visibly expanded by 30%, don’t panic—just give it more time to develop the flavor and structure we need for that soft loaf.
When you are ready to spread something amazing on your finished loaf, homemade mayo is the way to go for true flavor payoff. You can find my simple recipe here for easy homemade mayonnaise—it makes the first few sandwiches absolutely glorious!
Another critical point is handling the dough during shaping. Since this dough is softer than typical artisan loaves, treat it gently when you turn it out. You want to develop surface tension—that tight “skin” on the outside—without degassing all the air we just built up. Roll it gently into a log, making sure the bottom seam is well pinched closed. That tight seal will help guide your final rise straight up into the pan, guaranteeing that beautiful, uniform, sliceable sourdough loaf shape.
Storage and Reheating Instructions for Everyday Sourdough Bread
Okay, you’ve successfully navigated the project and you have a gorgeous, soft loaf cooling on the rack—hopefully, you let it cool completely! Now this bread is your everyday staple, right? We need simple storage methods that keep that tender crumb from getting crusty or gummy.
The biggest mistake anyone makes with this sourdough sandwich bread is slicing it too soon or storing it incorrectly. If you slice while it’s warm, the residual steam gets trapped, and you end up with that gummy texture we worked so hard to avoid. Wait until it is truly room temperature before grabbing your serrated knife. Trust me on this one; it’s worth the six minutes of agonizing waiting!
For short-term storage, ditch the plastic bag entirely. Plastic traps moisture right against the crust, which makes the crust soft and slightly slimy—not what we want for a great piece of toast. Instead, wrap your cooled loaf snugly in parchment paper, and then place that inside a clean paper bag or a reusable bread bag. This keeps the crust intact while letting the bread breathe a little.
If you plan on keeping it for more than two days, slicing the loaf first and freezing what you won’t eat immediately is the best strategy for maintaining freshness. Bread freezes wonderfully!
When you want a slice for breakfast, pull it straight from the freezer and pop it right into the toaster. It toasts up perfectly! This makes it amazing for getting those crunchy, satisfying pieces for your morning avocado topping. For some of my favorite ways to enjoy perfectly toasted sourdough, check out these avocado toast ideas!
If you have a slice that’s gone a little stale after a few days on the counter, don’t toss it! A quick spritz of water on the crust and warming it in a 350°F oven for about five minutes revives that soft interior beautifully. It’s like giving your sourdough bread for toast a second life!
Frequently Asked Questions About Sourdough Sandwich Bread
It’s totally normal to have questions when you start working with a naturally leavened dough like this. We’re optimizing for that soft, mild result, so let’s clear up any last bits of complexity with a few quick-fire Q&As. I’ve pulled the most common hang-ups people have when trying to achieve the perfect sourdough sandwich bread for their families.
How do I make my sourdough less sour for picky eaters?
That’s a super common issue, especially when baking for kids! Sourness mostly comes from acetic acid developed during long, cold ferments. Because this recipe is geared toward a milder taste, we are already avoiding the deep dives into the fridge. To make it even milder for your sourdough for picky eaters approach, make sure your starter is young—use it just after it has peaked and started to fall slightly, not one that’s been sitting in the cold for days. Also, make sure your bulk fermentation doesn’t go long; aim for that 30% rise rather than pushing it to 50% when the weather is warm.
Can I make this sourdough sandwich loaf without a loaf pan?
You can, but you’ll lose the signature shape and the easiest sliceability we designed this for. If you ditch the pan, you’ll want to bake it free-form on a baking stone or directly on a preheated baking steel. You might also want to use a Dutch oven, though you’ll need to cover it for the first 20 minutes to trap steam. Just be warned: baking it round or free-form means the crumb might be slightly less uniform, and it definitely won’t be the perfect, neat sourdough sandwich loaf shape for stacking!
What is the best flour for a buttery crumb sourdough bread?
If you want that rich, soft pull—that fantastic buttery crumb sourdough bread texture—you absolutely must stick with high-protein bread flour. I call for 500g of it because that extra gluten structure is non-negotiable for trapping the gases needed for a beautiful rise in a closed environment like a loaf pan. Low-protein all-purpose flour won’t hold the structure as well, leading to a collapsed or flatter profile. Stick to the bread flour, and you’ll see the quality difference immediately!
Estimating Nutritional Data for this Healthy Sourdough Sandwich Loaf
Now that you’ve got your delicious, homemade loaf, I know some of you are curious about the numbers. Because we are focusing on using simple ingredients—flour, water, starter, and just a tiny bit of honey and oil—this is actually a fantastic base for a healthy sourdough sandwich loaf, especially since the long fermentation process helps break down the complex carbs.
However, here’s the project manager reality check: Every variable changes the count. Your starter’s feeding ratio, the exact brand of honey you use, even fluctuating humidity—it all makes a difference. These figures should be seen as a strong guideline for planning meals, not gospel.
Based on the recipe ingredients for one standard slice, here’s a general breakdown:
- Serving Size: 1 slice
- Calories: 250
- Fat: 3.5g
- Carbohydrates: 48g
- Protein: 8g
- Sugar: 1.5g
See? Not bad at all for something this delicious and made entirely by you! It’s certainly a great base when you are trying to incorporate more wholesome options into your weekly rotation, like pairing it with something hearty and delicious. If you’re looking for another simple, high-protein meal to pair it with, you have to check out my incredible high-protein chili. Perfect match!
Remember, because you are controlling every single input in this basic sourdough sandwich bread, you know exactly what is (and isn’t) going into your body. That’s the real win here.
Share Your Perfect Sourdough Sandwich Bread Results
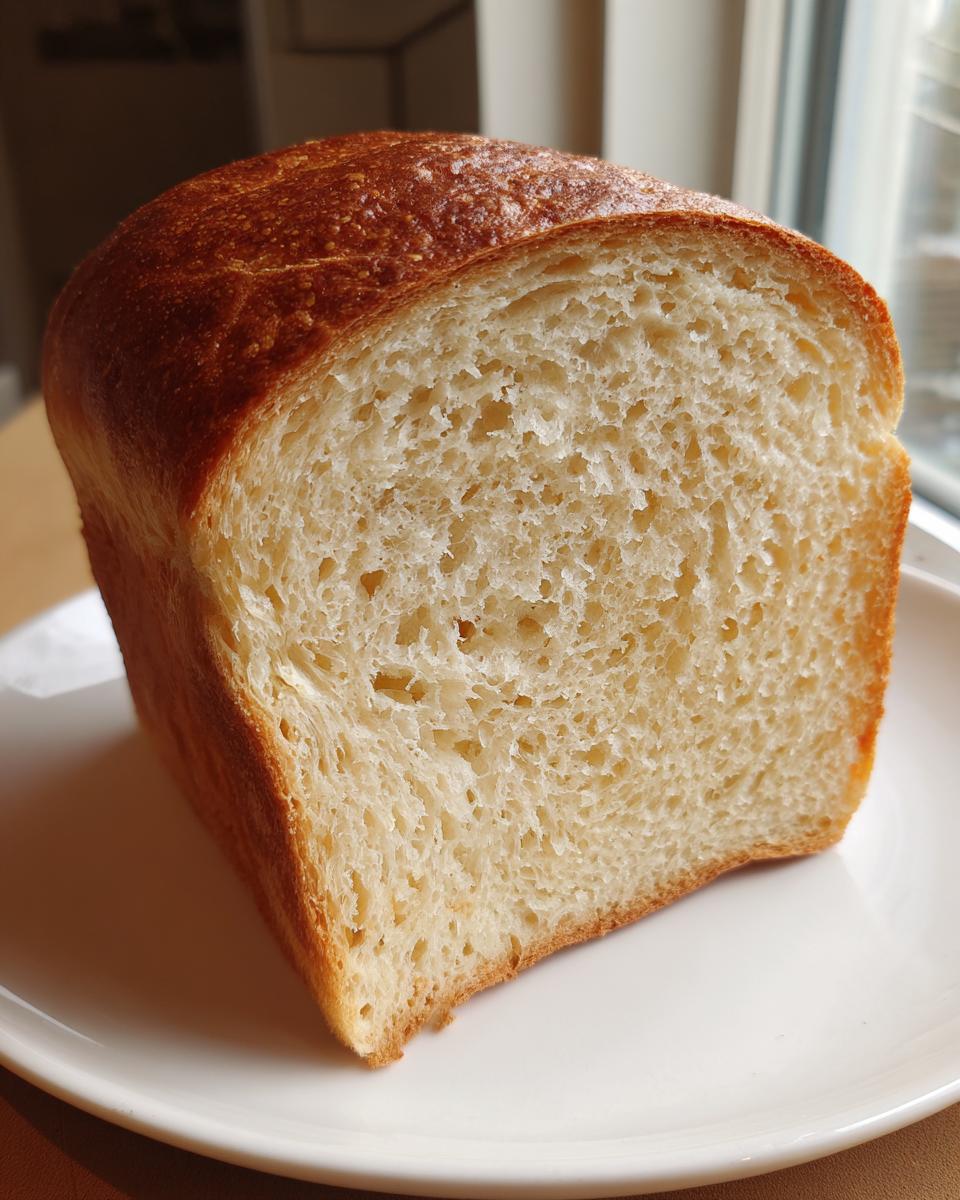
Alright, you’ve done the work, managed the variables, and hopefully managed to wait for that loaf to cool down completely! Now that you have created the best soft sourdough sandwich bread, I really want to see it. Did you get that even, fluffy crumb we aimed for? Did it slice perfectly for your lunchtime sandwiches?
This is the part of the project where you give me feedback so I can keep perfecting my own processes. If you loved how this recipe turned out, please take a moment to jump up to the top of the page and give it a solid 5-star rating. Those ratings tell me this straightforward, optimized approach is working for everyone!
Also, if you snapped a picture of the final, beautiful loaf—maybe smeared with butter or loaded up as a grilled cheese—please tag me on social media! I love seeing these loaves in real kitchens.
But here is the specific detail I’m hoping you’ll share in the comments below: What was your final baking temperature, and did you make any substitutions that worked out really well? Perhaps you used butter instead of oil, or maybe you discovered the perfect final proofing time for your warmer kitchen. Drop those details in the comments. Learning how you adapt this blueprint helps everyone else tackling their first homemade sourdough sandwich recipe!
If you are already planning your next baking project, maybe something a little more decadent, you might want to check out my methods for getting the perfect slice on my authentic red velvet cake recipe. It’s a whole different kind of delicious!
PrintThe Best Soft Sourdough Sandwich Bread for Beginners

This recipe delivers a soft, sliceable sourdough sandwich loaf with a mild tang, perfect for everyday meals and picky eaters. It is straightforward enough for new bakers.
- Prep Time: 30 min
- Cook Time: 45 min
- Total Time: 6 hours 45 min
- Yield: 1 loaf 1x
- Category: Baking
- Method: Baking
- Cuisine: American
- Diet: Vegetarian
Ingredients
- 150g active sourdough starter
- 325g warm filtered water
- 20g avocado oil
- 25g honey
- 500g unbleached bread flour
- 10g salt
Instructions
- Combine the starter, warm water, avocado oil, and honey in a large bowl. Mix until the liquid looks slightly milky.
- Add the bread flour and salt to the wet ingredients. Mix everything by hand until no dry flour remains. The dough will be shaggy.
- Cover the bowl and let the dough rest for 1 hour (autolyse/initial rest).
- Perform four sets of stretch and folds, spaced 30 minutes apart. To do this, gently stretch one side of the dough up and fold it over the center. Rotate the bowl and repeat until you have stretched all four sides.
- After the final set of folds, cover the dough and allow it to bulk ferment at room temperature for 4 to 8 hours, or until it has increased in volume by about 30-50% and shows signs of activity. The exact time depends on your kitchen temperature.
- Gently turn the dough out onto a lightly floured surface. Shape the dough into a tight log or oval suitable for a standard loaf pan (approximately 9×5 inches).
- Place the shaped dough seam-side down into a lightly greased loaf pan.
- Cover the pan loosely and allow the dough to proof (final rise) at room temperature for 1 to 3 hours, or until it has risen about 1 inch above the rim of the pan.
- Preheat your oven to 375 degrees Fahrenheit (190 degrees Celsius) about 30 minutes before baking.
- Bake the loaf for 35 to 45 minutes, or until the crust is golden brown and the internal temperature reaches 200-205 degrees Fahrenheit (93-96 degrees Celsius).
- Remove the bread from the pan immediately and let it cool completely on a wire rack before slicing. This step is crucial for a non-gummy crumb structure.
Notes
- Use an active, recently fed sourdough starter for best results in this recipe.
- For a buttery crumb sourdough bread texture, you can substitute the avocado oil with melted, unsalted butter.
- Allow the bread to cool for at least 2 hours before slicing to achieve the perfect sliceable sourdough loaf.
Nutrition
- Serving Size: 1 slice
- Calories: 250
- Sugar: 1.5
- Sodium: 230
- Fat: 3.5
- Saturated Fat: 0.5
- Unsaturated Fat: 3.0
- Trans Fat: 0.0
- Carbohydrates: 48
- Fiber: 2
- Protein: 8
- Cholesterol: 0