
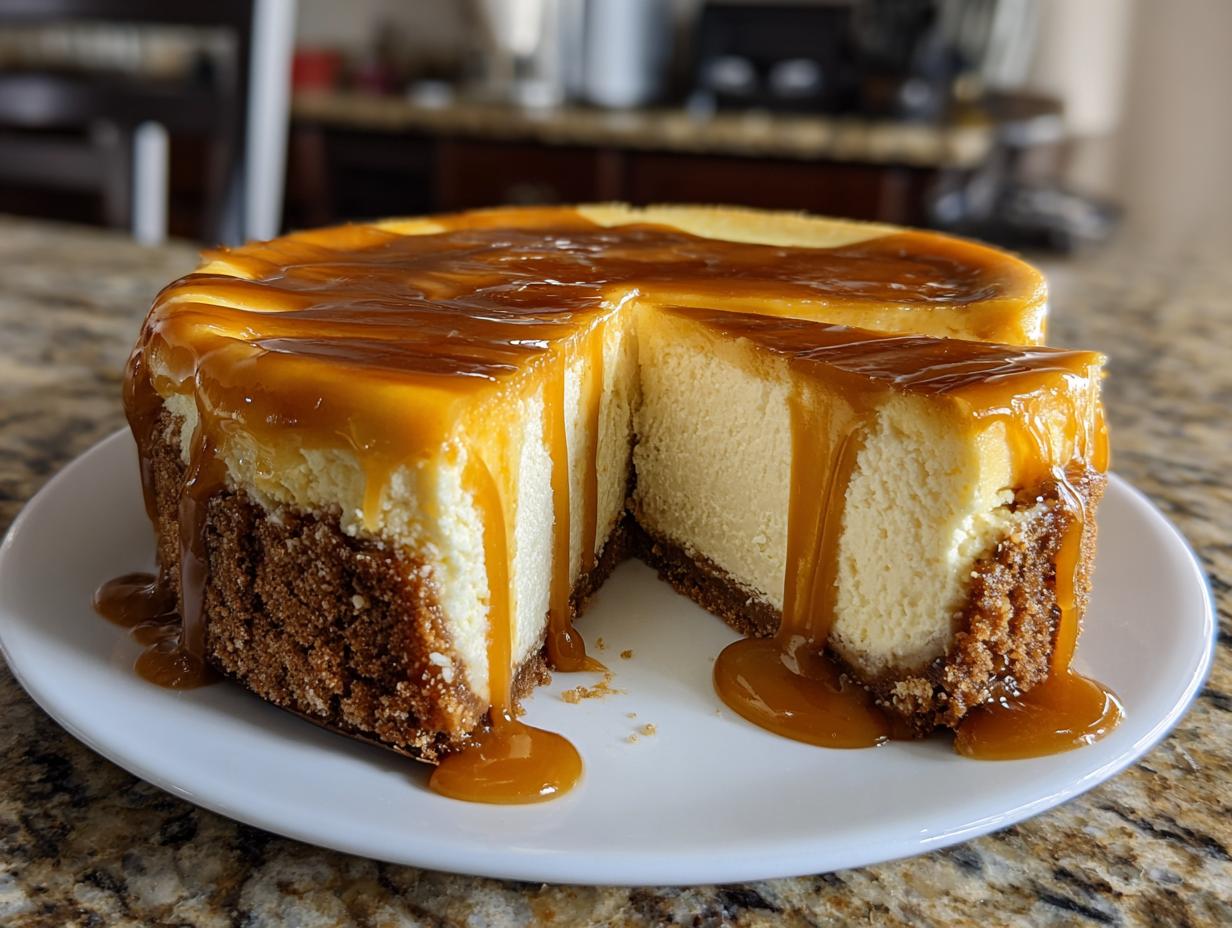
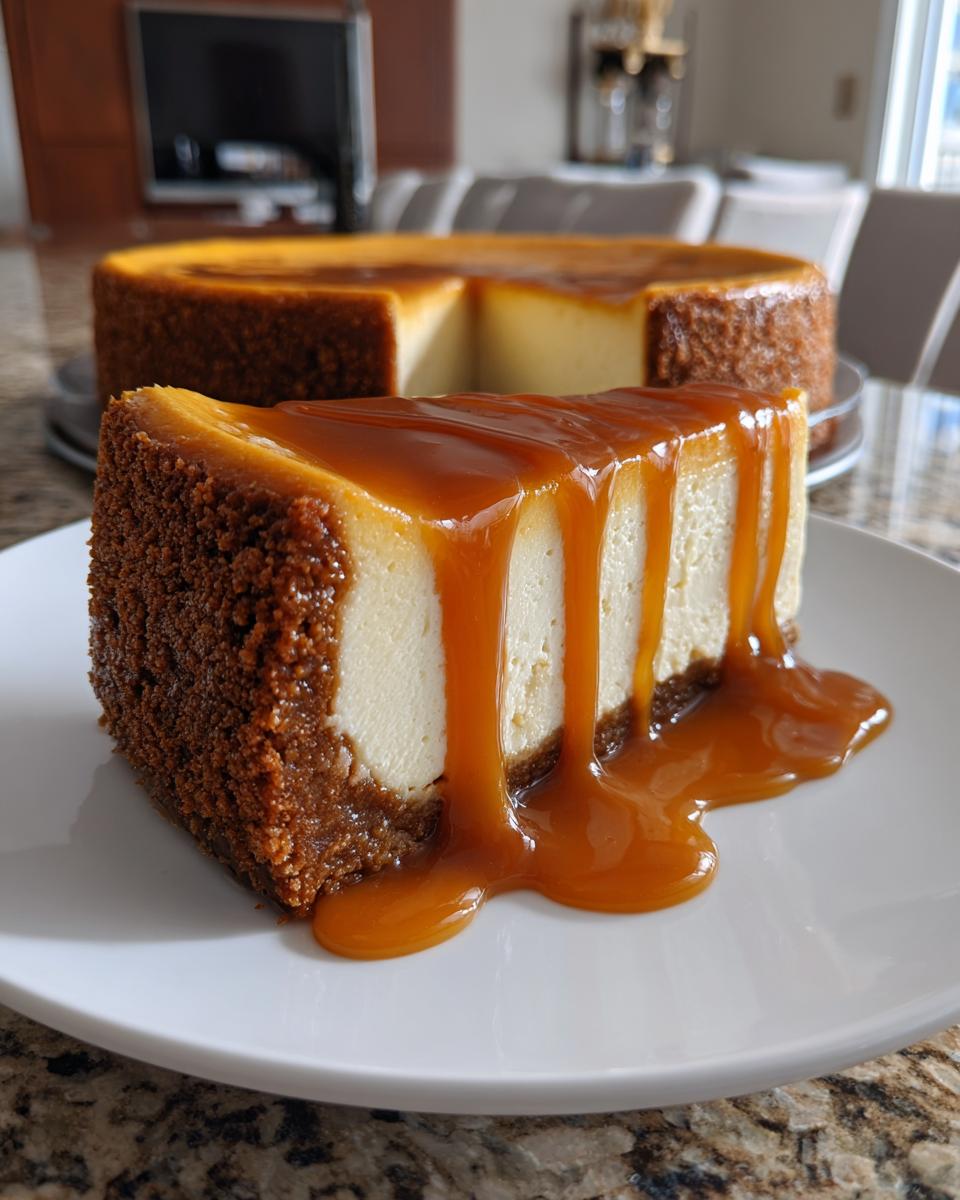
Let’s be honest, sometimes you just need something outrageously decadent, right? When that craving hits for that perfect sweet-and-salty punch, nothing beats a truly spectacular salted caramel cheesecake. But the thought of all those steps—cracking, cooling slowly, worrying about the water bath—can feel like too much project management for a Tuesday night. That’s where I learned to change things up. I’m Leo Grant, and I treat recipes like projects: we cut the unnecessary steps, keep the essential flavor, and make sure the process actually works. This Easy Baked Salted Caramel Cheesecake is the result of that optimization. It delivers that rich, creamy experience without the usual stress. Trust me, this formula is foolproof, even if you’re completely new to baked desserts.
- Why This Easy Salted Caramel Cheesecake Is Your New Favorite Baked Dessert Recipes
- Ingredients for the Ultimate Salted Caramel Cheesecake with Biscoff Crust
- Step-by-Step Instructions for Your Baked Salted Caramel Cheesecake
- Crafting the Homemade Salted Caramel Sauce for Topping
- Tips for the Best Salted Caramel Cheesecake Every Time
- Serving Suggestions for This Decadent Sweet Treats
- Storage and Reheating Instructions for Your Salted Caramel Cheesecake
- Frequently Asked Questions About Making Salted Caramel Cheesecake
- Final Thoughts on Your Perfect Salted Caramel Cheesecake
Why This Easy Salted Caramel Cheesecake Is Your New Favorite Baked Dessert Recipes
I love this cheesecake because it checks every box without demanding your entire weekend. It’s proof that a truly show stopping dessert recipe can still be an easy no stress cheesecake experience. We’re skipping the fussy stuff and going straight for big flavor and reliable results. I put the work into testing so you don’t have to!
- The Biscoff crust changes the game—it’s crunchy, spiced, and pairs unbelievably well with the caramel. Way better than standard graham crackers, in my opinion!
- We use simple steps for the filling, making sure you get that decadent texture without any guesswork.
- It’s baked, but we manage the heat so well that you barely have to worry about cracks.
If you’re looking for a really delightful recipe to try out next, check my guide for easy no-bake peanut butter pretzel bark for a different kind of deliciousness.
Achieving That Smooth Dessert Texture
The secret sauce for a creamy cheesecake recipe is thermal control, period. That water bath setup we use isn’t just for decoration; it creates a steamy environment that cooks the cheesecake gently from the sides and bottom. This slow, even heating lets the fats and proteins set up beautifully, which is what gives you that impossibly smooth dessert texture. Then, cooling it slowly inside the turned-off oven keeps everything stable. No jarring temperature changes allowed!
Ingredients for the Ultimate Salted Caramel Cheesecake with Biscoff Crust
When you break down a recipe into its project components, the ingredient list becomes crystal clear. For this salted caramel cheesecake, we have three main parts: the base, the creamy body, and the glorious topping. Organization here means less chance of scrambling mid-bake, which is crucial for an easy baked dessert. Getting your ingredients prepped—like making sure that cream cheese is actually soft—is half the battle won. We want efficiency and flavor here!
If you need another go-to recipe for a creamy treat, my creamy maple fudge is another winner that requires minimal effort for maximum payoff.
For the Biscoff Cookie Crust Recipe
Forget those boring graham crackers! The Biscoff cookies bring spicy, warm notes right into the base, elevating this whole endeavor. This crust is what makes ours different.
- 1 1/2 cups Biscoff cookie crumbs (use a food processor, or crush them really well in a zip-top bag!)
- 1/4 cup granulated sugar
- 6 tablespoons unsalted butter, melted
For the Rich Creamy Cheesecake Filling
This is where we build the body of our rich creamy cheesecake. Please, please check your fridge first! The cream cheese must be fully softened to room temperature. Cold cream cheese equals lumps, and lumps mean that smooth dessert texture we are aiming for gets ruined. Don’t risk it!
- 3 (8 ounce) packages cream cheese, softened to room temperature
- 1 1/2 cups granulated sugar
- 1/4 cup all-purpose flour (this helps stabilize it during baking)
- 1 teaspoon vanilla extract
- 1/2 teaspoon salt
- 3 large eggs (also room temperature is best!)
- 1/2 cup sour cream
- 1/2 cup homemade salted caramel sauce, plus extra for topping
Step-by-Step Instructions for Your Baked Salted Caramel Cheesecake
Okay, here is where we put the plan into action. Baking a cheesecake isn’t complicated, but it does require precise execution, which is why I love breaking it down into small, manageable tasks. We’re aiming for that perfect bake that results in barely any cracks, setting us up for a truly show stopping dessert recipe. If you follow these timings exactly, we avoid disaster.
If you ever need a simple, reliable side recipe while you wait, my guide on easy homemade copycat Olive Garden breadsticks is always ready!
Preparing the Biscoff Crust and Water Bath Setup
First things first: get the oven warmed up to 325 degrees F. Now, before anything else, we need to protect the springform pan from water seeping in during the bath—and that means heavy-duty foil, wrapped tightly all the way up the sides. Believe me, finding cheesecake batter floating in the bottom of your roasting pan is a project failure we want to avoid!
- Preheat your oven to 325 degrees F. Wrap the outside of a 9-inch springform pan tightly with heavy-duty aluminum foil to prepare for a water bath.
- Prepare the crust: Mix the Biscoff cookie crumbs, 1/4 cup sugar, and melted butter until combined. Press the mixture firmly into the bottom of the prepared springform pan. Bake for 10 minutes. Remove from the oven and let cool slightly.
Mixing the Filling for a Perfect Salted Caramel Cheesecake
Remember our goal: smooth, creamy texture. Use that electric mixer, but keep the speed low! We want combined, not whipped air into the mixture. Incorporating too much air is what causes major rising and subsequent cracking.
- Prepare the filling: In a large bowl, beat the softened cream cheese with an electric mixer until smooth. Gradually beat in the 1 1/2 cups sugar, flour, vanilla extract, and salt until just combined. Do not overmix.
- Beat in the eggs one at a time, mixing only until each egg is incorporated. This timing is vital! Stop the mixer after each addition before adding the next egg. Gently mix in the sour cream and 1/2 cup of the homemade salted caramel sauce.
Baking and Cooling Your Show Stopping Dessert Recipe
This section takes patience, but it’s where we guarantee that smooth finish we talked about. Water baths protect against harsh heat, and slow cooling locks in structure. Don’t cheat the cooling time!
- Pour the filling over the cooled crust. Place the springform pan inside a larger roasting pan. Carefully pour hot water into the roasting pan until the water reaches halfway up the sides of the springform pan. This creates that essential steam environment.
- Bake for 60 to 75 minutes, or until the edges are set but the center still has a slight jiggle—that center wobble is your sign it’s ready.
- Turn off the oven, crack the oven door open slightly, and let the cheesecake cool inside the oven for 1 hour. This gradual cooling is the engineering trick that prevents cracking!
- Remove the cheesecake from the water bath and foil. Cool completely on a wire rack, then chill in the refrigerator for at least 6 hours, or preferably overnight.
- Before serving, carefully remove the sides of the springform pan. Drizzle generously with extra homemade salted caramel sauce.
Crafting the Homemade Salted Caramel Sauce for Topping
Okay, this is the part where we go from a really great cheesecake to a true showstopper—and you absolutely have to make the sauce yourself. Seriously, don’t substitute this part! That store-bought stuff just doesn’t have the same depth of flavor. Making your own homemade salted caramel sauce isn’t hard; it just requires you to pay attention to the color, which is non-negotiable for a perfect caramel drizzle dessert.
This is simple chemistry in action, and it comes together faster than you think. By making sure you use good quality sea salt for that finishing touch, you get that perfect salty counterpoint to the sweet, rich body of the cheesecake. It’s the final quality check in our project plan!
If you’re already thinking about other rich toppings, I have a fantastic recipe you might enjoy later, my guide to chocolate fudge cake.
Here’s the quick and dirty guide to getting that perfect, pourable consistency for your topping:
- Use a heavy-bottomed saucepan. This spreads the heat out evenly, which is key to preventing scorching.
- Melt your sugar (start with about 1 cup, plus a splash of water) over medium heat. You must let it melt completely without stirring it with a spoon; instead, gently swirl the pan if necessary.
- When it turns a deep amber color—think the color of an old whiskey bottle—pull it off the heat immediately. That color means deep flavor!
- Whisk in half a cup of room-temperature heavy cream quickly (it will bubble up violently, so stand back!) followed by 4 tablespoons of butter. Whisk until smooth, then stir in a generous pinch of flaky sea salt.
Let it cool slightly until it thickens just enough so it flows nicely off a spoon without running straight off the cheesecake. This golden, luscious topping is what takes this from a simple treat to being one of the base salted caramel dessert recipes you’ll keep forever.
Tips for the Best Salted Caramel Cheesecake Every Time
Getting this creamy cheesecake recipe perfect seems intimidating, but I promise you, once you know the process steps, it’s pure efficiency. Think of these as final quality control checks for your project. We’ve already built in the water bath magic, but a few small details around the ingredients themselves make the difference between a good caramel cheesecake and one that earns you applause.
I’ve compiled the most important takeaways here. Following these ensures you get that dense, luxurious texture every single time. I learned these the hard way, so you don’t have to repeat my mistakes!
If you are looking for other reliable flavor profiles, you absolutely must check out my guide to best lemon cookies that are chewy and zesty for a totally different kind of indulgence.
Ingredient Notes and Substitutions for Your Salted Caramel Cheesecake
When you’re managing a process, flexibility with ingredients is important, provided you maintain the core outcome. For this salted caramel cheesecake, the biggest win comes from room temperature ingredients, but I know sometimes things just don’t thaw in time.
- Cream Cheese Temperature is Non-Negotiable: I know I stressed this, but it’s worth repeating. Cold cream cheese forces you to overmix to get it smooth, which whips in excess air, resulting in cracks. Softened means soft enough to press an indent into with one finger easily.
- Biscoff Crust Swap: I prefer the Biscoff crust, obviously, but if you are out or just don’t have any on hand, you can substitute graham cracker crumbs perfectly fine. You might need to add just a tiny bit more melted butter since graham crumbs tend to be drier than Biscoff. It will still be a great cheesecake with cookie crust!
- Water Bath Alternative: If you decide to skip the foil-wrapped springform pan and the roasting pan setup (maybe you’re short on equipment), you can bake it without the water bath. Just reduce your time slightly—maybe check it closer to 55 minutes rather than 75. But fair warning: you need to be much, much more diligent about the slow cooling process in the turned-off oven to avoid major surface cracks on your caramel drizzle dessert. The water bath is the ultimate safeguard.
Serving Suggestions for This Decadent Sweet Treats
Now that you have this beautiful, rich, and perfectly balanced creamy cheesecake recipe ready to serve, we need to talk about presentation. A dessert this good deserves the right supporting cast! Since we nailed that salty-meets-sweet combination, we want pairings that either enhance that contrast or provide a clean, bright counterpoint.
This dessert, with its warm spice from the Biscoff and deep caramel notes, screams for a cozy setting. It’s definitely one of my top picks for fall baking recipes when the weather shifts, but honestly, it’s amazing year-round.
For a simple elegance, you really only need a few things on the plate:
- A Hot Beverage: My go-to is a strong, slightly bitter black coffee or a dark roast espresso. The bitterness cuts right through the richness of the cream cheese and that thick caramel drizzle dessert topping beautifully.
- Light Fruit: Don’t weigh it down with heavy sauces! I love slicing a few fresh raspberries or a spear of crisp green apple to place on the side of the plate. The acidity provides a fantastic palate cleanser against the decadence. If you need something fun to dip fruit into, check out my guide for easy fruit dip—though you might just eat the cheesecake plain, I can’t blame you!
- Seasonal Touches: If you are planning this for a holiday cheesecake ideas spread, a little sprinkle of toasted pecans or crushed toffee bits on top always adds texture and visual appeal. It really makes this shine as a show stopping dessert recipe for Thanksgiving or Christmas.
Think less about adding more sugar and more about adding textural contrast. That contrast is what keeps people coming back for a second slice of this ultimate caramel cheesecake!
Storage and Reheating Instructions for Your Salted Caramel Cheesecake
Alright, now that you’ve successfully navigated the bake, we have to handle the cooling period correctly. Seriously, this is as important as the baking itself if you want that perfect, rich creamy cheesecake texture when it’s time to eat. Cheesecake isn’t like regular cake; you can’t just leave it on the counter waiting its turn. It requires chilling time to fully firm up and stabilize.
For the best experience, you absolutely must let this bake chill for a minimum of six hours. Honestly, overnight is where it truly shines. This long chill time allows the structure to set completely, meaning when you slice into it, you get clean, gorgeous portions that show off that beautiful Biscoff crust and creamy filling. Don’t rush this if you want that smooth texture you worked so hard for!
When it comes to saving leftovers—and let’s be real, there might be some—storage is key to maintaining quality. Treat it like you would any dairy product.
How to Store Leftover Salted Caramel Cheesecake
Once the cheesecake is completely chilled and you’ve pulled the springform ring off, you need to cover it well before putting it in the fridge. Plastic wrap alone isn’t heavy-duty enough here; you risk drying out the edges or picking up fridge odors. I recommend covering it tightly, first with a layer of plastic wrap, and then placing the whole thing on a plate covered loosely with foil or putting it inside an airtight cake carrier.
Stored this way, your salted caramel cheesecake should stay fantastic for about 5 to 7 days in the refrigerator. The homemade caramel topping will get a bit firmer as time goes on, but the flavor holds up beautifully.
Serving Chilled vs. At Room Temperature
This is a common question for baked dessert recipes: Do I serve it straight from the fridge? My professional opinion (from a project management standpoint) is that room temperature dulls dairy flavor. You want that cool, dense feel. However, taking it straight from a 38°F fridge can make the caramel topping hard as a rock.
Here’s the optimized procedure:
- Take the slices out of the refrigerator about 20 minutes before you plan to serve them.
- This slight warming period softens the filling just enough to release that full, creamy flavor and makes the caramel topping perfectly gooey again.
This simple 20-minute wait drastically improves the eating experience. By the way, if you’re looking for simple pantry staples to try out another time, my recipe for easy homemade mayonnaise is incredibly useful!
Can I Freeze This Cheesecake?
Yes, you absolutely can freeze this! Freezing is a great way to preserve this decadent treat for a future holiday or just a mid-week emergency craving. If you freeze it, make sure it is fully chilled first, and then use heavy plastic wrap and a layer of foil to protect it from freezer burn. It keeps well for up to three months.
When you’re finally ready to thaw it, just transfer the wrapped cheesecake back into the refrigerator for a good 24 hours before unwrapping and letting it sit on the counter for that final 20 minutes before serving.
Frequently Asked Questions About Making Salted Caramel Cheesecake
When you finish a project, there are always a few loose ends or leftover questions. That makes perfect sense! Baking is chemistry, and sometimes we need clarification on the process to ensure the outcome is perfect. This is where we streamline any remaining confusion about making the best salted caramel dessert. I’ve gathered the most common queries I get from people trying this recipe for the first time.
If you are planning a holiday spread and need another fruity item to balance the richness, you might want to check out my recipe for easy cranberry jam made without pectin. It’s a great textural counterpoint!
Can I make this a no-bake salted caramel cheesecake?
That’s a good question, especially when you’re looking for an easy dessert. This recipe is specifically optimized for baking because the oven method is what gives us that perfect, dense, rich creamy cheesecake texture we crave. A no-bake version relies on significant stabilizers, like gelatin or a ton of whipped cream, and it just won’t deliver the same melt-in-your-mouth satisfaction as this baked version will.
My advice? Stick to the plan here. The water bath technique is designed to make the baking process practically stress-free, so you get the best result without the hassle of setting up alternative stabilizers. Trust the baked method for the ultimate experience!
What is the best way to get a crack-free cheesecake?
This is the #1 source of anxiety for cheesecake bakers! The reason cheesecakes crack is almost always simple: rapid temperature change. When you take a hot cheesecake directly into a cold kitchen or fridge, the structure contracts too quickly and cracks right down the middle.
Our defense strategy is twofold, just like in the instructions:
- The Water Bath: This creates a humid, even cooking environment. It acts as a buffer against direct heat and ensures everything sets slowly and evenly.
- The Slow Cooldown: This is the most crucial part for achieving an easy no stress cheesecake look. Turning the oven off and leaving the cake inside with the door cracked for a full hour lets the temperature drop gradually. That cheesecake isn’t shocked, so it settles perfectly.
Follow those two steps, and you will have the most beautiful, crack-free surface for drizzling that gorgeous homemade salted caramel sauce tonight.
Is the Biscoff crust really necessary for a good result?
Look, you *could* use graham crackers, but honestly, the Biscoff crust really pushes this over the edge into the **ultimate caramel cheesecake** category. Biscoff cookies have way more spice and fat, so they bake into a firmer, more flavorful base for your creamy layer. It adds a background note of spiced caramel before you even get to the main event. It’s a simple ingredient upgrade that pays huge dividends in flavor!
How much caramel topping do I need for serving?
You should plan on having at least double the amount needed for the filling. The goal is an extremely generous drizzle! I always use the 1/2 cup in the batter for structure and flavor infusion, and then I reserve at least another 3/4 cup to fully blanket the top when serving. If you love caramel as much as I do, go ahead and make a full batch of the sauce; you won’t regret having extra for dipping spoons or future baked desserts.
Final Thoughts on Your Perfect Salted Caramel Cheesecake
So, there it is! We took a dessert that sounds deeply complicated—a baked, layered, drizzled, specialty crust cheesecake—and executed it using smart, efficient steps. That’s the Dishicious way. You didn’t just follow a recipe; you managed a successful project that resulted in an incredible show stopping dessert recipe. You achieved that perfect marriage of salty and sweet that makes this final salted caramel cheesecake simply irresistible.
I want to see what you made! When you pull that magnificent, glossy slice onto a plate, snap a picture and tag me. Knowing these recipes work for real home cooks on tight schedules is the whole point of this site. If you loved the balance of flavor and the manageable process, please take a second to give this recipe a rating right below. It helps other busy people know they can trust this easy caramel cheesecake recipe to be reliable.
If you nailed this one, remember that the principles of slow cooling and room-temperature ingredients apply to every project. For another classic that follows similar structural integrity rules, check out my guide for the best authentic red velvet cake recipe. Happy baking, everyone!
PrintEasy Baked Salted Caramel Cheesecake with Biscoff Crust
A straightforward recipe for a rich, creamy baked cheesecake featuring a Biscoff cookie crust and topped with homemade salted caramel sauce. This dessert balances sweet and salty flavors for a show-stopping treat.
- Prep Time: 25 min
- Cook Time: 75 min
- Total Time: 100 min
- Yield: 12 servings 1x
- Category: Dessert
- Method: Baking
- Cuisine: American
- Diet: Vegetarian
Ingredients
- 1 1/2 cups Biscoff cookie crumbs
- 1/4 cup granulated sugar
- 6 tablespoons unsalted butter, melted
- 3 (8 ounce) packages cream cheese, softened
- 1 1/2 cups granulated sugar
- 1/4 cup all-purpose flour
- 1 teaspoon vanilla extract
- 1/2 teaspoon salt
- 3 large eggs
- 1/2 cup sour cream
- 1/2 cup homemade salted caramel sauce, plus extra for topping
Instructions
- Preheat your oven to 325 degrees F. Wrap the outside of a 9-inch springform pan tightly with heavy-duty aluminum foil to prepare for a water bath.
- Prepare the crust: Mix the Biscoff cookie crumbs, 1/4 cup sugar, and melted butter until combined. Press the mixture firmly into the bottom of the prepared springform pan. Bake for 10 minutes. Remove from the oven and let cool slightly.
- Prepare the filling: In a large bowl, beat the softened cream cheese with an electric mixer until smooth. Gradually beat in the 1 1/2 cups sugar, flour, vanilla extract, and salt until just combined. Do not overmix.
- Beat in the eggs one at a time, mixing only until each egg is incorporated. Gently mix in the sour cream and 1/2 cup of the homemade salted caramel sauce.
- Pour the filling over the cooled crust. Place the springform pan inside a larger roasting pan. Carefully pour hot water into the roasting pan until the water reaches halfway up the sides of the springform pan. This creates a water bath for even baking.
- Bake for 60 to 75 minutes, or until the edges are set but the center still has a slight jiggle.
- Turn off the oven, crack the oven door open slightly, and let the cheesecake cool inside the oven for 1 hour. This prevents cracking.
- Remove the cheesecake from the water bath and foil. Cool completely on a wire rack, then chill in the refrigerator for at least 6 hours, or preferably overnight.
- Before serving, carefully remove the sides of the springform pan. Drizzle generously with extra homemade salted caramel sauce.
Notes
- For the smoothest dessert texture, ensure your cream cheese is fully softened to room temperature before mixing.
- If you do not want to use a water bath, bake at 325 degrees F for 55-65 minutes, then cool slowly in the turned-off oven.
- You can substitute graham cracker crumbs for Biscoff cookies if needed for the crust.
Nutrition
- Serving Size: 1 slice
- Calories: 450
- Sugar: 45
- Sodium: 350
- Fat: 28
- Saturated Fat: 17
- Unsaturated Fat: 11
- Trans Fat: 0.5
- Carbohydrates: 48
- Fiber: 1
- Protein: 7
- Cholesterol: 120