
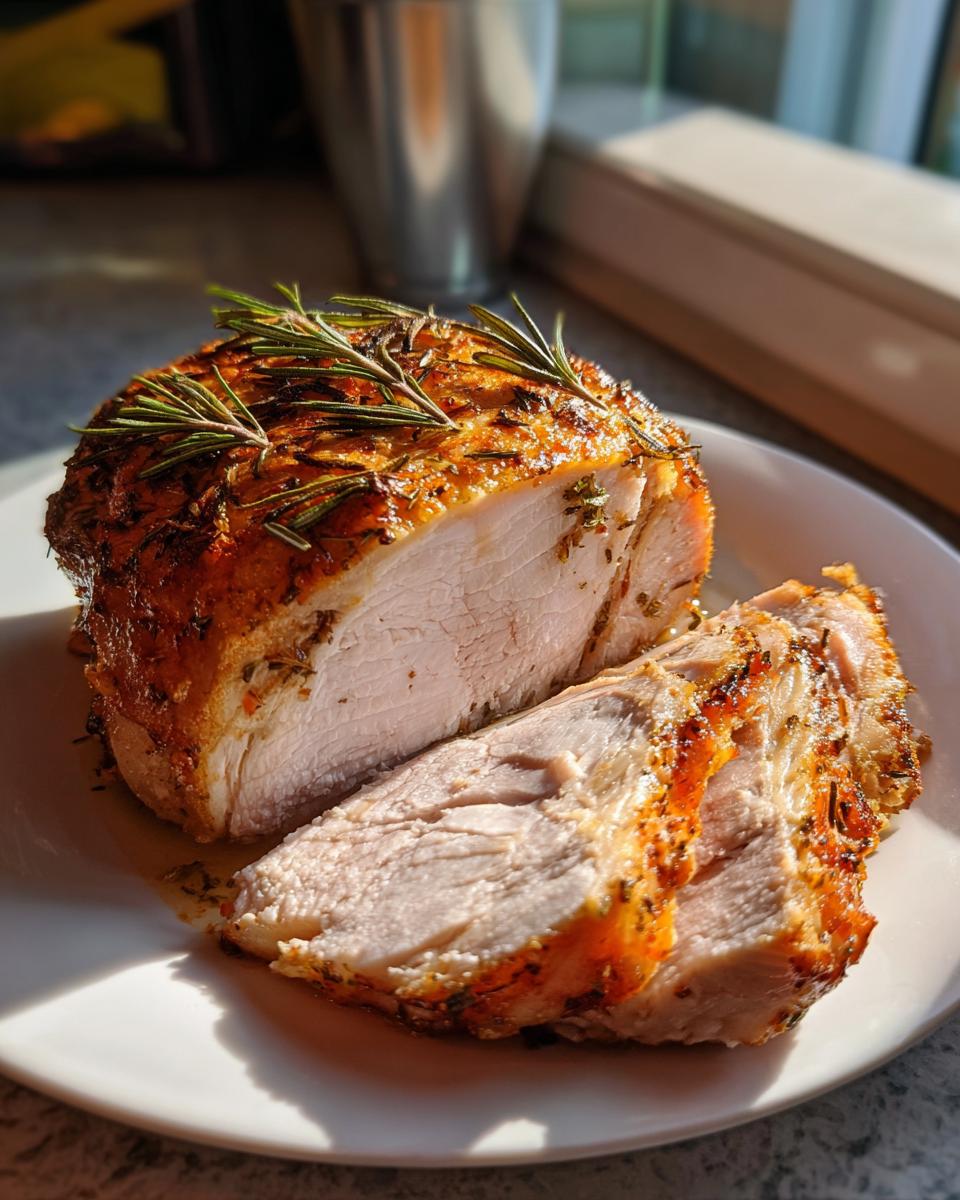
Let’s be honest: when you think about baking chicken breast, is your first thought, “Oh good, another excuse for dry, tough protein”? I used to feel that way, too! That sad, stringy texture kept me ordering expensive takeout way too often. But as the founder of Dishicious, I approached this problem like a project manager—I engineered a solution. This isn’t just another recipe; it’s the ultimate **baked chicken breast** method designed for reliability. We are cutting out the guesswork, utilizing precise temperature control, and ensuring you get that melt-in-your-mouth tenderness every single time you open the oven door. Forget the stress; we’re making dinner foolproof.
- Why This is the Best Baked Chicken Breast Recipe You Will Ever Make
- Ingredients for Foolproof Juicy Baked Chicken Breast
- How to Prepare Perfect Baked Chicken Breast: Step-by-Step Instructions
- Flavor Variations for Your Baked Chicken Breast Recipe
- Tips for Meal Prep Chicken Breast Success
- Storage and Reheating Instructions for Tender Chicken Breast Oven Leftovers
- Frequently Asked Questions About How to Bake Chicken Breast
- Estimated Nutritional Data for Healthy Baked Chicken
- Share Your Perfectly Baked Chicken Breast Success
Why This is the Best Baked Chicken Breast Recipe You Will Ever Make
I know you’ve tried recipes before that promise juicy results and deliver cardboard instead. I fixed that. This **baked chicken breast** method cuts through the noise because it focuses only on what matters: locking in moisture and maximizing flavor with minimal time investment. Trust me, this simple technique guarantees a **tender chicken breast oven** outcome that rivals anything you get from a fancy restaurant. It’s efficiency meets deliciousness. If you’re looking for flavor packed into a quick protein for your healthy lunch ideas, you’ve found it.
- Guaranteed Juiciness: We hit that sweet spot temperature perfectly every time. No more guesswork!
- Max Flavor, Minimum Effort: Our simple dry rub does all the heavy lifting while you focus on cleanup.
- Weeknight Ready: Prep takes maybe ten minutes, meaning you get a substantial dinner on the table fast.
Moist Chicken Breast Secrets: Temperature and Resting
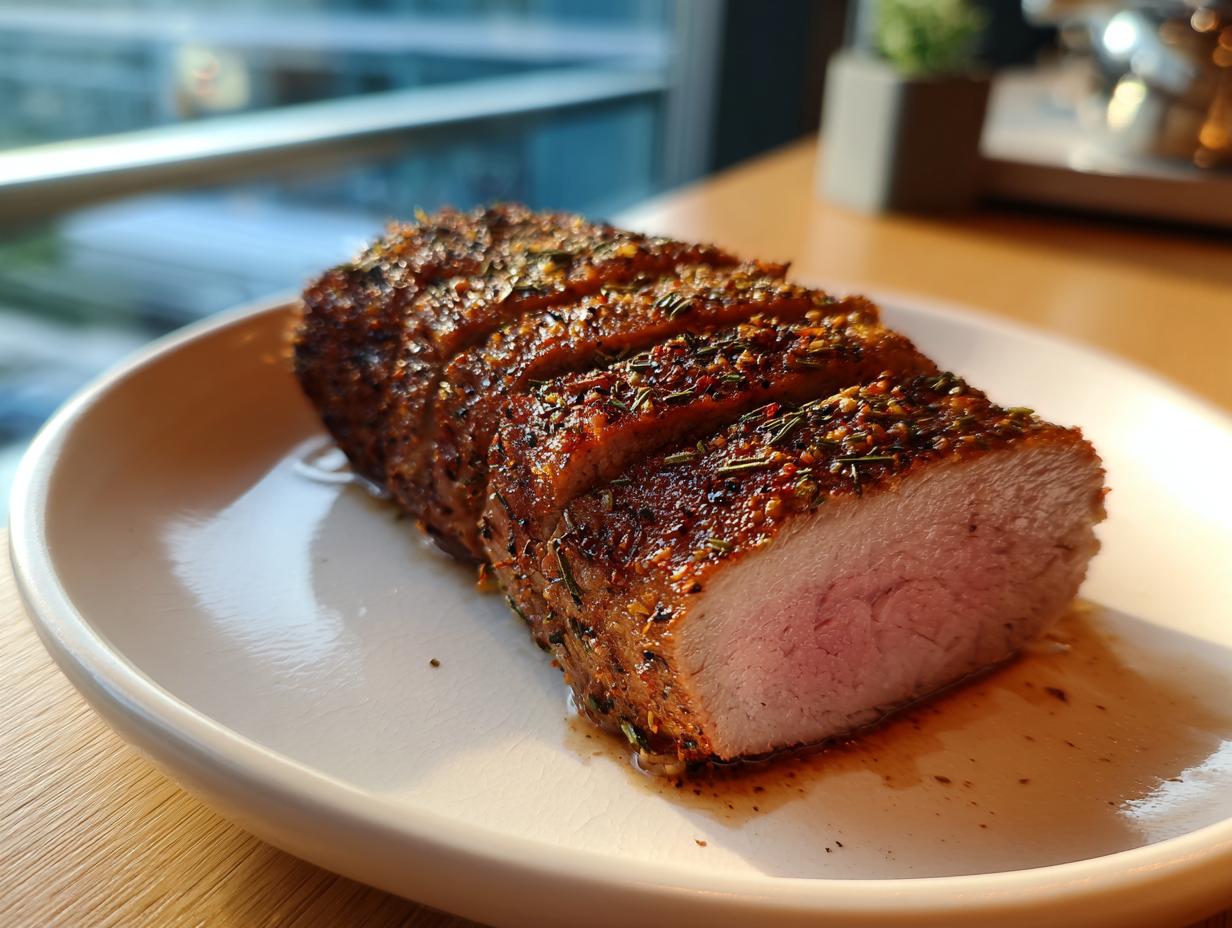
Here is the non-negotiable truth about a **juicy baked chicken breast**: you must pull it out of the oven slightly before you think it’s done. We pull it at 160°F because resting does the final magic! Resting is crucial; it allows the hot, contracted muscle fibers to relax and reabsorb those internal juices. If you slice it right out of the oven, everything important just runs out onto the cutting board. That resting time—a minimum of five minutes—is what guarantees your results.
Ingredients for Foolproof Juicy Baked Chicken Breast
When I engineered this **baked chicken breast recipe**, I kept accessibility front and center. You won’t need to run to a specialty store for any of this, which is essential for a reliable **quick chicken recipe**. The magic is in what we do with these simple items! This blend of spices creates incredible flavor without needing complex marinades, which keeps prep time low for your **simple chicken breast dinner**.
- 4 boneless, skinless chicken breasts (about 6-8 oz each)
- 1 tablespoon olive oil
- 1 teaspoon salt
- 1 teaspoon black pepper
- 1 teaspoon garlic powder
- 1 teaspoon onion powder
- 1 teaspoon paprika
- 1/2 teaspoon dried oregano
See? Just good, clean pantry staples. That’s all it takes to set up this **easy oven baked chicken** for success.
How to Prepare Perfect Baked Chicken Breast: Step-by-Step Instructions
This is where the project management approach really pays off. We need to treat every piece of chicken like it has to perform equally well, which means we have to tackle uneven thickness head-on. If one end cooks faster than the other, we automatically get a dry piece! Follow these steps closely; they are optimized for a guaranteed **perfectly baked chicken** that is ready when you need it for your quick, easy dinners.
- First, get that oven hot! Preheat to 400 degrees Fahrenheit (200 Celsius). Prep your baking dish—a little oil or parchment paper goes a long way for cleanup later.
- Next, we build our flavor base. Combine your salt, pepper, garlic powder, onion powder, paprika, and oregano in a small bowl. This is your master rub.
- Drizzle olive oil over the breasts, then pat that seasoning mixture all over them. Don’t be shy; cover every surface!
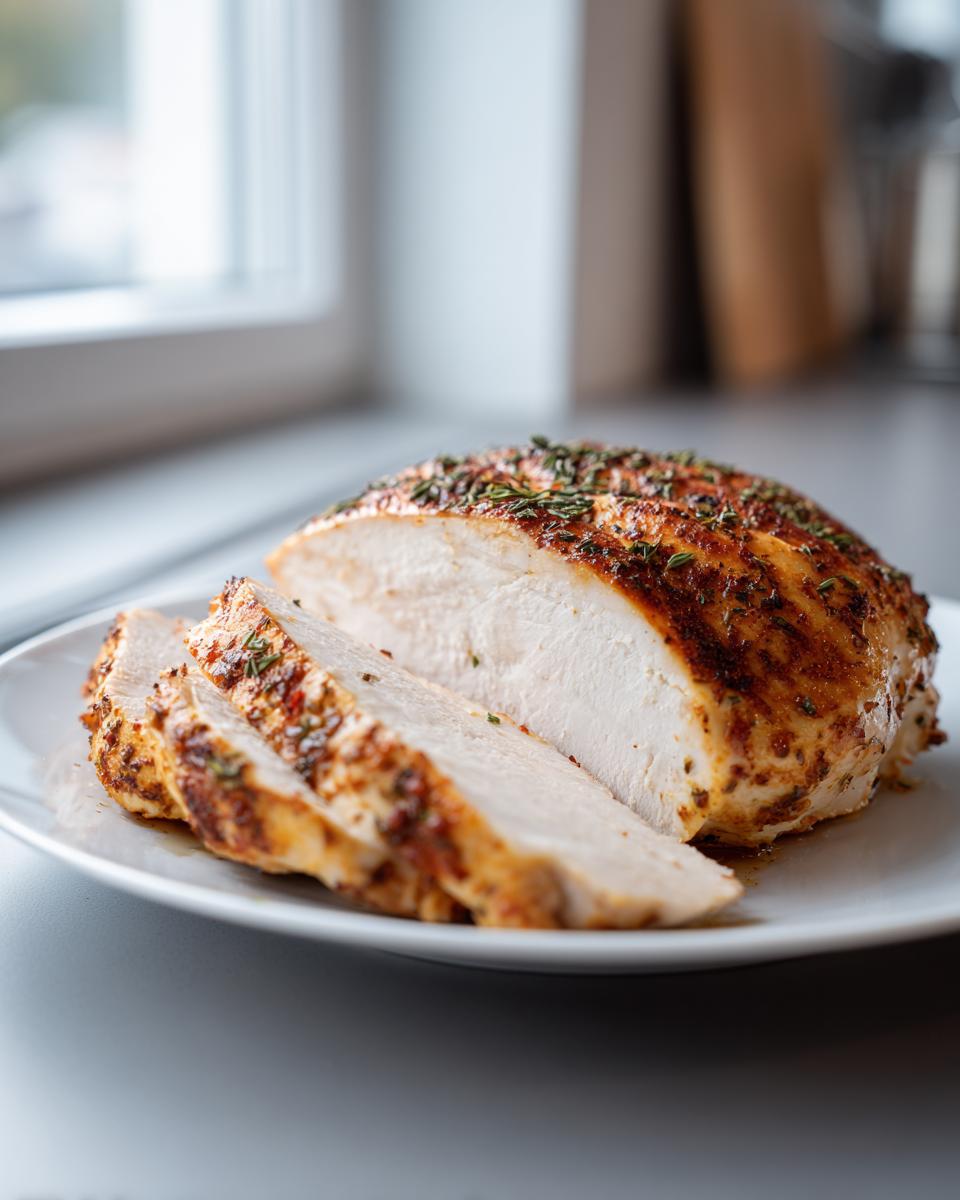
- Time them for 18 to 22 minutes. I’m serious about that internal temp check: pull them out once they hit 160 degrees Fahrenheit in the center.
- Then, we wait during the resting phase—don’t skip it! This is the secret sauce to moistness.
Prepping the Chicken for Even Cooking
Chicken breasts are naturally teardrop-shaped; the top ends are thick and the bottom tapers off. If you throw them in as-is, the thin ends are done and drying out while you wait for the thick center to finish cooking. That’s the main reason people get tough chicken! To prevent this completely, you need to use a meat mallet or even the bottom of a heavy pan to gently pound the thickest part down until the breasts are about an inch thick across the board. This consistency is what guarantees you a **tender chicken breast oven** experience across the entire serving.
The Crucial Resting Period for Your Baked Chicken Breast
I can’t say this enough: Resting is not optional, it’s part of the cooking process! Once they hit that 160°F internal temperature, yank them out immediately. Place them on a clean cutting board and let them chill out under a loose piece of foil for 5 to 10 minutes. During this essential downtime, those muscle fibers relax and redistribute the juices they were holding onto so tightly. That five-minute wait is what bumps the temperature safely up to 165°F while ensuring every slice remains incredibly moist.
Flavor Variations for Your Baked Chicken Breast Recipe
This base seasoning is fantastic, but that’s the beauty of using a reliable method like this: it’s a perfect starting point for all sorts of **weeknight chicken breast ideas**. Since the cooking process is so solid, you can throw some flavor curveballs at it and still end up with phenomenal results. Think of the seasoning as your foundation, and these additions as your personalized gourmet touch. We want to keep things flexible for your meal planning, so these tweaks are designed to be incredibly fast, just like the original recipe from this great recipe.
Try Garlic Butter Chicken Breast
If you want something richer, melt about two tablespoons of real butter and stir in a teaspoon of minced garlic right before you rub the oil onto the chicken. Use that garlic butter mixture *instead* of the plain olive oil. It adds unbelievable depth! The butter helps the seasonings adhere even better, and it gives you that restaurant feel on your plate. Pair it with some garlicky roasted veggies and you’re set for an amazing dinner.
Quick Dry Rub Baked Chicken Ideas
Want to switch gears completely? Forget the oregano and onion powder for a night! For a slightly sweeter and smokier profile, swap out the simple rub for something like a mix of chili powder, a touch of brown sugar (maybe half a teaspoon), and extra smoked paprika. It cooks down into this amazing crust on your **dry rub baked chicken**. This works especially well if you plan on shredding the chicken later for tacos or bowls.
Tips for Meal Prep Chicken Breast Success
If you’re cooking for one or just smart about your weekly schedule, this **baked chicken breast** recipe is actually perfect for batch cooking. No sense firing up the oven four times a week, right? When I’m planning ahead for my meal prep chicken breast containers, I use the exact same process, but I pull the chicken just *before* it hits the final safe temperature. I aim for that 160°F mark, just like the recipe states, and then I immediately transfer it to an airtight container once it’s rested.
Because we are pulling it slightly early, the residual heat will carry it a tiny bit further, but you’re guaranteed that juicy result even when you reheat it later in the week. People love the reliability of our method, and it ensures your midday meals taste fresh, not like something dug out of the back of the fridge. Check out how easy it is compared to some of the other methods noted over at this great guide!
Storage and Reheating Instructions for Tender Chicken Breast Oven Leftovers
So, you made extra—smart move! Storing your leftovers correctly is the only hurdle between perfection today and perfection tomorrow. You need to keep that hard-earned moisture locked in when saving your **juicy baked chicken breast**. Pop the cooled chicken into a completely airtight container. I swear by really sealing those lids tight!
When it comes time to reheat, avoid nuking it dry. A quick 30 to 60 seconds in the microwave is usually enough, but here’s the trick: add a tablespoon of water, chicken broth, or even some of those sauces you normally use right into the microwave-safe dish with the chicken. That steam traps the moisture. Honestly, though, I often just slice the cold chicken thinly and eat it straight over a salad. It’s still tender that way!
Frequently Asked Questions About How to Bake Chicken Breast
I know that even with the best recipe, sometimes you have a few quick questions pop up right when you’re trying to get dinner on the table. That’s totally normal! I gathered the most important things people ask me about mastering **how to bake chicken breast** so you can feel totally confident moving forward.
What is the safest internal temperature for baked chicken breast?
The USDA officially says that chicken is safe to eat once it hits 165 degrees Fahrenheit (74°C). However, remember my core advice for getting a **juicy baked chicken breast**? You should absolutely pull the chicken out of the oven when your thermometer reads 160°F. That extra five minutes of resting under the foil is what carries the temperature safely up to 165°F while redistributing the moisture. Don’t leave it in the oven until 165°F, or it will dry out on the way to your plate!
Can I use frozen chicken breasts for this easy oven baked chicken recipe?
Oh, I really advise against it, friend. While I push for efficiency, trying to cook chicken from frozen throws off our whole timing strategy. If you put a partially frozen breast in the oven, the outside cooks way too fast trying to melt the ice in the middle. You end up with burnt edges and raw centers, totally ruining the chance for a **tender chicken breast oven** result. For this recipe, always make sure your chicken is completely thawed before you start seasoning and pounding it for evenness.
How can I make this a one pan baked chicken meal?
That’s a great way to cut down on dishes! To turn this into a true **one pan baked chicken** situation, you just need to factor in your sides. Since the chicken needs about 20 minutes, toss some quick-cooking veggies like asparagus, green beans, or broccoli florets onto the pan around the chicken breasts during the last 10 to 15 minutes of baking. They’ll roast up perfectly right alongside your protein. Easy cleanup for a nearly complete meal!
Estimated Nutritional Data for Healthy Baked Chicken
Because we’re focusing on a healthy protein source that tastes amazing, people always ask about the macros. This recipe is designed to be lean and high-protein, which is why it’s a staple for so many of my **healthy baked chicken** routines. Remember, these numbers are just estimates, based on using the four 6-ounce chicken breasts listed in the ingredients and weighing out the light coating of olive oil and spices.
- Serving Size: 1 breast
- Calories: 220
- Protein: 40g
- Fat: 5g (Mostly healthy unsaturated fat)
- Carbohydrates: 1g
- Sodium: 450mg (This can easily be reduced by lowering the added salt!)
See? You get a huge punch of protein without adding a ton of fat or carbs. It’s exactly what you need for a busy weeknight dinner or a solid base for your weekly diet goals.
Share Your Perfectly Baked Chicken Breast Success
Seriously, I want to know if this engineered approach worked for you! If you followed the temperature check and the crucial resting step, you should be looking at the juiciest pieces of chicken you’ve ever pulled from the oven. Did you test out my tip about pounding the chicken to an even thickness? I bet you noticed a massive difference!
If you loved the results and got that **melt in your mouth chicken** experience we aim for, please tap that 5-star rating right below this section. And don’t be quiet about your wins! Drop a comment below and tell me what happened. Did you stick to the paprika and oregano rub, or did you try one of the flavor variations, like folding in that **garlic butter chicken breast** mix?
Your feedback helps me keep refining these recipes, making sure every **baked chicken breast** that leaves Dishicious headquarters is a guaranteed win for your busy kitchen. If you ever run into a snag or need backup on another recipe, don’t hesitate to reach out via my contact page. Happy cooking!
PrintFoolproof Juicy Oven Baked Chicken Breast
This recipe delivers tender, moist baked chicken breast every time using a simple seasoning blend and a reliable oven method. It is perfect for quick weeknight dinners or easy meal prep.
- Prep Time: 10 min
- Cook Time: 20 min
- Total Time: 35 min
- Yield: 4 servings 1x
- Category: Dinner
- Method: Baking
- Cuisine: American
- Diet: Low Fat
Ingredients
- 4 boneless, skinless chicken breasts (about 6–8 oz each)
- 1 tablespoon olive oil
- 1 teaspoon salt
- 1 teaspoon black pepper
- 1 teaspoon garlic powder
- 1 teaspoon onion powder
- 1 teaspoon paprika
- 1/2 teaspoon dried oregano
Instructions
- Preheat your oven to 400 degrees Fahrenheit (200 degrees Celsius). Lightly grease a baking dish or line it with parchment paper for easy clean-up.
- Prepare the chicken: If your chicken breasts are uneven, gently pound the thicker end with a meat mallet or rolling pin until the thickness is relatively uniform. This step is key for even cooking and preventing dry edges.
- In a small bowl, combine the salt, pepper, garlic powder, onion powder, paprika, and oregano to create your dry rub.
- Rub the olive oil over all surfaces of the chicken breasts. Then, evenly coat each breast with the seasoning mixture.
- Place the seasoned chicken breasts in the prepared baking dish.
- Bake for 18 to 22 minutes. Cooking time depends on the thickness of the chicken. For the juiciest results, use a meat thermometer to check for an internal temperature of 160 degrees Fahrenheit (71 degrees Celsius) in the thickest part.
- Remove the chicken from the oven. This is a crucial step: Let the chicken rest on a cutting board, loosely tented with foil, for 5 to 10 minutes before slicing. The internal temperature will rise to the safe 165 degrees Fahrenheit (74 degrees Celsius) while resting, and this allows the juices to redistribute, keeping your chicken moist.
- Slice against the grain and serve immediately.
Notes
- For extra flavor, substitute half of the olive oil with melted garlic butter before seasoning.
- If you are meal prepping, bake the chicken to 160 degrees Fahrenheit, let it rest, and then slice or shred it for storage.
- To ensure even cooking, you can place the chicken breasts on a wire rack set inside the baking sheet.
Nutrition
- Serving Size: 1 breast
- Calories: 220
- Sugar: 0
- Sodium: 450
- Fat: 5
- Saturated Fat: 1
- Unsaturated Fat: 4
- Trans Fat: 0
- Carbohydrates: 1
- Fiber: 0
- Protein: 40
- Cholesterol: 110