
When that first chill hits in the fall, what’s the first thing you crave? For me, it’s pure, sweet comfort that doesn’t require an entire afternoon of labor. That’s why I engineered what I firmly believe is The Best, Easiest apple crisp recipe with a perfectly crunchy oat topping. As a project manager who hates kitchen inefficiency, I optimized every step of the classic apple crisp to deliver maximum flavor payoff for minimal hands-on time. Forget fussy lattice work or tricky pie dough; this dessert is straightforward, foolproof, and smells incredible while it bakes. It’s the quintessential cozy autumn dessert, ready fast.
- Why This is The Best, Easiest apple crisp Recipe (The Dishicious Method)
- Gathering Ingredients for Your Homemade apple crisp
- How To Make apple crisp: Step-by-Step Instructions
- Tips for the Perfect apple crisp Every Time
- Serving Suggestions for Your Warm apple crumble
- Storage and Reheating Instructions for apple crisp
- Variations on the Classic apple crisp Recipe
- Frequently Asked Questions About apple crisp
- Nutritional Estimate for This apple crisp
Why This is The Best, Easiest apple crisp Recipe (The Dishicious Method)
I didn’t call this the best for nothing—this recipe is designed for someone who needs a reliable win in the kitchen. It strips away all the complexity while keeping that essential, deeply satisfying flavor profile. It’s practically engineered to be a Comfort Food Dessert you can pull together even on a hectic Tuesday.
- It uses pantry staples only; no specialty shopping required here.
- It truly is a Quick Apple Dessert with only 15 minutes of active prep.
- It’s foolproof because we control the one element that usually goes wrong (the topping!).
You’ll find everything you need to execute this perfectly right here, like my tip for quick stovetop apple oatmeal.
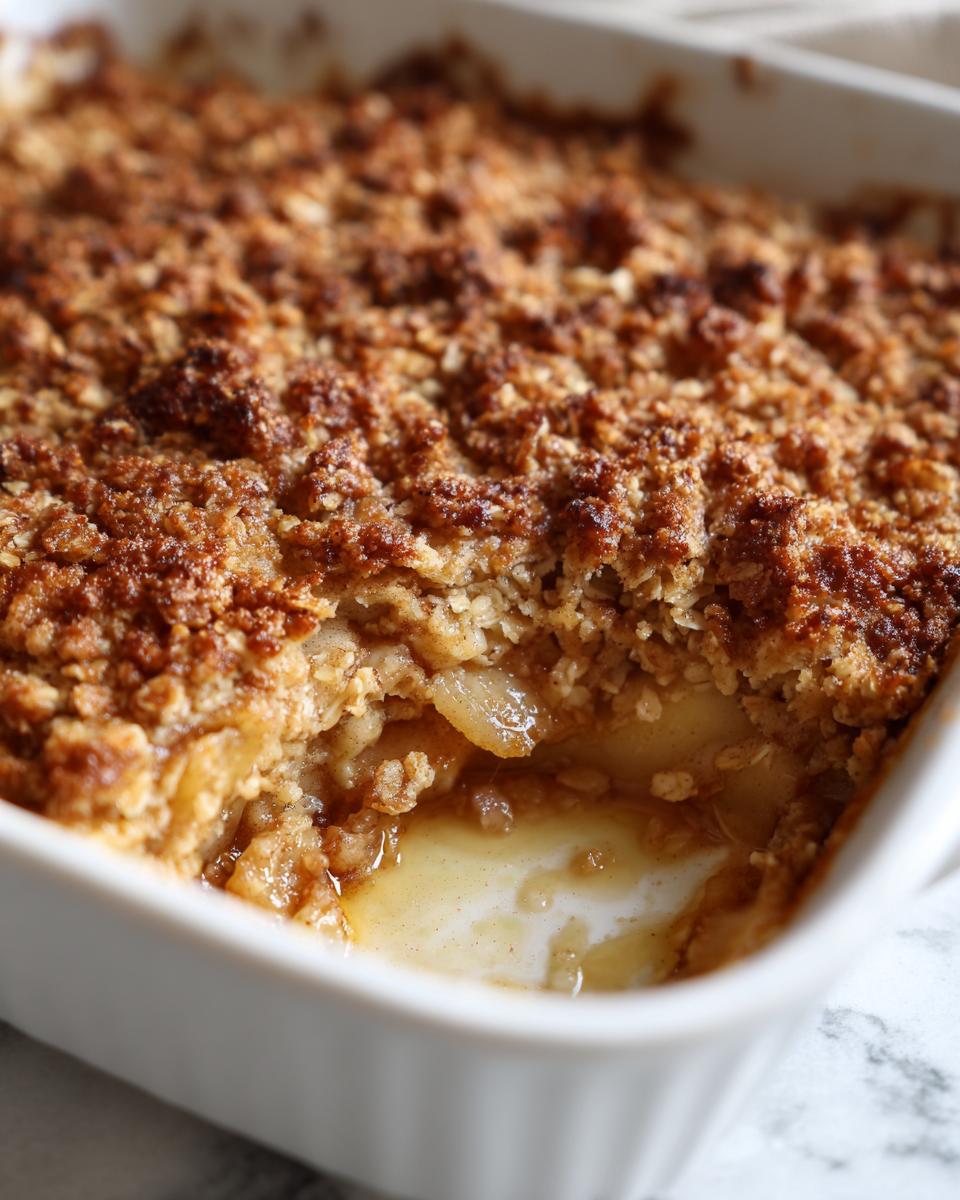
Guaranteed Crunchy Oat Topping Crumble
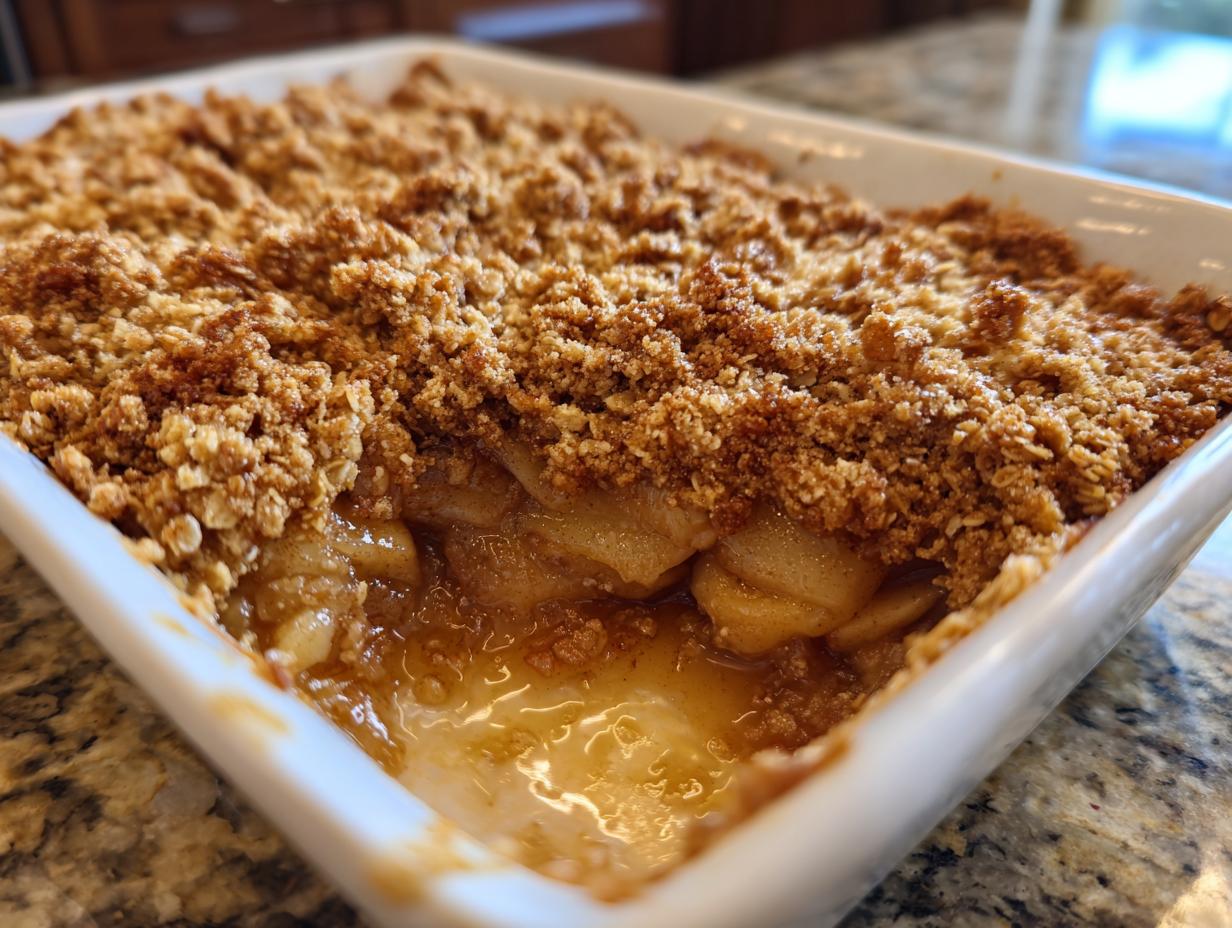
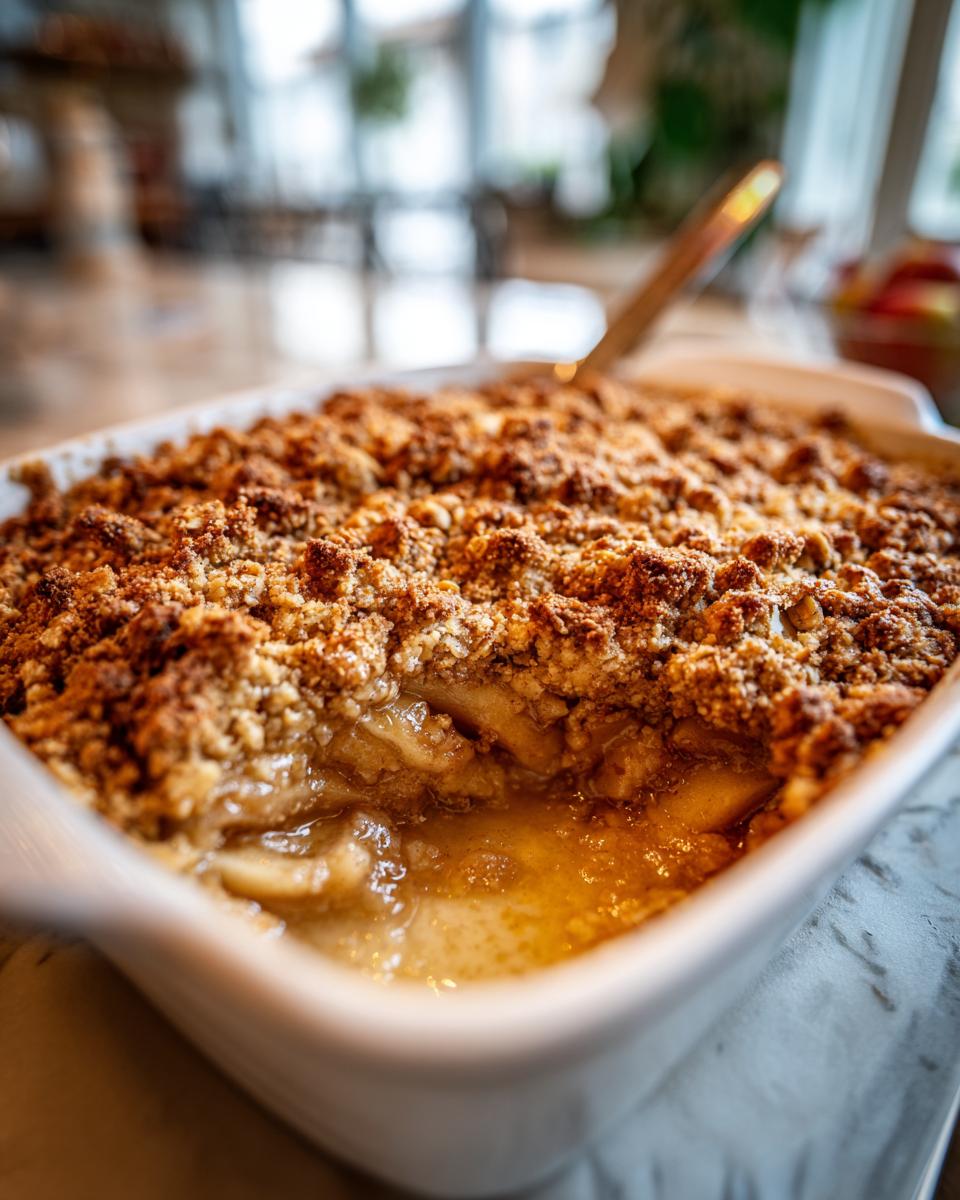
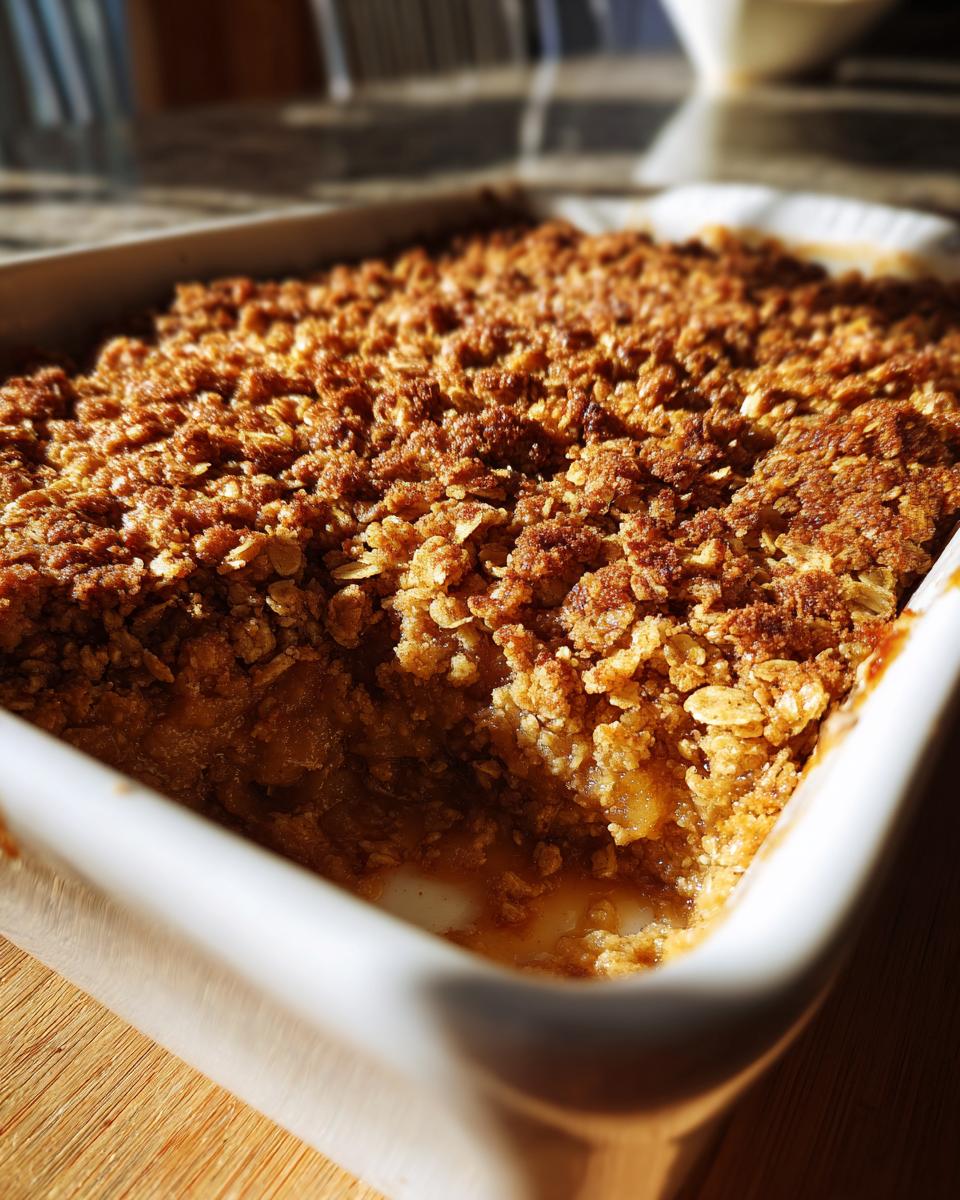
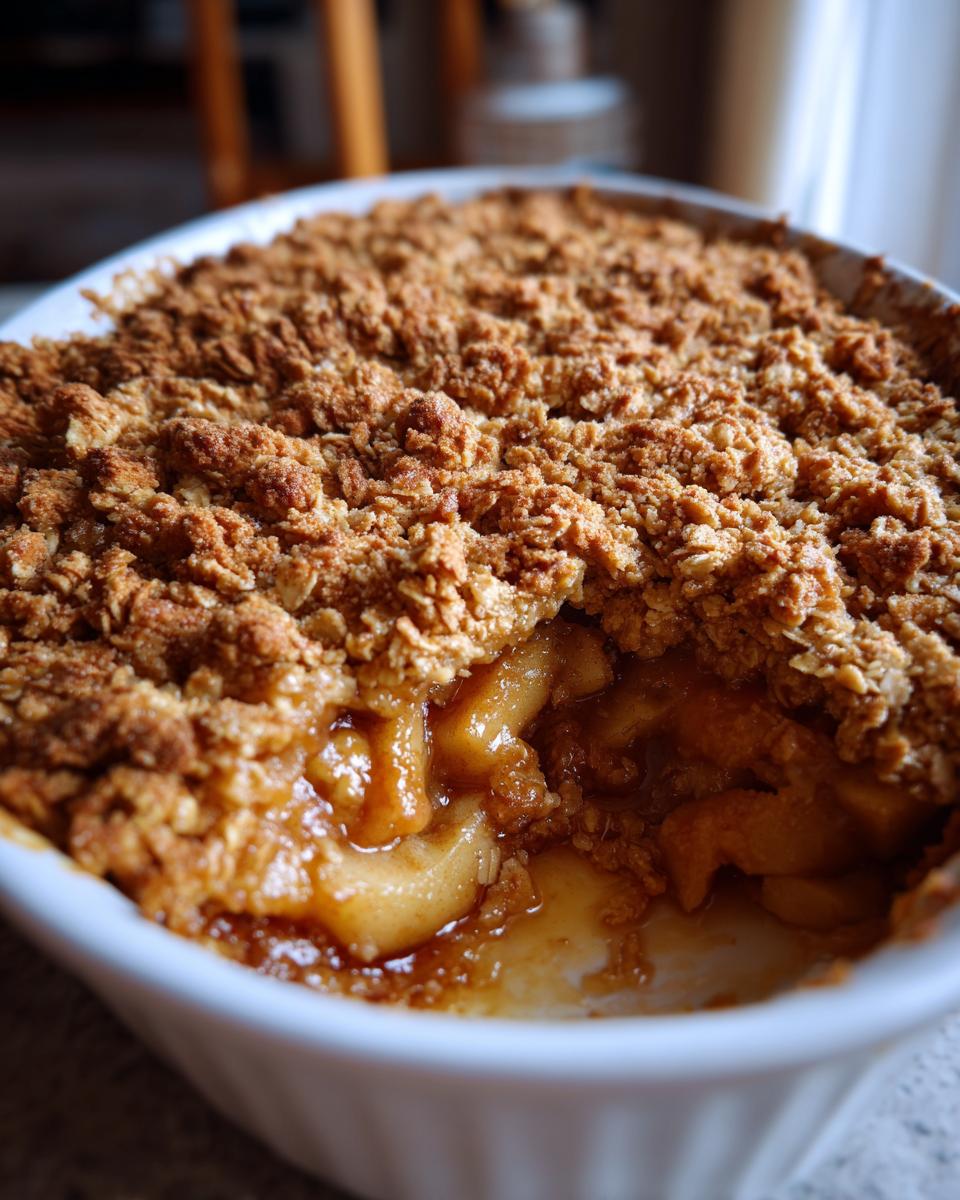
The secret to avoiding that sad, soggy top layer is simple: cold butter and minimal mixing. We aren’t making dough; we are making coarse crumbs! You want to see some pea-sized butter bits in there. Those bits melt down and create pockets of crispness while they bake. Don’t touch it once it’s topped; resist the urge to stir!
Quick Prep Time for Your Simple Apple Dessert
This is one of my favorite time-saves. The entire process of peeling, slicing, and mixing the fruit takes me about 10 minutes flat once I get going. That leaves another 5 minutes to throw together the topping. Fifteen minutes of work for a dessert that tastes like it simmered all afternoon? That’s what I call efficient baking for a Simple Apple Dessert.
Gathering Ingredients for Your Homemade apple crisp
When I design a recipe, I only include the essentials—no fuss, no mystery jars required. For this flawless homemade apple crisp, you only need a handful of pantry mainstays. The key to making mine stand out, as noted in my recipe card, is the apples. You absolutely have to grab Granny Smith or maybe a mix with Honeycrisp. Those varieties hold their shape better; mushy apples are an unacceptable outcome in my kitchen!
- 6 medium apples (Granny Smith or Honeycrisp recommended)
- 1/4 cup granulated sugar
- 1 tablespoon lemon juice
- 1 teaspoon ground cinnamon
- 1/4 teaspoon ground nutmeg
- 1/4 cup all-purpose flour
- 1/2 cup rolled oats
- 1/2 cup packed brown sugar
- 1/4 teaspoon salt
- 6 tablespoons cold unsalted butter, cut into small pieces
Quick tip: Don’t forget the lemon juice! It brightens the whole flavor profile. Find more great fruit companions over at my stovetop applesauce recipe.
How To Make apple crisp: Step-by-Step Instructions
Okay, now we get into the execution phase. This is where my project management skills really shine—following the sequence prevents chaos and guarantees that perfect bake. Learning exactly how to make apple crisp is about timing the layers correctly. First things first: We’re setting the oven to 375°F and getting an 8×8 dish ready. Don’t forget that light grease!
Preparing the Cinnamon Spiced Apples
Grab your apples—peel, core, and slice them consistently to about 1/4-inch thickness. Throw those slices into a big bowl. Now, add the granulated sugar, lemon juice, cinnamon, and nutmeg. Toss absolutely gently! You need every slice coated nice and evenly, but you don’t want to bruise them into mush before they even hit the heat. Spread the coated apples into your prepared dish in one flat layer. That’s Layer One done!
Creating the Buttery Crisp Topping
Time for the best part—the crunch! In a separate bowl, whisk together the flour, rolled oats, brown sugar, and salt. Now, drop in those cold chunks of butter. You must cut that butter in using a pastry blender or your fingertips. Stop mixing the second it looks like coarse crumbs. I can’t stress this enough: you need some butter bits larger than grains of rice. That’s the key to a fantastic Buttery Crisp Topping.
Baking and Resting Your apple crisp
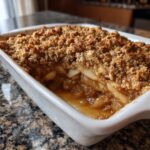
Sprinkle that beautiful crumb topping evenly over the apples. Pop it into the oven for about 35 to 45 minutes. Keep an eye out for that thick, gloriously bubbly filling around the edges and a topping that’s golden brown. This is critical: Let it rest for 15 minutes once it comes out. Seriously, walk away! If you slice into it right away, all that gorgeous sauce runs out. Resting lets the filling thicken up perfectly, ensuring your apple crisp holds its structure.
Tips for the Perfect apple crisp Every Time
Even an easy recipe like this can have small pitfalls if you aren’t strategic. I learned this the hard way years ago while trying to impress some colleagues—I pulled the crisp out, cut into it immediately, and ended up serving runny soup in a dish! That experience taught me that efficiency means mastering the key failure points. We want this to be a completely foolproof apple crisp experience for you.
Selecting the Right Apples for Your apple crisp
Look, if you use soft apples, you’re going to get sauce, not structure. It’s that simple. I lean heavily on Granny Smith because they have that necessary tartness that cuts through the brown sugar sweetness, and they just refuse to break down completely in the oven. A mix of tart and sweet is always my top recommendation for that perfect flavor balance.
Preventing a Soggy Bottom in Your apple crisp
This is my anti-sog Tip Number One. I used to bake my crisps dead center in the oven every time, and honestly, the bottom would steam itself into mush. Now, I always place the baking dish on a lower-middle rack, especially for the first 20 minutes. This blasts the bottom layer with heat early on, which sets the juices up before the topping is fully golden. It’s a small adjustment that guarantees you a crisp base!
When you’re ready to serve this masterpiece, check out my apple fritter bites if you want another quick fruit-and-oat fix!
Serving Suggestions for Your Warm apple crumble
Honestly, you’ve worked hard enough making this perfect, so don’t stop now! While this Warm Apple Crumble is absolutely divine on its own, I often make it a complete production. It really transforms into a true Family Favorite Apple Dessert when you add the right accoutrements.
The classic pairing wins every time: a generous scoop of good, vanilla bean ice cream that melts slowly into all those hot, spiced apples. If you want something richer, try drizzling it with a homemade caramel sauce—I have a fantastic recipe for a foolproof chewy caramel that takes minutes. A dollop of fresh, lightly sweetened heavy cream works too, if you’re keeping it simple!
Storage and Reheating Instructions for apple crisp
Even the best apple crisp is even better the next day, provided you store it right! Don’t just cover it on the counter—that ruins the topping fast. Once cool, transfer any leftovers into an airtight container. It’ll keep beautifully in the fridge for about three to four days. That’s great, because leftovers count as food prepped for the next day!
When it’s time to reheat, forget the microwave if you actually want that crunch back. The microwave works in a pinch, but it steams the topping. For the truly optimized experience, pop a serving or two onto a baking sheet and reheat it in a 350°F oven for about 8 to 10 minutes. That hits the apples just right and crisps the topping up wonderfully. You can find more easy recipes like this in my main dessert section.
Variations on the Classic apple crisp Recipe
Part of making a recipe a staple is knowing how to switch it up just enough to keep folks interested. Since this base recipe is so solid, you can easily pivot toward different flavor profiles without breaking anything. This is where efficiency meets creativity!
For the topping, if you want a little more texture, try adding about half a cup of chopped pecans or walnuts when you mix in the oats. They bake up beautifully golden. Or, if you love spice, introduce a pinch of ground cloves or even a tiny bit of cardamom along with that cinnamon. If you want to try something completely different but using the same great topping formula, check out my rhubarb crisp recipe—it’s amazing how well that topping works on other fruits!
Frequently Asked Questions About apple crisp
Look, I know you might have a substitution in mind or you’re wondering about timing, so here are the quick answers to the most common roadblocks people run into when trying to make this recipe. My goal is always to de-risk the process for you so you can cook with absolute confidence!
Can I use frozen apples in this apple crisp recipe?
You totally can, especially if you’re trying to make a dump-and-bake desert on a really tight schedule. The key thing here, though, is moisture control. Frozen apples will release a ton of liquid when they thaw, and we don’t want a soupy base. So, I recommend you thaw them slightly first, maybe for 20 minutes on the counter, and then drain off any excess liquid before you toss them with the sugar and spices. That keeps things running smoothly.
What is the difference between apple crisp and apple crumble?
That is such a classic kitchen debate, right? Most people use them interchangeably, which is totally fine for a laid-back dessert. However, technically speaking, the differentiator is oats. If the topping has oats, it’s a crisp—that’s what gives you that signature texture. If it’s just flour, butter, and sugar, that’s technically the crumble. Since this recipe uses oats for that extra crunch, we are calling it an apple crisp, though I know folks looking for an Easy Apple Crisp Recipe often search for crumble too!
Can I make this apple crisp ahead of time?
Yes, absolutely! That’s great for when you’re planning a big family gathering. You can assemble the whole thing—apples mixed, topping scattered—cover it tightly, and stick it in the fridge for up to 24 hours. When you bake it, just plan to add about 5 to 10 extra minutes to the baking time since you’re starting cold. This is a real win for anyone managing Desserts To Make Ahead!
If you’re looking for more simple options that work well for busy schedules, check out my roundup of easy breakfast and brunch ideas—it’s all about smart planning!
Nutritional Estimate for This apple crisp
When you’re optimizing a recipe for flavor, you obviously have to keep nutrition in mind too, right? Here is the estimated breakdown per serving for this apple crisp. Remember, these numbers are based on my specific measurements and ingredients, so they are estimates, not gospel. If you use extra butter on your ice cream, that’ll change things!
- Serving Size: 1 serving
- Calories: 320
- Sugar: 35g
- Fat: 16g
It’s a delicious classic comfort food, so enjoy it! If you ever have questions about the process or need to get in touch about any recipe, you can always reach me through the contact page.
PrintThe Best, Easiest Apple Crisp Recipe with a Perfectly Crunchy Oat Topping
This foolproof apple crisp recipe delivers tender, cinnamon-spiced apples beneath a buttery, golden oat topping. It is simple to prepare and perfect for a cozy autumn dessert or family gathering.
- Prep Time: 15 min
- Cook Time: 40 min
- Total Time: 55 min
- Yield: 6 servings 1x
- Category: Dessert
- Method: Baking
- Cuisine: American
- Diet: Vegetarian
Ingredients
- 6 medium apples (Granny Smith or Honeycrisp recommended)
- 1/4 cup granulated sugar
- 1 tablespoon lemon juice
- 1 teaspoon ground cinnamon
- 1/4 teaspoon ground nutmeg
- 1/4 cup all-purpose flour
- 1/2 cup rolled oats
- 1/2 cup packed brown sugar
- 1/4 teaspoon salt
- 6 tablespoons cold unsalted butter, cut into small pieces
Instructions
- Preheat your oven to 375 degrees Fahrenheit. Lightly grease an 8×8 inch baking dish.
- Peel, core, and slice the apples into 1/4-inch thick pieces. Place the apple slices in a large bowl.
- Add the granulated sugar, lemon juice, cinnamon, and nutmeg to the apples. Toss gently to coat the apples evenly.
- Pour the spiced apple mixture into the prepared baking dish and spread it into an even layer.
- In a separate medium bowl, combine the flour, rolled oats, brown sugar, and salt for the topping. Mix these dry ingredients together.
- Cut in the cold butter pieces using a pastry blender or your fingertips until the mixture resembles coarse crumbs. Do not overmix; you want some pea-sized pieces of butter remaining for the best crisp texture.
- Sprinkle the oat topping evenly over the apples in the baking dish.
- Bake for 35 to 45 minutes, or until the topping is golden brown and the apple filling is bubbling thickly around the edges.
- Let the apple crisp cool for at least 15 minutes before serving. This allows the filling to set.
Notes
- For the best flavor and texture, use a mix of tart and sweet apples, like Granny Smith and Honeycrisp.
- To prevent the bottom from getting soggy, place the baking dish on a lower-middle rack in the oven for the first 20 minutes of baking.
- Serve this warm apple crumble with a scoop of vanilla ice cream or a drizzle of caramel sauce for a classic comfort food dessert experience.
Nutrition
- Serving Size: 1 serving
- Calories: 320
- Sugar: 35g
- Sodium: 110mg
- Fat: 16g
- Saturated Fat: 9g
- Unsaturated Fat: 7g
- Trans Fat: 0g
- Carbohydrates: 45g
- Fiber: 4g
- Protein: 4g
- Cholesterol: 35mg