
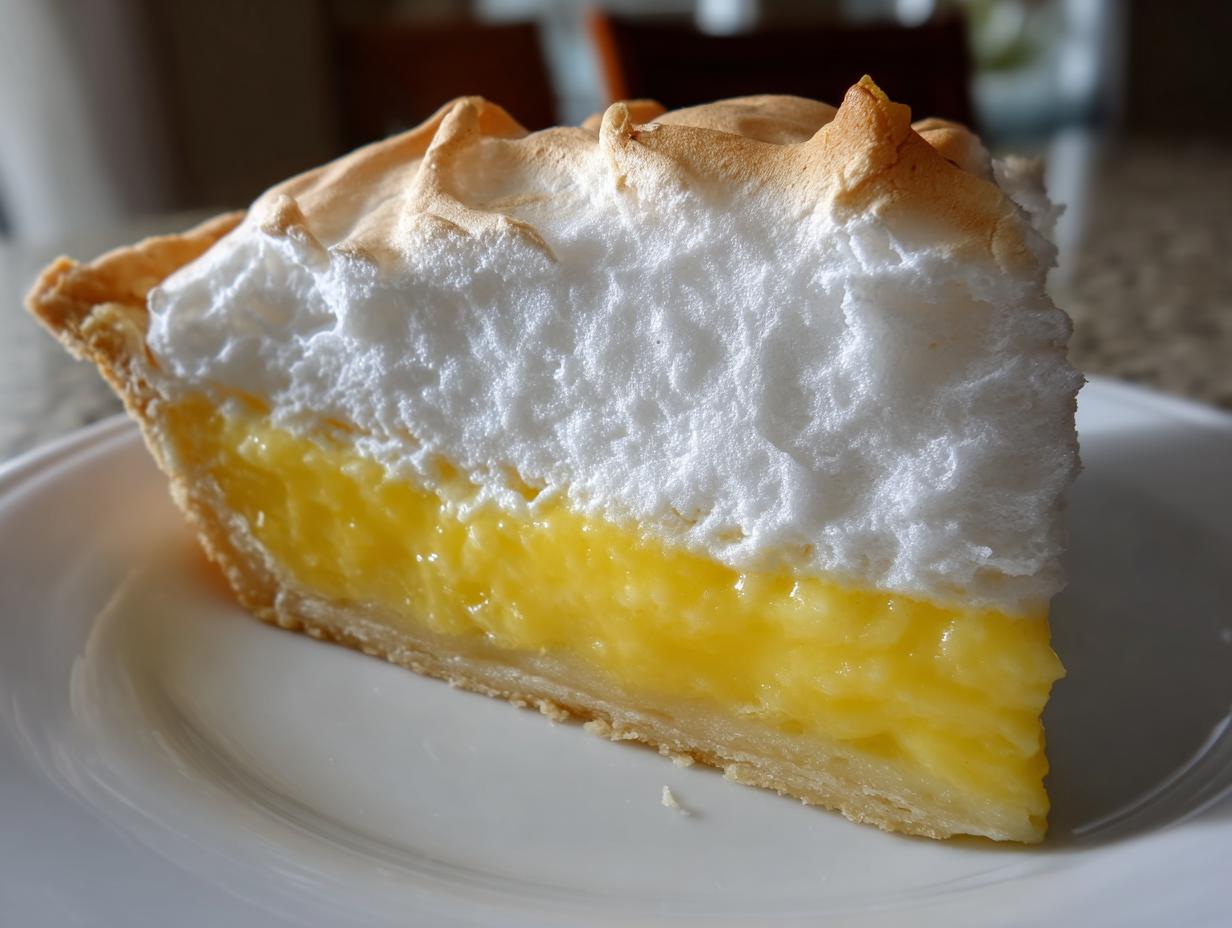
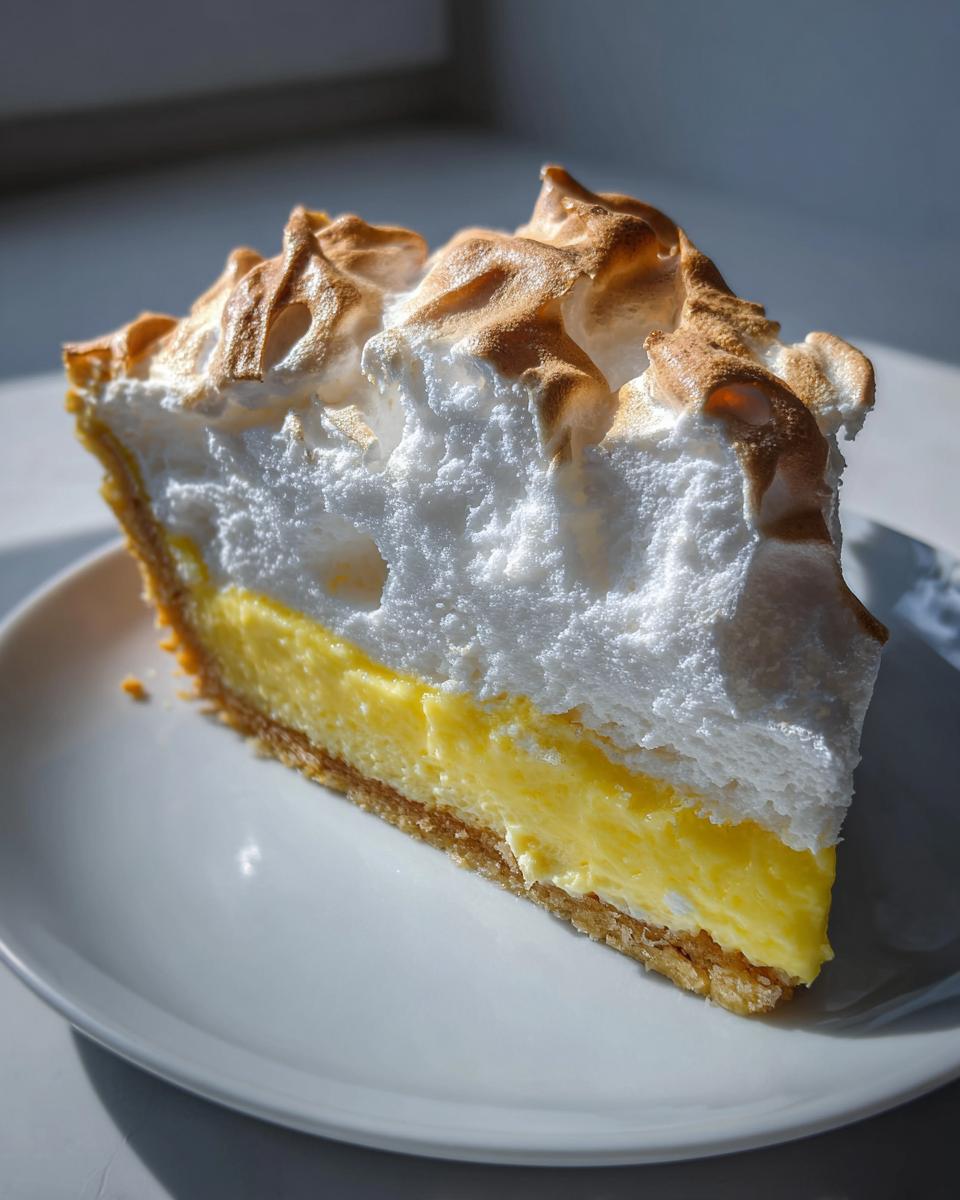
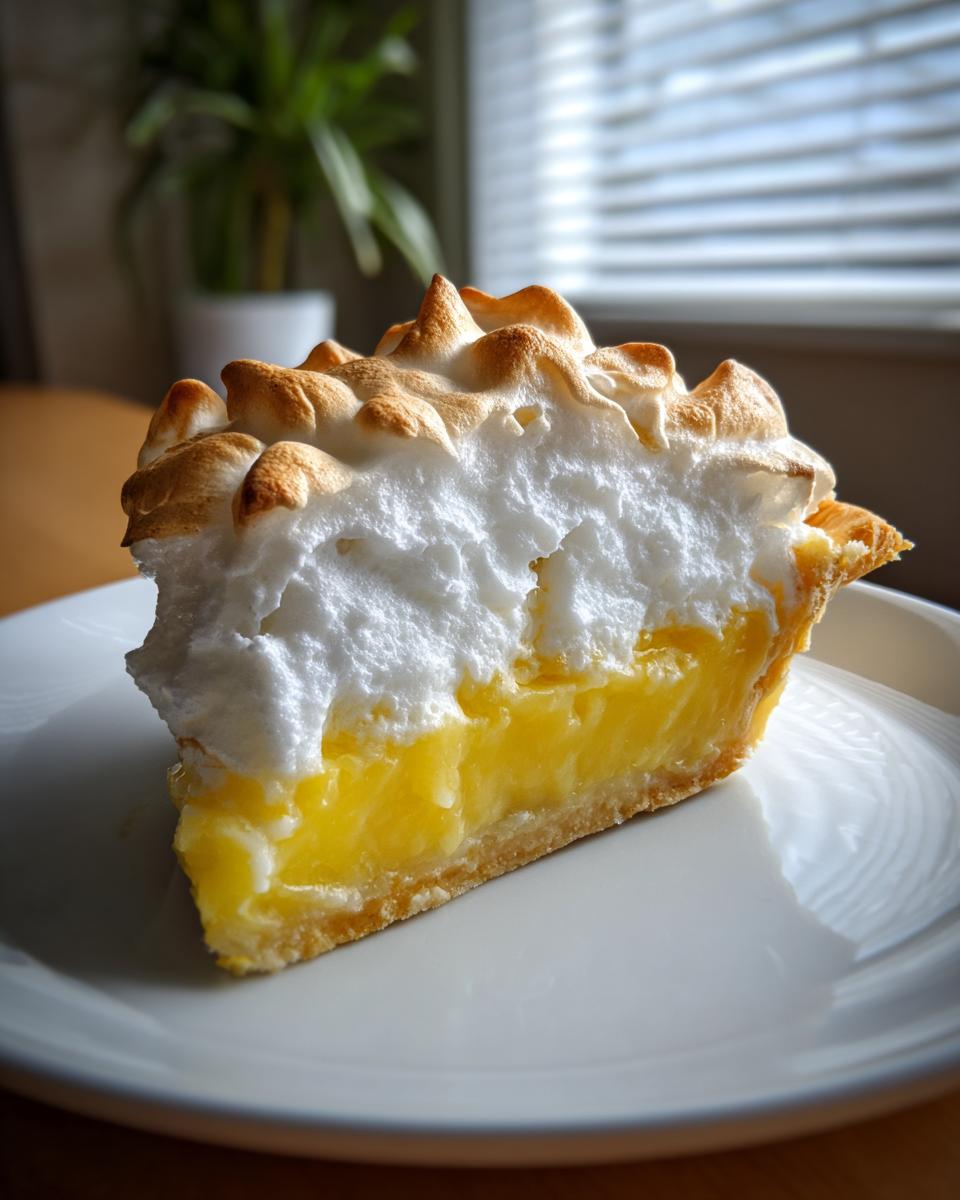
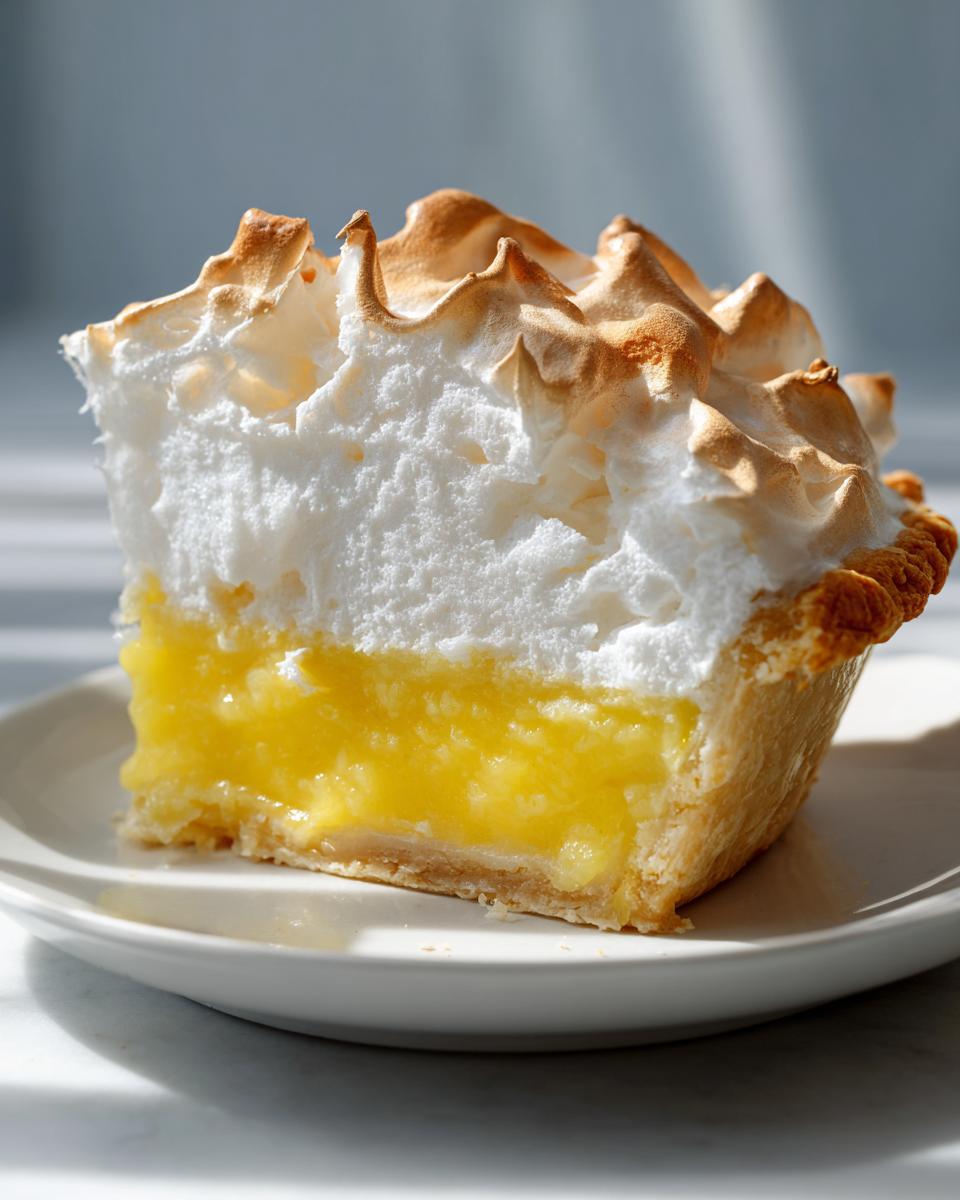
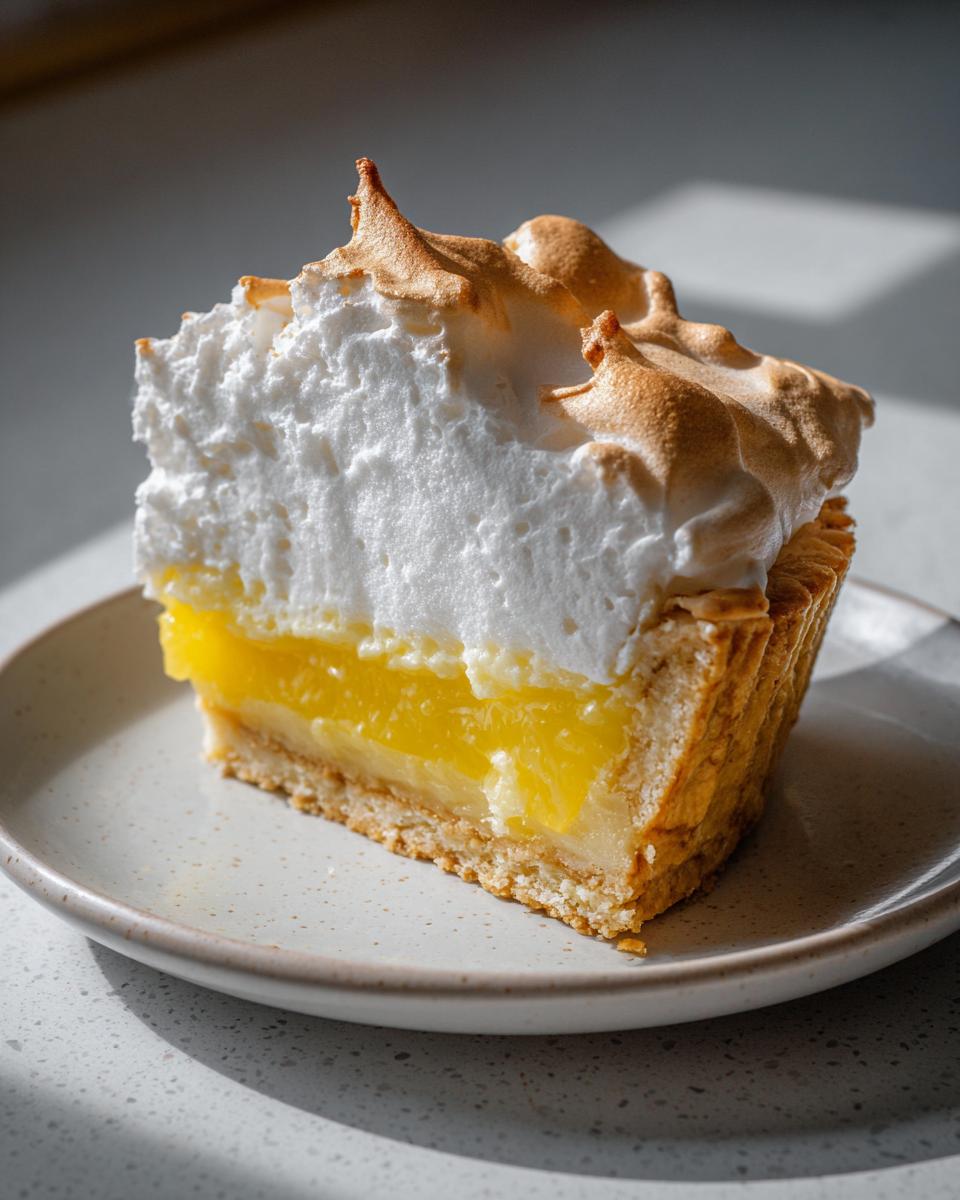
There’s almost nothing better than that first slice of a truly perfect pie. I mean, that high, cloud-like meringue tower sitting atop a filling so bright and zesty it makes your eyes water just a little bit? That’s the goal. Forget struggling with soggy bottoms or weeping meringue; I’ve engineered this lemon meringue recipe to be foolproof. As someone who approaches everything like a project, I’ve streamlined the classic steps needed to guarantee you get the Best Lemon Meringue Pie Recipe—intense tartness, maximum height, and zero kitchen drama. You’re going to love how efficiently this comes together.
- Why This Classic Lemon Meringue Pie Works Every Time
- Gathering Your Ingredients for the Best Lemon Meringue
- Step-by-Step Instructions for Your Homemade Lemon Meringue Pie
- Tips for Success with Your Lemon Meringue Recipe
- Ingredient Notes and Simple Lemon Dessert Substitutions
- Serving Suggestions for This Impressive Dessert Recipe
- Storage and Reheating for Your Lemon Meringue
- Frequently Asked Questions About Lemon Meringue Pie
- Estimated Nutritional Data for Classic Lemon Meringue
- Estimated Nutritional Data for Classic Lemon Meringue
Why This Classic Lemon Meringue Pie Works Every Time
When I design a recipe, the goal is always peak performance with minimal risk. This lemon meringue pie isn’t just delicious; it’s structurally sound. We eliminate the guesswork by focusing on two critical phases: the filling set and the meringue stability. You get that impressive dessert presentation without the usual fuss.
- Guaranteed texture balance between the filling and the topping.
- Techniques are broken down for absolute reliability.
- You get intense citrus flavor, not sugary flatness.
If you’re looking for something reliable, this is it. Check out my process for a zesty lemon loaf if you want more ways to nail that citrus balance!
Achieving the Perfect Tart Lemon Filling
We skip the condensed milk shortcuts here. For a true, vibrant experience, we rely on the combination of fresh lemon juice and cornstarch. The cornstarch is the project manager for the liquid; it dictates exactly when and how the filling will set up firmly. This control ensures a perfectly thick, Tart Lemon Filling that won’t run the second you slice it. That fresh zest? That’s where the intensity comes from.
Engineering the Fluffy Meringue Topping
Meringue seems intimidating, but it’s all about controlling the environment. We use cream of tartar because it acts like insurance for your egg whites, stabilizing them immediately. Keeping those egg whites at room temperature ensures they whip up faster and incorporate more air. If you nail this part, you’ll achieve a towering, Fluffy Meringue Topping that browns beautifully and stays perfectly proud on your pie.
Gathering Your Ingredients for the Best Lemon Meringue
When you’re ready to build this lemon meringue masterpiece, organization is everything. I treat ingredient gathering like pre-production for a build—we need every component measured and ready so the actual assembly goes smoothly. There’s no pausing mid-whisking to check if you have enough lemon juice!
Check out my recipe for lemon scones; organizing your mise en place is a concept that applies everywhere in the kitchen.
For the Crust and Tart Lemon Filling
You need a cool foundation and the zesty heart of the pie right here:
- 1 (9-inch) unbaked pie crust (homemade or store-bought—I won’t judge!)
- 1 ½ cups granulated sugar (for the filling base)
- ¼ cup cornstarch
- 1 teaspoon lemon zest
- 3 tablespoons cornstarch (yes, two different amounts—don’t skip!)
- 1 ½ cups cold water
- 4 large egg yolks, lightly beaten
- ½ cup fresh lemon juice (this is non-negotiable for the best flavor)
- 2 tablespoons unsalted butter
For the Fluffy Meringue Topping
This is the architecture for our towering finish, so make sure these egg whites are pure and ready:
- 4 large egg whites, at room temperature
- ½ teaspoon cream of tartar
- ½ cup granulated sugar (for the meringue)
Step-by-Step Instructions for Your Homemade Lemon Meringue Pie
Okay, now we move into the build phase. This sequence is crucial for getting that perfect, bright lemon meringue pie without any nasty surprises like curdled filling or a sad, sunken topping. We’re breaking this into clear, manageable chunks, just like any good project plan. You’ll be amazed how smooth the process is when you follow the timing.
I highly recommend using a stand mixer for the meringue part, but if you’re using a hand mixer, you’ve got this! If you ever need inspiration while you wait for things to cool down, check out my crockpot soup recipes—sometimes the slowest cooking needs the fastest recipes!
Preparing the Pie Crust and Tart Lemon Filling Base
First things first: you need a cool crust. Preheat your oven to 350°F (175°C) and bake that crust according to your package or recipe until it’s just lightly golden, then let it cool down completely. Seriously, it needs to be cool! While the crust cools, make the base of your Tart Lemon Filling. In a saucepan, whisk together the 1 ½ cups sugar, ¼ cup cornstarch, and lemon zest. Slowly whisk in the cold water until everything is smooth. Pop this over medium heat and stir nonstop until it thickens and hits a good boil. Then, drop the heat to low and keep stirring for one full minute. Take it off the burner right after that.
Tempering Yolks and Finishing the Zesty Citrus Dessert Filling
This is the moment where we protect the yolks, so pay attention! In a separate bowl, lightly beat your 4 egg yolks. Now, here’s the crucial part: take about one cup of that hot sugar mixture and SLOWLY stream it into the yolks while whisking like crazy. This is called tempering, and it gently raises the temperature of the yolks so they don’t scramble when you add them back in. Once tempered, pour that yolk mixture back into the saucepan with the rest of the sugar base. Cook this over medium heat, stirring constantly, until it gets thick again and just begins to bubble. Remove it, stir in the lemon juice and the 2 tablespoons of butter until that butter disappears. Pour that gorgeous, zesty filling into your cooled crust!
Whipping and Baking the Fluffy Meringue Topping
Get those 4 egg whites—make sure they are room temp—into a super clean bowl. Add the cream of tartar and start beating on medium speed until you see soft peaks forming. Now, add the remaining ½ cup of sugar one tablespoon at a time, beating well after every addition. You must beat this on high until you get stiff, glossy peaks. I mean, proud peaks that hold their shape! Before it goes into the oven, the most important final step for structure: spread this Fluffy Meringue Topping over the filling so that it touches the crust edge all the way around. This seals the pie and stops the meringue from shrinking! Bake at 350°F for about 12 to 15 minutes until those swirls are beautifully golden brown. If you want another excellent recipe for a classic dessert, check out this linked recipe too!
Tips for Success with Your Lemon Meringue Recipe
You’ve conquered the bake, but now we talk logistics. Getting the perfect lemon meringue to stay perfect is half the battle! I’ve learned a few tricks over the years to avoid that dreaded weeping—you know, when the sugar starts sweating out of the meringue? It’s all about controlling moisture and cleanliness in the final steps.
Meringue Stability Secrets
This is where your project management skills come in handy: eliminate potential contaminants! I mean it—your mixing bowl and beaters must be surgically clean. Any trace of grease or old yolk residue will sabotage your volume. Also, always use room temperature egg whites for your Fluffy Meringue Topping. They incorporate air much more efficiently than cold ones, which gives you that beautiful height we built during the whipping stage.
Cooling and Setting the Lemon Meringue
This tip is huge, so listen up. Do not immediately rush your finished pie into the fridge! Rapid, drastic temperature changes are what cause the meringue to contract and release moisture—that’s weeping central. You need to let your beautiful lemon meringue pie cool slowly on the counter, fully set, for at least four hours before you even think about chilling it. Slow cooling ensures the filling sets perfectly below the meringue without shocking the whole structure. For great side dish ideas while you wait, check out my beans and rice recipe!
Ingredient Notes and Simple Lemon Dessert Substitutions
Look, I get it. Sometimes you need a fast track. While I designed this lemon meringue recipe to be completely from scratch for the best results, we can still make smart, efficient swaps. If you’re short on time, switching that homemade crust for a good quality store-bought one is perfectly fine. It instantly creates an Easy Lemon Dessert!
For the filling, fresh lemon juice is truly the only way to get that bright zing, but if you absolutely must use bottled, use the best quality you can find, maybe adding a little extra zest to compensate. Also, I’ve seen people make this into Lemon Meringue Bars using a shortbread base, which is a great texture change for serving a crowd!
Serving Suggestions for This Impressive Dessert Recipe
So, you’ve navigated the whole process, you’ve got this showstopper sitting perfectly cooled on the counter, and now it’s time to serve! Because this pie is so incredibly rich and tart, you don’t need much accompaniment, but a little something extra enhances the experience beautifully. Presentation is key when you’ve put this much work in.
If you’re looking for lighter fare after serving dessert, I’ve shared my super simple strawberry daiquiri recipe—it’s the perfect palate cleanser!
Here are a few things that just make that first slice sing:
- Plain Whipped Cream: A small dollop of unsweetened or very lightly sweetened whipped cream cuts through the tartness perfectly without competing with the meringue.
- Fresh Berries: Toss some fresh raspberries or sliced strawberries on the plate next to the slice. Their slight acidity and sweetness are a fantastic counterpoint to the lemon.
- A Great Cup of Coffee: Honestly, sometimes the best accompaniment is a strong, dark cup of coffee. The bitterness balances the sugar in the meringue texture perfectly.
- Keep it Simple: Because the pie itself is so visually impressive with that tall brown topping, sometimes just a clean white plate is all you need to let the dessert shine on its own merits.
Storage and Reheating for Your Lemon Meringue
Here’s the reality check for your beautiful lemon meringue pie: it’s designed to be eaten fresh. That fluffy topping? It hates sitting around! If you have leftovers, which I doubt you will, cover the pie loosely with plastic wrap—don’t let it touch the meringue, or it will stick and tear off the clouds! Store it in the fridge because of the custard filling, but know that even in the cold, the meringue will start to weep eventually. Honestly, reheating isn’t really an option; the meringue texture just falls apart under heat, so plan on enjoying this masterpiece within 24 hours max!
Frequently Asked Questions About Lemon Meringue Pie
I know you might still have a few lingering questions, especially when dealing with something as temperamental as a tall meringue. No problem! I’ve gathered the most frequent engineering challenges people face when making their Homemade Lemon Meringue or trying out other Zesty Citrus Dessert variations.
How do I stop my meringue from ‘weeping’ after it cools?
Weeping happens when the sugar in the meringue gets too humid or contracts too quickly. My number one rule is cooling slowly at room temperature for four hours—don’t rush it into the fridge! Also, make sure you’re beating those egg whites until you achieve stiff, glossy peaks; underbeating leaves sugar unabsorbed, leading to weeping later. This is the key to a stable topping for your Classic Lemon Pie.
Can I use bottled lemon juice instead of fresh lemon juice?
You can, but you’ll lose that bright, vibrant pop that makes this dessert so good. Bottled juice is often pasteurized, which dulls the flavor significantly. If you have to substitute, try adding an extra half teaspoon of lemon zest to your filling to boost the aroma. For the absolute Best Lemon Meringue taste, though, fresh is the way to go.
I want an easier version. Can I make Lemon Meringue Bars?
Absolutely! People love Lemon Meringue Bars because they are so much easier to serve at big parties. Essentially, you bake the tart lemon filling layer in a graham cracker or shortbread crust base in a square or rectangle pan. You still top it with the same fluffy meringue and bake it the same way. It holds up much better on a buffet line than a traditional pie!
What’s the secret to a really thick filling that sets up solid?
That comes down to the cornstarch and the cook time. Notice in the recipe we use cornstarch twice? We want that base to get a good boil for one minute *before* the yolks go in. Then, once the tempered yolks are added back, we cook it again until it thickens and bubbles again. That double-cook ensures the starch is fully activated. If you need to check out some savory meal prep while you wait for things to set, take a look at my Italian Chopped Salad recipe!
Do I need to use meringue shells or can I use jarred spread?
Stick to making your own Fluffy Meringue Topping! I know those canned spreads look convenient, but they often contain stabilizers that make them heavy and sometimes rubbery when baked. When you make it From Scratch Pie style, you get those amazing, light, cloud-like peaks that actually brown nicely instead of just melting down the side. If you want inspiration for other great recipes, check out this external link I trust for classic desserts.
Estimated Nutritional Data for Classic Lemon Meringue
When planning your menu, remember that this is a legitimately indulgent lemon meringue pie, so a little goes a long way! These numbers are estimates based on using standard recipe components divided into 8 servings. As always, if you swap the crust or use a different amount of sugar in your meringue, these values will shift. Think of this as your baseline reference for planning your day.
- Serving Size: 1 slice
- Calories: 380
- Sugar: 45g
- Fat: 18g
- Protein: 5g
- Carbohydrates: 52g
The Best Classic Lemon Meringue Pie Recipe

Follow these straightforward steps to create a classic lemon meringue pie featuring a zesty, tart lemon filling and a tall, fluffy meringue topping. This recipe delivers impressive results for any occasion.
- Prep Time: 25 min
- Cook Time: 30 min
- Total Time: 4 hours 55 min
- Yield: 8 servings 1x
- Category: Dessert
- Method: Baking
- Cuisine: American
- Diet: Vegetarian
Ingredients
- 1 (9-inch) unbaked pie crust (homemade or store-bought)
- 1 ½ cups granulated sugar
- ¼ cup cornstarch
- 1 teaspoon lemon zest
- 3 tablespoons cornstarch
- 1 ½ cups cold water
- 4 large egg yolks, lightly beaten
- ½ cup fresh lemon juice
- 2 tablespoons unsalted butter
- 4 large egg whites, at room temperature
- ½ teaspoon cream of tartar
- ½ cup granulated sugar
Instructions
- Prepare your pie crust. Preheat your oven to 350°F (175°C). Bake the pie crust according to package directions or until lightly golden. Let it cool completely.
- Make the tart lemon filling. In a medium saucepan, whisk together 1 ½ cups sugar, ¼ cup cornstarch, and lemon zest. Gradually whisk in the cold water until smooth.
- Cook the filling base. Place the saucepan over medium heat. Stir constantly until the mixture thickens and bubbles. Reduce the heat to low and cook for 1 minute more, stirring. Remove from heat.
- Temper the egg yolks. In a separate bowl, whisk the 4 egg yolks. Slowly pour about 1 cup of the hot sugar mixture into the yolks while whisking constantly to temper them.
- Combine and finish the filling. Pour the tempered yolk mixture back into the saucepan with the remaining sugar mixture. Cook over medium heat, stirring constantly, until the filling thickens again and just begins to bubble. Remove from heat. Stir in the lemon juice and butter until the butter melts completely.
- Pour the filling into the cooled pie crust. Set aside while you prepare the fluffy meringue topping.
- Make the fluffy meringue topping. In a clean, large bowl, beat the 4 egg whites and cream of tartar with an electric mixer on medium speed until soft peaks form.
- Gradually add the remaining ½ cup of sugar, one tablespoon at a time, beating well after each addition. Increase the mixer speed to high and beat until stiff, glossy peaks form. This creates your cloud-like meringue.
- Top the pie. Spread the meringue evenly over the hot or warm lemon filling, making sure the meringue touches the edge of the crust all the way around to prevent shrinking. Create decorative swirls with the back of a spoon.
- Bake the meringue. Bake at 350°F (175°C) for 12 to 15 minutes, or until the meringue is lightly golden brown.
- Cool the pie. Cool the lemon meringue pie completely on a wire rack at room temperature for at least 4 hours before slicing. Avoid placing it in the refrigerator immediately, as rapid cooling can cause the meringue to weep.
Notes
- For the best results with your meringue, ensure your mixing bowl and whisk attachments are completely free of any grease or egg yolk residue.
- To achieve a stable, high meringue, use room temperature egg whites.
- If you prefer a quicker version, you can use a pre-made graham cracker crust instead of baking a traditional crust.
Nutrition
- Serving Size: 1 slice
- Calories: 380
- Sugar: 45g
- Sodium: 150mg
- Fat: 18g
- Saturated Fat: 9g
- Unsaturated Fat: 9g
- Trans Fat: 0g
- Carbohydrates: 52g
- Fiber: 1g
- Protein: 5g
- Cholesterol: 110mg