
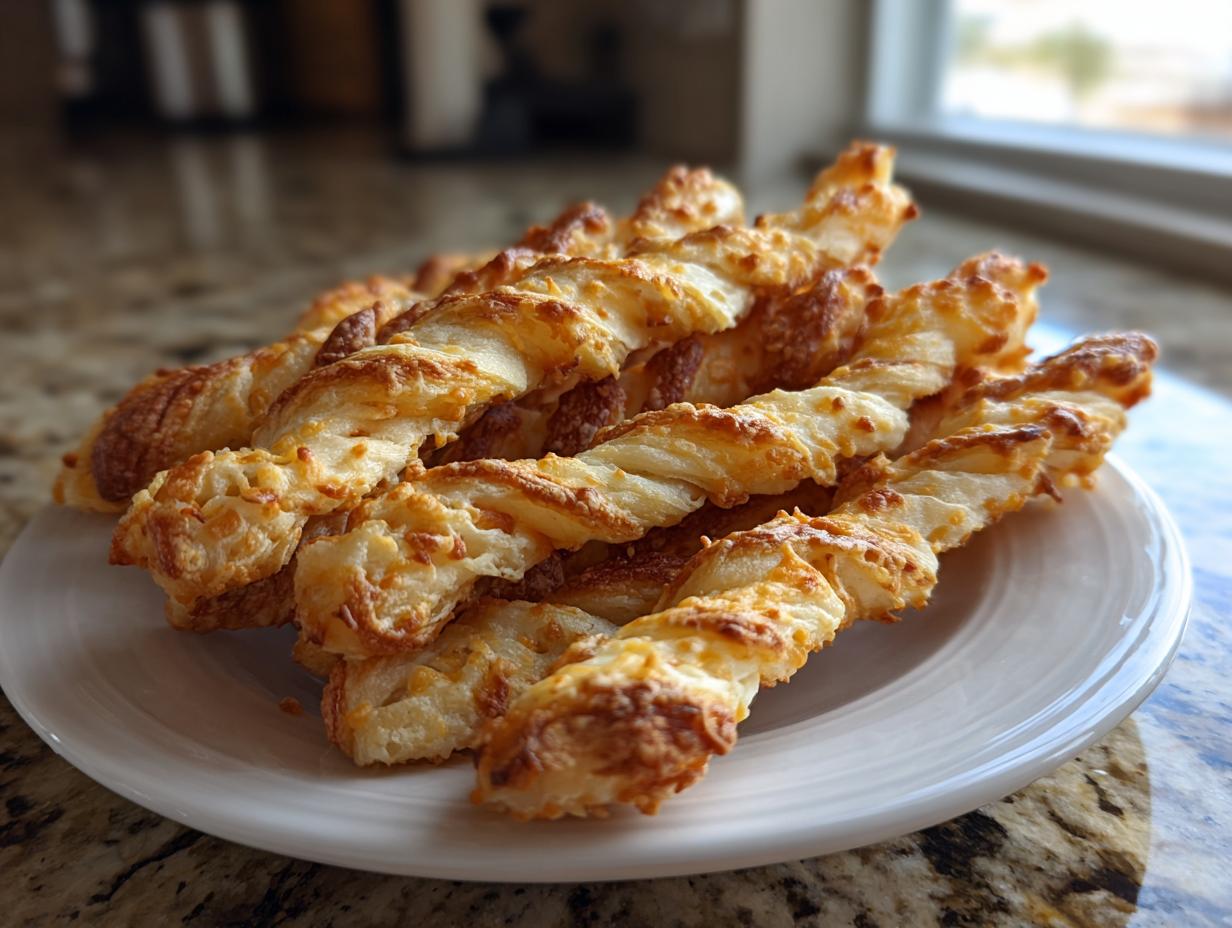
If you’re hosting or just looking for that perfect, addictive, savory crunch to accompany your afternoon coffee, you know you need something better than those stale crackers in the cupboard. Forget wrestling with complicated pastry dough; I’ve engineered a smarter way to bake these beauties. As someone who organizes complex projects for a living, I approached the classic Southern staple, the cheese straw, and stripped away every unnecessary step. This isn’t just any recipe; this is the absolute best cheese straws recipe you’ll ever use to get that intensely sharp cheddar flavor and perfect, delicate crispness without wasting your whole evening in the kitchen. Trust me, these little bites vanish first at every party.
- Why This is the Best Cheese Straws Recipe for Entertaining
- Ingredients for Your Crispy Cheddar Cheese Straws Recipe
- How to Prepare the Ultimate Southern Style Cheese Straws Recipe
- Baking and Cooling Your Flavorful Savory Crackers
- Tips for Perfect Homemade Cheese Straws Every Time
- Storage and Reheating Instructions for Your Cheese Straws Recipe
- Serving Suggestions for These Party Appetizer Recipes
- Frequently Asked Questions About Making Cheese Straws Recipe
- Nutritional Estimates for This Savory Snack Recipe
Why This is the Best Cheese Straws Recipe for Entertaining
Look, I know there are shortcuts out there—the puff pastry versions pop up everywhere, and they’re fine for a desperate last minute snack. But if you want that genuine, shatteringly crispy cheese straws texture that makes people ask for the recipe, you need this traditional dough method. It’s all about cutting the cold butter right into the flour. That technique creates the structure that ensures maximum crunchiness when they come out of the oven.
When it comes to entertaining finger foods, flavor is everything, which is why we rely 100% on sharp cheddar here. None of that mild stuff! This intensity means you get bold satisfaction in a tiny package. I always batch these for larger gatherings because they’re the ultimate reliable savory snack recipes, tasting better the day after you make them. If you’re looking for amazing appetizer and snack recipes that guests rave about, this is your go-to.
Ingredients for Your Crispy Cheddar Cheese Straws Recipe
Okay, let’s look at what you need for this fantastic cheese straws recipe. Since we are aiming for maximum crunch and flavor, precision matters here, especially with the cheese and fat. Don’t worry, it’s a short list!
You’ll need one cup of all-purpose flour, a half teaspoon of salt, and just a pinch—a quarter teaspoon—of cayenne pepper if you like a little kick. The star is one cup of sharp cheddar cheese, and it absolutely must be finely grated, not the pre-shredded stuff! We also use a half cup of cold, unsalted butter, cut into small pieces. Lastly, the liquid component is one large egg yolk blended with one tablespoon of cold water.
Ingredient Notes and Sharp Cheddar Snacks Tips
Listen, this is where the magic happens. You cannot skimp on the cheese quality for these sharp cheddar snacks. I insist on genuine, aged sharp cheddar—it melts beautifully while baking but leaves behind that super intense, wonderful savory flavor. If you skip the sharpness, you just end up with buttery crackers. Also, while the cayenne is optional, I highly recommend it! It doesn’t make them fiery hot, but just gives them that subtle something that makes people reach for a second and third—perfect for those who enjoy Cheese Straws with Spice.
How to Prepare the Ultimate Southern Style Cheese Straws Recipe
Alright, time to put on our project manager hats—we are breaking this down into clear, efficient phases. Since we are aiming for that incredible crunch, every step here matters. First, grab your biggest bowl. We need to combine the dry ingredients, then we move to cutting in the cold butter. Think of it like making shortbread; you want the butter pieces coated in flour, forming coarse crumbs. It should look sandy but with a few pea-sized bits of butter remaining. That’s the blueprint for flaky, homemade cheese straws!
Once the cheese is mixed in, we only add the liquid—the egg yolk and water mix—just until the mess comes together into a dough. Stop mixing! This is critical. Overmixing develops gluten, and we are making savory crackers, not tough chew toys. You’ll want to wrap that dough disk tightly and get it into the fridge for at least 30 minutes. That chilling time is non-negotiable; cold dough equals impossibly crispy cheese straws.
Mixing and Chilling the Homemade Cheese Straws Dough
When you’re cutting in that cold butter, use your fingers or a pastry blender until you hit that coarse crumb consistency. That little bit of butter that doesn’t fully incorporate? That’s the steam pocket waiting to happen, leading to that airy, delicate shatter we love in a great cheese straws recipe. Don’t rush the chill, either. If the dough is warm when you roll it, the butter melts too fast, and you lose that structure for your Buttery Cheese Bites. Thirty minutes is the minimum, but sometimes an hour is even better if you’re prepping other easy holiday appetizers.
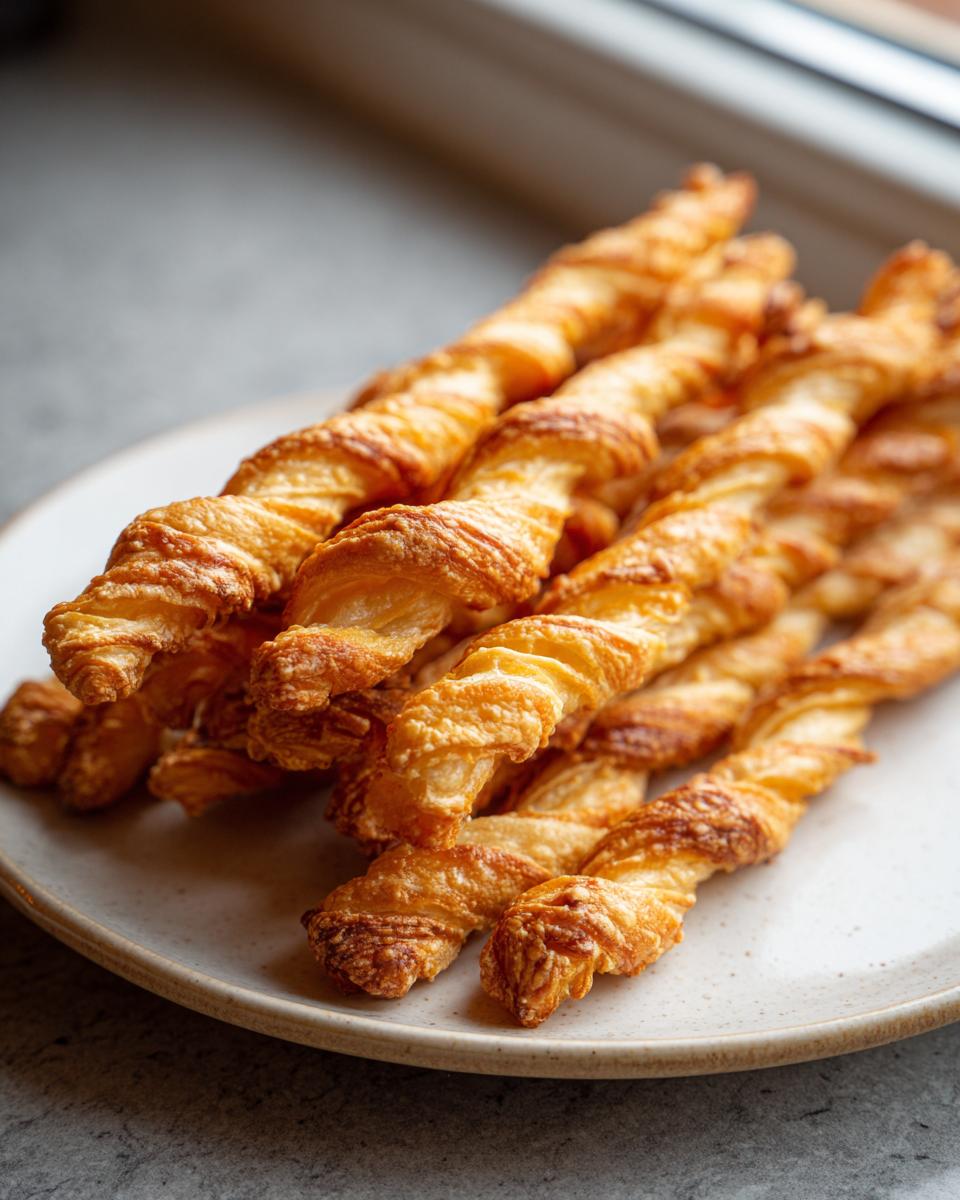
Cutting and Twisting for Crispy Cheese Straws
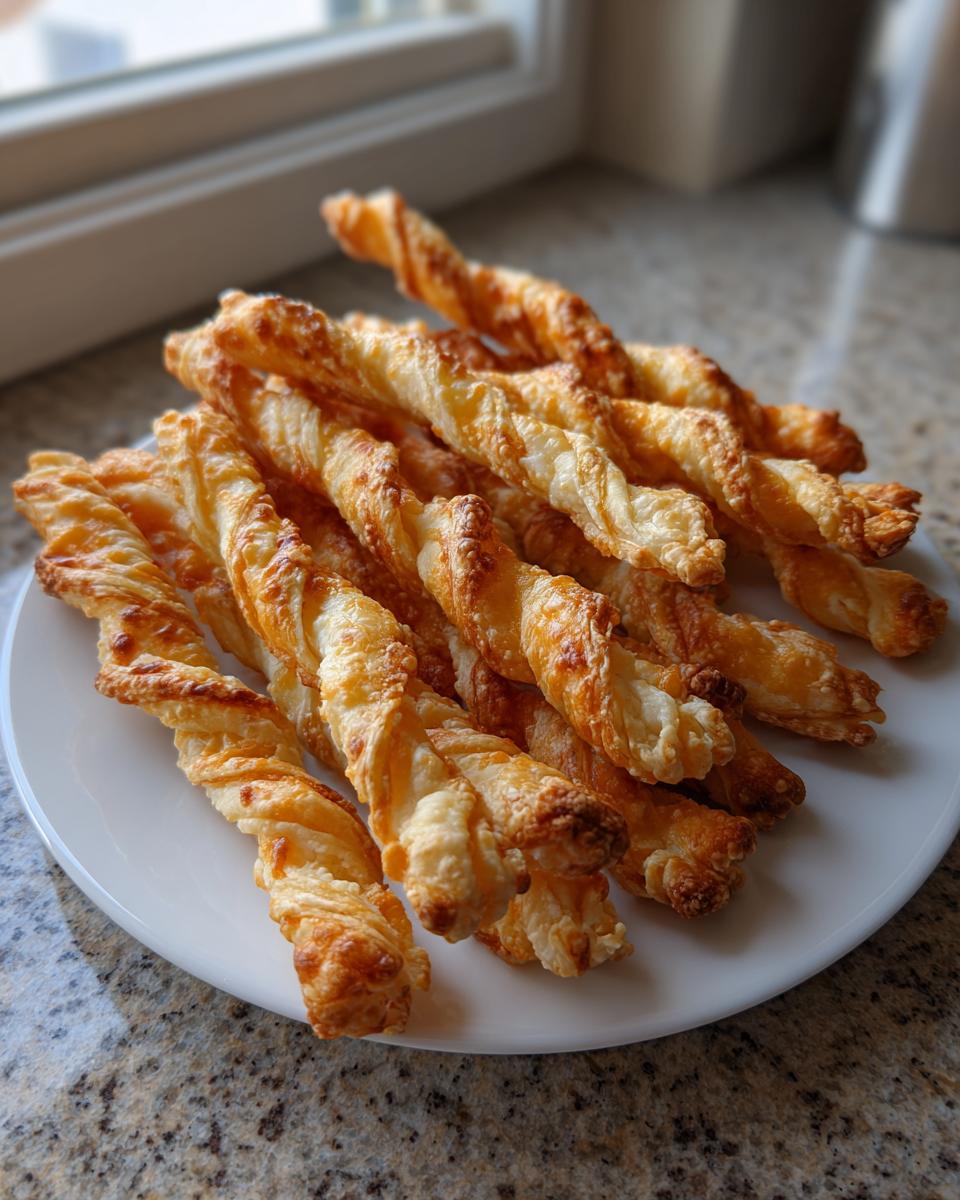
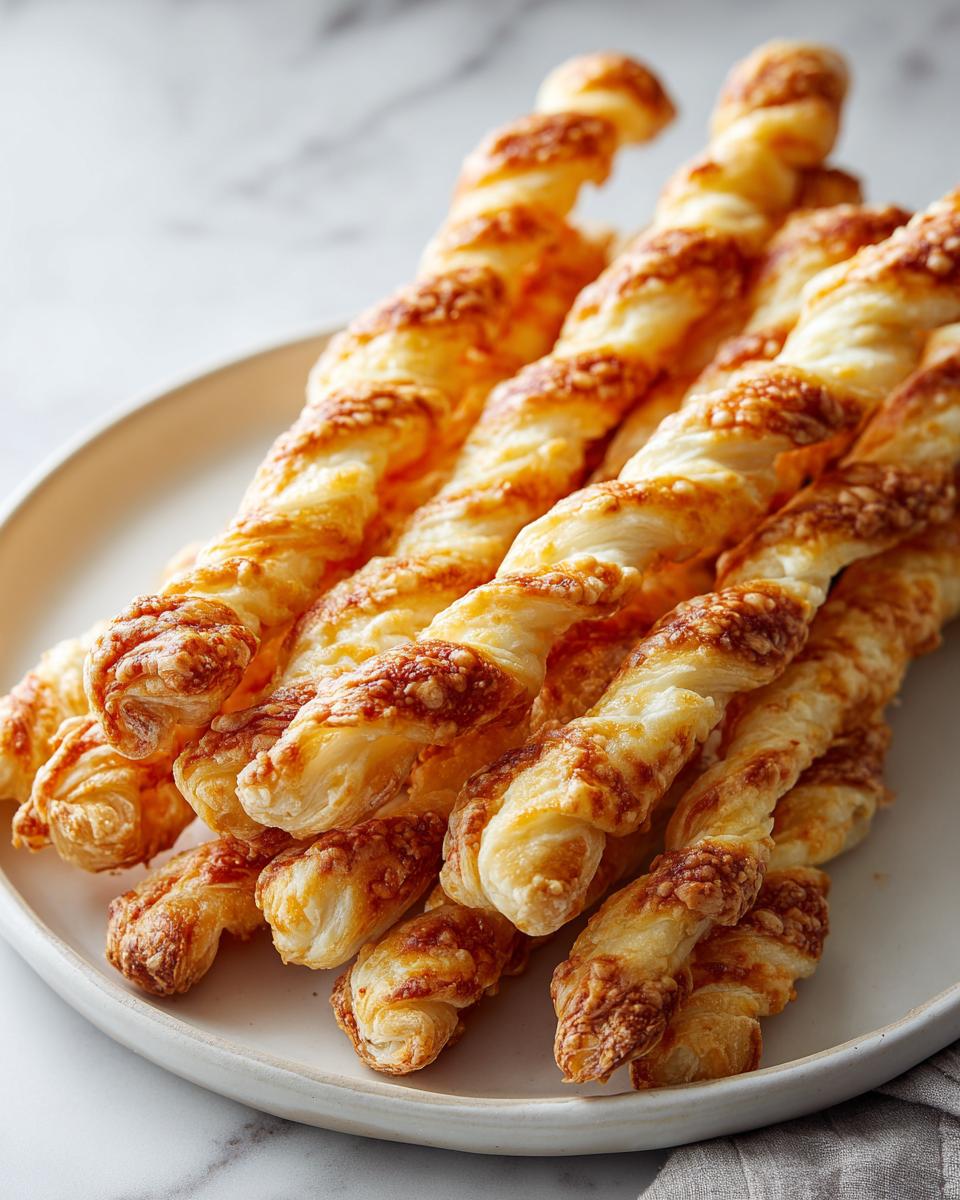
Once chilled, dust your surface lightly—and I mean lightly! Roll that dough out until it’s thin, aiming for about an 1/8-inch thickness. This thinness is another secret weapon for crispness. Now, take your knife and cut strips that are about a half-inch wide and four inches long. If you want that beautiful, rustic look, give each strip a single or double twist before laying them out. Remember to preheat your oven to 400°F (200°C) while you’re cutting so it’s scorching hot when they go in!
Baking and Cooling Your Flavorful Savory Crackers
This is the moment of truth! Once your twists are laid out on the parchment-lined sheets, slide them carefully into that 400°F (200°C) oven. Don’t wander off! Because we rolled these thin—about 1/8-inch—they cook fast. I find that 10 minutes is usually the bare minimum for starting to listen, but most batches hit that perfect deep golden brown around the 12 to 14-minute mark. You want them visibly golden, not pale yellow.
Now, here’s what separates a good batch from an absolutely stellar one when making your cheese straws recipe: cooling! As soon as they come out, transfer those hot straws straight onto a wire rack. They will still seem a little delicate and slightly soft right out of the oven, but seriously—do not touch them! They firm up and achieve that signature audible snap as they cool down completely. It’s in that cooling phase that they transform into the perfect savory cracker you were aiming for. They must be totally cool before you store them, or you’ll seal in steam and lose that hard-earned crispness!
Tips for Perfect Homemade Cheese Straws Every Time
Even though this is a straightforward cheese straws recipe—I mean, that’s the whole point of Dishicious—there are just a few little tricks I picked up over the years that guarantee success. It’s about efficiency, yes, but also about maximizing flavor payoff. If you nail these details, you’ll be making the best batch of buttery cheese bites your friends have ever tasted.
My biggest tip, and I mentioned it before, revolves around the cheese. You must grate it yourself! Pre-grated cheese is coated in anti-caking agents like potato starch or powdered cellulose. That starch messes with how the fat melts during baking, and it can prevent that beautiful, connected texture you want. When you grate quality, sharp cheddar by hand, you get pure, fatty cheese goodness that creates those gorgeous, crisp edges.
Also, remember that chilling time isn’t suggestion; it’s required maintenance! If the dough is too warm when you roll it aggressively, the butter starts to smear instead of staying in distinct, cold pieces. We cut in the butter to create flakiness, and if the butter warms up, all that careful work turns into a hard, dense cracker instead of a light, amazing snack. Save your work by keeping that dough cold!
Making Variations of the Cheese Straws Recipe
Now, once you’ve mastered the classic sharp cheddar, it’s fun to experiment, right? While this is the classic Southern Style Cheese Straws blueprint, you can easily customize it. If you ever want to lean into something a little more sophisticated for a wine night, try swapping out half of the sharp cheddar for finely grated Parmesan cheese. You automatically get a richer, nuttier flavor profile. If you do that, you’ve basically made Rosemary Parmesan Straws, especially if you mix in about a teaspoon of finely minced fresh rosemary with the flour.
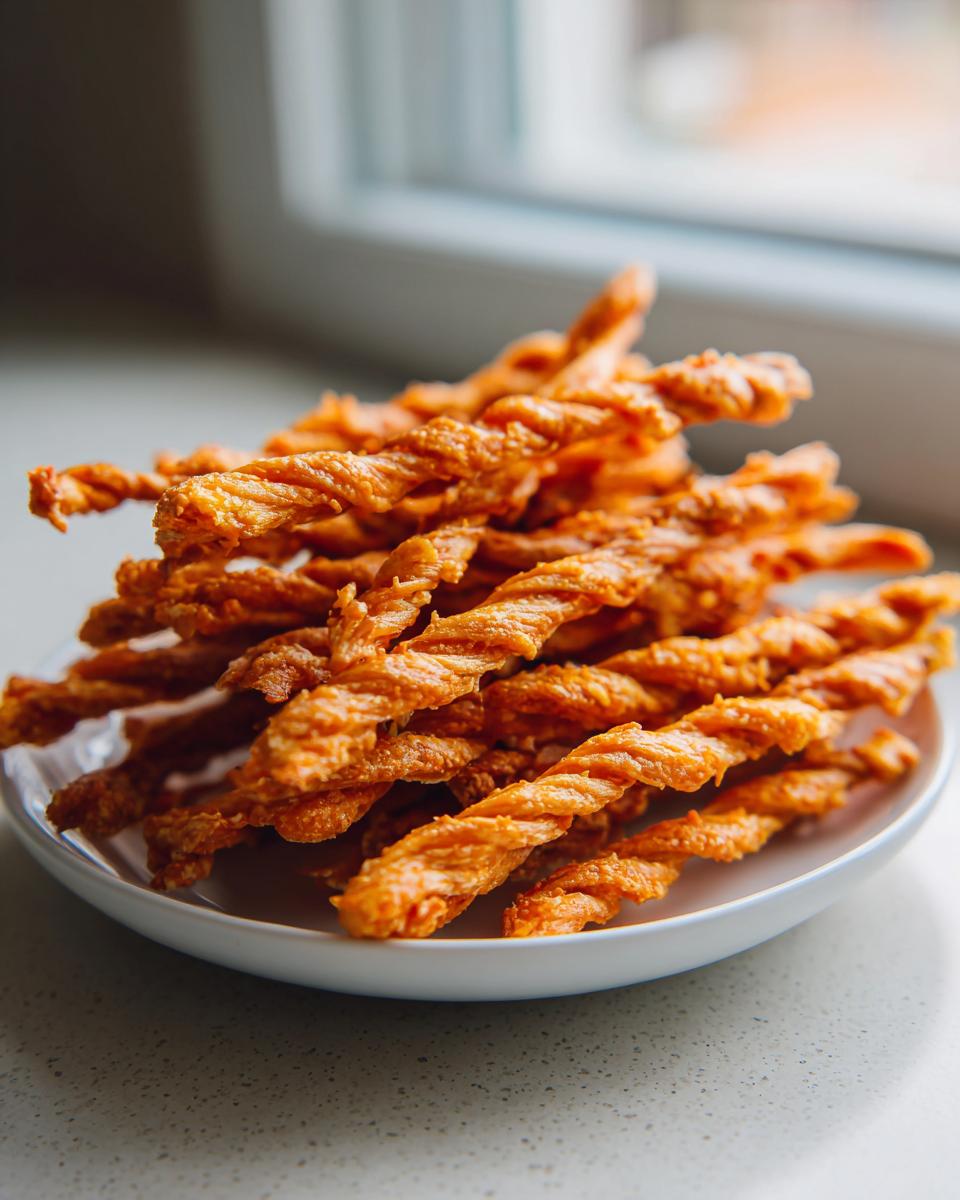
Another variation I love, which leans into that little kick from the cayenne, is adding smoked paprika. A half teaspoon of smoked paprika along with your cayenne transforms this into a smoky, flavorful bite—perfect for Game Day Snacks. You can also dust them with a little extra sharp cheese right before baking for a crustier exterior. Just remember the base recipe is your reliable anchor; any additions should be kept minimal so you don’t disrupt the hydration ratio of the dough, which would ruin the crispness.
If you are looking for other crowd-pleasing appetizers you can bake up easily, check out my recipe for easy chicken enchiladas—it’s simple comfort food that always disappears fast!
Storage and Reheating Instructions for Your Cheese Straws Recipe
So you bravely made a huge batch of the best cheese straw recipe, but you didn’t eat them all in one sitting? Good problem to have! Because we took the time to bake them until deeply golden and then let them cool completely on that wire rack, they are designed to last, provided you store them correctly.
The absolute key to longevity for these homemade cheese straws is keeping air away from them. You need an airtight container, like a sturdy container with a good seal or a heavy-duty zip-top bag with every last puff of air squeezed out. You want to keep them on the counter at room temperature. Do NOT stick them in the fridge! Seriously, the fridge is the enemy of crispness; the humidity will make them go soft faster than you can say ‘sharp cheddar.’
If you happen to store them for a few days and they’ve softened up just a tiny bit—maybe they’ve been sitting out while you were hosting—don’t stress out! We don’t want to throw them away before parties or game days. You can bring back that beautiful snap super easily.
Reviving Your Cheese Straws Recipe with Reheating
When you need to refresh your batch of cheddar cheese straws, just spread them back out on a baking sheet—don’t pile them up! Give them about 5 to 7 minutes back in a moderate oven, say 300°F (150°C). You aren’t actually cooking them again; you are just gently warming them to drive off any residual moisture they might have absorbed from the air. They will come out piping hot, smelling amazing, and totally crisp again. Let them cool for maybe 90 seconds on the tray before transferring them back to their airtight container. Enjoy your perfectly flavorful savory crackers all over again!
Serving Suggestions for These Party Appetizer Recipes
Honestly, the best part about mastering a great cheese straws recipe is figuring out what to serve them alongside! My philosophy is that you shouldn’t have to cook a complicated dip or sauce just to serve a savory snack—they should stand on their own. But if you want to elevate the spread, these straws are incredibly versatile.
For an easy starter that always looks impressive, just arrange them on a platter with a few bowls of simple accouterments. If you’re setting up for a casual afternoon, they are absolutely mandatory for Game Day Snacks. They pair wonderfully with the crisp bite of celery sticks or maybe a few pickled onions for some acidity to cut through that rich cheddar.
For something more sophisticated, think about your Wine Night Pairings. A sharp, strong cheese straw is perfection next to a glass of robust Cabernet Sauvignon or even a dry sparkling wine. The saltiness just enhances the wine—it’s a fantastic match. If you happen to have some spicy pepper jelly, just spoon a little into a small dish next to the straws; the sweet heat against that sharp cheese is incredible.
But maybe my favorite way to serve them is when the weather turns chilly. These aren’t just little snacks; they are savory vessels! They are perfect for dunking into a creamy, velvety soup. If you’re making a big pot of soup, especially something like a creamy tomato or broccoli cheddar, crumbling a few cheese straws right on top adds texture and a serious flavor boost. Seriously, try them on my broccoli cheddar ultimate copycat soup; it’s a game-changer for a cozy night in!
Frequently Asked Questions About Making Cheese Straws Recipe
When you’re working on a proven recipe like this, people always have clarifying questions, and that’s totally smart! Since I’ve streamlined this down to the essentials, you don’t have many variables, but a few sticking points always come up when people try to nail that perfect crunch for their cheese straws recipe.
Can I use pre-shredded cheese for this Cheesestraws Recipe Easy?
Oh boy, I wish you could! But honestly, no, you really shouldn’t if you want that spectacular, crispy result. My whole system relies on using a block of sharp cheddar that you grate yourself. Pre-shredded bags are coated with things like cellulose or potato starch to keep them from clumping in the bag. When you bake that starch, it changes the texture of your dough. Instead of getting those beautiful, savory, melty spots, you can end up with a slightly tougher, less flavorful result. This is your biggest flavor driver, so take two extra minutes and grate it fresh!
What kind of cheese is truly the best for these savory snacks?
As I’ve probably mentioned a few times already, sharp cheddar is the gold standard here for Southern Style Cheese Straws. You want that intensity! If you use mild cheddar, the cheese flavor gets lost beneath the butter and flour. You need the bite that only a sharp or extra-sharp cheese gives you. If you want to mix it up for flavor variety—maybe for a game day snack when you want something different—grating in Parmesan or Gruyère along with the cheddar works beautifully. But keep that sharp cheddar as your base!
Can I make the dough ahead of time and freeze it?
Yes, this dough is fantastic for prep-ahead work! I actually recommend it when you’re planning a big party. You can make the dough, wrap it tightly right after you flatten it into a disk, and keep it in the fridge for up to two days. That chilling time actually helps the flour hydrate a bit more, which is great for texture. If you need to freeze it, wrap it super well in plastic wrap and then put it in a freezer bag. It keeps well for about a month. Just let it thaw overnight in the fridge before you roll it out thin. This makes them feel like super easy finger foods when it’s time to bake!
Why is my dough so crumbly and hard to bring together?
That usually happens for one of two reasons, and both relate back to temperature control. First, if your butter wasn’t cold enough when you cut it in, or if your kitchen was warm, the butter might have started melting before you even got to the wet ingredients. Second, if you added too much liquid, but that’s less common here. My best fix? If the dough is just barely holding together but still looks dusty, add just half a teaspoon more of cold water at a time. Mix until it just forms a cohesive ball. Remember, we want everything cold to make those crunchy homemade cheese straws!
If you’re looking for other make-ahead appetizers that save you time when hosting, you’ve got to check out my recipe for easy creamy chicken tortilla soup; you can freeze that whole batch!
Nutritional Estimates for This Savory Snack Recipe
I always keep track of what we’re eating, even when it comes to savory snack recipes like this one. While I’m not a nutritionist—I’m just a home cook optimizing flavor and efficiency—I ran the numbers based on the ingredients list we used. These estimates give you a good baseline, but you know how it goes; the exact brand of cheese or butter you use can shift things slightly!
This information is based on an average serving size, so keep that in mind when you’re reaching for the second or third bite (which, let’s be real, you will!).
- Serving Size: 3 straws
- Calories: 110
- Total Fat: 8g
- Carbohydrates: 6g
- Protein: 4g
- Sodium: 180mg
We’re looking at a snack that delivers great flavor without loading up on sugar—only about 0.2g of sugar per serving! The fat content is what gives these Cheddar Cheese Straws their amazing, buttery texture, so that comes with the territory. Remember, all these numbers are just estimates for these buttery cheese bites, factoring in standard ingredient measurements. Use this as a helpful guide, but focus more on how incredibly delicious these homemade cheese straws are!
PrintCrispy Southern Cheddar Cheese Straws Recipe

Make these classic Southern Cheese Straws for a flavorful, crispy snack or party appetizer. This straightforward recipe uses sharp cheddar for maximum taste.
- Prep Time: 20 min
- Cook Time: 14 min
- Total Time: 54 min
- Yield: About 3 dozen 1x
- Category: Appetizer
- Method: Baking
- Cuisine: American
- Diet: Vegetarian
Ingredients
- 1 cup all-purpose flour
- 1/2 teaspoon salt
- 1/4 teaspoon cayenne pepper (optional, for spice)
- 1/2 cup (1 stick) cold unsalted butter, cut into small pieces
- 1 cup sharp cheddar cheese, finely grated
- 1 large egg yolk
- 1 tablespoon cold water
Instructions
- In a large bowl, whisk together the flour, salt, and cayenne pepper, if using.
- Cut the cold butter into the flour mixture using a pastry blender or your fingertips until the mixture resembles coarse crumbs.
- Stir in the grated sharp cheddar cheese until evenly distributed.
- In a small bowl, whisk the egg yolk with the cold water. Add this liquid mixture to the flour and cheese, mixing just until a cohesive dough forms. Do not overmix.
- Shape the dough into a ball, flatten it into a disk, wrap it in plastic wrap, and chill in the refrigerator for at least 30 minutes.
- Preheat your oven to 400°F (200°C). Line two baking sheets with parchment paper.
- On a lightly floured surface, roll the chilled dough out to about 1/8-inch thickness.
- Use a knife or pizza cutter to cut the dough into strips, about 1/2-inch wide and 4 to 5 inches long. You can twist each strip once or twice for a classic look.
- Place the cheese straws on the prepared baking sheets, leaving a small space between them.
- Bake for 10 to 14 minutes, or until the straws are golden brown and crisp. Baking time varies based on thickness.
- Transfer the straws to a wire rack to cool completely. They will crisp up further as they cool.
Notes
- Use high-quality, sharp cheddar cheese; this provides the best flavor for these savory snack recipes.
- For a different flavor profile, substitute half the cheddar with Parmesan cheese for Rosemary Parmesan Cheese Straws.
- You can prepare the dough up to 2 days ahead; keep it tightly wrapped in the refrigerator.
Nutrition
- Serving Size: 3 straws
- Calories: 110
- Sugar: 0.2
- Sodium: 180
- Fat: 8
- Saturated Fat: 5
- Unsaturated Fat: 3
- Trans Fat: 0.2
- Carbohydrates: 6
- Fiber: 0.3
- Protein: 4
- Cholesterol: 25