
Summer means sunshine, but it also means juggling food logistics at every single outing—patio BBQs, picnics, or graduation parties. Nobody wants to lug out plates and spoons for a slippery dessert! That’s why I optimized this classic flavor into something sturdy and utterly reliable. We are taking that warm, spiced comfort of a traditional cobbler and engineering it into perfect, no-fuss squares. Trust me, these cherry cobbler bars are about to become your go-to summer snack because they deliver maximum flavor with minimum cleanup. It’s smart cooking—efficiency first, amazing taste always. I’ve streamlined the layering process right down so you can get these ready in a flash and get back to enjoying the good weather. Check out more of my efficient dessert recipes; this is simple, powerful baking that just *works*.
- Why These Cherry Cobbler Bars Are Your New Favorite Summer Snacks
- Ingredients Needed for Sturdy Cherry Cobbler Bars
- Step-by-Step Instructions to Make Cherry Cobbler Bars
- Tips for Perfect Cherry Cobbler Bars Every Time
- Ingredient Notes and Substitutions for Fruit Bars
- Making Ahead and Storing Your Summer Snacks
- Serving Suggestions for This Cherry Dessert
- Frequently Asked Questions About Bar Recipes
- Nutritional Estimate for Cherry Cobbler Bars
Why These Cherry Cobbler Bars Are Your New Favorite Summer Snacks
When you’re planning for outdoor events, every recipe needs an efficiency review. These bars pass the test with flying colors. Forget messy serving; these are designed for grab-and-go reliability. You get all the rich, sweet-tart flavor you expect from a great cherry cobbler, optimized for easy snacking.
Perfectly Portable Dessert Bars
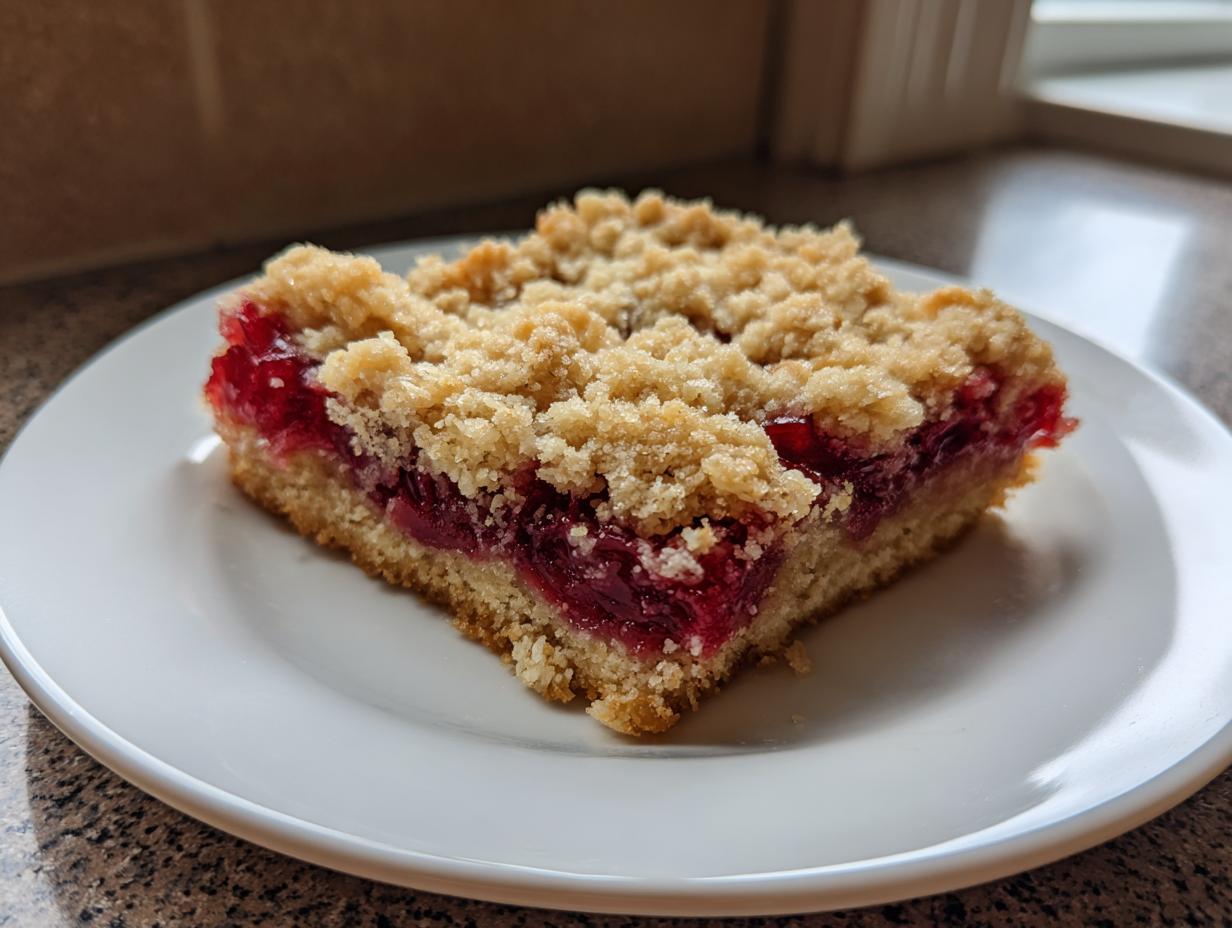
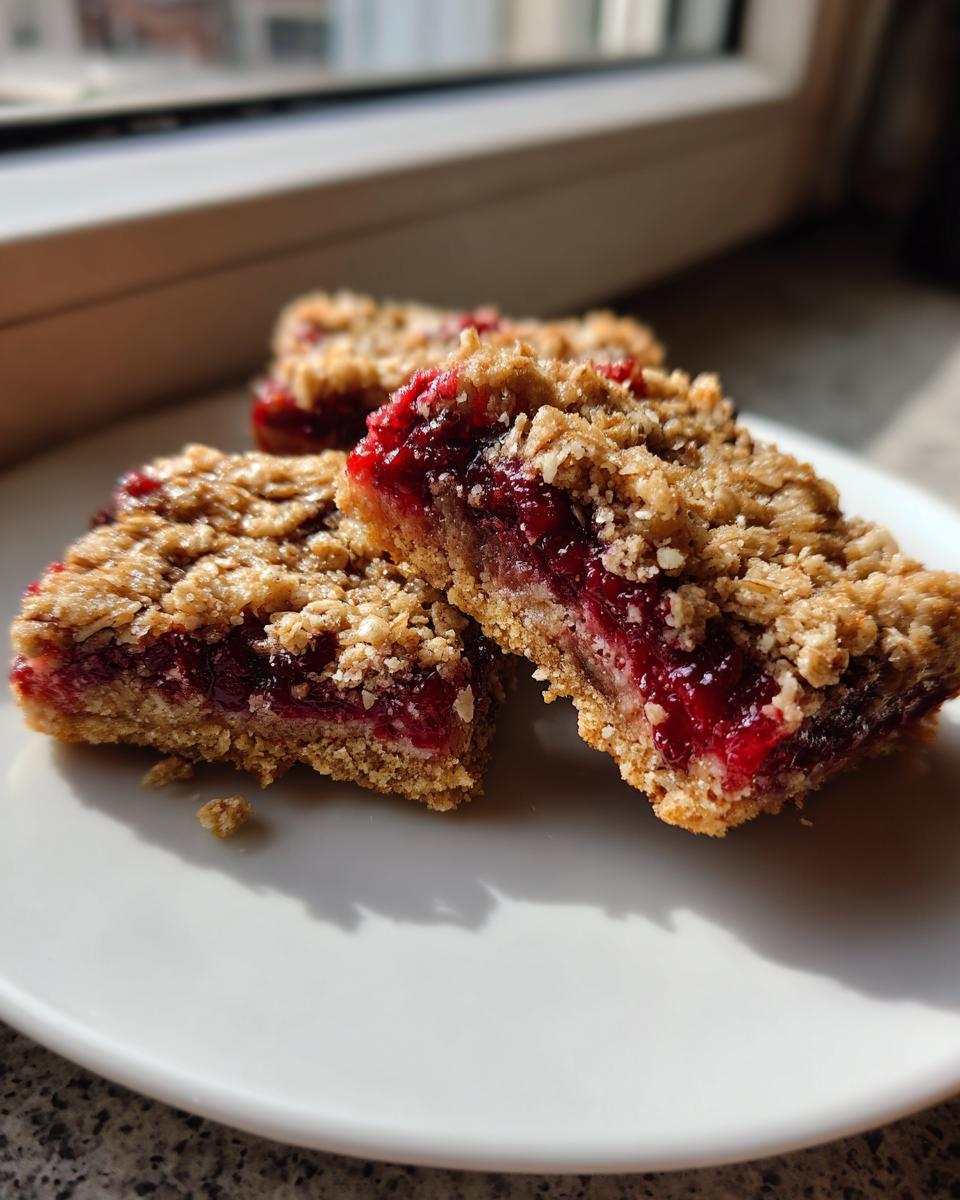
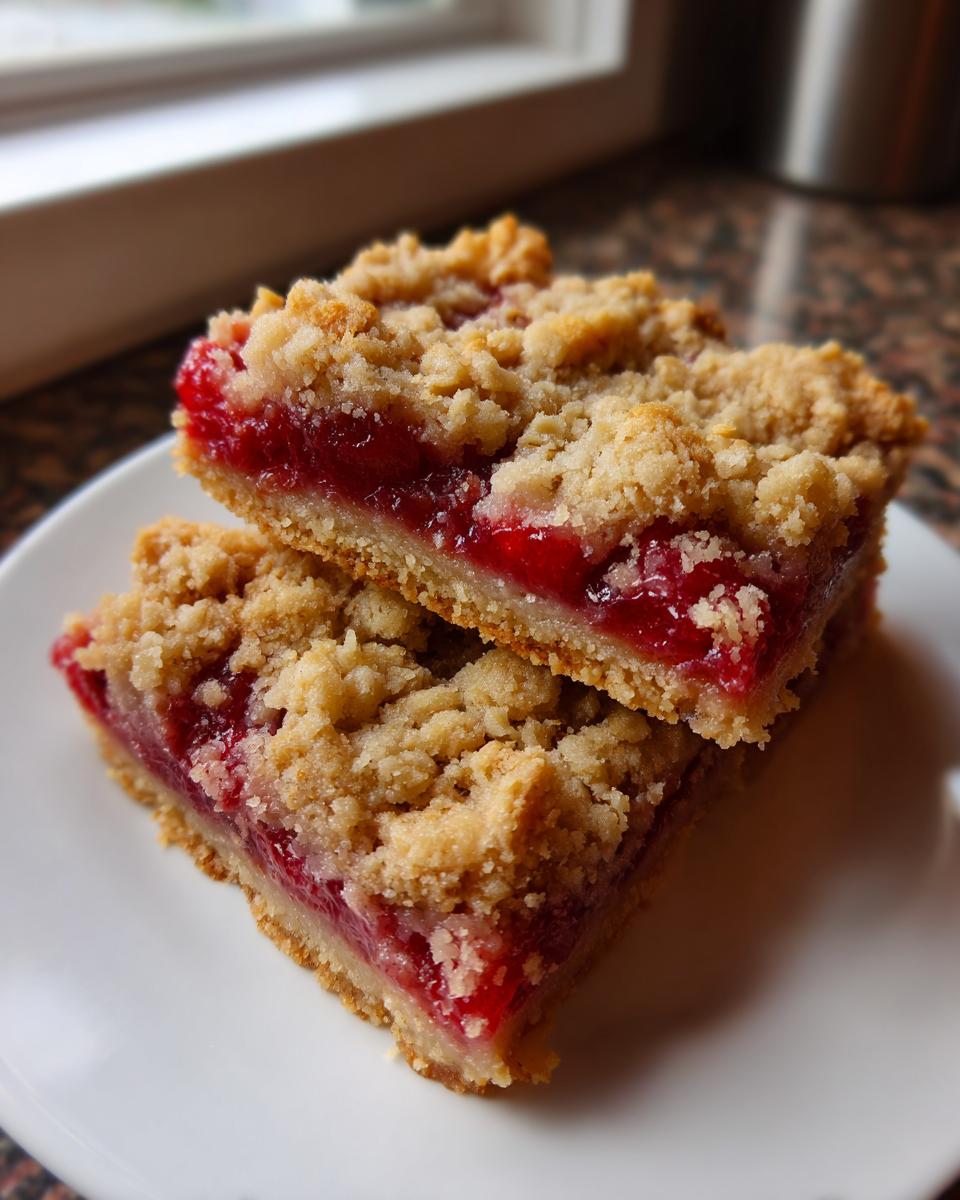
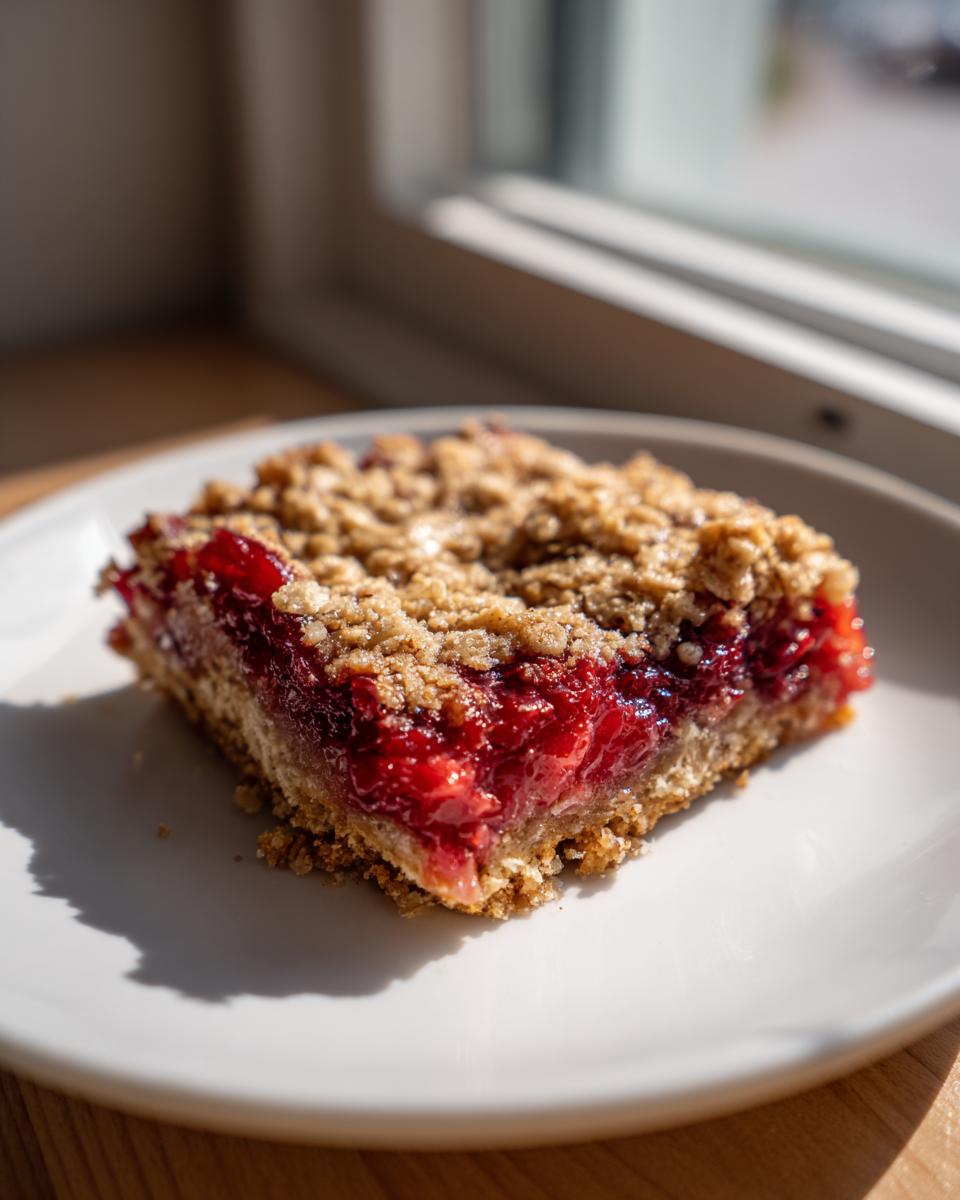
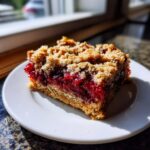
These aren’t delicate cakes; they are sturdy, reliable squares. You can stack them in a container and haul them to a picnic, graduation party, or beach day without worrying that they’ll collapse into a pile of fruit goo. They hold their shape beautifully, meaning no extra plates or spoons are necessary when serving these fantastic summer snacks.
Simple Assembly for Cherry Cobbler Bars
This recipe follows my project approach: crust, filling, topping, done. We press the crust, spread the canned filling—no stovetop cooking required—and finish with a simple crumble. That’s it. These dessert bars come together faster than you can decide which cooler to pack.
Ingredients Needed for Sturdy Cherry Cobbler Bars
When I design a recipe for efficiency, every single ingredient has to pull its weight. We aren’t here to mess around with complicated substitutions; we want maximum flavor impact with minimal shopping lists. That’s why these fruit bars rely on the standard-issue canned pie filling—it’s the perfect shortcut to getting that intense cherry flavor without cooking down fresh cherries for an hour.
You’re basically making a sturdy shortbread base and topping it. Here’s the list of what you need to pull this off smoothly. Remember, the butter absolutely needs to be cold and cubed; that’s key to the structure!
- 1 1/2 cups all-purpose flour
- 1/2 cup granulated sugar
- 1/2 teaspoon baking powder
- 1/4 teaspoon salt
- 1/2 cup (1 stick) cold unsalted butter, cut into cubes
- 1 large egg
- 1 teaspoon vanilla extract
- 1 (21 ounce) can cherry pie filling (See my notes on selecting the best canning brand here: cherry pie filling)
- 1/4 cup quick-cooking oats
- 2 tablespoons packed brown sugar
Step-by-Step Instructions to Make Cherry Cobbler Bars
This is where the project management mindset really shines. We’re dividing the work into clear, sequential phases to ensure nothing gets messy or over-mixed. Follow these steps exactly, and you’ll have perfectly structured fruit bars ready before you know it. I’ve also linked my guide to other similar cookie bar recipes if you need more portable sweet ideas!
Preparing the Pan and Dry Mix
First thing: get the oven to 350°F. Next, line that 8×8 pan with parchment paper, making sure you leave a serious overhang on two sides. That overhang is your built-in handle for lifting everything out later—zero sticking issues guaranteed. Then, quickly whisk your flour, granulated sugar, baking powder, and salt together in a bowl. Keep moving!
Forming the Crust for Your Cherry Cobbler Bars
Now we deal with the butter. Don’t let it warm up! Cut that cold butter into cubes and use a pastry blender—or your fingertips if you’re fast—to cut it into the dry mix until it looks like coarse crumbs. Whisk the egg and vanilla separately, add it in, and mix just until a dough just forms. Press only two-thirds of this dough evenly into the bottom of your prepared pan. Don’t press too hard!
Layering and Topping the Cherry Dessert Bars
Time for the filling! Pop that entire can of cherry pie filling right over the crust layer. Since we want that classic cobbler crumble, take the remaining dough mixture (that last one-third) and mash it together with the quick-cooking oats and the brown sugar. Crumble this topping mixture liberally and evenly over your luscious cherry dessert filling. This contrast is what makes these bars so fantastic.
Baking and Cooling for Perfect Cherry Cobbler Bars
Slide them into the oven for 35 to 40 minutes. You are looking for that beautiful golden-brown topping and bubbly cherry filling peeking through. This is the most important part for clean slicing: let the cherry cobbler bars cool completely in the pan. If you try to cut them warm, they will completely fall apart. Use the parchment overhang to lift them out after they’ve set up!
Tips for Perfect Cherry Cobbler Bars Every Time
After running this recipe through several test cycles in my Chicago kitchen, I found a few small tweaks that make a huge difference between a good bar and an absolutely reliable bar! These aren’t complicated steps; they are just efficiency checkpoints to ensure your flavor delivery system is perfect for your next outdoor event. Check out these tips, and don’t forget to look at my guide for equally reliable no-bake peanut butter bars, too!
- For those presentation-critical moments, like a head table at a party, plan ahead. If you chill those cooled cherry cobbler bars for at least one full hour before slicing, the cuts will be razor-sharp. Trust the cooling process; patience saves you from sticky messes.
- If you’re short on time during assembly and your crust dough feels too sticky to handle—or if you just want a cracker-crisp base—chill the two-thirds of dough designated for the crust for about 15 minutes before pressing it into the pan.
- One of the major wins here is stability. This fruit bar recipe holds up incredibly well at room temperature for several hours. I’ve tested them after a full afternoon in the sun (covered, of course!), and they stayed firm, which is exactly what we need for ultimate portability.
Ingredient Notes and Substitutions for Fruit Bars
I chose canned cherry pie filling specifically because it’s the ultimate efficiency hack for these fruit bars. If your filling seems a little runny, you can drain off a spoonful or two of the excess syrup before spreading it onto the crust. If you absolutely must use fresh cherries—maybe you picked them yourself—you’ll have to create your own filling. Just pit about two cups of fresh cherries, cook them down on the stove with a couple of tablespoons of sugar and a pinch of cornstarch until thickened, and then let that mixture cool completely before layering it. It adds time, but it certainly boosts that homemade flavor!
Making Ahead and Storing Your Summer Snacks
Since these cherry cobbler bars are designed for maximum grab-and-go ease, planning ahead is simple. I’ve found they are perfectly stable at room temperature for a full afternoon, which is great for keeping up with the flow of events at any party. If you need them to last longer than a day, just seal them tightly in an airtight container. They are fantastic in the fridge, though make sure they come back to room temperature for about 20 minutes before serving so the crust softens slightly. If you’re using up leftover ingredients, these freeze surprisingly well stacked between layers of wax paper! Check out my tips for meal prepping brunch items for other make-ahead wins.
Serving Suggestions for This Cherry Dessert
Because these cherry dessert bars are built for rugged portability, keeping the serving simple is key. If you are serving them right out of the oven at home, a dollop of cold whipped cream or a scoop of high-quality vanilla ice cream is divine. But for those outdoor summer gatherings? Just stick to the core design!

A light dusting of powdered sugar right before you pack them up looks classy but adds zero mess. If you want to offer something extra, serve them alongside individual small cups of sweetened whipped cream. That way, people can customize their fruit bars without turning the whole batch into a sticky situation. This one is all about maximizing enjoyment while minimizing cleanup!
Frequently Asked Questions About Bar Recipes
When I’m optimizing a recipe, I always run through the variables in my head. These common questions always pop up when people are trying to make sure their dessert bars travel well or taste just right. I’ve compiled the things I learned during testing so you don’t have to repeat any of my trial runs!
Can I use fresh cherries instead of pie filling in these fruit bars?
You certainly can, but you’re sacrificing the efficiency I baked right into this recipe! If you use fresh cherries, you need to cook them down with sugar and a thickener, like cornstarch, until they form a thick syrup. If you skip that step, the moisture from the fresh fruit will make your crust soggy. Using the canned filling is the streamlined route for perfect fruit bars every time.
How do I prevent my dessert bars from becoming too crumbly?
The crumble comes from two places: the butter and the mixing. Rule one for a sturdy crust is that the butter *must* be cold. When you cut it into the flour, those cold pieces create steam pockets that set up the structure. Rule two: don’t overmix the dough once you add the egg. Mix only until it *just* comes together into a cohesive mass. Overmixing turns that structure into something too tender, leading to crumbling when you try to cut those beautiful cherry cobbler bars.
How long can I leave these cherry cobbler bars out when serving outdoors?
Because they rely mainly on butter and fruit filling, they are surprisingly stable compared to something like a cream cheese frosting. For general party serving, they are good for about four to six hours outside, assuming it’s not blazing hot. Always keep them covered to prevent any unexpected visitors (like bugs!) from landing on your perfect summer snacks. For longer storage, bring them inside to the fridge! If you’re looking for other quick ideas once dinner is done, check out my guide for quick, easy dinners—sometimes you need an easy win for the main course, too!
Nutritional Estimate for Cherry Cobbler Bars
Now, let’s look at the project breakdown for the end result. Since these are packed with butter and sugar to give us that sturdy texture and cozy flavor, they aren’t exactly a diet food—but they are perfect for a special gathering! I always stress that these figures are based on the exact ingredients and measurements listed, calculated using standard data for comparison. Don’t treat this like a strict nutritional label, but it gives you a good idea of what you’re working with when planning your weekend menu.
Here is the estimated nutritional data based on my testing and standard ingredient databases:
- Serving Size: 1 bar
- Calories: 210
- Sugar: 18g
- Sodium: 85mg
- Fat: 10g
- Saturated Fat: 6g
- Unsaturated Fat: 4g
- Trans Fat: 0g
- Carbohydrates: 30g
- Fiber: 1g
- Protein: 3g
- Cholesterol: 30mg
Cherry Cobbler Bars for Easy Summer Snacking
Make sturdy, portable cherry cobbler bars perfect for picnics and parties. This recipe delivers classic cherry dessert flavor in a simple bar format.
- Prep Time: 15 min
- Cook Time: 40 min
- Total Time: 55 min
- Yield: 16 bars 1x
- Category: Dessert
- Method: Baking
- Cuisine: American
- Diet: Vegetarian
Ingredients
- 1 1/2 cups all-purpose flour
- 1/2 cup granulated sugar
- 1/2 teaspoon baking powder
- 1/4 teaspoon salt
- 1/2 cup (1 stick) cold unsalted butter, cut into cubes
- 1 large egg
- 1 teaspoon vanilla extract
- 1 (21 ounce) can cherry pie filling
- 1/4 cup quick-cooking oats
- 2 tablespoons packed brown sugar
Instructions
- Preheat your oven to 350 degrees Fahrenheit. Line an 8×8 inch baking pan with parchment paper, leaving an overhang on two sides for easy removal.
- In a medium bowl, whisk together the flour, granulated sugar, baking powder, and salt.
- Cut in the cold butter using a pastry blender or your fingers until the mixture resembles coarse crumbs.
- In a small bowl, whisk the egg and vanilla extract. Add this to the flour mixture and mix until just combined into a dough.
- Press two-thirds of the dough evenly into the bottom of the prepared pan to form the crust.
- Spread the entire can of cherry pie filling over the crust layer.
- In a small bowl, combine the remaining one-third of the dough mixture with the quick-cooking oats and brown sugar. Crumble this topping evenly over the cherry layer.
- Bake for 35 to 40 minutes, or until the topping is golden brown and the filling is bubbly.
- Let the bars cool completely in the pan on a wire rack before lifting them out using the parchment paper overhang.
- Cut into squares for serving your summer snacks.
Notes
- For cleaner cuts, chill the cooled bars for at least one hour before slicing.
- If you prefer a firmer crust, chill the dough for 15 minutes before pressing it into the pan.
- This fruit bar recipe holds up well at room temperature for several hours, making it ideal for outdoor events.
Nutrition
- Serving Size: 1 bar
- Calories: 210
- Sugar: 18
- Sodium: 85
- Fat: 10
- Saturated Fat: 6
- Unsaturated Fat: 4
- Trans Fat: 0
- Carbohydrates: 30
- Fiber: 1
- Protein: 3
- Cholesterol: 30