
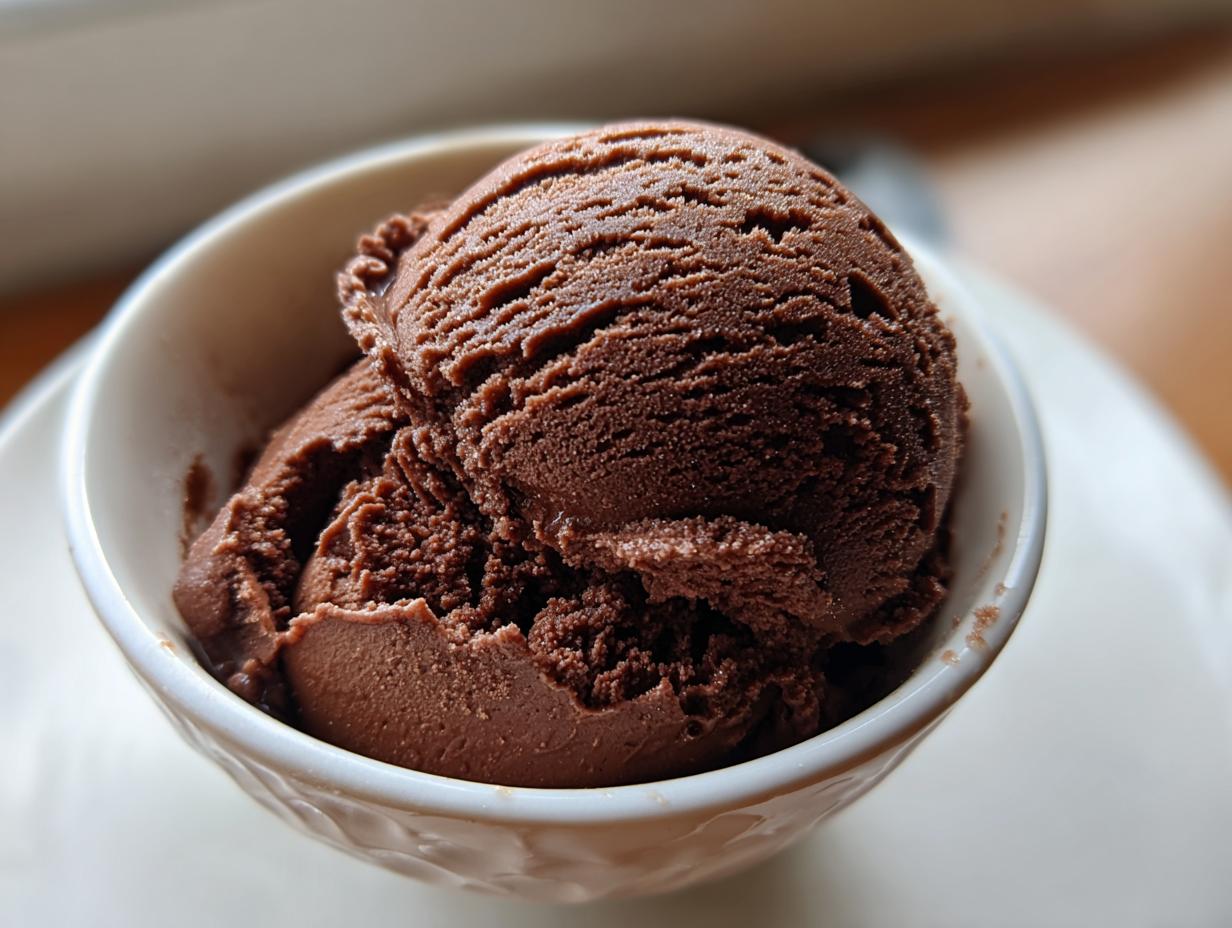
Sometimes, you just crave that sleek, elegant vibe—the kind you find at a tiny trattoria in Rome, but without booking a flight. That’s exactly what this chocolate gelato recipe delivers. When I first started Dishicious, I wanted to prove you don’t need complicated techniques or three hours of churning time to achieve true Italian sophistication right in your Chicago apartment. This recipe is the blueprint for that feeling.
Forget everything you think you know about heavy, air-whipped ice cream. We’re making authentic Italian-style gelato here. The density is incredible, the flavor is an all-out blast of intense chocolate, and because we use less fat than traditional recipes, it feels incredibly luxurious yet totally guilt-free. It’s efficient elegance, bottled up in a scoop. Trust me, once you nail this foolproof custard base, you’ll be skipping straight over the store-bought tubs. Plus, you can find more of my streamlined dessert projects right over here in my dessert recipe index.
- Why This Chocolate Gelato is Your New Gourmet Dessert
- Ingredients for Authentic Chocolate Gelato
- Essential Equipment for Perfect Chocolate Gelato
- How to Prepare Your Intense Chocolate Gelato Base
- Chilling and Churning: Making the Best Chocolate Gelato
- Tips for Perfect Chocolate Gelato Consistency
- Ingredient Notes and Substitutions for Your Chocolate Gelato
- Serving Suggestions for This Gourmet Dessert
- Frequently Asked Questions About Making Chocolate Gelato
Why This Chocolate Gelato is Your New Gourmet Dessert
When you want that real Italian experience, you need gelato, not just ice cream! This recipe strips away the fluff and gets right to the heart of what makes an amazing gourmet dessert. We aren’t adding loads of heavy cream here; we are focusing on pure, deep flavor and that signature texture. It’s all about streamlined elegance, which means less time worrying and more time enjoying.
- It delivers serious sophistication perfect for an elevated summer evening treat.
- The fat content is naturally lower than standard ice cream, making it feel lighter.
- The texture is silkier and denser—it melts slower on your tongue.
Achieving Intense Chocolate Flavor in Your Chocolate Gelato
Look, if you skimp on the chocolate quality, you might as well grab a cheaper tub from the freezer aisle. The magic here comes from using a cocoa powder that packs a punch and making sure your solid chocolate bar is at least 70% cacao. That’s how we lock in that deep, intense chocolate profile. It’s worth sourcing the good stuff, trust me on this one.
The Science Behind Creamy Treats Texture
This is where we separate ourselves from the big, fluffy tubs. Traditional ice cream uses a ton of fat, which freezes up harder. Gelato uses more milk and less cream. That lower fat content means your final product freezes just slightly warmer and has a much silkier mouthfeel. It’s denser, it’s smoother, and it’s why those delightful creamy treats just feel more refined.
Ingredients for Authentic Chocolate Gelato
When you run a tight kitchen operation, you can’t afford ingredient guesswork. Everything listed here serves a specific purpose in hitting that perfect density and rich profile. Don’t try to eyeball these measurements, especially the sugars—precision is where the elegance comes from!
- 300 ml whole milk
- 150 ml heavy cream
- 100 g granulated sugar
- 50 g dextrose (this helps with the smooth freezing point!)
- 50 g high-quality unsweetened cocoa powder
- 50 g dark chocolate (70% cacao minimum), chopped finely
- 2 large egg yolks
- Pinch of salt
Seriously, make sure that dark chocolate is at least 70%. It makes a world of difference in the final flavor impact.
Essential Equipment for Perfect Chocolate Gelato
Since we’re treating this like a project that needs the right tools, don’t skip setting up your workspace first. You don’t need thirty specialty gadgets, but a couple of items here are non-negotiable if you want that restaurant-quality result.
The absolute MVP for making true chocolate gelato is, of course, your ice cream or gelato maker. Make sure you read the manual for your specific model before you start the custard, especially if you have one where the bowl needs freezing overnight—that throws a wrench into the project timeline!
Here are the few items I always pull out when making this italian ice cream:
- A good quality fine-mesh sieve. This is crucial for straining out any tiny bits of cooked egg or undissolved cocoa dust.
- A sturdy medium saucepan. We’re gently heating the milk base, so nothing too flimsy.
- A reliable instant-read or candy thermometer. Look, I love intuition, but when we’re cooking eggs to 175°F, precision is efficiency. It prevents curdling and ensures food safety!
- A large bowl set over an ice bath for rapid cooling. This stops the custard from overcooking instantly.
Get this gear ready, and the rest of the process just flows smoothly. It’s all about preparation!
How to Prepare Your Intense Chocolate Gelato Base
Okay, this is the project centerpiece: making the perfect custard base. Many people get nervous around this stage, especially with the eggs, but if you treat it like a timed checklist, it’s totally manageable. Heat your milk, cream, half the sugar, and the dextrose until it’s just steaming—we absolutely do not want a boil, that ruins everything! While that’s warming, whisk your remaining dry stuff, cocoa, and those two egg yolks together in a bowl until it looks like thick, dark mud.
I remember the first time I made a baked custard from scratch. I dumped the hot milk right into the yolks, and—*poof*—I had dessert soup instead of smooth custard. That’s why the tempering step is vital here. It’s how we raise the temperature of the eggs slowly so they don’t seize up. If you want my deep dive on getting custards just right, this process is actually nearly identical to how I handle my flawless custard pie filling.
Once that base is tempered, pop it back on the stove and watch it like a hawk. We are aiming for 175°F (or when it coats the back of a wooden spoon). Once it hits that mark, kill the heat immediately and stir in that chopped dark chocolate until it vanishes. Then, get it into that ice bath fast—that halts the cooking process right there. This slow progression is what guarantees that dense, gourmet dessert texture.
Tempering Eggs: A Key Step for Smooth Chocolate Gelato
Tempering is simple: You are slowly introducing heat to the eggs so they smoothly integrate into the dairy base without scrambling. You ladle about a cup of the warm milk mixture *very slowly* into your egg/cocoa bowl while whisking constantly, nonstop. Once that is incorporated (it will look slightly looser), you pour that entire egg mixture back into the saucepan with the rest of the warm milk. Keep whisking! This careful process ensures your final chocolate gelato is just pure silk.
Chilling and Churning: Making the Best Chocolate Gelato
Listen, I know you’re excited to taste this, but here is where my project management approach demands patience: the chilling phase. This isn’t something you rush. Once that base is strained and sitting in the ice bath, cover it up and plan on forgetting about it for at least four hours, but honestly, overnight is where the magic happens.
That long chill time allows all those lovely chocolate solids and sugars to fully hydrate. It truly develops the deep profile you expect from top-tier italian ice cream. Once it’s ice cold, dump it into your churner. Follow your machine’s directions—it moves fast compared to custard bases for baked goods. If you’re looking for other chilled dessert projects, my easy banana ice cream is a great no-churn option for busy nights, but for this intense chocolate experience, churning is the way to go.
Tips for Perfect Chocolate Gelato Consistency
One of the biggest pitfalls when moving from homemade ice cream to true Italian gelato is getting the texture wrong. You want that fantastic dense mouthfeel, not a rock-hard frozen block. After churning, your gelato will feel very soft, almost too runny. Don’t panic! Unlike American ice cream, gelato isn’t meant to be eaten straight out of a deep freeze.
Transfer the churned mixture into a freezer-safe, airtight container. Now it needs a quick hardening session—about 1 to 2 hours in the coldest part of your freezer. This ‘curing’ time is essential to get it perfectly scoopable. If you keep it in longer than that, it gets extremely firm.
Here’s the final key for that elegant Italian experience: serve it slightly warmer than you would regular ice cream. Take it out of the freezer about 5 to 10 minutes before you plan to serve it. This slight warming allows those lower fat solids to relax, giving you that signature, silky smooth texture that melts perfectly on your tongue instead of clinging on like a block of ice. That’s how you manage the final delivery of this gourmet dessert!
Ingredient Notes and Substitutions for Your Chocolate Gelato
When trying to capture that pure, intense chocolate experience, every ingredient choice matters, especially since we are skipping heavy stabilizers. You absolutely cannot skimp on the cocoa powder. If it’s dull or dusty, your final flavor will be dull. Use the highest quality you can find—it’s the primary driver of flavor here.
Now, about the sugar situation: I specified both granulated sugar and dextrose. Dextrose is a simple sugar present in corn that has a lower freezing point than regular table sugar. Why use it? Because it helps keep the gelato softer and more elastic, ensuring it’s easily scoopable straight from the freezer. If you don’t have it, just replace the 50g of dextrose with 50g more granulated sugar, but you MUST remember to let the finished gelato temper on the counter for a full 10 minutes before serving. That extra sugar replacement will freeze slightly harder.
Serving Suggestions for This Gourmet Dessert
So, you’ve nailed the texture, you’ve got that deep, pure chocolate blast—now, how do we present this masterpiece? Since this chocolate gelato is so intensely flavored, you don’t want any side pairings fighting it for attention. We are aiming for elegance here, keeping that Italian aesthetic front and center. It sits perfectly on its own, frankly, but if you want to dress the plate up a little, I have a few methods I use when friends drop by.
Forget heavy sauces! A few thinly sliced, perfect crimson strawberries or a scattering of raspberries work beautifully because their slight tartness cuts through the richness of the cocoa. If you want a little crunch, serving it alongside a couple of homemade almond biscotti is the absolute perfect move. Dunking biscotti into rich, slightly melting italian ice cream? Now *that’s* an evening well spent.
For a truly sophisticated finish, especially after a heavy meal, serve just a small scoop alongside a tiny sip of espresso—a proper *caffè freddo* vibe. It cleanses the palate while still giving you that last luxurious hit of chocolate. If you’re looking for other recipes that carry that same elegant, simple Italian flair, you should check out my recipe for Italian Love Cake; it’s a different kind of sweet finish but just as satisfying!
Frequently Asked Questions About Making Chocolate Gelato
I get a ton of emails after people try this recipe, usually asking how to troubleshoot texture or storage. Making true chocolate gelato is simple once you understand the science, but sticking to the plan ensures success. You’ve already built a fantastic base, so let’s make sure the payoff is perfect.
Can I make this without an ice cream/gelato machine?
I’m going to be honest here: the density required for authentic italian ice cream needs agitation while freezing. If you try the ‘freeze and stir’ method, you will absolutely end up with an icy mess, not that signature silky smoothness. I dedicated this method to working through the machine because it’s the only way to guarantee those beautiful creamy treats. If you’re looking for no-churn options, you’ll need a totally different recipe, like my posts on quick, easy dinners—totally different category!
Why is my finished gelato icy instead of perfectly scoopable?
If your gelato is icy, it almost always boils down to one of two things: either you skipped the long overnight chill time (the base wasn’t fully hydrated), or you used too much plain white sugar instead of the dextrose. That dextrose really helps keep the final product flexible. If it’s a little icy, just let it warm up on the counter for a full 10 minutes before you try to scoop; that often fixes the issue right away.
How long does homemade chocolate gelato last in the freezer?
Because we aren’t using industrial stabilizers, fresh is always best. I try to finish it within a week. Store it in a very shallow, airtight container—the shallower, the better—to limit air exposure. Make sure it’s pressed right up against plastic wrap on the surface before sealing the lid. This helps keep that marvelous intense chocolate flavor locked in.
PrintIntense Dark Chocolate Gelato

Make authentic, dense Italian gelato with deep chocolate flavor. This recipe yields a lower-fat, intensely satisfying gourmet dessert perfect for an elegant summer evening.
- Prep Time: 20 min
- Cook Time: 15 min
- Total Time: 4 hours 35 min
- Yield: About 1 quart 1x
- Category: Dessert
- Method: Churning
- Cuisine: Italian
- Diet: Vegetarian
Ingredients
- 300 ml whole milk
- 150 ml heavy cream
- 100 g granulated sugar
- 50 g dextrose
- 50 g high-quality unsweetened cocoa powder
- 50 g dark chocolate (70% cacao minimum), chopped
- 2 large egg yolks
- Pinch of salt
Instructions
- In a medium saucepan, combine the milk, heavy cream, half of the sugar, and the dextrose. Heat over medium heat until steaming, but do not boil. Remove from heat.
- In a separate bowl, whisk together the remaining sugar, cocoa powder, and salt. Whisk in the egg yolks until smooth.
- Temper the egg mixture by slowly whisking about one cup of the warm milk mixture into the egg bowl.
- Pour the tempered egg mixture back into the saucepan with the remaining milk mixture.
- Return the saucepan to medium-low heat. Stir constantly with a wooden spoon or spatula until the mixture thickens slightly and coats the back of the spoon (reaching about 175°F or 80°C). Do not let it boil.
- Remove the custard from the heat. Stir in the chopped dark chocolate until it is completely melted and smooth.
- Strain the mixture through a fine-mesh sieve into a clean bowl set over an ice bath. Stir occasionally until cooled down.
- Cover the bowl and chill the base in the refrigerator for at least 4 hours, or preferably overnight. This step is essential for the best texture.
- Churn the chilled base in your ice cream maker according to the manufacturer’s instructions for gelato.
- Transfer the churned gelato to an airtight container and freeze for 1 to 2 hours to firm up to the desired dense, scoopable consistency.
Notes
- For the smoothest texture, ensure your dark chocolate is finely chopped before adding it to the warm base.
- Gelato is traditionally served slightly warmer than American ice cream, giving it a softer, silkier mouthfeel. Allow it to sit at room temperature for 5 minutes before serving.
- Use a high-quality cocoa powder for the most intense chocolate flavor.
Nutrition
- Serving Size: 1/2 cup
- Calories: 280
- Sugar: 30
- Sodium: 45
- Fat: 12
- Saturated Fat: 7
- Unsaturated Fat: 5
- Trans Fat: 0
- Carbohydrates: 38
- Fiber: 3
- Protein: 7
- Cholesterol: 60