
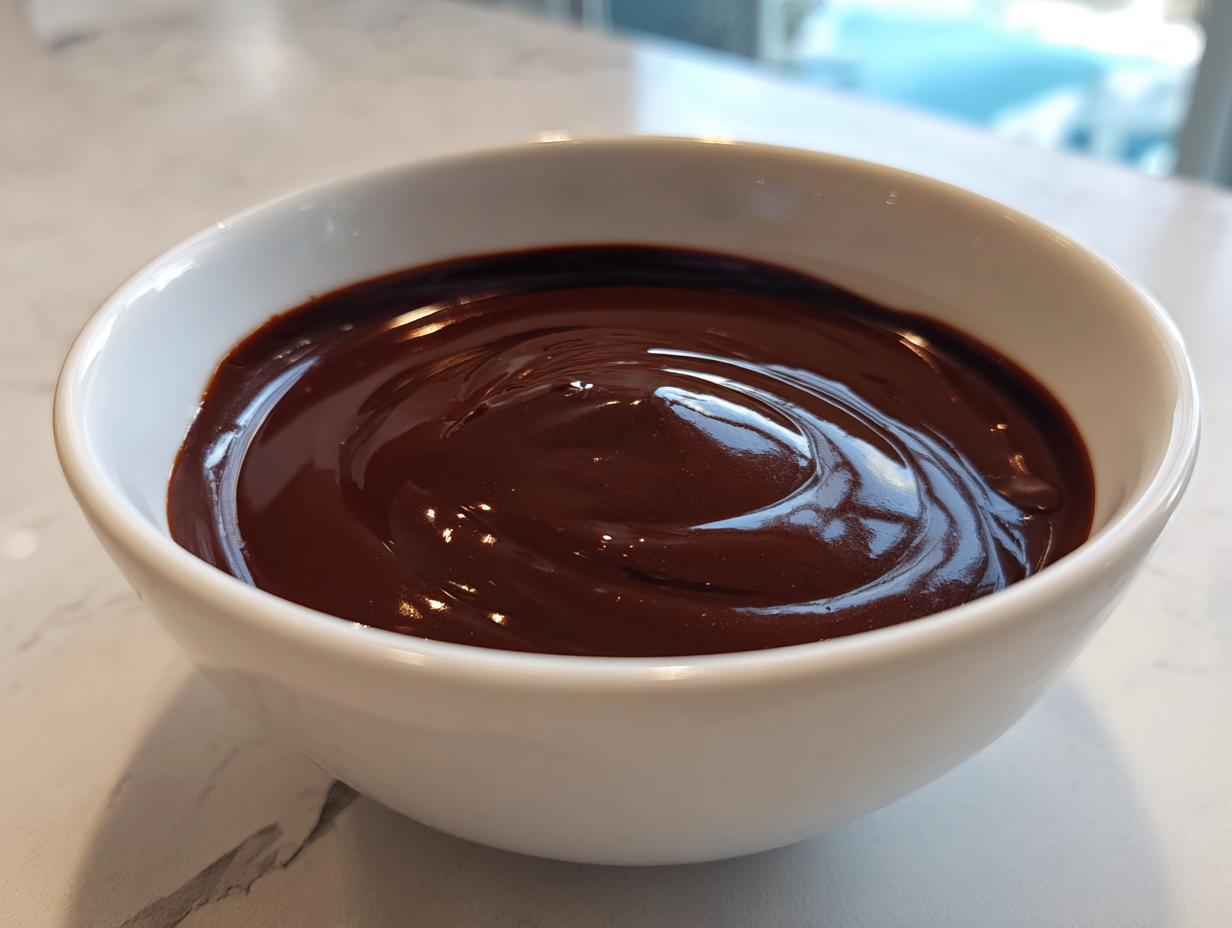
Forget those watery, bland syrups you buy at the store! Seriously, we’re kicking those to the curb today. If you want to upgrade every scoop of ice cream, every stack of pancakes, or even just dip a strawberry in liquid happiness, you need the right foundation. That foundation starts right here with this foolproof, **chocolate sauce recipe**. I developed this focusing exactly on Leo’s philosophy here at Dishicious—getting maximum flavor and that gorgeous, glossy texture without wasting all night in the kitchen. This is purely pantry staples, quick stove action, and zero running around for specialty ingredients. Trust me when I say once you make this **Homemade Chocolate Sauce**, you’ll never reach for a jar again!
- Why This Chocolate Sauce Recipe is Your New Go-To Dessert Topping
- Ingredients for the Foolproof Chocolate Sauce Recipe
- Step-by-Step Stovetop Chocolate Sauce Instructions
- Tips for the Best Chocolate Sauce with Cocoa Powder
- Versatile Uses for Your Homemade Chocolate Sauce
- Making a Best Homemade Fudge Sauce Variation
- Storage and Reheating for This Chocolate Sauce Recipe
- Frequently Asked Questions About Making Easy Chocolate Syrup
- Share Your Chocolate Sauce Recipe Creations
Why This Chocolate Sauce Recipe is Your New Go-To Dessert Topping
Listen, my whole goal here is to make your life easier without sacrificing flavor quality. That’s the Dishicious way, right? This sauce hits all my must-have points. It’s fast, it uses stuff most of us already have, and it looks like something you’d find in a fancy gourmet shop.
- It’s the ultimate Quick Dessert Topping—ready faster than you can decide on which ice cream to use!
- It delivers an incredible, high-shine finish, turning into a stunning Silky Smooth Chocolate Drizzle perfect for presentation.
- No weird specialty thickeners needed here; we keep it real and simple.
Speed and Simplicity: An Easy Chocolate Sauce Recipe
I am so serious when I say you blink, and it’s done. The total time from opening the pantry to having this warm, decadent topping ready is about 15 minutes. That’s efficiency you can count on when you suddenly realize you need topping for those pancakes you just threw on the griddle. It feels almost magical how fast this comes together.
Achieving That Rich and Creamy Sauce Texture
The secret to that incredible gloss—that thick, velvety look that screams “gourmet”—comes down to two things: constant whisking and adding the butter right at the end, completely off the heat. This little trick creates a truly Rich and Creamy Sauce. Plus, you can feel great knowing this is a totally natural, No Corn Syrup Chocolate Sauce. It’s pure, rich chocolate goodness!
Ingredients for the Foolproof Chocolate Sauce Recipe
This is where we keep things super simple! I love that this entire recipe relies on pantry staples. There’s nothing worse than planning a quick dessert and realizing you need one obscure ingredient. For this foolproof **chocolate sauce recipe**, we’re using just a few things to get maximum flavor and that beautiful, deep chocolate color everyone loves.
Here is what you need to pull together this stunning, glossy topping:
- 1 cup granulated sugar
- 1/2 cup unsweetened cocoa powder (Make sure it’s unsweetened, or the sauce gets way too sweet!)
- 1/4 teaspoon salt (Don’t skip this—it really wakes up the chocolate!)
- 1/2 cup water
- 1/4 cup milk or dairy-free alternative
- 1 teaspoon vanilla extract
- 1 tablespoon unsalted butter (This is completely optional, but I highly recommend it. It’s the secret to the professional shine for that Gourmet Chocolate Topping.)
Ingredient Notes and **Dairy Free Chocolate Sauce Option**
Because we all have different things kicking around in the fridge, let’s quickly talk substitutions, especially since folks often ask about making this without dairy. It’s super easy to swap things out!
If you need a Dairy Free Chocolate Sauce Option, just swap the 1/4 cup of standard milk for any unsweetened, unflavored plant milk you like—almond or soy work perfectly fine. For the butter at the end, which really helps with that mirror-like finish, you can omit it entirely, or just use an equal amount of your favorite vegan butter stick substitute. It thickens beautifully no matter what you use. We aren’t relying on the dairy for structure here, just extra richness!
Also, if you happen to be making an easy creamy peanut sauce recipe later and run out of milk, the ratio of water-to-sugar base here is so solid you could even just use water, though the texture will be slightly less rich without the milk solids.
Step-by-Step Stovetop Chocolate Sauce Instructions
Okay, now for the fun part! This is where we transform those dusty pantry items into liquid heaven on the stove. Because we are deliberately avoiding corn syrup and any weird gums, the technique is everything to get that perfect, **Silky Smooth Chocolate Drizzle**. Remember what Leo says about optimizing the process? We’re doing that right now to ensure zero graininess and maximum flow. This whole stove process takes just about 10 minutes, so keep an eye on it!
We start by building the base, making sure we incorporate everything slowly so we don’t end up with little cocoa pebbles floating around. It’s all about whisking ahead of time before the temperature starts climbing. I really think that pre-mixing step is what makes this **Homemade Chocolate Sauce** recipe so dependable compared to others.
Mixing Dry Ingredients and Initial Heating for Your **Chocolate Sauce Recipe**
First things first: grab that medium saucepan. You absolutely have to whisk your sugar, your cocoa powder, and that tiny pinch of salt together *before* anything wet goes in. Think of it like laying the groundwork for a perfect house! Once that’s totally uniform and looks like nice, dark dirt, then you add your water and your milk. Now, whisk it again until you see zero dry spots clinging to the bottom. Once it’s smooth—and I mean *smooth*—then you can put the pan over medium heat. Just keep stirring until you see the sugar disappear and the mixture starts to barely bubble at the edges.
Simmering and Finishing Touches for a **Silky Smooth Chocolate Drizzle**
Once it starts to simmer gently, you need to drop that heat right down to low! This is super important. You only want a very low simmer for about one or two minutes—just enough time for everything to fully integrate and thicken up just a touch. You don’t want this to turn into hard candy! When that minute or two is up, immediately pull the pan right off the burner. Now is the moment for magic: stir in your vanilla and, if you’re using it, that tablespoon of cold butter. The butter melts right into this hot base, and that’s what gives you that unbelievable, mirror-like shine we are looking for. It’s the best homemade alfredo sauce recipe secret, but for chocolate!
Tips for the Best Chocolate Sauce with Cocoa Powder
I know the instructions are simple, but I want you to feel totally confident that you’re making the absolute best sauce possible. We’re talking about achieving that professional texture here, the kind that makes people ask if you bought it bottled. Since we are leaning heavily on cocoa powder, we have to treat that powder right so it doesn’t ever feel gritty.
The biggest piece of advice I can pass along is remembering the importance of that constant stirring when the sauce is on the heat—don’t walk away! That gentle agitation is vital for keeping the sugar completely dissolved. If the sugar starts to crystallize, or if you don’t whisk that dry mixture thoroughly enough at the start, you end up with a grainy texture, and totally ruins that beautifully Gourmet Chocolate Topping look.
Also, when we talk about thickness, that’s all about timing off the heat. If you want a thinner sauce, like an **Easy Chocolate Syrup** for coffee mixing, take it off the heat the second it starts to simmer. If you want something closer to a thick fudge, let it bubble gently for the full two minutes. And remember that cold butter trick? That’s pure alchemy right there; that finishing fat gives the sauce its deep, incredible gloss. If you want to see someone else nail that shine, check out this great article on dark chocolate sauce for ideas on shine too!
For general maintenance, remember you can always adjust the consistency later using ingredients you already have. If it ends up too runny, you can whisk in a tiny spoonful of cornstarch slurry (mix cornstarch with cold water first!) at the very end, but honestly, with this recipe, you should rarely need it. If it’s too thick, just stir in a teaspoon of hot water while gently warming it up. Think of this as your foundational, can’t-mess-it-up recipe, which is really what we aim for here at Dishicious. If you’re looking for ways to use your leftover sauces, maybe try my recipe for easy creamy horseradish sauce—just kidding! Stick to dessert with this one!
Versatile Uses for Your Homemade Chocolate Sauce
Honestly, the hardest part about making this amazing **chocolate sauce** is deciding what to put it on first. It’s so rich and easy that you’ll start looking for excuses to pour it over everything in sight. I think that’s why this recipe became such a staple for Leo—it solves so many dessert dilemmas instantly, meaning less time stressing and more time enjoying!
Since this sauce is perfectly balanced and doesn’t use corn syrup, it pours beautifully when warm but holds up great when chilled too. This means it’s ready for anything you throw at it. It’s truly the MVP of my dessert pantry.
Here are just a few of my favorite ways to use this decadent topping:
- It’s the classic, must-have Chocolate Topping for Ice Cream. Drizzle it on, maybe add some chopped nuts, and boom—you’ve got a fancy sundae!
- If you’re making brunch, this makes the absolute best Chocolate Sauce for Pancakes and Waffles. Forget the thin stuff; this actually clings to the ridges perfectly.
- It’s unbelievably good as a fruit dip! Strawberries, bananas, or even just some plain apple slices taste completely transformed when dipped into this glossy stuff.
- Don’t forget your coffee routine! Whisk a couple of spoonfuls into hot milk for an instant, high-quality hot chocolate, or chill it down for an amazing mocha. Forget those complicated simple syrup recipes for a day and embrace the chocolate!
The best part is that it is stable enough to use as an easy homemade chocolate glaze if you need a quick finish for pound cakes or brownies, too. It’s just so flexible, which is exactly what you want from a great pantry staple recipe.
Making a Best Homemade Fudge Sauce Variation
Okay, so maybe you’re thinking, “This is great for drizzling, but what if I want something spoon-worthy? Something that feels deeply decadent, almost like a molten brownie topping?” You’re looking for the **Best Homemade Fudge Sauce**, and yes, we can absolutely pivot this **chocolate sauce recipe** toward that thicker, richer consistency!
The beauty of this specific stovetop method is how controllable it is. Since we didn’t use corn syrup, we rely mostly on timing and sugar concentration to get that fudge texture. If you want it thick enough to cool into a sliceable topping, you just need to adjust the simmer phase slightly. Think of it as gently concentrating the flavor and the sugar structure.
The easiest way to transition this into a true fudge sauce without making it grainy is to cook it just a bit longer on low heat. Instead of pulling it off after 1 or 2 minutes of simmering, keep that gentle heat going for 3 to 4 minutes total, stirring constantly. Watch it carefully because even an extra minute can make a huge difference when it thickens up.
Another tiny trick is slightly reducing the liquid, or you can completely skip the final tablespoon of butter. If you skip the butter, the resulting sauce will set up quite a bit firmer as it chills, giving you that classic fudge texture that’s perfect when warmed back up. If you want something super gooey, though, stick to the original recipe, but let it cool completely first!
It’s so fun to see how just small tweaks turn this into exactly what you need for dessert night. If you love fussing with textures, you should check out my guide on getting the perfect chew in my caramel apple recipe—the same principles of controlling sugar moisture apply!
If you really want to see a great example of a thick, pourable hot fudge, check out what my friends over at Take Two Tapas do with theirs; sometimes seeing another approach helps you fine-tune your own technique!
Storage and Reheating for This Chocolate Sauce Recipe
So, what happens when you have nearly a cup and a half of this liquid gold left over? Because we purposefully kept this **chocolate sauce recipe** clean—no corn syrup or industrial preservatives—storage is simple, but you do need to manage expectations on thickness. This sauce is totally different from the stuff in the supermarket aisle, which stays runny forever because of additives. Here, the texture changes as it cools, which is actually a good sign!
You’ll want to transfer any leftovers into a clean, airtight container. A small mason jar works perfectly for me, but any small, sealed container will do the trick. Pop it into the refrigerator. It keeps really well this way, too. I find it lasts easily for a good week, maybe even ten days if you are dipping into it cleanly. Just remember, any time you dip a warm spoon in, you’re introducing variables, so keep the container sealed tight.
Now, when you pull it out of the fridge, guess what? It’s going to be super thick—almost like soft fudge. Don’t panic! This is exactly what happens when the sugar settles down when it’s cold. You never want to try to drizzle rock-hard sauce over ice cream, so you need to wake it back up.
Reheating for the Perfect Drizzle Consistency
Returning this sauce to its beautiful, glossy, pourable state is super easy, but you must use gentle heat. If you blast it in the microwave on high power for too long, you risk overheating the sugars and potentially scorching the bottom or making it seize up.
My preferred method, which keeps the incredible shine we worked so hard to achieve, is using the microwave in 15-second bursts. Put your jar or bowl in, zap it for 15 seconds, pull it out, and stir well. Even if it still looks a little thick, stir it—the residual heat will continue to melt the solids. You might need one more 10-second blast, but usually, that’s it. It comes right back to that perfect, smooth drizzling temperature.
If you are heating a larger batch and don’t want to use the microwave, you can gently reheat it in a small pot on the stovetop over the lowest setting, stirring constantly. If you’re heating a larger amount, you can add just a teaspoon of hot water or milk right at the beginning to help loosen it up quickly. Honestly, though, if you’re just warming up a couple of tablespoons, the microwave is your fastest, most efficient route—right in line with our goal of simple cooking here at Dishicious! It’s almost as easy as making the dressing for my easy Mexican potato side—just way sweeter, of course!
Frequently Asked Questions About Making Easy Chocolate Syrup
I totally get it—sometimes you just need the FAQ section to quickly clear up those last few niggling doubts before you dive in. We all want perfection when it comes to a perfect Easy Chocolate Sauce Recipe, right? Here are the common questions I see popping up most often about ditching the bottle and making your own incredible **Homemade Chocolate Sauce** on the stovetop.
How do I prevent my **chocolate sauce recipe** from becoming grainy?
This is the number one question about any sauce that uses granulated sugar, and it’s all about the starting line! Graininess happens when the sugar crystals never fully dissolve. Before you even think about turning on the heat, you must whisk the sugar, cocoa powder, and salt together until they look like one homogenous powder. Once you add the water and milk, whisk that mixture vigorously again for a good minute until it looks completely smooth.
The second part is heat control. You have to stir constantly once it’s on the stove, and you absolutely cannot let it tumble into a hard, rapid boil. We want a gentle simmer—just letting the sugar completely dissolve throughout the liquid. If you rush this part or boil it too hard, those undissolved sugar crystals might reappear once the sauce cools down, giving you that sandy texture we are fighting so hard to avoid. Follow those steps, and your **chocolate sauce recipe** will be beautifully glossy, not grainy!
How long does this Homemade Chocolate Sauce last?
Because we rely on simple pantry ingredients and we intentionally skip the corn syrup and stabilizers they use in commercial jarred syrups, this sauce has a natural but fantastic shelf life when stored correctly. Once you cool the sauce completely and store it in a tightly sealed, airtight container in the refrigerator, expect it to be fantastic for about one week. I’ve pushed it to ten days, but that rich, fresh flavor is best within seven days.
You’ll notice it gets quite firm when it’s chilled, almost like a spoonable paste. That’s normal! As I mentioned earlier, a quick, gentle reheat is all it needs to return to that perfect drizzling consistency. This makes it ideal for prepping ahead, meaning you always have an instant **Decadent Dessert Sauce** ready for unexpected ice cream cravings!
If you’ve ever tried to whip up a perfect creamy garlic sauce ahead of time, you understand how crucial storage is. Chocolate is a bit more sensitive with the sugar, but a week is a very safe bet for this recipe!
Share Your Chocolate Sauce Recipe Creations
Wow, you made it! If you followed along, you now have the absolute best, foolproof **chocolate sauce recipe** sitting on your counter. Seriously, give yourself a pat on the back. We managed to squeeze premium flavor and that incredible shine out of just basic pantry things, all while keeping things efficient—Leo would be proud!
Now, here’s the thing: I love hearing about how you customize things or what you topped. Did you try it over my favorite easy Mexican potato side (kidding again!)? Or maybe you finally perfected that **Silky Smooth Chocolate Drizzle** over brownies?
I really want to know! Please jump down to the comments section below and tell me how this turned out for you. Did it become your new favorite **Quick Dessert Topping**? Did the 15-minute timeline hold up on your stove? Leaving a star rating helps everyone else see how reliable this recipe is. If you have any lingering questions, or just want to share a picture of your masterpiece, don’t hesitate to reach out via my contact page—I read every single note!
PrintFoolproof Silky Smooth Chocolate Sauce Recipe (Cocoa Powder)
Make rich, velvety homemade chocolate sauce quickly using simple pantry staples like cocoa powder. This recipe delivers a glossy, decadent topping perfect for ice cream, pancakes, or fruit dipping.
- Prep Time: 5 min
- Cook Time: 10 min
- Total Time: 15 min
- Yield: About 1 1/2 cups 1x
- Category: Dessert Topping
- Method: Stovetop
- Cuisine: American
- Diet: Vegetarian
Ingredients
- 1 cup granulated sugar
- 1/2 cup unsweetened cocoa powder
- 1/4 teaspoon salt
- 1/2 cup water
- 1/4 cup milk or dairy-free alternative
- 1 teaspoon vanilla extract
- 1 tablespoon unsalted butter (optional, for extra shine)
Instructions
- In a medium saucepan, whisk together the sugar, cocoa powder, and salt.
- Add the water and milk to the saucepan. Whisk until the mixture is smooth and no lumps remain.
- Place the saucepan over medium heat. Stir constantly until the sugar dissolves and the mixture begins to simmer.
- Reduce the heat to low and let it simmer gently for 1 to 2 minutes, stirring occasionally. Do not boil rapidly.
- Remove the saucepan from the heat. Stir in the vanilla extract and the butter, if using, until fully melted and incorporated.
- Pour the sauce into a heatproof jar or bowl. Allow it to cool slightly before using. The sauce will thicken as it cools.
Notes
- For a dairy-free option, substitute the milk with an equal amount of unsweetened almond or soy milk, and omit the butter or use a vegan butter substitute.
- To achieve maximum gloss and shine, stir in the cold butter off the heat at the very end.
- If the sauce becomes too thick after cooling, reheat it gently on the stovetop or in the microwave for a few seconds, stirring well.
- This sauce works well as a base for homemade hot chocolate; simply whisk 2-3 tablespoons of sauce into 1 cup of hot milk.
Nutrition
- Serving Size: 2 tablespoons
- Calories: 110
- Sugar: 18g
- Sodium: 25mg
- Fat: 2g
- Saturated Fat: 1g
- Unsaturated Fat: 1g
- Trans Fat: 0g
- Carbohydrates: 23g
- Fiber: 1g
- Protein: 1g
- Cholesterol: 5mg