
Let’s be honest, making cheesecake feels like walking a tightrope, right? You’re always bracing yourself for those dreaded surface cracks, and who has time to mess around with assembling a whole water bath setup? Trust me, I get it. That’s why we engineered this specific cheesecake recipe. It delivers that ultra-rich, velvety, restaurant-quality experience without any of the usual drama. We focused on simplifying every complex step, just like our founder Leo does over at Dishicious—turning something intimidating into something surprisingly simple and foolproof for your family table. You are going to love how easy this turns out!
- Why This is the Best Easy Cheesecake Recipe for Beginners
- Ingredients for Your No-Crack Cheesecake Recipe
- Step-by-Step Instructions for the Perfect Cheesecake Recipe
- Tips for the Ultimate Cheesecake Recipe
- Serving Suggestions for Your Homemade Baked Cheesecake
- Storage and Reheating Instructions for This Cheesecake Recipe
- Frequently Asked Questions About This Cheesecake Recipe
- Estimated Nutritional Data for This Cheesecake Recipe
- Share Your Experience with Our Cheesecake Recipe
Why This is the Best Easy Cheesecake Recipe for Beginners
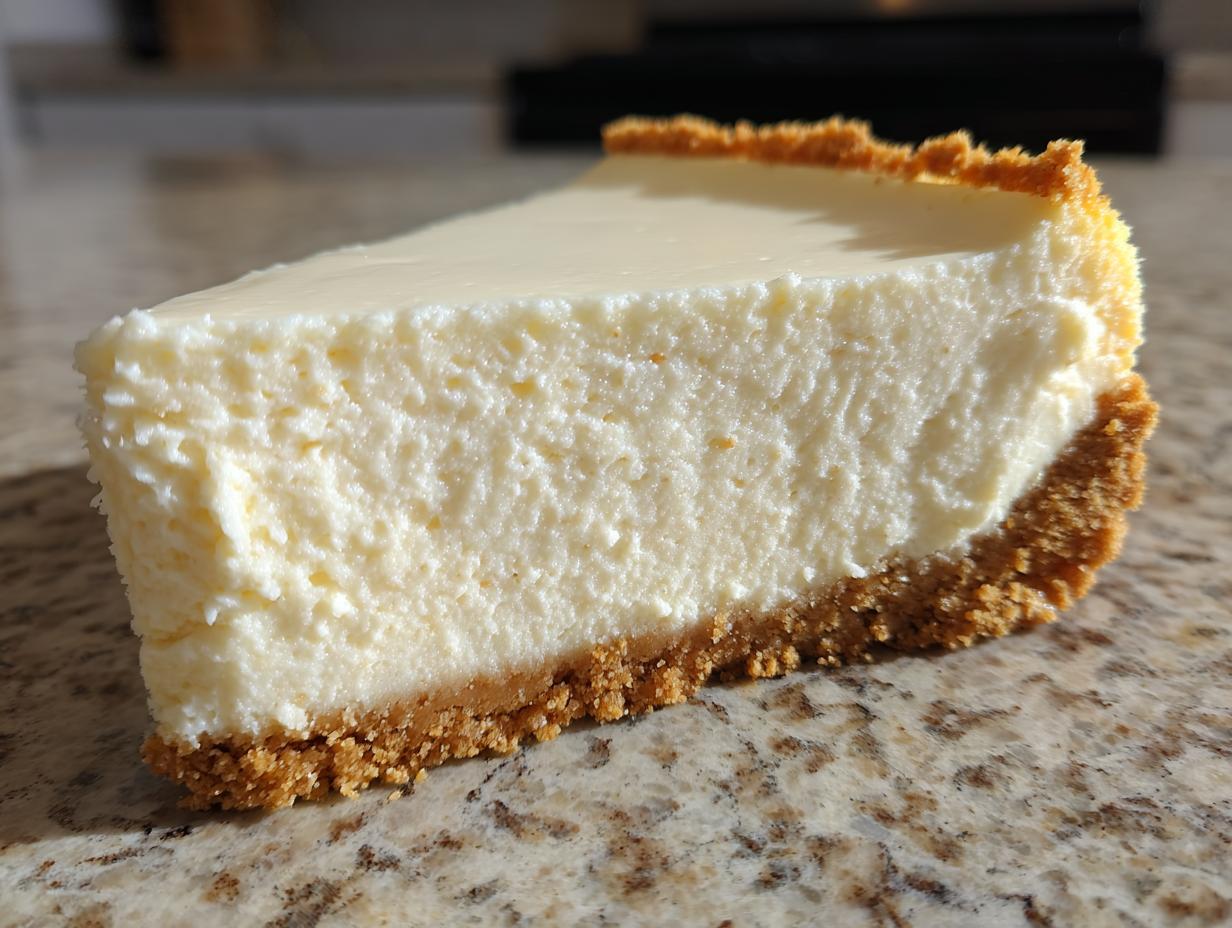
If you’ve avoided baking cheesecake because it seems too fussy, then this is absolutely your moment! This recipe cuts out all the unnecessary stress. We skip the dreaded water bath entirely—seriously, toss that idea out your window! This specific approach guarantees that beautiful, non-cracked surface you see in bakeries. It truly is the Easy Cheesecake Recipe I recommend to everyone new to baking. I spent ages testing out methods until I found the sweet spot where complexity disappeared, leaving only that incredible, creamy result.
This recipe is designed to be your go-to Classic Cheesecake for Beginners. You’ll get results that look like they took hours or required crazy techniques, but you and I will know the secret is actually in our streamlined process.
Achieving Rich and Velvety Cheesecake Texture
Our goal here isn’t just a cheesecake; it’s a Restaurant Quality Cheesecake experience. We achieve that dense, unbelievably smooth, and velvety texture primarily through what you *don’t* do. We are incredibly strict about not overmixing the filling, especially after the eggs go in.
The second secret? A very slow cooling process right in the oven after turning it off. That gradual temperature shift is what sets the structure gently, keeping those cracks away and locking in that perfect richness we crave in our dessert recipes.
Ingredients for Your No-Crack Cheesecake Recipe
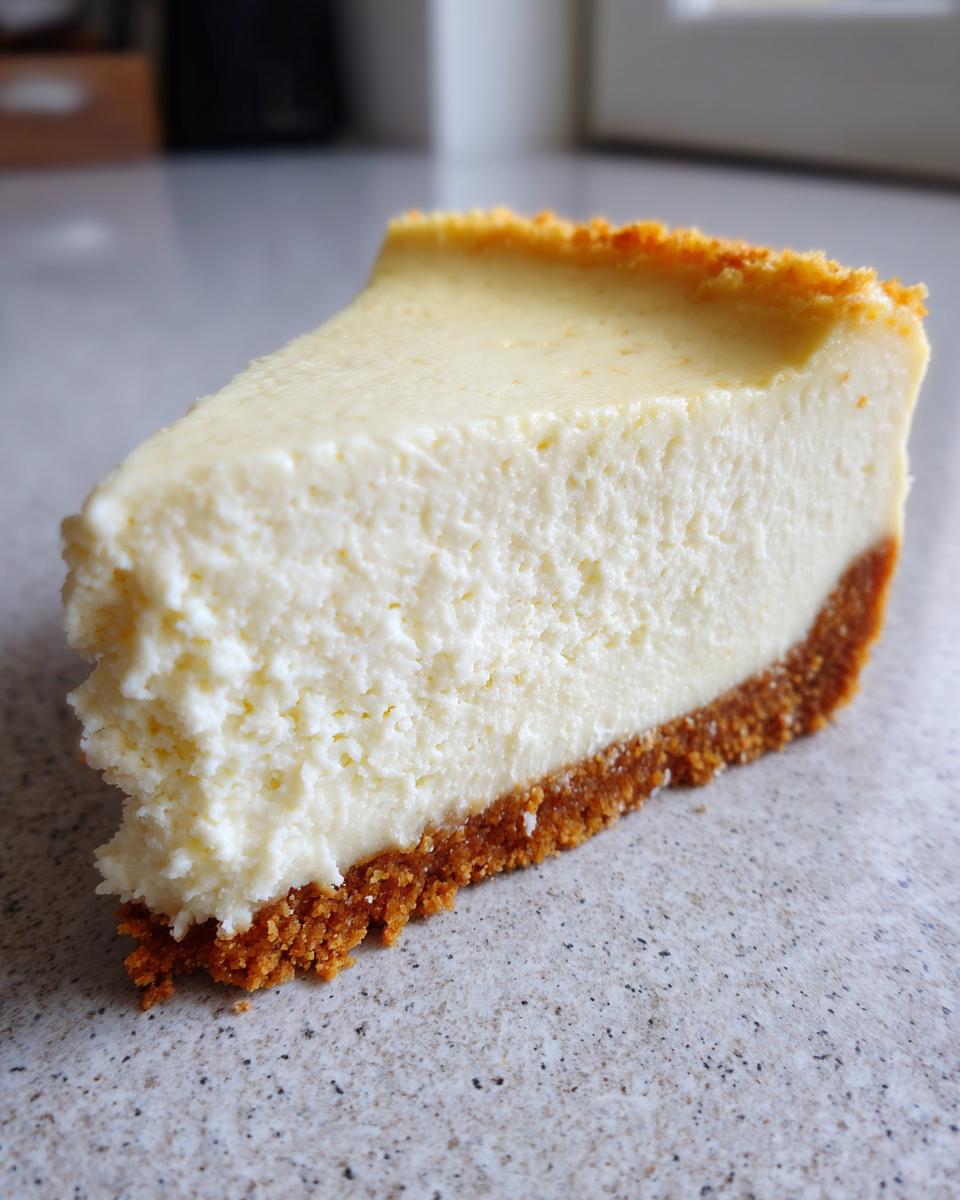
Okay, grabbing the right ingredients is half the battle won when tackling a cheesecake recipe that refuses to crack. Don’t try to shortcut this! Temperature is super important here, so make sure that cream cheese isn’t cold straight from the fridge. We want it soft and pliable so we can get that totally smooth base—we hate lumps!
For the best texture, you simply must use full-fat cream cheese. Anything less fatty just won’t give you that classic, rich mouthfeel we are aiming for. It’s the backbone of this whole decadent experience. Check out these requirements for the crust and the filling below!
Simple Graham Cracker Crust Ingredients
- 1 1/2 cups graham cracker crumbs
- 1/4 cup granulated sugar (for crust)
- 6 tablespoons unsalted butter, melted
Creamy Cheesecake Filling Ingredients
These amounts are spot on for a 9-inch springform pan, making sure the filling sets perfectly with that lovely, dense structure.
- 3 (8 ounce) packages full-fat cream cheese, softened (See? Told you about the fat content!)
- 1 1/2 cups granulated sugar (for filling)
- 1 teaspoon vanilla extract
- 1/4 cup sour cream
- 3 large eggs
If you’re looking for other ways to incorporate cream cheese into your baking—like in these amazing cream cheese chicken taquitos—let me know! But for this cheesecake, stick to the list!
Step-by-Step Instructions for the Perfect Cheesecake Recipe
Now for the fun part—actually putting the puzzle together! Follow these steps exactly, and I promise you’ll master this Creamy Cheesecake Tutorial. Every action is small but mighty in preventing the dreaded crack. We’re keeping the mixing gentle and the cooling slow, which is how we skip the water bath entirely. Get that oven preheating to 325°F (160°C) while you get organized!
Crust Preparation and Initial Bake
First up is our simple graham cracker base. You’ll mix those crumbs with the small amount of sugar and then pour in the melted butter. Mix it up until it looks like wet sand—you need that perfect, moist consistency. Press it firmly and evenly right into the bottom of your 9-inch springform pan. Don’t be shy here; pressing hard ensures you get a sturdy base that won’t crumble when you slice it later. Pop that pan in the oven for just 10 minutes. Once it’s done, pull it out and let it cool down a little while you whip up the filling.
Mixing the Cheesecake Filling: Avoiding Air Bubbles
This step is where we build trust, focusing only on smooth cream cheese first! Use your mixer on low speed and beat the softened cream cheese until it’s completely lump-free and silky smooth. Scrape those sides down! Next, slowly beat in your sugar. Add the vanilla and sour cream next. Here’s the big secret for no cracks: add your eggs one at a time. You only mix on *low* speed after each egg, just until you see that yellow disappear. Stop the second the last speck of egg yolk vanishes! Seriously, don’t chase after every single bubble; that air is the enemy of a smooth top.
Baking and Slow Cooling for Cheesecake Success
Pour that beautiful batter over your crust and gently tap the whole pan on the counter a couple of times. Just a couple! This knocks out any *big* air pockets that might have snuck in. Bake it for about 55 to 65 minutes. You’ll know it’s ready when the sides are set, but the very center—about a two-inch circle—still has a slight wobble when you nudge the pan. Now, resist the urge to rush! Turn the oven off, prop the door open about two inches, and just leave the cheesecake inside to cool slowly for a full hour. This gradual cool-down is the real trick to avoiding separation and cracks, which is exactly how we managed this cheesecake recipe without that messy water bath. You can check out methods like the one detailed at Natasha’s Kitchen, but trust me, the slow cooling step is key.
After that hour in the oven, take it out and let it come fully to room temperature on the rack. Then, cover it up gently and send it to the fridge for at least six hours, but overnight is always better for that ultimate creamy texture. Don’t forget to check out how I organize my other recipes, including tips for my twice-baked potatoes!
Tips for the Ultimate Cheesecake Recipe
Now that you’ve mastered the baking and cooling, let’s talk about those little things that turn a great dessert into the best cheesecake recipe ever. It’s those small details that make the difference between a good homemade cake and one that rivals anything you’d get at a fancy spot. These little habits are what convinced me I could finally nail this dessert every single time.
Ingredient Temperature and Mixing Technique
I cannot stress this enough: your cream cheese has to be truly room temperature! If it’s even slightly cold when you start, you will end up with lumps, no matter how long you beat it. Lumps mean you mix longer, and mixing longer means more air. More air means cracks in your final cheesecake recipe surface. So, let that cheese sit out for at least two hours. Keep that mixer speed on low, especially when those eggs are incorporated. We are gently persuading these ingredients to combine, not whipping them into a frenzy!

Simple Variations for This Cheesecake Recipe
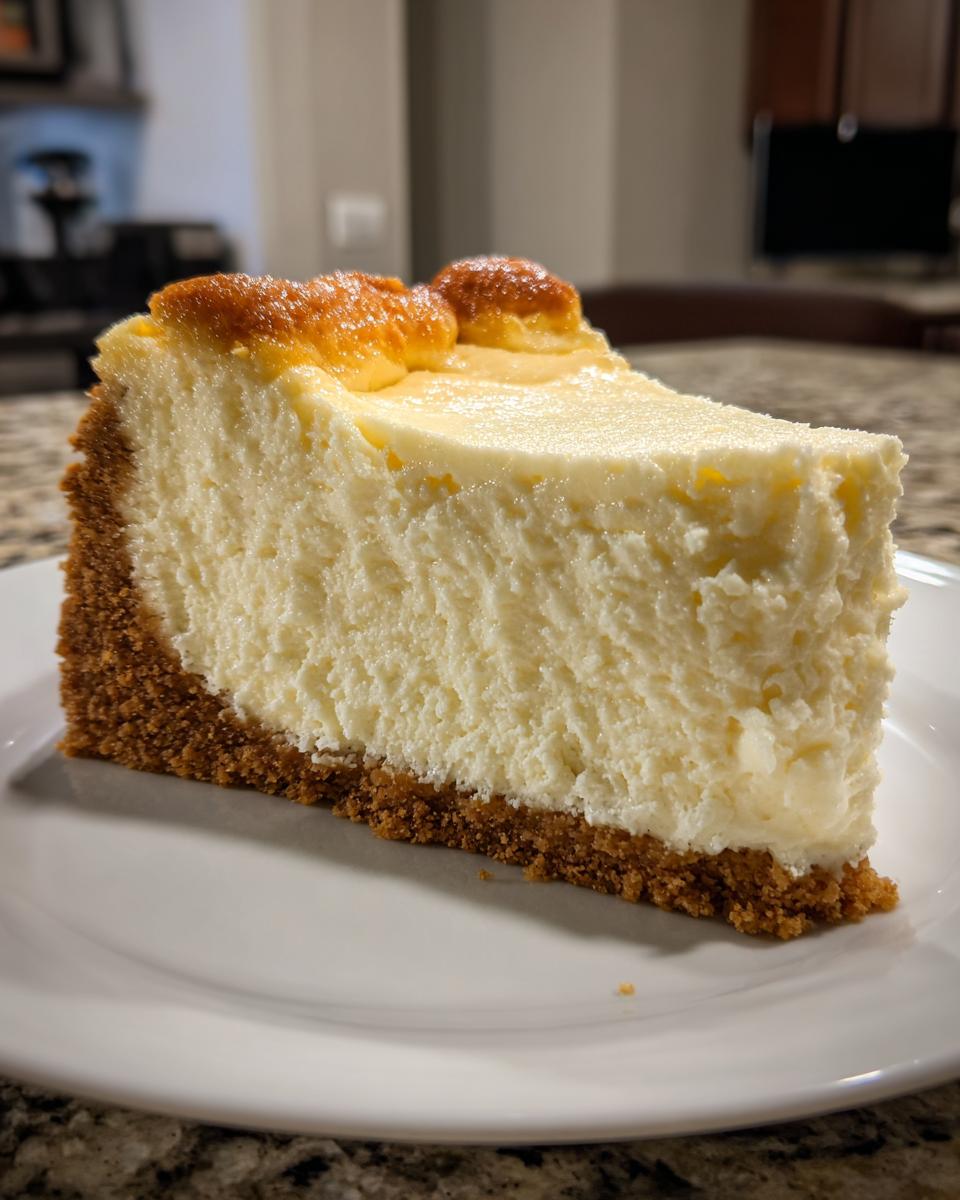
If you want to lean into that dense, classic structure, try adding a little zest and juice from one lemon to the filling when you add the sour cream. That instantly gives you that fantastic, tangy feel associated with a true New York Style Cheesecake. Also, don’t feel tied only to graham crackers for the crust! You can swap those out anytime for vanilla wafers or even shortbread cookies if you happen to have some buttery ones lying around. It’s still a simple base, just a little flavor twist!
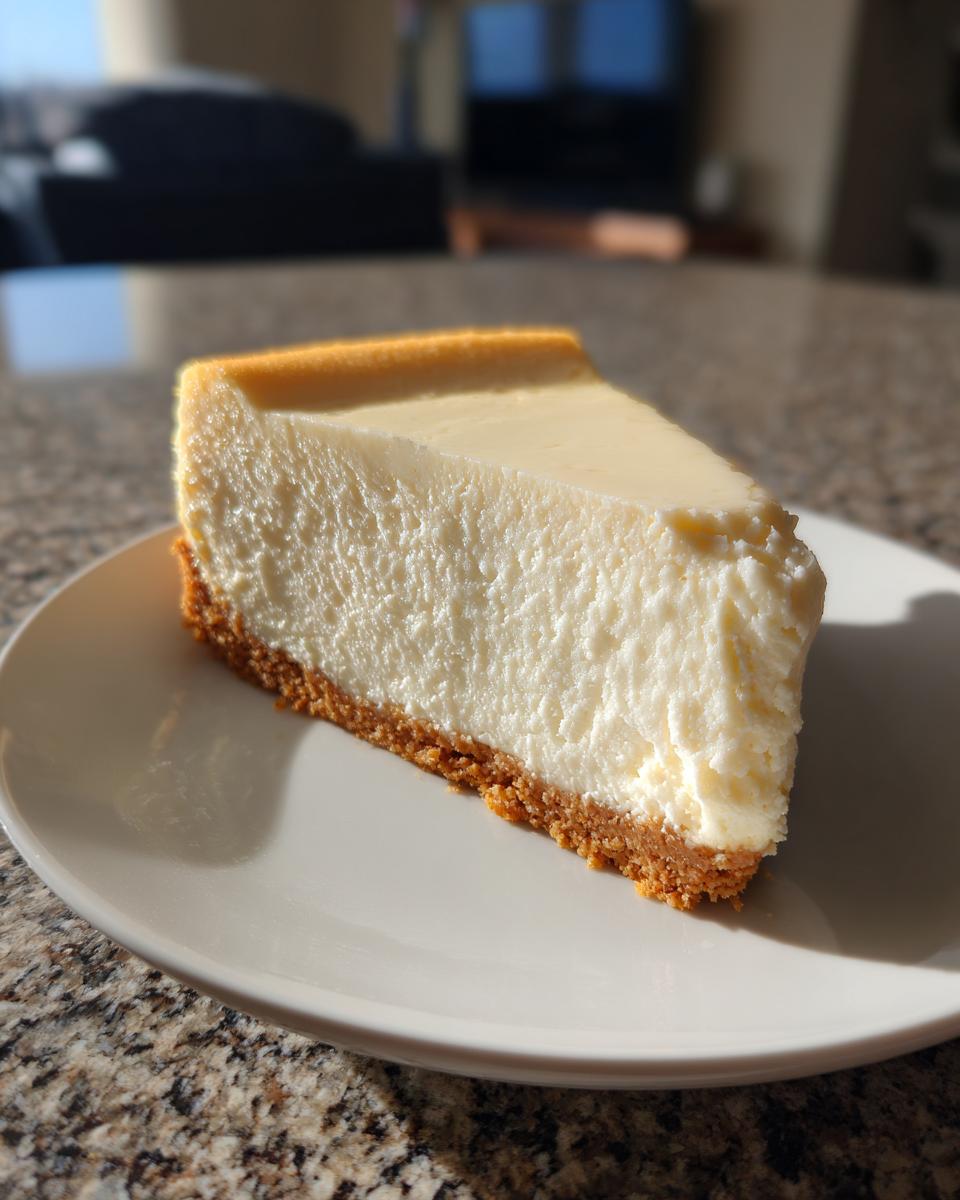
Serving Suggestions for Your Homemade Baked Cheesecake
Okay, the hard part is done and your beautiful, crack-free cheesecake is chilling. Now we get to the fun part: dressing up this Family Favorite Dessert! Since this is such a rich and decadent base, sometimes less is truly more. A simple topping really lets that creamy texture shine through.
My absolute favorite? Just a fantastic warm berry compote. Think cherries or tart raspberries—the zing cuts through the richness perfectly. If you love mixing textures, you should check out my recipe for incredible cherry cheesecake hand pies; using a similar topping here is an easy win.
If you’re feeling extra fancy for the holidays, a drizzle of caramel sauce or some finely chopped toasted pecans makes this rich dessert feel seriously gourmet. But honestly, serving it straight up, cold from the fridge, is often the best way to enjoy this perfect cheesecake recipe!
Storage and Reheating Instructions for This Cheesecake Recipe
Your patience is about to pay off, but don’t ruin your masterpiece by storing it wrong! This cheesecake recipe is best served fridge-cold, so keeping it chilled correctly is super important for maintaining that dense, creamy texture we worked so hard to achieve.
Once your cheesecake is completely cool—and I mean *totally* cool, not warm at all—you need to cover that springform pan loosely with plastic wrap. Don’t press the plastic directly onto the surface if you can avoid it; we want to prevent any weird condensation patterns from forming on top.
You absolutely need to let it chill in the refrigerator for a minimum of six hours. Honestly though? Overnight is preferable. That long chill time solidifies the filling structure properly. If you try to cut it too soon, it’ll be a bit soft and you risk messing up those beautiful, smooth sides.
If you have leftovers—which usually means you made it for a crowd because this disappears fast!—it keeps really well in the fridge, still covered, for up to five days. If you want to freeze it? Yes, you can! Just make sure it’s fully chilled first, then wrap it well in a couple of layers of plastic and then some foil for protection. When you’re ready to eat it, let it thaw slowly in the fridge overnight. It’s always better cold, but if you want a tiny taste of other delicious baked goods while you wait, you could check out my Christmas Cheesecake Bars while you plan your thaw!
Frequently Asked Questions About This Cheesecake Recipe
I totally get it; you follow the steps, but one little question still pops up. That’s fine! That’s why we are here, making sure this cheesecake recipe works perfectly for you. People often ask me about the logistics since this is designed to be an easy cheesecake recipe, but we still want that perfect structure.
Do I absolutely need to wrap the pan if I am making this cheesecake recipe without a water bath?
Yes, you do! I know, it feels a little redundant since we aren’t putting the whole thing *in* the water bath, but hear me out. Wrapping that springform pan tightly with heavy-duty foil is like insurance! If any accidental moisture somehow managed to sneak in around the sides of the pan, the foil catches it and protects your crust. It’s purely preventative, safeguarding your beautiful base from getting soggy, which is always a good thing in any homemade baked cheesecake!
Can I use low-fat cream cheese in this easy cheesecake recipe?
Oh, honey, please don’t tempt fate! I strongly advise against it. The traditional recipe calls solely for full-fat cream cheese for a reason. Using low-fat or Neufchâtel cheese changes the fat content dramatically, and that fat is crucial. It’s what gives us that incredible, rich and velvety cheesecake mouthfeel and helps the cake stay stable when baking. If we mess with the fat, we risk a denser, sometimes grainy texture instead of the smooth wonder we promised!
How long does this homemade cheesecake recipe need to chill?
You need patience for cheesecake, so plan this right! The bare minimum time for chilling is six hours. But if you can wait until the next day—overnight is honestly the secret weapon here! A longer, colder chilling time really allows that structure to firm up completely. That’s when the texture transforms into something truly divine.
If you’re looking for some other simple, sweet treats to try while you wait for that cheesecake to set, you should really take a peek at my recipe for pumpkin cobbler!
Estimated Nutritional Data for This Cheesecake Recipe
Alright, let’s talk numbers! After all that hard work making the best cheesecake recipe ever, you might be curious about what’s packed into a generous slice of this wonderful dessert. Remember, since this is a homemade recipe, these figures are just kind of a starting point. They’re great guides, but your actual measurements, like how much butter you used in the crust, might shift things slightly.
This information is based on creating 12 servings from the full recipe:
- Serving Size: 1 slice
- Calories: 400
- Fat: 25g (Watch that saturated fat, it’s rich!)
- Carbohydrates: 38g
- Sugar: 35g (Molasses in the crust and sugar in the filling add up!)
- Protein: 7g
It’s a decadent treat, no question about that! But as far as simple dessert ideas go, getting this much creamy satisfaction for 400 calories is actually pretty respectable for a classic baked treat. Enjoy every bite of your perfectly set cheesecake!
Share Your Experience with Our Cheesecake Recipe
Now that you’ve created a flawless, crack-free masterpiece, I would absolutely love to hear about it! Did this cheesecake recipe finally cure your cracking woes? Please hop down to the comments and give me a star rating—five stars if you’re feeling amazing about that smooth top!
And hey, if you took a gorgeous photo of your homemade baked cheesecake, don’t keep it to yourself! Snap a picture and tag us on social media. We built this simplified method to give everyone confidence, and sharing your success really helps others believe they can do it too. If you need anything else or have questions, you can always reach out via my contact page!
PrintThe Best Easy No-Crack Cheesecake Recipe (No Water Bath Required)

Make a rich, creamy, and velvety classic cheesecake without the stress of cracks or needing a water bath. This straightforward recipe delivers restaurant-quality results for beginners.
- Prep Time: 20 min
- Cook Time: 65 min
- Total Time: 85 min
- Yield: 12 servings 1x
- Category: Dessert
- Method: Baking
- Cuisine: American
- Diet: Vegetarian
Ingredients
- 1 1/2 cups graham cracker crumbs
- 1/4 cup granulated sugar (for crust)
- 6 tablespoons unsalted butter, melted
- 3 (8 ounce) packages full-fat cream cheese, softened
- 1 1/2 cups granulated sugar (for filling)
- 1 teaspoon vanilla extract
- 1/4 cup sour cream
- 3 large eggs
Instructions
- Preheat your oven to 325°F (160°C). Wrap the outside bottom of a 9-inch springform pan tightly with heavy-duty aluminum foil to prevent water seepage, even though you will not use a water bath.
- Prepare the crust: Mix graham cracker crumbs and 1/4 cup sugar. Pour in melted butter and mix until combined. Press the mixture firmly and evenly into the bottom of the prepared springform pan. Bake for 10 minutes. Remove from oven and let cool slightly.
- Prepare the filling: In a large bowl, beat the softened cream cheese with an electric mixer until completely smooth. Scrape down the sides.
- Gradually beat in 1 1/2 cups sugar until just combined. Do not overmix.
- Beat in the vanilla extract and sour cream until smooth.
- Add the eggs one at a time, mixing on low speed after each addition only until the yolk disappears. Stop mixing as soon as the last egg is incorporated. Overmixing adds air, which causes cracks.
- Pour the filling over the cooled crust. Gently tap the pan on the counter a few times to release any large air bubbles.
- Bake for 55 to 65 minutes. The edges should look set, but the center 2 inches should still have a slight jiggle when gently nudged.
- Turn off the oven, prop the door open slightly (about 2 inches), and let the cheesecake cool inside the oven for 1 hour. This slow cooling prevents cracking.
- Remove the cheesecake from the oven and let it cool completely on a wire rack.
- Once cool, cover the pan loosely with plastic wrap and refrigerate for at least 6 hours, or preferably overnight, before serving.
Notes
- For the smoothest texture, ensure your cream cheese is truly at room temperature before starting.
- To prevent cracks, mix the batter on low speed and stop mixing immediately after the last egg is incorporated.
- If you want a New York Style Cheesecake, consider adding 1 tablespoon of fresh lemon juice to the filling mixture.
Nutrition
- Serving Size: 1 slice
- Calories: 400
- Sugar: 35g
- Sodium: 300mg
- Fat: 25g
- Saturated Fat: 15g
- Unsaturated Fat: 10g
- Trans Fat: 0.5g
- Carbohydrates: 38g
- Fiber: 1g
- Protein: 7g
- Cholesterol: 100mg