
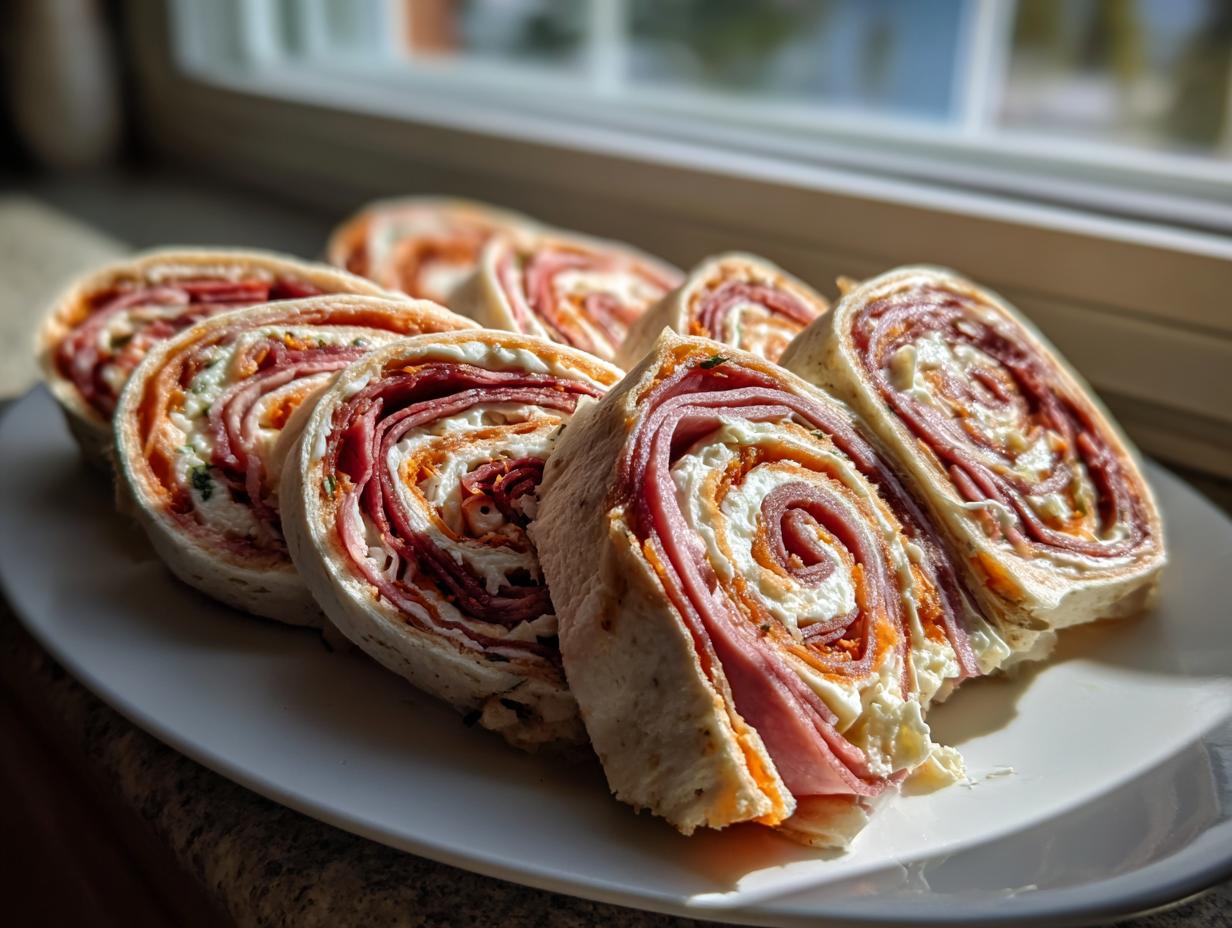
If you are hosting a gathering, or honestly, if you just need a really satisfying snack that doesn’t require turning on the oven, I have your solution. Forget trying to reinvent the wheel; we’re streamlining the flavor! These Italian Pinwheels are, hands down, the most efficient way to deliver the huge, complex taste of a hearty Italian sub in one perfect, bite-sized package. As the guy who approaches recipes like a project manager, I engineered this recipe to remove every frustrating, time-wasting step. We focus only on getting that maximum flavor payoff, making these the ultimate make-ahead appetizer. You get the deli quality without the chaos.
- Why These Italian Pinwheels Are Your New Go-To Party Finger Food
- Ingredients for the Ultimate Italian Pinwheels
- How to Prepare Perfect Italian Pinwheels Every Time
- Ingredient Notes and Customizing Your Italian Pinwheels
- Tips for Making the Best Cold Cut Pinwheels
- Storage and Serving Suggestions for Italian Pinwheels
- Frequently Asked Questions About Italian Pinwheel Sandwiches
- Estimated Nutritional Profile for These Italian Pinwheels
- Share Your Favorite Italian Pinwheels Creations
Why These Italian Pinwheels Are Your New Go-To Party Finger Food
Listen, when you’re planning an event, you need reliability. That’s why I love these Italian pinwheels so much. They are the best kind of Make Ahead Appetizer because you actually *need* to make them ahead! Chilling isn’t optional here; it’s part of the process that guarantees clean slices, which is crucial for good presentation.
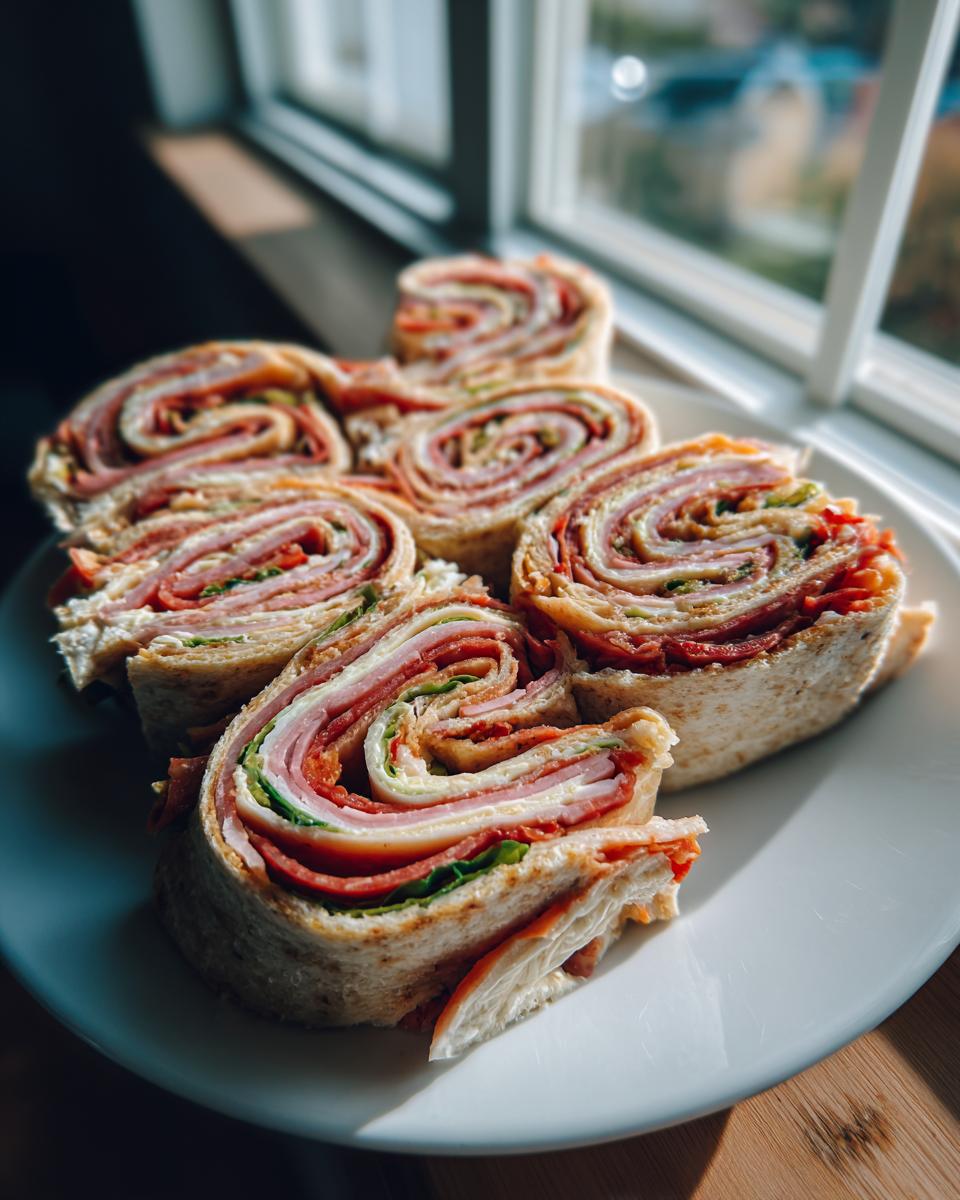
Even better? The flavor just deepens overnight. You get that intense blast of Italian deli flavor—the salty meats, the sharp provolone—all tied up in one neat bite. They work perfectly as casual Party Finger Food, they pack like a dream for picnic food ideas, and they are always the first thing gone during game day snacking. It’s pure efficiency meeting fantastic flavor.
If you’re looking for other easy, satisfying party fare, check out my take on easy grinder sliders too. It’s the same flavor profile, just a different delivery system!
Ingredients for the Ultimate Italian Pinwheels
When we talk about maximizing flavor with minimal time, ingredient quality is non-negotiable. For these italian pinwheels to really taste like those amazing deli sandwiches, you need to pay attention to how things are prepped. I’ve listed everything out here, but note those specific commands—they aren’t suggestions, they are project requirements for success!
Trust me when I say that using softened cream cheese is the difference between a smooth spread and a lumpy mess. Likewise, making sure your meats and cheeses are thinly sliced helps with that tight roll we need.
- 1 (8-ounce) package cream cheese, completely softened
- 1/4 cup mayonnaise
- 1 tablespoon Italian seasoning
- 1 teaspoon garlic powder
- 1/2 teaspoon dried oregano
- 1/4 cup sun-dried tomatoes, packed in oil and finely chopped (make sure they are well-drained!)
- 1/4 cup pepperoncini peppers, finely chopped
- 1/4 cup fresh basil, finely chopped
- 4 large (10-inch) flour tortillas
- 1 cup provolone cheese, thinly sliced
- 1/2 cup salami, thinly sliced
- 1/2 cup pepperoni, thinly sliced
- 1/2 cup deli ham, thinly sliced
- 1 cup iceberg lettuce, shredded (we only use the crisp, inner leaves!)
How to Prepare Perfect Italian Pinwheels Every Time
Handling a recipe like this efficiently means breaking it down into manageable phases—kind of like managing a small project. The goal here is maximum flavor extraction with zero wasted effort. We divide this into Prep (the spread), Assemble (the layering), and then the critical phases: Chill and Slice. Follow this sequence exactly, and you’ll end up with perfect rolls every time.
Creating the Flavorful Cream Cheese Pinwheels Spread
First step: the foundation. You need to mix that softened cream cheese with the mayo, Italian seasoning, garlic powder, and oregano until it’s completely unified. Then, fold in those tiny flavor boosters—the sun-dried tomatoes, the chopped pepperoncini, and the fresh basil. Before you go any further, take a tiny taste of the spread. This is the time to adjust; maybe it needs a tiny pinch more salt or another dash of oregano to really nail that savory profile. This base is what sets these apart from basic Cream Cheese Pinwheels.
Assembling and Rolling the Italian Sub Roll Ups
Time to build those layers! Lay out one of your 10-inch tortillas flat. You need an even, generous coating of that zesty spread across the surface, but leave about a half-inch border on all sides—that’s crucial to keep the filling from squishing out when you roll. Now, layer on your provolone, followed by the salami, pepperoni, and ham in relatively even quantities. Finally, top it off with a very thin layer of that shredded lettuce. This layering technique ensures you get all the classic Italian sub flavors in your Italian Sub Roll Ups.
Now, the tight roll. Start at one edge and roll it up as tightly as you possibly can without tearing the flour tortilla. You want a dense log. Overlap the seam, wrap that log tightly in plastic wrap, and seal the ends like a candy wrapper. Don’t skip that tight wrap; it compresses everything for clean cuts later.
Chilling and Slicing the Italian Pinwheels
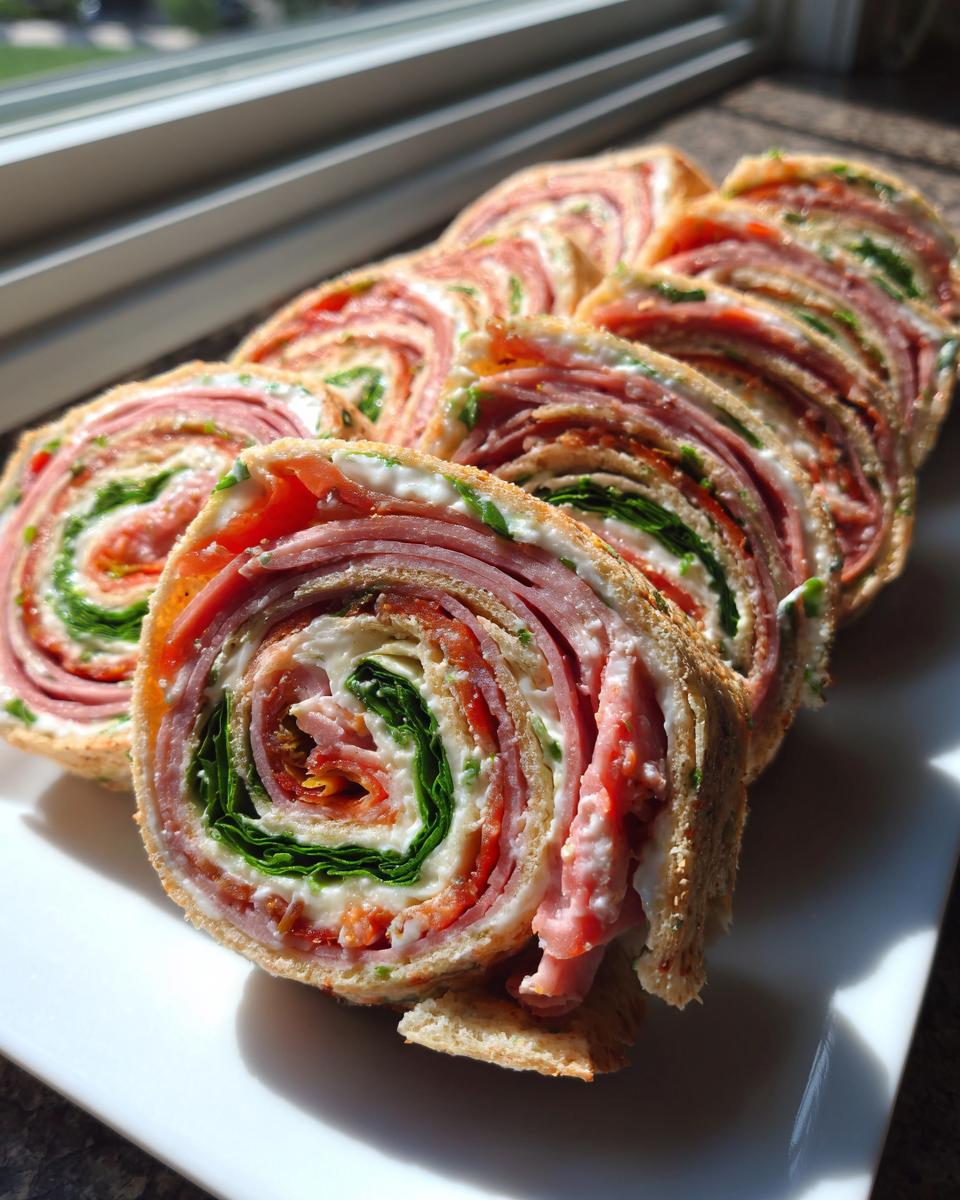
This is where many people fail, and we don’t do that here! Chilling is mandatory. Wrap those logs securely and get them into the fridge for a minimum of two hours, but frankly, overnight is even better. If you try to slice them warm, they turn into a meaty, cheesy mess—we need those professional, photo-ready italian pinwheels.

When you pull them out, use a very sharp knife and slice them into sturdy 1-inch thick bites. Wipe the knife blade clean between every couple of cuts to prevent drag. That’s the entire process!
If you want to explore more no-bake flavor bombs, you should check out my recipe for creamy bruschetta dip. It uses a similar concept of mixing powerful flavors into a spreadable base.
Ingredient Notes and Customizing Your Italian Pinwheels
One of the reasons this recipe is so reliable is that it handles tweaks really well. You don’t have to be tied to just salami and ham! Feel free to swap out those cold cuts for whatever you have—prosciutto works brilliantly if you’re feeling fancy, or maybe some turkey if you want a lighter feel. It’s the same concept for the cheese too; Swiss or even a sharp cheddar can work in a pinch, though provolone really hits that authentic deli note.
If you’re aiming for those extra bright flavors we talked about, consider my secret weapon for next-level tang: adding a teaspoon of Dijon mustard right into that cream cheese base when you mix it up. That quick addition transforms them into true Zesty Italian Bites. It’s a small step that really boosts the whole profile, and I always keep that option open, especially if I know the crowd loves a little sharp kick.
For more ways to add unexpected flavor depth to creamy bases, you might want to look at how I use horseradish in my creamy horseradish sauce—it’s a different direction, but the principle of boosting a rich base applies everywhere!
Tips for Making the Best Cold Cut Pinwheels
Even though this is an Easy Pinwheels Recipe, the devil is always in the details when you want professional results. I’ve run these tests so you don’t have to! Here are the three execution tips I always stick to.
First, that cream cheese absolutely must be at full room temperature. If you rush this, you’ll get lumps, and lumps ruin the smooth surface needed for a tight roll. Second, when you roll the tortilla log, use your hands to gently press down every couple of rotations. You are compacting the layers, not crushing them. This firm pressure is what keeps them together.
Third, and this is sneaky: make sure that shredded lettuce is bone dry. Any excess moisture will turn the bottom layer of your tortilla mushy during the chill time. A quick spin in a salad spinner solves this right away. Don’t forget to check out my collection of other great make-ahead egg muffins if you are prepping food for the week!
Storage and Serving Suggestions for Italian Pinwheels
Since these are the ultimate Cold Appetizers for Parties, planning ahead is key. Once you’ve sliced those beautiful logs, you need to get them arranged fast. I usually pack them close together on a large platter—they look really impressive that way. You can cover the whole platter loosely with plastic wrap and keep them chilled right up until your guests arrive, which is great because it keeps them perfectly cold.

They hold up wonderfully in the fridge for about 24 hours. Remember, they must stay wrapped tightly if you aren’t serving them immediately; air is the enemy of fresh tortillas. If you truly want to go the extra mile, offer a small bowl of something zingy on the side. A drizzle of good balsamic glaze or even a lighter version of a zesty dressing works surprisingly well with the richness of the cold cuts. For ideas on sharp, flavor-packed sauces, you might want to review my recipe for quick zesty remoulade sauce; it’s not Italian, but that tanginess contrasts nicely with salty meat!
Frequently Asked Questions About Italian Pinwheel Sandwiches
I get a ton of messages about these rolls because everyone wants to make sure they get that perfect, clean slice. It’s smart to plan ahead, so let’s knock out a few of the questions I hear most often about these Italian Pinwheel Sandwiches.
Can I use different tortillas or bread for these Italian pinwheels?
You absolutely can, but you need to be aware of the outcome. These recipes are engineered for 10-inch flour tortillas because they’re pliable and don’t crack when rolled tightly. If you try using smaller tortillas, you won’t get the right ratio of filling to wrap. You could try using whole wheat or spinach tortillas for a color change, but avoid anything too stiff, like large wraps meant for grilling. For instance, low-carb tortillas can be brittle when cold, so be extra gentle!
Can I freeze these Pinwheel Lunch Ideas?
This is a tricky one. While they are a fantastic Make Ahead Appetizer, I don’t recommend freezing them after they are sliced. The cream cheese spread usually handles the freeze fine, but the lettuce will become totally wilted and sad once thawed, and the tortillas can get a bit weird texturally. If you must freeze them, roll the logs tightly and freeze them *un-sliced*. Thaw in the fridge overnight, then slice them the morning you plan to serve them. That works much better.
What if someone doesn’t like salami or I need vegetarian Italian Pinwheels?
Customize everything! This recipe loves substitutions. If salami is too strong, skip it! You can beef up the pepperoni or ham, or add other Italian deli options like prosciutto or even shaved turkey. For a vegetarian version, swap out all the meat for things like thinly sliced roasted red peppers, artichoke hearts, or even finely chopped mushrooms sautéed with herbs. You’ll still want that binding cheese layer, check out my easy ham salad recipe for inspiration on mixing savory fillings!
Why are my pinwheels mushy on the bottom?
That usually happens if you didn’t chill them long enough, or if moisture built up inside the plastic wrap. Remember, the lettuce needs to be super dry before you add it. If you’re prepping these more than 12 hours in advance, try laying a thin paper towel flat on the tray before you wrap the log; that paper towel will absorb any tiny bit of bleed-off moisture during the long chill time and keep your bottoms crisp.
Estimated Nutritional Profile for These Italian Pinwheels
Okay, looking at the numbers—I always feel it’s important to show the work, even if we aren’t aiming for a diet food here. Based on my ingredient measurements, these italian pinwheels clock in around 210 calories per serving (which I defined as 4 pinwheels). We’re looking at about 16 grams of fat, 10 grams of protein, and 8 grams of carbs there.
Now, a critical disclaimer: Remember, I run this like a project. This calculation is based on averages. If you use premium prosciutto instead of ham, the numbers shift! This is a transparency measure, not a guarantee, so treat these figures as a solid estimate for planning your snack spread.
Share Your Favorite Italian Pinwheels Creations
I built these recipes for reliability, but I love seeing how you adapt them in your own kitchens! Once you’ve chilled, sliced, and served these amazing italian pinwheels, please come back here. I need to know how they performed at your party platter. Drop a star rating down below and tell me about any tasty substitutions you made. Did you try adding some fresh oregano? Did you use different cold cuts? I always check the comments and love seeing photos of your successful party finger food setups. If you need to reach out directly with a specific question, you can always use the contact page linked here.
PrintEasy Italian Pinwheel Sandwiches

Make these simple Italian pinwheels using tortillas, deli meats, cheese, and a creamy spread. They are perfect as a make-ahead appetizer for parties or a quick lunch.
- Prep Time: 20 min
- Cook Time: 0 min
- Total Time: 2 hours 20 min
- Yield: 48 pinwheels 1x
- Category: Appetizer
- Method: No Bake
- Cuisine: Italian-American
- Diet: Vegetarian
Ingredients
- 1 (8 ounce) package cream cheese, softened
- 1/4 cup mayonnaise
- 1 tablespoon Italian seasoning
- 1 teaspoon garlic powder
- 1/2 teaspoon dried oregano
- 1/4 cup finely chopped sun-dried tomatoes (packed in oil, drained)
- 1/4 cup finely chopped pepperoncini peppers
- 1/4 cup finely chopped fresh basil
- 4 large (10-inch) flour tortillas
- 1 cup thinly sliced provolone cheese
- 1/2 cup thinly sliced salami
- 1/2 cup thinly sliced pepperoni
- 1/2 cup thinly sliced deli ham
- 1 cup shredded iceberg lettuce
Instructions
- In a medium bowl, combine the softened cream cheese, mayonnaise, Italian seasoning, garlic powder, and oregano. Mix until smooth.
- Stir in the chopped sun-dried tomatoes, pepperoncini peppers, and fresh basil into the cream cheese mixture.
- Lay one flour tortilla flat on a clean surface. Spread about one-quarter of the cream cheese mixture evenly over the entire surface, leaving a small border around the edges.
- Layer one-quarter of the provolone cheese, salami, pepperoni, and ham evenly over the spread. Top with a thin layer of shredded lettuce.
- Starting from one edge, tightly roll the tortilla into a log. Wrap the log tightly in plastic wrap.
- Repeat the process with the remaining tortillas and fillings.
- Refrigerate the wrapped logs for at least 2 hours, or up to 24 hours, to allow them to firm up. This step is key for clean slicing.
- When ready to serve, unwrap the logs and use a sharp knife to slice each roll into 1-inch thick pinwheels.
- Arrange the Italian pinwheel sandwiches on a platter and serve cold.
Notes
- For cleaner slicing, chill the rolls for a minimum of 2 hours.
- You can substitute your favorite Italian cold cuts or cheeses.
- If you need a zesty kick, add a teaspoon of Dijon mustard to the cream cheese base.
- These are excellent as picnic food ideas since they are served cold.
Nutrition
- Serving Size: 4 pinwheels
- Calories: 210
- Sugar: 2
- Sodium: 550
- Fat: 16
- Saturated Fat: 7
- Unsaturated Fat: 9
- Trans Fat: 0.5
- Carbohydrates: 8
- Fiber: 1
- Protein: 10
- Cholesterol: 35