
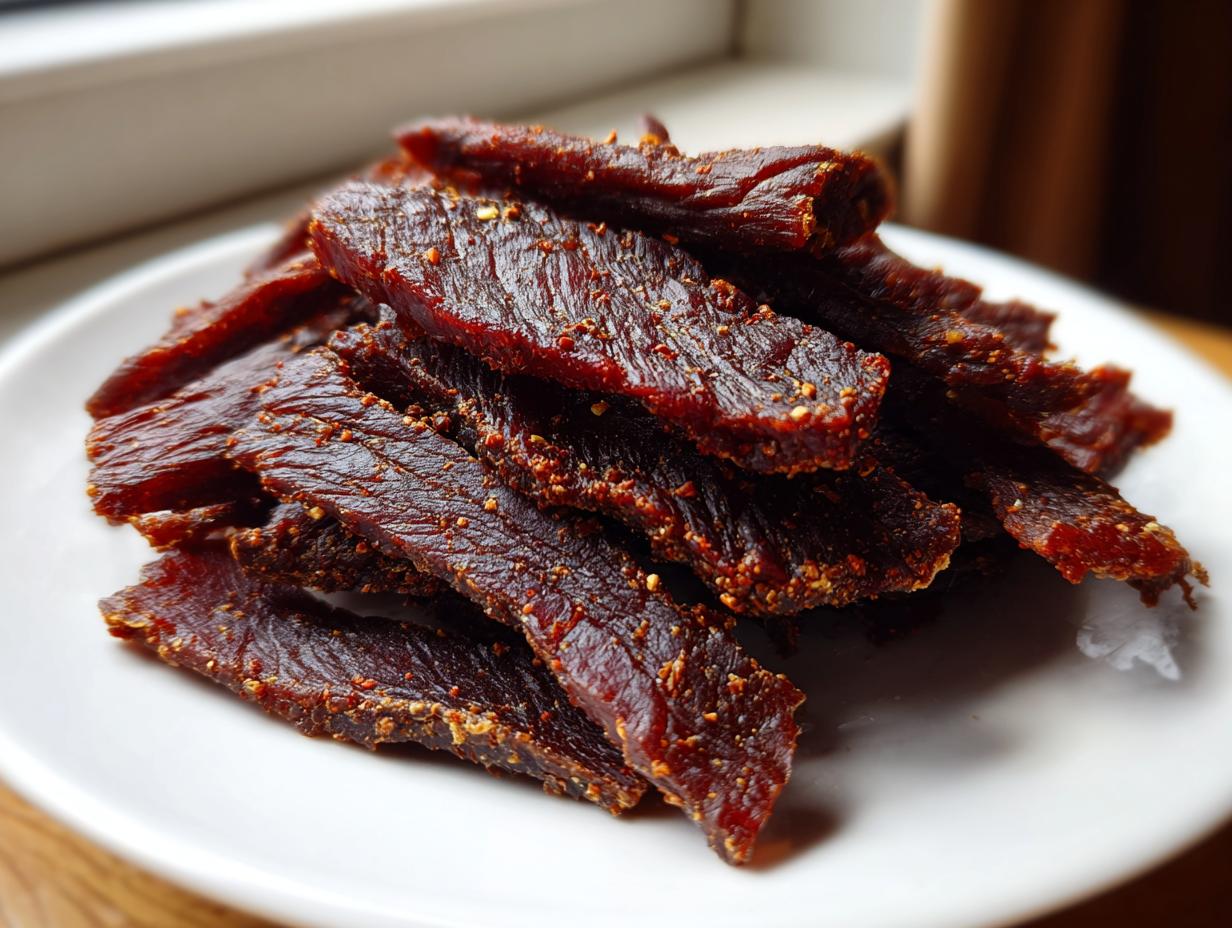
When you’re planning an epic summer road trip, what’s the one thing you absolutely need crammed into the cooler? Forget those flimsy bags of chips. You need reliable, savory, high protein fuel that doesn’t make a huge mess. That’s why I’m obsessed with sharing my perfect homemade beef jerky recipe with you today. As someone who approaches cooking like a streamlined project—focusing only on what delivers maximum flavor and efficiency—I promise this jerky is rock solid.
We aren’t messing around with complicated steps here. This method is engineered to give you that perfectly chewy texture, fantastic savory depth from the marinade, and it saves you a ton of cash compared to those pricey store brands. Trust me, once you master these simple dehydrator recipes, you’ll never go back to the gas station stuff again. This is your new go-to adventure snack.
- Why You Need This Homemade beef jerky for Your Next Road Trip Food Adventure
- Essential Ingredients for Savory Homemade beef jerky
- Step-by-Step Instructions for Perfect Homemade beef jerky
- Tips for Success When Making Homemade beef jerky
- Storage and Shelf Life for Your Homemade beef jerky
- Equipment Needed for Dehydrator Recipes like Homemade beef jerky
- Answering Common Questions About Homemade beef jerky
- Nutritional Snapshot of Homemade beef jerky
- Share Your Homemade Snacks Success
Why You Need This Homemade beef jerky for Your Next Road Trip Food Adventure
Look, I’m all about efficiency, and store-bought jerky is expensive for what you actually get. When you make it yourself, you control everything. This isn’t just about saving money, though—it’s about making the absolute best road trip food imaginable. If you want that perfect savory bite for a long drive, my recipe is the solution. It’s engineered for shelf stability and maximum enjoyment on the go. It’s a smarter way to snack, honestly.
If you’re looking for high-protein options beyond trail mix, you need to see that making your own is way better. For other ideas on smart eating during the week, check out these healthy lunch ideas too, but stick with me—this jerky is key for quick energy.
Here’s what you gain when you choose these homemade snacks over the pre-packaged stuff:
- Serious Protein Punch: We’re packing serious high protein content that keeps you fueled way longer than simple carbs do when you’re staring down miles of highway.
- Flavor You Can Adjust: The store cans’t match the richness of this marinade. You get that perfect balance of smoke and savory notes that just sings.
- That Ideal Chew: We aim for chewy, not brittle. The texture here is engineered to stand up to hours in the car without crumbling to dust.
- Pocketbook Friendly: Buying beef in bulk and marinating it yourself cuts the cost dramatically. It just makes sense, project-management style!
Essential Ingredients for Savory Homemade beef jerky
When we map out the components for this recipe, we are only choosing ingredients that do heavy lifting. No fillers, no nonsense. For the meat, you absolutely must start with 2 lbs of very lean beef. I always grab top round or flank steak because trimming the fat is the key to safe, non-spoiling homemade snacks. Fat goes rancid fast, remember that!
The marinade is where the savory magic happens. We need the umami from the soy sauce and Worcestershire, a touch of sweetness from the brown sugar, and that smoky depth from liquid smoke and paprika. These exact measurements are what lock in the flavor during the long drying process. Choosing low-sodium soy sauce is smart because it lets you control the final salt level, which is super important when you’re making dehydrator recipes like this.
Ingredient Notes and Flavor Customization for Homemade beef jerky
If you want to kick this up for a longer drive where you might need a bit more zip, I highly recommend adding 1 teaspoon of red pepper flakes right into the marinade mix. It gives a great little pop without overwhelming the savory base. Honestly, the base flavor here is so solid, but customization is what makes them *your* perfect beef jerky.
Also, make sure your spices are fresh! Old ground pepper just tastes like dust. When you’re relying on just a few core flavors, every single ingredient needs to be performing at its peak. This keeps our approach efficient and delicious.
Step-by-Step Instructions for Perfect Homemade beef jerky
Alright, let’s get tactical. This is where the project management brain kicks in. We divide this into two main phases: flavor introduction and moisture removal. Efficiency means we let the marinade do the heavy lifting while the beef chills out. If you follow these steps exactly, you skip all the guesswork that ruins other batches.
Slicing and Marinating: Building Flavor in Your Homemade beef jerky
First up, the slicing. This is non-negotiable for good texture. You must slice the 2 lbs of trimmed beef against the grain into uniform strips, about 1/4-inch thick. When I first started making beef jerky, I messed this up—I cut *with* the grain, and the result was just tough, stringy disappointment. Learn from my early failure! Uniform thickness is crucial so everything finishes drying at the same time.
Next, we build the marinade. Just whisk up all the wet ingredients, brown sugar, and spices in a bowl until that sugar dissolves. Then, toss those beautiful strips into a sturdy zip-top bag, pour that savory liquid over everything, and make sure every piece is totally coated. Now, the waiting game starts. You need to refrigerate this for a minimum of 6 hours, but seriously, aim for overnight. That time allows the salt and smoke to penetrate deep into the fibers. We’re optimizing flavor infusion here.
Dehydrating Your Homemade beef jerky: Achieving the Right Chew
Once your beef has marinated—and you’ve tossed out that leftover liquid—you *must* pat the strips thoroughly dry with paper towels. This is critical. Any surface moisture prevents proper drying and can encourage spoilage in your final homemade snacks. Don’t skip this step, no matter how much I remind you!
Lay the strips on your dehydrator trays, making sure none of them are touching. Overcrowding stalls the process, and we hate stalled projects. Set that temperature to 160°F (71°C). Now, we wait—usually 4 to 8 hours. You can find more detailed tips on optimizing your dehydrator recipes elsewhere, but the key test is here: when you bend a strip, it should feel firm, maybe even snap a little, but it shouldn’t break cleanly in half like a cracker. If it breaks clean, it’s too dry. If it flops, keep going. Once cooled, they become perfect for grabbing on the go.
Tips for Success When Making Homemade beef jerky
Making great beef jerky when you rely on efficient methods means avoiding the little mistakes that sabotage the process. The number one pitfall I see people fall into? Not drying the meat enough after marinating. Seriously, take the time to blot those strips bone-dry. Residual moisture is the enemy of shelf stability and creates that chewy texture you absolutely don’t want. It needs to feel tacky, not wet.
Another efficiency killer is overcrowding your dehydrator trays. If the air can’t circulate completely around every single strip, you end up with patches of jerky that take forever to dry, while others over-dry. Think of it like organizing files—everything needs its own space to be processed correctly. Keep them spread out so your drying time remains predictable. That’s smart cooking!
Storage and Shelf Life for Your Homemade beef jerky
So, you nailed the drying process and have a pound of amazing beef jerky! Now we need to lock in that freshness. Store your finished product in a truly airtight container. You can keep them right on the counter at room temperature for about two weeks since we cooked them perfectly dry. If you need them to last longer—maybe you’re stocking up for a huge cross-country haul—put them in the fridge for extended freshness.
The reason proper drying is so crucial for these homemade snacks is simple: moisture breeds issues. If you leave too much water content behind, you risk spoilage surprisingly fast compared to commercially processed jerky. Keep your storage smart, and you’ve got perfect on-the-go fuel. For more great ways to serve up simple bites, take a look at these appetizers and snacks.
Equipment Needed for Dehydrator Recipes like Homemade beef jerky
When setting up your workstation for this project, we keep the tool list minimal. You need a very sharp knife—this is essential for uniform slicing, remember? Also grab a large bowl for the marinade and the trays for your machine. Obviously, a dehydrator is the go-to tool for the best results in dehydrator recipes.
But don’t stress if you don’t have one! If you want to tackle this, you can absolutely bake your beef jerky in the oven set as low as it goes, usually around 170°F, just prop the door open slightly for air circulation. Either way, the method is sound! For more equipment insights specific to drying food, check out my deep dive on dehydrator recipes.
Answering Common Questions About Homemade beef jerky
I know you have questions—I did too when I first engineered this process. When you’re optimizing for high protein fuel, you want assurances that you’re getting the best value and safety. I’ve compiled the most common queries about stepping away from the store shelf and into the world of homemade snacks.
If you’re looking for other ways to maximize your efficiency in the kitchen beyond snacks, check out these quick and easy dinners for busy nights.
Is Homemade beef jerky healthier than store-bought options?
Absolutely, it’s healthier because *you* are in charge. Store-bought options often load up on preservatives and sodium to hit those unrealistic shelf-life goals. When I make this beef jerky, I use low-sodium soy sauce and skip all the weird chemical flavor enhancers. You’re getting pure, lean protein without the junk. That’s a win for any road trip food plan.
Can I use cuts of meat other than top round for Homemade beef jerky?
Top round and flank steak are my go-tos because they are naturally very lean. If you use something else, like sirloin, that’s fine, but you have to be ruthless about trimming fat. Any visible white bits need to come off. Fat doesn’t dry out the same way meat does, and it creates soft spots that can spoil your batch quickly. For safety in your dehydrator recipes, trim until the beef looks almost purple!
How do I know when my Homemade beef jerky is truly done?
This is the most important checkpoint! Ignore the clock sometimes and trust the bend test. When you take a piece out (let it cool for five minutes first—it’s hot!), it should feel firm and dry but still bend when you try to break it. It should snap but leave some strands connecting; it should *not* just cleanly break like a potato chip. That ‘pliable snap’ means the moisture content is finally low enough for safe storage.
Nutritional Snapshot of Homemade beef jerky
When you’re optimizing fuel for the road, you need to know what you’re putting in your body. Since this is one of my favorite high protein snacks, I pulled the numbers right off the recipe sheet. This is efficient data tracking for maximum results, just how I like it!
Keep in mind that these figures are all estimates based on using lean top round and the outlined marinade ingredients. Since we’re controlling the sodium levels by using low-sodium soy sauce, you get a much better profile than most pre-made jerky!
Here’s a quick look at what you’re getting in roughly a one-ounce serving:
- Calories: 100
- Protein: 15g
- Fat: 2g (Mostly unsaturated!)
- Carbohydrates: 4g
- Sodium: 350mg
That 15 grams of pure protein per ounce is exactly why this is the superior road trip food—it snaps you back into focus without weighing you down. It’s proof that smart cooking leads to better fuel. For another easy way to maximize your protein intake in the morning, check out this high-protein breakfast cookie recipe!
Share Your Homemade Snacks Success
So, that’s the blueprint for making incredible, custom-flavored homemade beef jerky. I hope you get that dehydrator humming this week! I want to know how it turns out for your next adventure. Did you go spicy? What kind of road trip are you fueling up for?
Head over to the main page at Dishicious, rate this recipe, and drop a comment below sharing your perfect batch photos. Happy snacking!
PrintHomemade Beef Jerky: High-Protein Adventure Fuel

Make savory, chewy beef jerky at home using a dehydrator. This recipe provides cost-effective, high-protein road trip food superior to store brands.
- Prep Time: 20 min
- Cook Time: 6 hours
- Total Time: 6 hours 20 min
- Yield: About 1 pound 1x
- Category: Snack
- Method: Dehydrating
- Cuisine: American
- Diet: Low Fat
Ingredients
- 2 lbs lean beef (top round or flank steak)
- 1/2 cup low-sodium soy sauce
- 1/4 cup Worcestershire sauce
- 2 tablespoons brown sugar
- 1 tablespoon liquid smoke
- 1 tablespoon smoked paprika
- 1 teaspoon black pepper
- 1 teaspoon garlic powder
- 1/2 teaspoon onion powder
Instructions
- Slice the beef against the grain into uniform 1/4-inch thick strips.
- In a bowl, whisk together the soy sauce, Worcestershire sauce, brown sugar, liquid smoke, smoked paprika, black pepper, garlic powder, and onion powder to create the marinade.
- Place the beef strips into a large resealable bag or container. Pour the marinade over the beef, ensuring all pieces are coated.
- Refrigerate the beef for at least 6 hours, or preferably overnight, turning the bag occasionally.
- Remove the beef from the marinade and pat the strips dry with paper towels. Discard the remaining marinade.
- Arrange the strips in a single layer on your dehydrator trays, ensuring they do not overlap.
- Set your dehydrator to 160°F (71°C). Dry the jerky for 4 to 8 hours, checking for doneness periodically.
- The jerky is ready when it is dry and firm but still slightly pliable when bent. It should snap, not break cleanly.
- Let the beef jerky cool completely on a wire rack before storing.
Notes
- For a spicier snack, add 1 teaspoon of red pepper flakes to the marinade.
- If you do not own a dehydrator, you can bake the jerky in an oven set to its lowest temperature (usually 170°F or lower) with the door propped open slightly for air circulation.
- Store your homemade snacks in an airtight container at room temperature for up to two weeks, or refrigerate for longer freshness.
Nutrition
- Serving Size: 1 oz
- Calories: 100
- Sugar: 3
- Sodium: 350
- Fat: 2
- Saturated Fat: 1
- Unsaturated Fat: 1
- Trans Fat: 0
- Carbohydrates: 4
- Fiber: 0
- Protein: 15
- Cholesterol: 45