
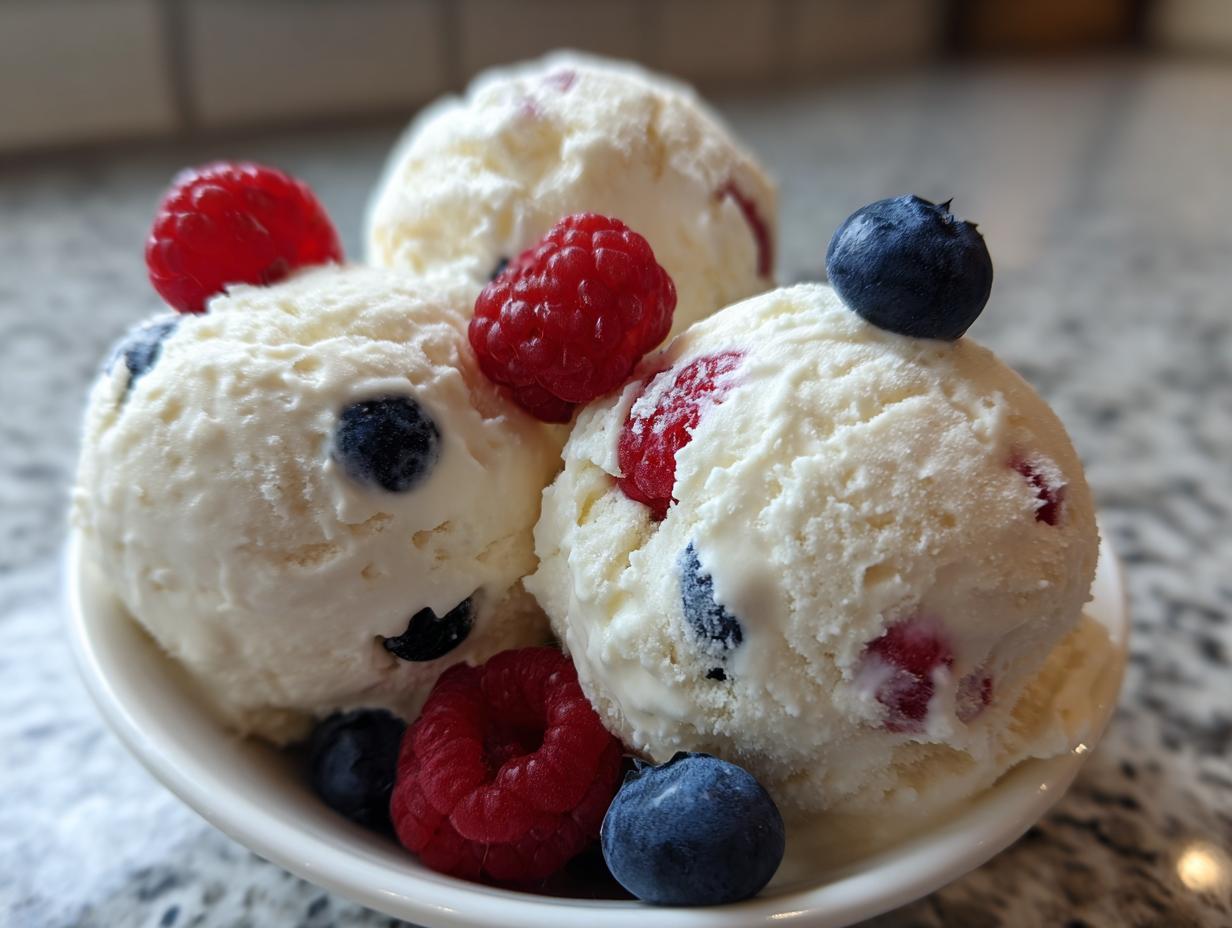
When that serious summer heat hits, you just need something cold, fast, and satisfying, right? Forget running to the store or dealing with complicated dessert projects. Today, we are dialing in on the ultimate quick win: this incredibly simple, refreshingly tart, and perfectly creamy Homemade frozen yogurt. As I always say here at Dishicious, delicious shouldn’t mean difficult. This recipe is my blueprint for beating the heat without messing up my schedule. It’s a lower-fat alternative to heavy ice cream, making it an easy win for enjoying a healthy treat after a long day. Trust me, this will be your new go-to for effortless summer dessert perfection. You can check out more of my simplified dessert ideas right here!
- Why This Homemade Frozen Yogurt is Your Go-To Summer Dessert
- Gathering Ingredients for Perfect Homemade Frozen Yogurt
- Step-by-Step Instructions for Homemade Frozen Yogurt
- Tips for Perfect Homemade Frozen Yogurt Texture
- Serving Suggestions for Your Homemade Frozen Yogurt
- Storage and Reheating Instructions for Homemade Frozen Yogurt
- Frequently Asked Questions About Homemade Frozen Yogurt
- Estimated Nutrition for Homemade Frozen Yogurt
- Share Your Thoughts on This Easy Yogurt Recipe
Why This Homemade Frozen Yogurt is Your Go-To Summer Dessert
Look, I approach recipes like I approach any problem at work: I streamline it until it’s genius. This frozen yogurt recipe is proof. It’s the definition of reliable flavor with minimal effort. If you’re looking for quality healthy treats that deliver that sharp, summery tang without the heavy fat content of traditional ice cream, you’ve found your winner.
This isn’t some fussy, multi-day project. It’s designed for busy people who still want a fantastic summer dessert. I promise, the results are consistently rich and creamy, and you won’t believe how fast the active mixing takes.
Quick Prep for Homemade Frozen Yogurt
We’re talking ten minutes of active work, tops. That’s impressive, right? My project management approach means we only handle the base ingredients once, we mix until it’s smooth, and then we let the machine (or the freezer) take over. It’s efficient cooking at its best. If you want more ideas that fit a tight schedule, check out my guide to healthy lunch ideas.
Lower Fat Alternative to Ice Cream
This is where the Greek yogurt earns its keep. It gives us that incredible thick mouthfeel—that creamy texture we crave—but keeps the overall fat profile way down compared to heavy cream bases. You get all the satisfaction of a rich dessert, but it sits much lighter. It’s proof that low fat doesn’t have to mean low flavor.
Gathering Ingredients for Perfect Homemade Frozen Yogurt
For this yogurt recipe, simplicity is key. We aren’t doing any complex cooking here; we’re just combining great ingredients efficiently. You need basic stuff: Greek yogurt, sugar, a splash of milk, vanilla, and fresh lemon juice for that necessary tang. And of course, those fresh berries! Remember, quality matters here since there are so few steps to hide behind. The texture you get relies heavily on starting right. If you love simple recipes involving fruit and dairy, you should totally check out my take on easy blueberry protein muffins too, they’re shockingly easy.
Ingredient Notes and Substitutions for Your Frozen Yogurt
I specifically call for plain Greek yogurt, either 2% or non-fat. The thickness of Greek yogurt is a huge asset for texture, trust me. If you’re watching the sugar, substituting granulated sugar with about 1/3 cup of a zero-calorie sweetener blend works great—it keeps the same volume without the extra sugar load. This recipe is designed to be flexible, so long as you respect the yogurt base!
Step-by-Step Instructions for Homemade Frozen Yogurt
Alright, time to execute the plan. Making this frozen yogurt is all about following the critical path efficiently. You aren’t cooking, you’re just combining inputs perfectly. We need that base smooth before any chilling happens, and then we make the call: machine or no machine? Either way, the final result is worth the short wait. If you ever need more simple yogurt recipes to streamline your week, take a peek here.
Mixing the Homemade Frozen Yogurt Base
Grab a medium bowl. We whisk everything—yogurt, sugar, milk, vanilla, and that bright lemon juice—together. The critical check here is the sugar; keep whisking until you can’t feel any grit on the bottom of the bowl. That’s essential for preventing a grainy texture later on. When it looks totally uniform, that base is ready for the next phase. Simple, right?
Churning or No-Churn Method for Your Froyo
If you have an ice cream maker, pour that beautiful base in and let it churn for about 20 to 25 minutes until it looks like soft-serve consistency. If you’re going the no-churn route, pour it into a shallow dish and get ready to work those muscles! Freeze for 45 minutes. Then, pull it out and you absolutely *must* whisk it vigorously, or beat it hard with an electric mixer. This breaks up the forming ice crystals. You repeat this punishing process every 30 to 45 minutes for about three hours. It takes more effort, but it keeps the froyo creamy!
Folding in Fresh Fruit Mix-ins
This step requires perfect timing so your berries don’t turn to total mush. If you are using the churner, fold your mixed fresh berries in during the last five minutes of the cycle. If you are doing the manual freeze method, add them right before the final hardening stage. This keeps their shape and flavor intact for bursts of summer fruit in every scoop.

Tips for Perfect Homemade Frozen Yogurt Texture
When you’re engineering a recipe, you have to account for variables, like freezer temperatures or humidity, which can throw off the final “product”- which in this case is creamy frozen yogurt! My goal is always peak performance, and that means nailing the texture every time. Even with the best base, you need a couple of tricks up your sleeve for serving day.
First, let’s talk about freezing too hard. Sometimes, especially if you let the batch freeze overnight, your yogurt might turn into a delicious, but un-scoopable, brick. Don’t panic! That’s not a failure; it just means the project paused unexpectedly. The fix is simple project management: bring it out of the freezer and let it sit on the counter for about 5 to 10 minutes. Just enough time for the edges to soften slightly. This tempering process gets it back to that perfect, easy-to-scoop condition.
Also, remember that Greek yogurt variation matters. If you used non-fat, it might be slightly icier than if you used 2%. That’s totally fine! If you want to avoid that slight iciness in future batches, next time try swapping half the milk for a spoonful of high-quality pureed fruit—not berries, maybe just a neutral fruit like banana—to help maintain structure. For more simple recipes designed around quick results, you should look at my easy breakfast and brunch ideas.
Serving Suggestions for Your Homemade Frozen Yogurt
Okay, the waiting is done, and your homemade frozen yogurt is perfectly firm and ready to go! This is the payoff phase, where we make this summer dessert look as amazing as it tastes. Because the base is naturally tart—thanks to that lemon juice—it plays incredibly well with toppings that add sweetness or crunch. Think of it as the perfect blank canvas for your afternoon treat.
If you want texture, you absolutely have to try sprinkling some crunchy granola over the top. It gives a satisfying contrast to that creamy, smooth froyo. A light drizzle of good quality honey or maple syrup is fantastic if you went the lower-sugar route but still want that sweet finish. It really complements the berries we mixed in!
For maximum refreshment, I always serve it with an extra small bowl of fresh fruit on the side—maybe some sliced peaches or firm mango to mix things up. It’s such a light, flavorful scoop. If you are looking for more ways to use up fresh produce in simple ways, I have a fantastic fruit dip recipe that’s great for a crowd!
Storage and Reheating Instructions for Homemade Frozen Yogurt
Once you nail that perfect scoopable consistency, the final step is successful storage—we don’t want to waste any of this hard work, right? The key here is preventing freezer burn and major ice crystal formation, which is the enemy of creamy frozen yogurt.
When you transfer the finished product, make sure you use a truly airtight container. I usually press a piece of plastic wrap directly onto the surface of the froyo before snapping the lid on tight. That seal is your best defense against freezer air messing with the texture.
Now, we talked about this briefly, but it’s worth repeating as a storage tip: if you decide to make a big batch and it freezes rock-solid overnight, don’t try to attack it with an ice pick! That’s overcomplicating the solution. Just pull the container out of the deep freeze and let it sit on the counter for maybe 8 to 12 minutes. It only takes a few minutes for the outer layer to soften just enough that you can easily scoop it. It’s the simplest way to manage your leftovers!
Frequently Asked Questions About Homemade Frozen Yogurt
Whenever I simplify a process, people always have great efficiency questions, and that’s fair! We want reliable results from our yogurt recipes, which is why I gathered the stuff I get asked most often about this frozen yogurt project. If you’re looking for even more ideas that slash preparation time, check out my guide to quick easy dinners.
Can I make Homemade frozen yogurt without an ice cream maker?
Absolutely, you can! I know not everyone has specialized equipment lying around—that’s not the Dishicious way. If you skip the machine, you just need to commit to the manual freezer agitation steps. You pour the mix into a shallow dish, freeze for 45 minutes, and then you have to whisk it *vigorously* every half hour or so for about three hours. It’s more hands-on, but it absolutely works to break up those ice crystals and keep things creamy!
How tart should the final Homemade frozen yogurt taste?
That signature tartness comes almost entirely from the fresh lemon juice we add to the base. It’s there to balance out the sweetness of the sugar and the natural flavor of the fruit. When you taste the base before churning, it should taste slightly too tart and sweet—that’s how you know! As it freezes, the flavors mute slightly, so you want that initial punch. If you prefer less ‘zing,’ just pull back the lemon juice by a tablespoon next time and adjust to your taste.
What is the best yogurt type for creamy frozen yogurt?
For the absolute creamiest, thickest result that mimics a dairy-aisle product, stick with plain Greek yogurt, preferably 2% or whole milk if you aren’t concerned about fat content. Greek yogurt is strained, so it has less water, which is great for texture. You can certainly use regular plain yogurt if that’s what you have, but be prepared—the final froyo might come out just a little bit icier because of the extra water content. It’s still delicious, just slightly less dense!
Estimated Nutrition for Homemade Frozen Yogurt
When we talk about efficiency in the kitchen, we also need to look at the numbers. Knowledge is power, especially when you’re trying to keep things light for a healthy summer dessert. Since this homemade frozen yogurt relies on simple, whole ingredients like Greek yogurt and fresh fruit, the nutrition profile is excellent compared to standard ice cream.
Keep in mind, because we are calculating this using standard ingredient averages—and your sugar or sweetener choice will change things drastically—these figures are our best estimate based on the recipe card. It’s never exact, but it gives you a solid benchmark for what you’re enjoying!
Here’s the breakdown for one serving (about 1/2 cup):
- Calories: 185
- Fat: 1.5g (Saturated Fat: 1g)
- Protein: 11g
- Carbohydrates: 35g (Fiber: 1g)
- Sugar: 24g
See that protein count? That’s thanks to the Greek yogurt base doing the heavy lifting. It’s a great way to get a satisfying fix that actually fuels you a little bit too. It’s an optimized dessert, plain and simple!
Share Your Thoughts on This Easy Yogurt Recipe
Well, that’s the plan mapped out! We took a dessert that seems complicated and streamlined it into a genuinely achievable, set-it-and-forget-it project. Now that you have the blueprint for this tart, creamy homemade frozen yogurt, I really want to know how it performed in your kitchen.
Did you stick with the strawberries and blueberries, or did you try something wild like mango chunks or raspberries? Let me know in the comments below! I love seeing the variations people come up with to make their perfect summer dessert.
If you found this method useful—if it saved you time and still delivered high-flavor results—please hit that five-star rating button near the top of the article. Your feedback helps me focus on engineering more efficient yogurt recipes like this one. And hey, if you have any general questions about streamlining your cooking projects or need to send over some feedback directly, you can always reach out via my contact page. Happy scooping!
PrintSimple Homemade Frozen Yogurt for Summer Refreshment

Make this easy, tart, and creamy frozen yogurt at home. It is a lower-fat alternative to ice cream and perfect for mixing with fresh fruit on a warm day.
- Prep Time: 10 min
- Cook Time: 0 min
- Total Time: 2 hr 10 min
- Yield: 4 servings 1x
- Category: Dessert
- Method: Churning/Freezing
- Cuisine: American
- Diet: Low Fat
Ingredients
- 2 cups plain Greek yogurt (2% or non-fat)
- 1/2 cup granulated sugar
- 1/4 cup milk (any type)
- 1 teaspoon vanilla extract
- 1/4 cup fresh lemon juice
- 1 cup mixed fresh berries (strawberries, blueberries)
Instructions
- In a medium bowl, whisk together the Greek yogurt, sugar, milk, vanilla extract, and lemon juice until the sugar dissolves and the mixture is smooth. This is your base.
- If you have an ice cream maker, pour the yogurt base into the machine and churn according to the manufacturer’s directions, usually 20 to 25 minutes, until it reaches a soft-serve consistency.
- If you do not have an ice cream maker, pour the mixture into a shallow freezer-safe dish. Freeze for 45 minutes, then remove and vigorously whisk or beat with an electric mixer to break up ice crystals. Return to the freezer. Repeat this process every 30 to 45 minutes for about 3 hours, until firm but scoopable.
- Gently fold in the mixed fresh berries during the last 5 minutes of churning or just before the final freeze if using the no-churn method.
- Transfer the frozen yogurt to an airtight container and freeze for at least 2 hours to firm up before serving.
- Serve this healthy treat for a perfect summer dessert.
Notes
- For a lower-sugar option, substitute the granulated sugar with 1/3 cup of a zero-calorie sweetener blend.
- If the frozen yogurt becomes too hard after freezing, let it sit on the counter for 5 to 10 minutes before scooping.
- This recipe works well with any yogurt, but Greek yogurt provides the best creamy texture.
Nutrition
- Serving Size: 1/2 cup
- Calories: 185
- Sugar: 24
- Sodium: 55
- Fat: 1.5
- Saturated Fat: 1
- Unsaturated Fat: 0.5
- Trans Fat: 0
- Carbohydrates: 35
- Fiber: 1
- Protein: 11
- Cholesterol: 5