
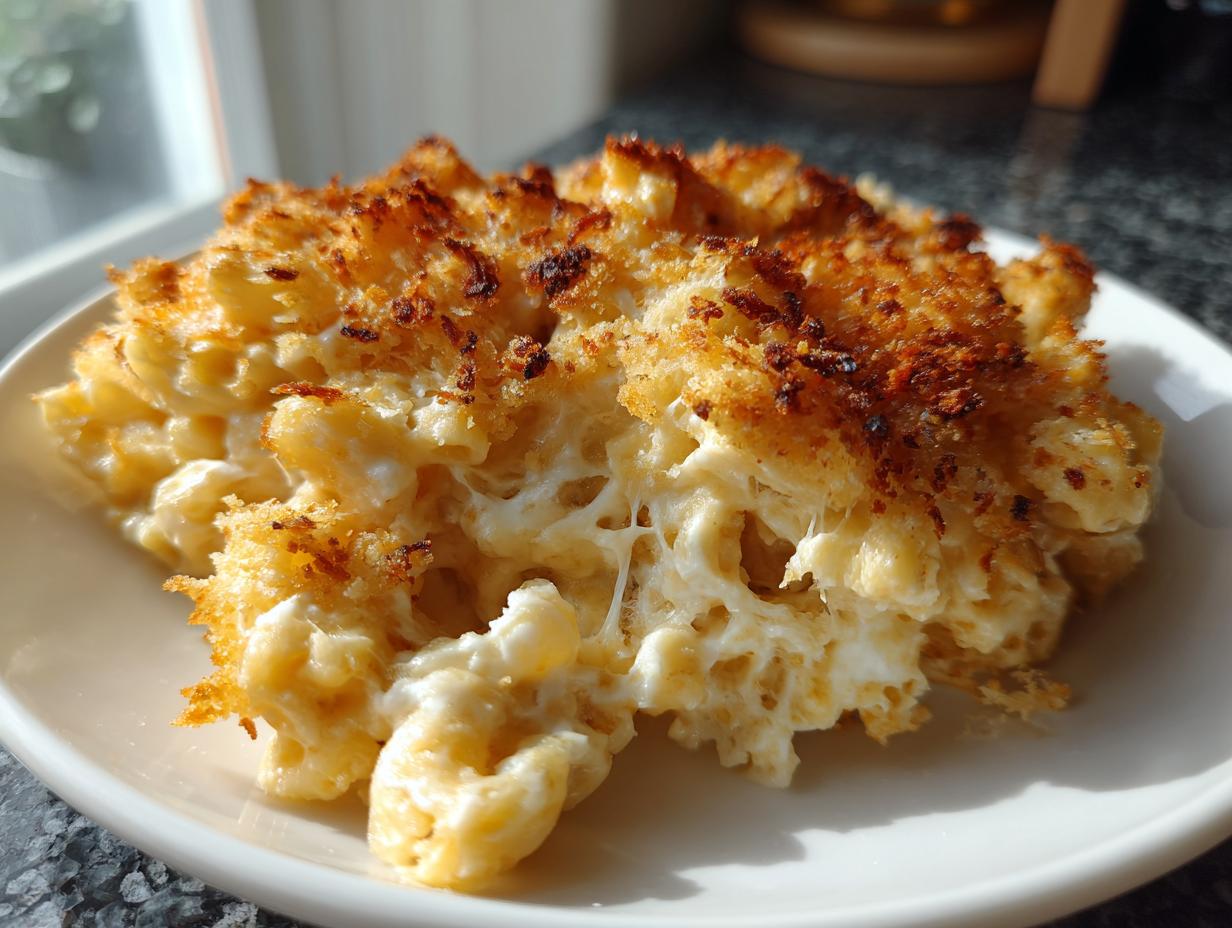
If you’re like me, National Cheese Day demands something truly spectacular—not just good, but utterly unforgettable comfort food. Too often, we choose between speed and flavor, especially when planning big meals like a graduation BBQ where everyone wants the best side dish possible. That’s where the Dishicious philosophy under Leo Grant comes in: maximum payoff, minimal chaos. This Ultimate Baked Mac and Cheese recipe delivers that rich, multi-cheese experience you crave, topped with the perfect golden, crispy crust. We’ve engineered every step to ensure reliability. Trust me, this creamy, savory casserole is the optimized solution to your ultimate side dish dilemma. If you love cheese this much, you should seriously check out our recipe for easy cheesy twice baked potatoes; it pairs perfectly!
- Why This Baked mac and cheese is Your Ultimate Comfort Food Side
- Gathering Ingredients for the Best Baked mac and cheese
- Leo Grant's Project-Managed Steps for Perfect Baked mac and cheese
- Ingredient Notes and Smart Substitutions for Baked mac and cheese
- Tips for Success When Making Baked mac and cheese
- Serving Suggestions for Your Ultimate Baked mac and cheese
- Storage and Reheating Instructions for Leftover Baked mac and cheese
- Frequently Asked Questions About This Baked mac and cheese
- Nutritional Estimates for Your Comfort Food Casserole
Why This Baked mac and cheese is Your Ultimate Comfort Food Side
This isn’t just a pasta dish; it’s a strategy for a winning party spread! For your next big event, like a graduation BBQ, this casserole is the star runner-up. It ticks every box for satisfying comfort food:
- It handles volume beautifully—just make it in a 9×13 pan.
- The blend of three cheeses gives you depth that simple recipes miss.
- That crunchy panko topping provides the textural contrast we all secretly crave in a baked pasta dish.
If you enjoyed this setup, you might want to check out my recipe for southern baked macaroni and cheese or maybe some loaded mashed potatoes!

Gathering Ingredients for the Best Baked mac and cheese
When you’re optimizing for flavor, ingredient selection is key. We need ingredients that perform reliably, especially when serving a crowd. Here is the checklist so you don’t have to run back to the store mid-process. Remember, we are aiming for rich, complex flavor here. If you love crispy snacks, take a peek at my cheese straws recipe for later!
Cheese Selection for Maximum Flavor in Your Baked mac and cheese
The cheese blend is everything in this cheese recipe! We use 8 ounces of sharp cheddar for that foundational bite, 4 ounces of Gruyère because it melts like a dream and adds nuttiness, and 4 ounces of Monterey Jack for pure, stretchable creaminess. Using all three ensures we get depth, sharpness, and ultimate melt quality every time.
Leo Grant’s Project-Managed Steps for Perfect Baked mac and cheese
Okay, now we move into execution—this is where my project manager brain really kicks in. I approach cooking like breaking down a big task into sequential, manageable sprints. We need precision in the sauce phase, but zero stress. Preheat that oven right away to 375°F and get your 9×13 dish oiled up. Next, cook your elbows until they hit that sweet spot: al dente. Don’t overcook them; they’ll soften more in the oven!
If you’re looking for more reliable weeknight wins after this, check out my collection of quick easy dinners; they follow the same optimization principles.
Creating the Creamy Three-Cheese Sauce
The foundation of this baked mac and cheese is the roux. Melt your butter on medium heat, whisk in the flour, and cook it for one full minute—resist the urge to stop stirring! This cooks off the raw flour taste. Then, start adding the 4 cups of whole milk slowly, whisking constantly until it’s smooth. Keep that heat going, stirring often, for about 5 to 7 minutes until it coats the spoon nicely. The critical step? Take it OFF the heat before adding your spices and then those gorgeous shredded cheeses. Stir until totally glossy!
Achieving the Crispy Topping on Your Baked mac and cheese
Once the pasta is folded into that liquid gold, transfer everything to your prepared dish. For the topping, we need crunch contrast! Simply toss your panko breadcrumbs with the reserved two tablespoons of melted butter. Sprinkle that evenly over the top. We bake this baby at 375°F for 25 to 30 minutes. You are looking for bubbly sides and a crust that’s deeply golden brown. Don’t pull it out early. That rest time of 10 minutes at the end is mandatory; it lets the sauce set up before you slice into it!
Ingredient Notes and Smart Substitutions for Baked mac and cheese
Listen up, because this is where we build unstoppable trust in our cheese recipes. My biggest non-negotiable rule? You absolutely must shred your own cheese from blocks. Pre-shredded stuff has anti-caking agents, and Leo Grant hates friction; those agents stop your sauce from becoming perfectly creamy. Trust me on this one!
If you want to seriously dial up the decadence for a special occasion, try swapping one cup of that whole milk for heavy cream. It makes the sauce feel richer, almost luxurious. If you’re worried about your sauce thinning out later, I have a great recipe for homemade brown gravy that explains roux science if you’re curious about stabilizers!
Tips for Success When Making Baked mac and cheese
We want this comfort food to work perfectly, even if you’re managing ten other dishes for that BBQ. My best advice for keeping stress low is planning ahead. You can totally manage the prep work in stages. Go ahead and cook the pasta and make the entire cheese sauce—stop right before you mix the pasta in. Cover that beautiful sauce and stick it in the fridge up to a day early.
When you’re ready to bake, just combine the sauce and pasta, add your panko topping, and bump that baking time up by about 10 minutes since everything is cold. I actually find this works better for parties because you only have the final bake under pressure. If you like prepping appetizers ahead of time, you should look at my instructions for an easy baked brie appetizer!
Also, always let it rest for those ten minutes after it comes out of the oven. It might seem like a waste of time when people are waiting, but it stops the sauce from running everywhere when you slice into that casserole. Patience pays off, trust me.
Serving Suggestions for Your Ultimate Baked mac and cheese
When this baked mac and cheese centerpiece hits the buffet table at your graduation party, what’s sitting next to it? Since this is rich comfort food, we need things that cut through that creaminess. I always pair it with something smoky or something seriously fresh to balance everything out. You can’t go wrong with slow-cooked BBQ like my easy BBQ chicken recipe.
But you also need greens! A crisp, bright salad keeps things moving. My favorite pairing is definitely a vibrant street corn salad. That tang and crunch make the rich cheese sauce taste even better!
Storage and Reheating Instructions for Leftover Baked mac and cheese
You’re probably going to have leftovers, because this recipe makes a lot! That’s a win, honestly. Just cover your baking dish tightly with foil or plastic wrap and stick it in the fridge. It keeps beautifully for about three or four days. My instructions for this are similar to how I handle my funeral potatoes—keep it covered!
When you reheat, the sauce can tighten up, so we need a little hydration boost. Add a splash of milk or cream to your portion before microwaving, stirring midway. For the best result, use the oven at 350°F until warmed through. That keeps the integrity of the topping better!
Frequently Asked Questions About This Baked mac and cheese
I know when you’re taking the time to make something this special, you want zero guesswork. I’ve tackled a few common hang-ups people have when they try to perfect their baked mac and cheese. If you are into perfect casserole textures, you should also look at the science I used for my potato casserole!
Can I use different pasta shapes in this mac and cheese?
Absolutely! The recipe calls for elbows because they’re traditional and hold onto that thick sauce nicely. But feel free to experiment. Shapes like medium shells, cavatappi, or even rotini work brilliantly because they trap that creamy cheese inside their curves. Just make sure whatever you choose is cooked until it’s just shy of done!
How do I prevent my Baked mac and cheese sauce from becoming grainy?
This is a big one for anyone serious about their cheese recipes! Graininess usually happens because the sauce gets too hot after the cheese is added, or the cheese hits milk that isn’t warm enough. My key fix is making sure the milk is tempered (not ice cold) and, most importantly, taking the pan completely off the burner before you stir in the cheddar, Gruyère, and Jack. Stir gently until it’s just melted and smooth, that’s all it takes.
Is this recipe suitable for making ahead of time?
Yes, this is one of the best features for hosting! You can definitely prepare the pasta and the complete cheese sauce mixture—just assemble it in the dish but skip adding the buttered panko topping. Cover it tightly and refrigerate overnight. When you’re ready to bake it for your party, just add that crispy topping and tack on about 10 extra minutes to the baking time so it heats all the way through.
Nutritional Estimates for Your Comfort Food Casserole
Okay, so this is ultimate comfort food, and we’re not pretending it’s a light salad—it’s hearty, cheesy, and made for a celebration like that graduation BBQ! I pull up these numbers just to be organized, but remember these are just estimates based on the ingredients we used, especially that glorious three-cheese blend.
Here is the breakdown per serving (which yields 8 servings from the 9×13 pan):
- Calories: Around 550 (A solid number for a hearty side!)
- Total Fat: About 32g, with 19g of that being saturated fat (That’s the butter and cheese doing their delicious work).
- Protein: A whopping 22g, thanks to all that dairy power.
- Carbohydrates: Roughly 48g.
It’s definitely a dish that fuels a celebration! If you’re looking for another creamy, satisfying dish that hits similar flavor notes but maybe focuses more on poultry, you have to try my easy creamy chicken tortilla soup next week!
PrintUltimate Baked Mac and Cheese with Three Cheeses
A rich, multi-cheese baked pasta casserole with a crisp topping, perfect as a side dish for your next gathering.
- Prep Time: 15 min
- Cook Time: 35 min
- Total Time: 50 min
- Yield: 8 servings 1x
- Category: Side Dish
- Method: Baking
- Cuisine: American
- Diet: Vegetarian
Ingredients
- 1 pound elbow macaroni
- 6 tablespoons unsalted butter
- 1/2 cup all-purpose flour
- 4 cups whole milk
- 1 teaspoon salt
- 1/2 teaspoon black pepper
- 1/4 teaspoon nutmeg
- 1/4 teaspoon cayenne pepper
- 8 ounces sharp cheddar cheese, shredded
- 4 ounces Gruyère cheese, shredded
- 4 ounces Monterey Jack cheese, shredded
- 1 cup panko breadcrumbs
- 2 tablespoons melted butter (for topping)
Instructions
- Preheat your oven to 375 degrees Fahrenheit. Grease a 9×13 inch baking dish.
- Cook the elbow macaroni according to package directions until al dente. Drain the pasta and set it aside.
- In a large saucepan over medium heat, melt the 6 tablespoons of butter. Whisk in the flour and cook for one minute, stirring constantly to create a roux.
- Gradually whisk in the whole milk until the mixture is smooth. Continue cooking, stirring often, until the sauce thickens enough to coat the back of a spoon, about 5 to 7 minutes.
- Remove the sauce from the heat. Stir in the salt, pepper, nutmeg, and cayenne pepper.
- Add the shredded cheddar, Gruyère, and Monterey Jack cheeses to the sauce. Stir until the cheese is completely melted and the sauce is smooth. This is your cheese sauce.
- Fold the cooked macaroni into the cheese sauce until the pasta is evenly coated.
- Pour the mixture into the prepared baking dish.
- In a small bowl, toss the panko breadcrumbs with the 2 tablespoons of melted butter. Sprinkle the breadcrumb mixture evenly over the top of the pasta.
- Bake for 25 to 30 minutes, or until the sauce is bubbly and the topping is golden brown.
- Let the baked mac and cheese rest for 10 minutes before serving.
Notes
- Shred your own cheese from blocks for the best melting quality and flavor. Pre-shredded cheese contains anti-caking agents that affect creaminess.
- For extra richness, substitute 1 cup of the milk with heavy cream.
- You can prepare the pasta and cheese sauce up to the baking step one day ahead. Cover and refrigerate, then add topping and bake when ready, adding 10 minutes to the bake time.
Nutrition
- Serving Size: 1 serving
- Calories: 550
- Sugar: 6
- Sodium: 580
- Fat: 32
- Saturated Fat: 19
- Unsaturated Fat: 13
- Trans Fat: 1
- Carbohydrates: 48
- Fiber: 2
- Protein: 22
- Cholesterol: 95